Verifying Email Addresses in PHP Got Easy
Time to read: 5 minutes
March 30, 2020
Written by

As web developers, we end up creating a ton of login systems, and part of the “create user” flow is invariably verifying that the email address entered by the user is real, and owned by that person.
Typically we'll verify the email address by sending an email to that address with a unique token as a query parameter in a link that the recipient should click. Creating the forms and handling the data entry is relatively easy in PHP; we have libraries and frameworks that can help with these everyday tasks. But nobody wants to configure and maintain a mail server to send out email verification requests.
Luckily for us, Twilio Verify now supports email verification so we can send email verification requests complete with an auto-generated token with a single API call to Twilio. Once our user has clicked the link, we can validate the token is correct with another API call. It leaves us free to solve our specific business problems and not spend our energy solving problems that we don't need to.
Prerequisites:
- A Twilio account
- A SendGrid account
- A domain authenticated with SendGrid
- Your Twilio Account SID and Token in environment variables
- Your SendGrid Account SID in an environment variable
Creating an Email Template
We'll be using SendGrid to send our verification emails, and Twilio to trigger the verify actions, so before we start we'll need an email template in our SendGrid account that we can use to send out our token.
Head to the Dynamic Templates section of the SendGrid dashboard and click the Create a Dynamic Template button. We can name our template anything we want; it's just a friendly name for us to recognise the template. Click on the newly created template and Add Version then select a Blank Template.
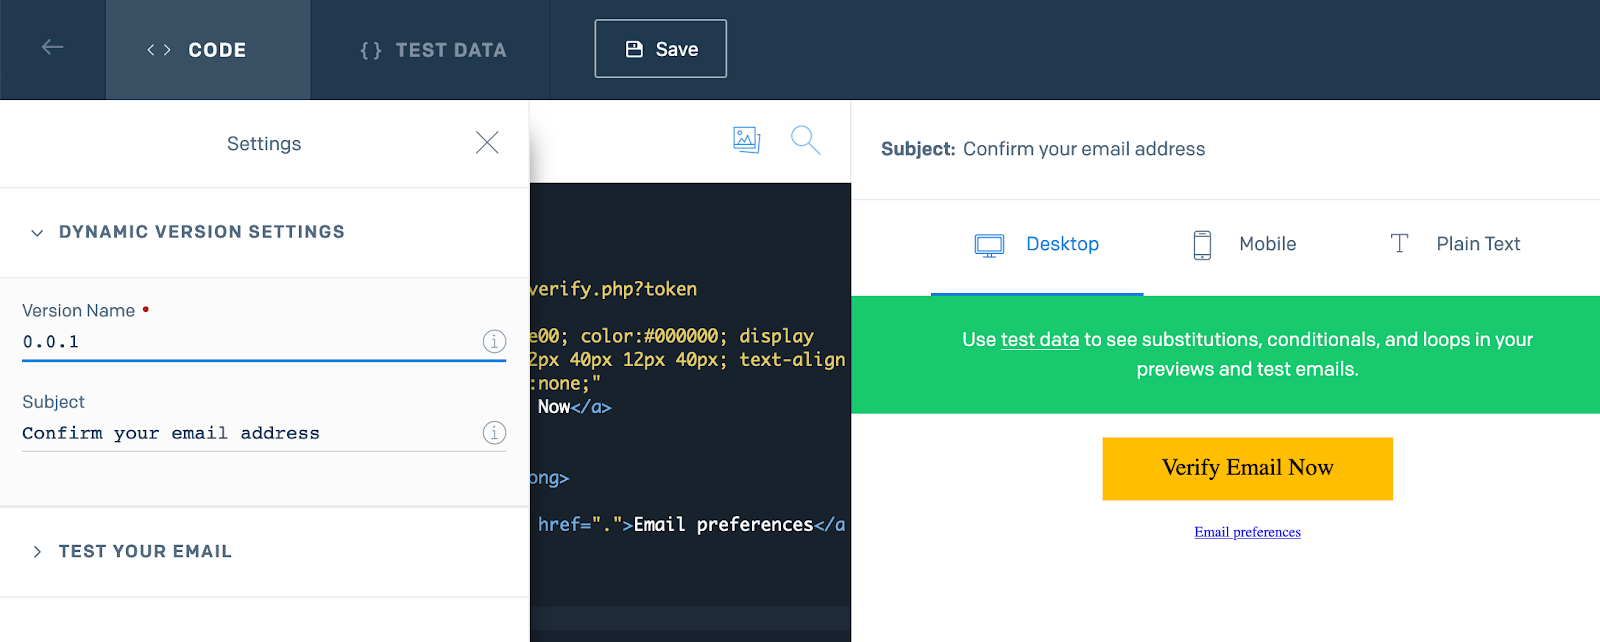
Our template will be in HTML only, but in a production system, we'd also want to create text versions of our email. Select the Code Editor and paste the body of our email into the editor on the left.
Notice how we can use Mustache variables in our template to substitute the auto-generated token in the twilio_code variable. The API will automatically replace this with the token before sending the email. This is a feature of SendGrid's dynamic templates. It's really cool.
Don't forget to set an email subject and name your version using the settings cog on the left-hand side of the page.
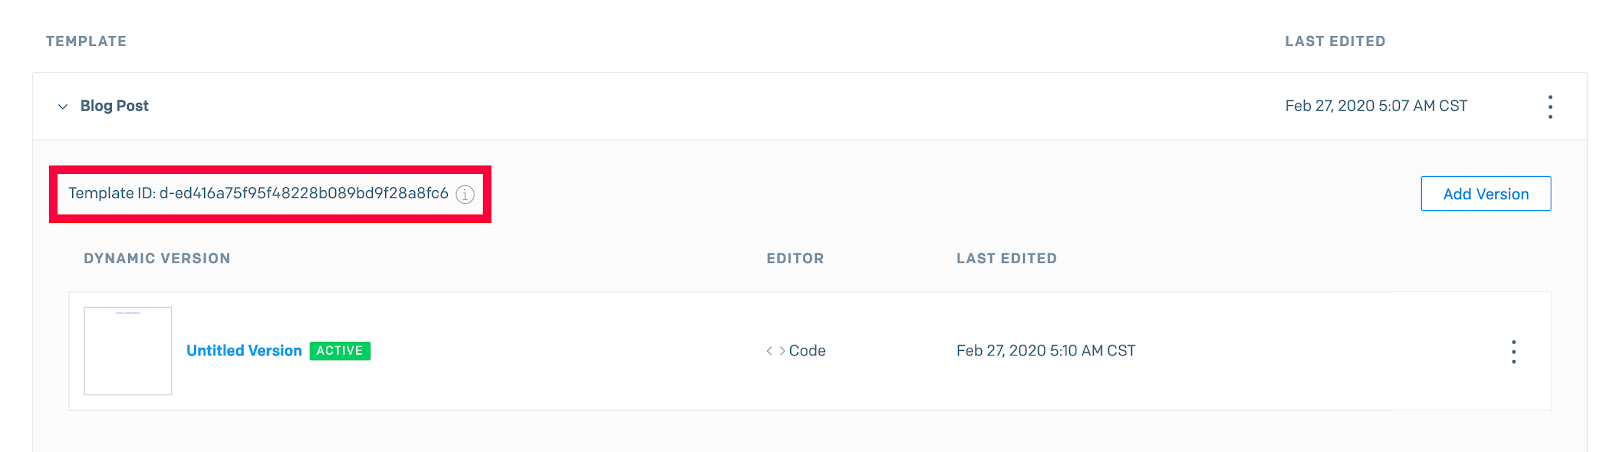
Once we've created our template, we'll need the Template SID later to complete the integration, you can find it in the template information.
Creating a Verify Email Integration
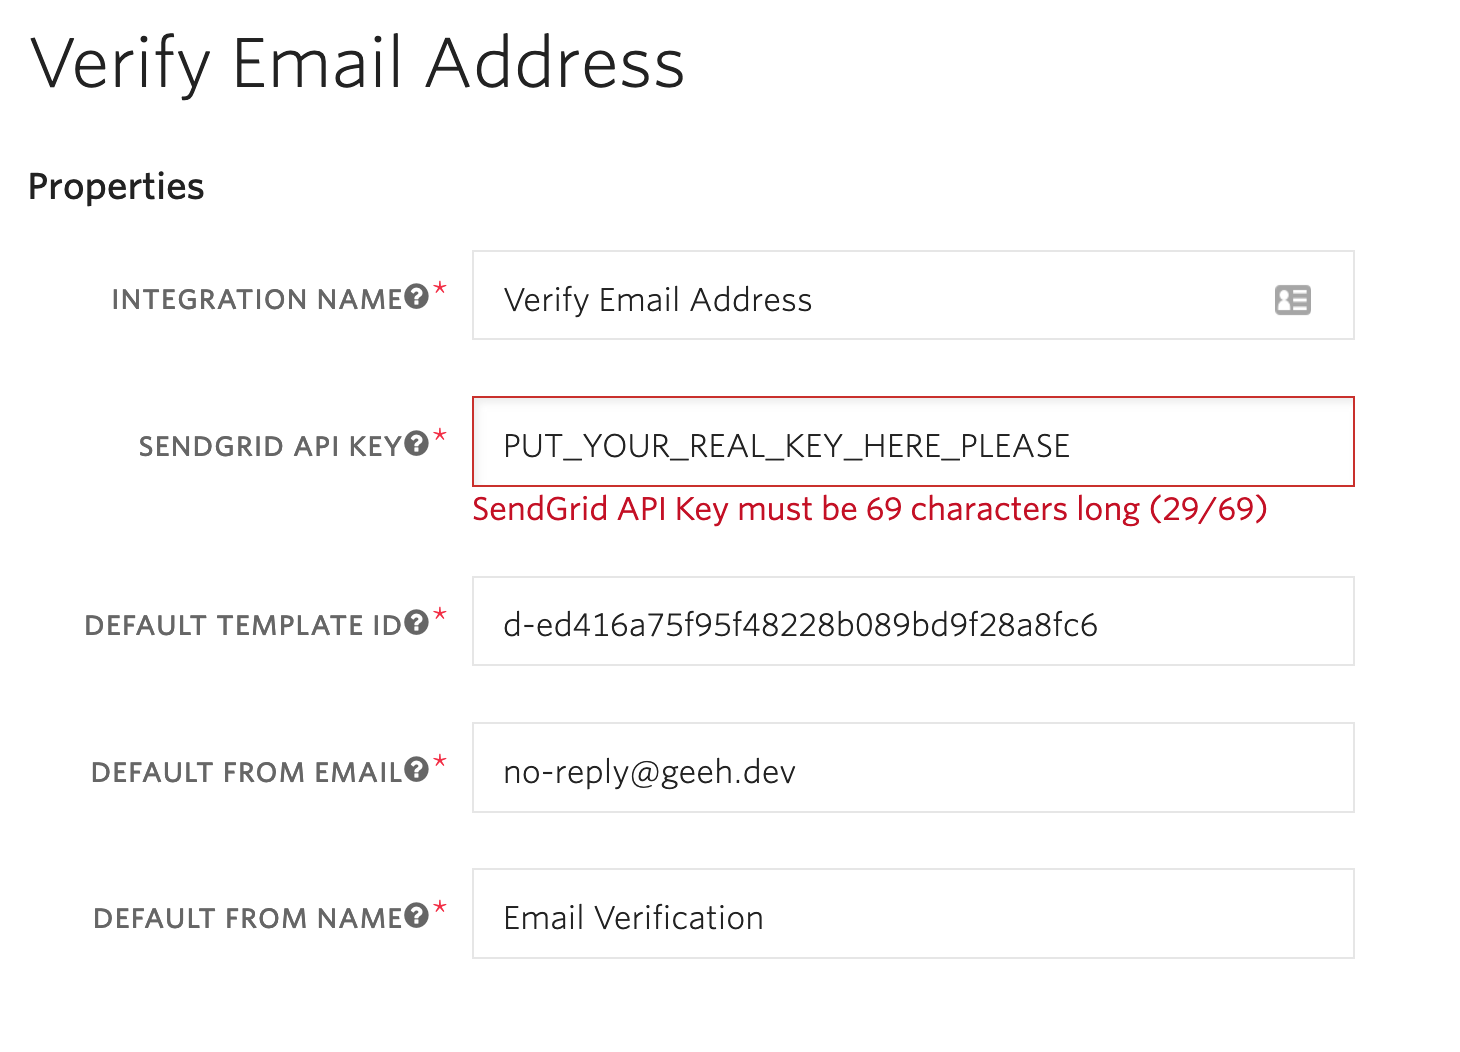
We've got our email template; next, we need to link our Twilio Email Verify service to it. Head over to the Email Integration page on the Twilio Console, and click the big red Create Email Integration button. Name our integration anything, it's a friendly name again, then enter your SendGrid API Key, the Template SID we saved from earlier and an email address and name.
The email address you use must be from a domain you've authenticated with SendGrid. Authenticated Domains are those that you've confirmed you own within the SendGrid system and it shows email systems that SendGrid has permission to be sending emails on your behalf. Find out more information from the SendGrid documentation.
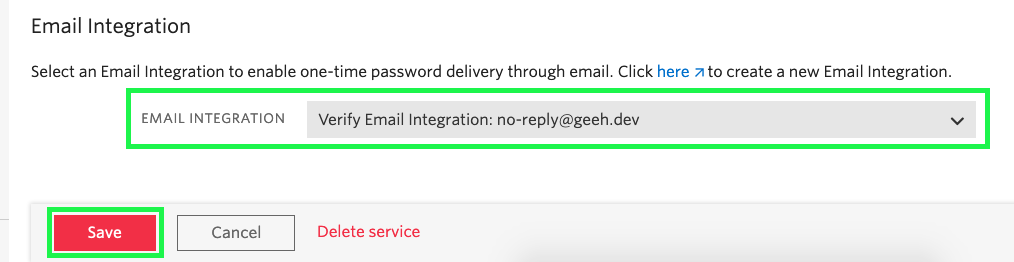
To have access to the verify API, we'll need to create a Verify service. Head over to the Verify Services page of the Twilio Console, and click the big red Create Service Now button, and give it a Friendly Name. The only thing we need to change is right at the bottom of the page, select your Email Integration we created in the last step from the Email Integration drop-down at the bottom of the page, and hit Save.
Writing Our PHP Code
We're all set up, now we get to write some PHP code to send our verification request and check that it’s correct. I created an incredibly simple HTML form that posts to a PHP script to send our verification email. I've tried to make this as generic as possible, but if you're using a framework, then you'll want to do this with your controllers and template renderer.
The only dependency we have in our project is the Twilio PHP SDK, which we can install using Composer.
If Composer asks you No composer.json in current directory, do you want to use the one at somewhere else? reply n to create a new composer.json file.
register.html
We've created a simple web form that posts to our handle.php script that is going to make our API request to the Verify Email API. In the real world, we'd want to create the user in our database before sending the verification email, so we have a record of this user creation attempt. We'd create the user with a flag to set to unverified so we can display a custom error message page should they try to log in before verifying. For this example, I've created the most straightforward form handler.
handle.php
It's also important to understand that we've stored the user's email address in the PHP session. We'll need access to this in the next step when the user clicks the link in the email to check that the token is correct with the Verify API.
Writing the Verification Handler
To wrap this up, we'll need to code up the page that the newly registered user will hit when they click the link in the email.
verify.php
We pull the verification token out of the querystring and the email address from the session. In production systems we'd definitely want to validate and filter these values to prevent any kind of attacks. We then do a verification check request to the Twilio Verify API and check if the status is ‘accepted’. The API will throw a RestException with a 404 status code if the verification is very old and has expired, so we can catch that and give a resend message to the user.
If the verification is successful, we will update our user record to set the verified flag, which allows them to log in.
Testing it out
Start a development PHP web server to serve up the code we've written:
Then navigate to the registration page at http://localhost:8000/register.html and fill in your email address and a spoof password then check your inbox.
Wrapping it Up
You can find the sample code for this post on GitHub. You'll need to set your environment variables with your Twilio token information, and do a composer install.
Any tools that can help me to stop repeatedly solving the same problems are fantastic in my book. We can use the Verify API to send and handle verification emails, and we could use a similar system to send password change request emails. SendGrid dynamic templates are also handy for sending any other admin-type emails our application might need.
Let me know how you get on using Twilio Verify to verify email addresses in your applications in the comments or on Twitter. I'd love to see how you integrate Verify into your framework applications. If there's interest, maybe we could add Verify as an email mechanic to a Laravel application on a live-stream someday.
I can't wait to see what you build.
- Email: ghockin@twilio.com
- Twitter: @GeeH


Related Resources
Twilio Docs
From APIs to SDKs to sample apps
API reference documentation, SDKs, helper libraries, quickstarts, and tutorials for your language and platform.
Resource Center
The latest ebooks, industry reports, and webinars
Learn from customer engagement experts to improve your own communication.
Ahoy
Twilio's developer community hub
Best practices, code samples, and inspiration to build communications and digital engagement experiences.