Create a WhatsApp Bot to Discover Restaurants using Twilio and Node.js
Time to read: 5 minutes
May 08, 2023
Written by
Reviewed by

WhatsApp is one of the most widely used messaging platforms globally, and developing a bot for WhatsApp can offer a powerful means of engaging customers and improving service.. This tutorial will demonstrate how to develop a bot that allows users to discover vegan restaurants near their location and retrieve restaurant details. Twilio’s WhatsApp Business API will be used to integrate WhatsApp with a NodeJS web application. By promoting plant-based food options, this tutorial can contribute to Earth Day and climate change efforts by reducing the demand for animal-based products, which are a significant contributor to greenhouse gas emissions from animal agriculture.
In this tutorial, you will employ the Google Maps API to obtain restaurant data and generate the message using Twilio's messaging service. By the end of this tutorial, you will have a functional WhatsApp bot for a vegan restaurant discovery that can be further enhanced and customized to suit your requirements.
Prerequisites
To proceed with this tutorial, it is required that your development environment is configured as follows:
- NodeJS v16+ on your development machine
- NestJS framework that you will use to build your web server. Use this command install:
npm i -g @nestjs/cli - Have a Twilio account. If you don’t have one, you can register for a trial account
- Install Ngrok and make sure it’s authenticated.
- Have a Google Cloud account, get a Maps API Key and enable the API
Develop Your App
The NestJS framework comes with a command-line interface (CLI) tool that simplifies the process of bootstrapping your web application. To get started, navigate to your preferred working directory using your terminal and execute the following command to create your application.
The CLI will then ask which package manager you’d like to choose. Select npm and wait as your application scaffolds out. Once its finished navigate to your newly created vegan-restaurant directory with the following command:
To launch your web application locally at http://localhost:3000, enter the following command in your terminal:
To enable integration with WhatsApp, your web application must be accessible through a public domain. To achieve this, utilize ngrok to expose your local web server by executing the following command in a different tab on your terminal:
Upon execution, you will receive a public URL as displayed below. Ensure to take note of this URL, as it will be required later on in the tutorial.

Setup Twilio
Launch your preferred code editor and open the project folder. Proceed to install the Twilio package, the config module for NestJS, which will aid in loading the environment variables in subsequent steps:
Open up the src/app.module.ts file and replace the contents with the following code to import the config module as a dependency for your AppModule.
Now let’s set up the environment variables for this project.
Create a .env file at the root of your project folder and copy in the following to define the following variables:
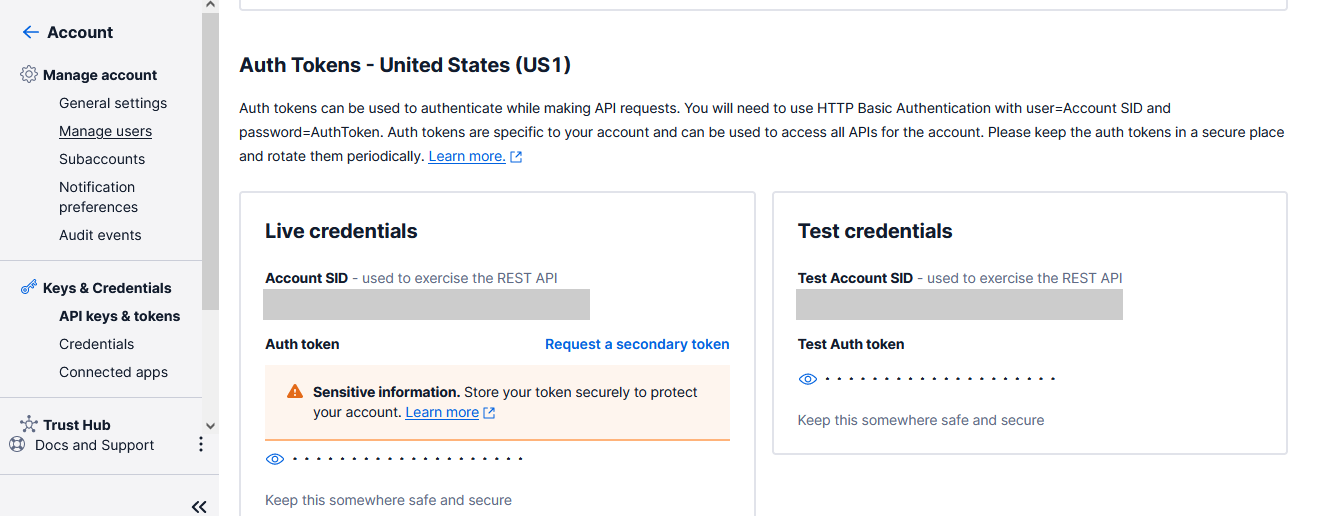
To access the variables required by Twilio's package that was installed earlier, log in to your Twilio console using your account details. From the toolbar's Account menu, select "API Keys and Tokens". Copy your test credentials, which include the Account SID and Auth Token, and then paste them into the respective placeholders in .env file that you created earlier.
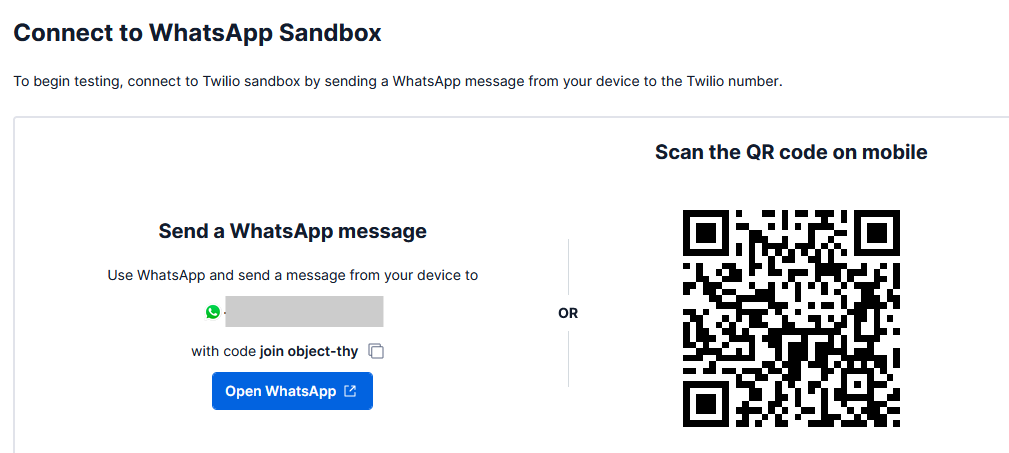
To complete the setup process, access your Twilio Console dashboard and navigate to the WhatsApp sandbox in your account. This sandbox is designed to enable you to test your application in a development environment without requiring approval from WhatsApp. To access the sandbox, select Messaging from the left-hand menu, followed by Try It Out and then Send A WhatsApp Message. From the sandbox tab, take note of the Twilio phone number and the join code.
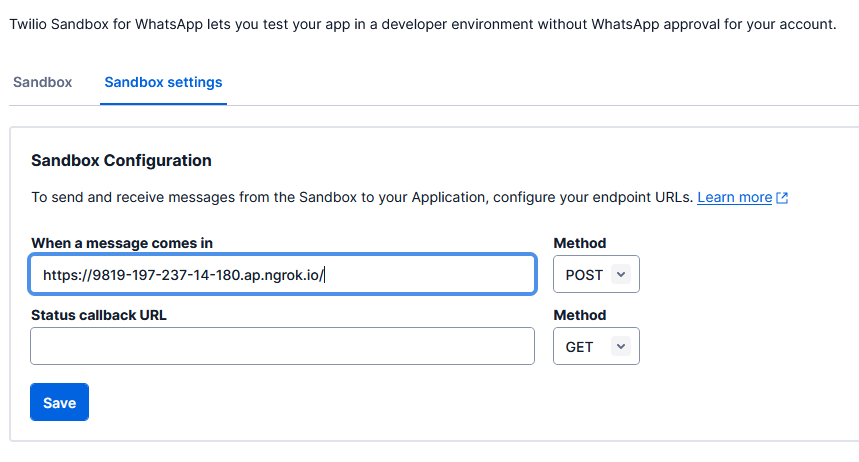
Access the Sandbox Settings tab and configure the endpoint URL that Twilio will use to forward messages sent or received from WhatsApp. This is where you will paste the public URL obtained earlier from ngrok.
Receive and Respond to Messages
This section covers implementing the necessary logic for receiving and responding to messages sent through WhatsApp. To get started, open the src/app.service.ts file and replace the existing code with the following to initialize the Twilio package, then add the required functionality to reply to incoming messages:
The provided code excerpt uses TwiML (Twilio's Markup Language) to specify the desired action for incoming messages received by Twilio. To simplify the process, the MessagingResponse helper class from Twilio's package is utilized to generate the TwiML.
To receive event notifications from Twilio, you must establish a route. To accomplish this, navigate to the src/app.controller.ts file and replace the code with the following which adds a route handler for all incoming POST requests.
When a user sends a message to your WhatsApp bot, the message object is received by the route handler from Twilio. From the request object, you extract the necessary information.
The response type from the route handler must be in XML, and the message is formatted using TwiML before being returned.
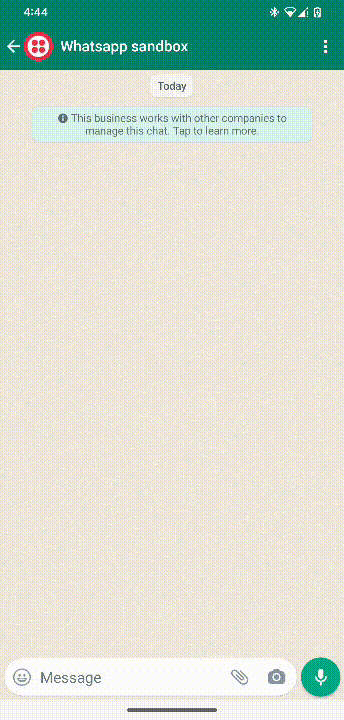
To test this on your WhatsApp, send a message to the Twilio phone number for your Sandbox. Before testing, make sure you authenticate by sending Join <sandbox code>.
Integrating Google Maps APIs
In this use case, your app needs to find vegan restaurants around a user’s location. Google Maps offers an easy-to-use API that helps us query for places registered on the service. In order to do so, copy your API key from Google Cloud Console and add it to your .env file.
Navigate back to your terminal and install the request package using npm as this will be needed to communicate with the Google Maps API.
Next, open the src/app.service.ts file, import the request package and create a function in the AppService class to fetch vegan restaurants from Google Maps:
The function above sends a GET request to Google Maps API with the following query parameters:
location- the latitude and longitude coordinates of your usertype- The type of place you want to find. For our use-case, you will userestaurantskeyword- Additional search terms that can be helpful to filter through the type of place you are searching for. For this use-case, you’ll usevegankey- Your API Key acquired earlier
Add another function in the same file that will loop through the restaurants found and create the response messages.
Finally, you will need to modify the route handler that receives incoming messages so that you can have it use the Google Maps API to respond to the user. Open the src/app.controller.ts file and replace the incoming route handler as shown below.
Testing
Your app is ready for testing. Open your WhatsApp and request it to give you recommendations for vegan restaurants. Ensure to send the message to the Twilio phone number acquired earlier from the sandbox. Send Join <sandbox code> message first in order to join as a test user.
Conclusion
Congratulations on creating your vegan restaurant discovery app in WhatsApp using NodeJS, Google Maps API, and Twilio. You have learned how to create a web application using the NestJS framework and integrate it with Twilio to make it available on WhatsApp. You have also learned how you can use Google Maps API to find and recommend places relevant to your use case using GPS coordinates. You can learn more about taking your chatbot into a production environment by referring to Twilio’s documentation.

Related Resources
Twilio Docs
From APIs to SDKs to sample apps
API reference documentation, SDKs, helper libraries, quickstarts, and tutorials for your language and platform.
Resource Center
The latest ebooks, industry reports, and webinars
Learn from customer engagement experts to improve your own communication.
Ahoy
Twilio's developer community hub
Best practices, code samples, and inspiration to build communications and digital engagement experiences.