How to Build Simple Chat Apps with JavaScript, Node.js and Twilio
Time to read:
November 16, 2017
Written by
This post is part of Twilio’s archive and may contain outdated information. We’re always building something new, so be sure to check out our latest posts for the most up-to-date insights.

Twilio Chat makes it easy to add chat capability to your application by handling the worst devilish details that come up when building real-time chat. In this post we’ll walk you through how to add Twilio Chat to your own web application using JavaScript. The requirement to follow along are:
- An understanding of HTML, JavaScript and CSS.
- Some familiarity with Node.JS and Express or a similar framework
- Have node, git, and npm installed.
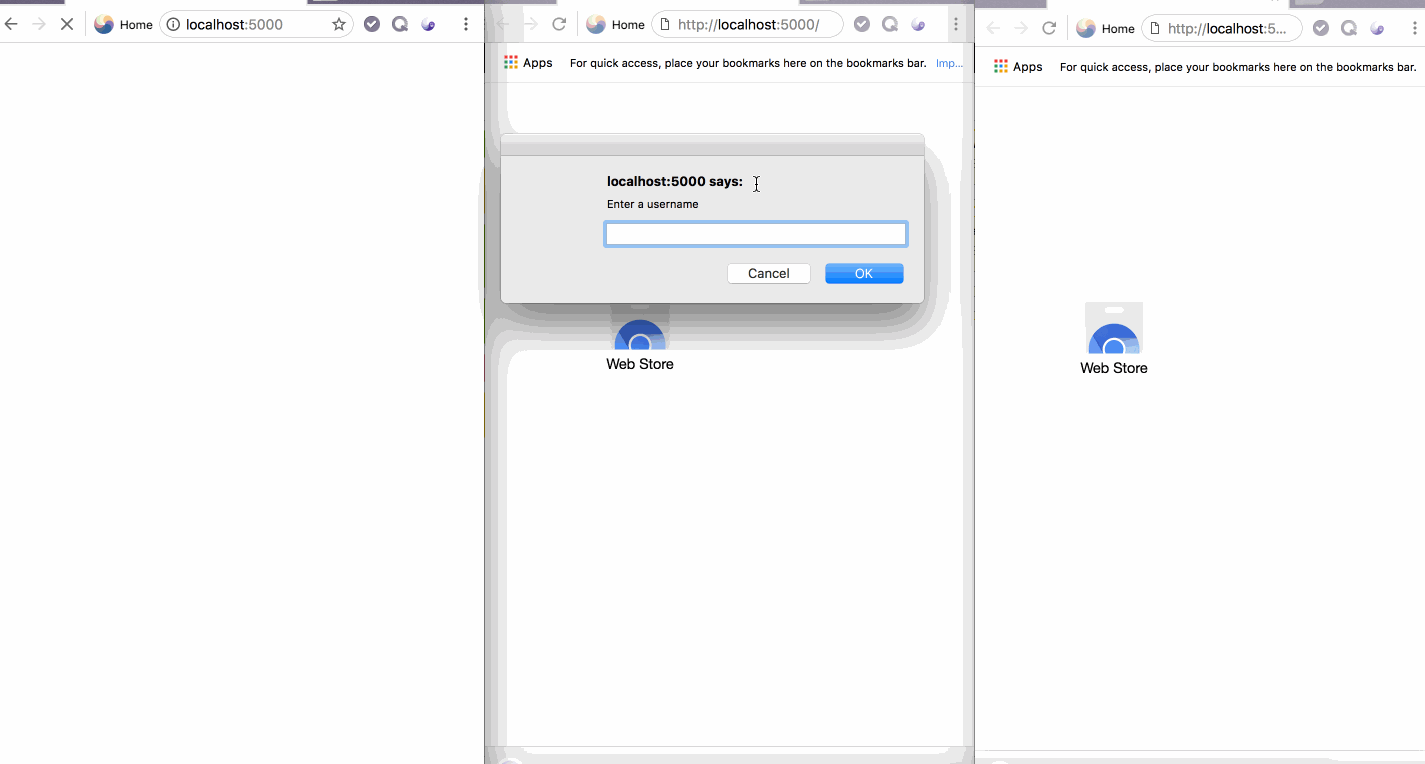
Below is a peek at what we’ll be building, and the completed source code of what we’ll be building is on GitHub.
Setting Up Twilio Chat Service
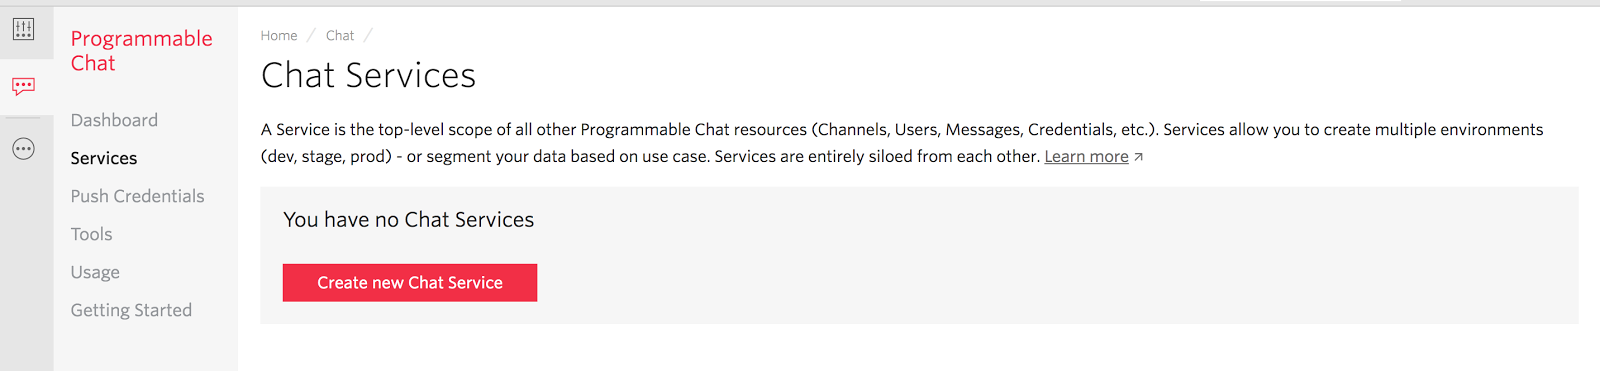
To get started we need to create a Chat Service from the Twilio console. If you don’t already have a Twilio account, sign up for a free account here. Then in the Console, create a new chat service and enter a name for the service.
The Chat Service is a way to scope the resources needed for building this application and making sure they do not overlap or interact with other resources we might have defined. The resources available in a Service include:
- User: A user is a unique entity with an identity that can connect to the chat service and send messages to other users.
- Message: A message is of a string datatype that is used to pass message across to other users in the system.
- Channel: A channel is the medium by which messages sent by a user are distributed to other users (Members) of the channel. Chat Messages exist within a Service as part of a Channel. Channels can either be private or public.
- Public channels are available to users within the service and they can freely join or leave.
- Private channels are not available when browsed by users. A user can join by invitation or be added by the channel admin.
- Member: A user within a channel is referred to as a Member.
- Roles and Permissions: Roles and Permissions are used to enforce what Users and Members can do within a Service instance.
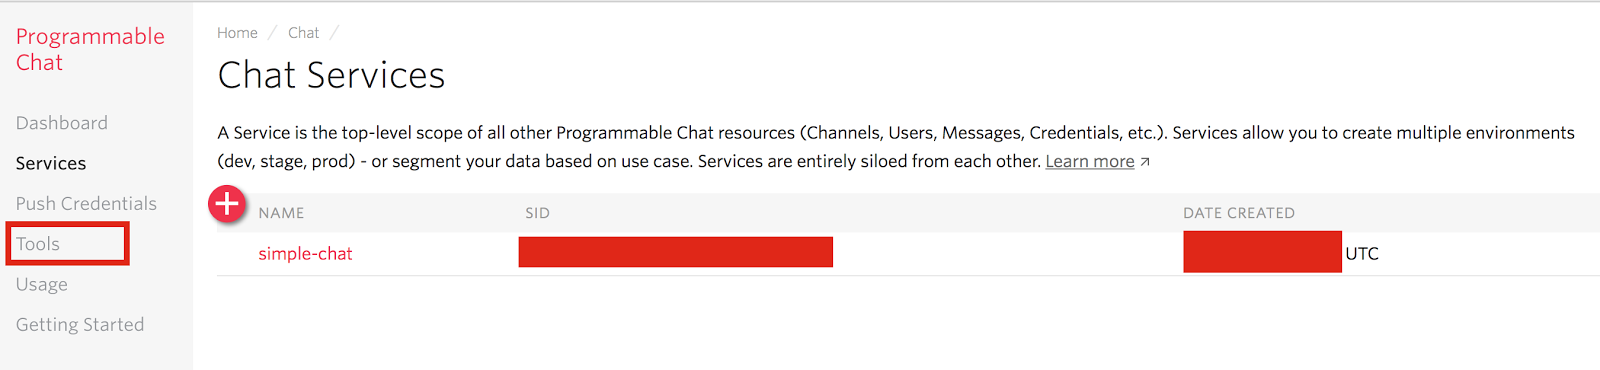
After creating the Service, note the service SID which will be used by the chat client SDK, which provides APIs to connect to the chat service and send messages between users. We also need an API key and secret, which will be used to generate an access token to the Chat Service. All chat client SDK need a valid access token to be able to authenticate and interact with the chat service. Create a new API key with the following steps:
- Click the Back link in the side menu.
- Click the Tools menu that appears, then select API Keys.
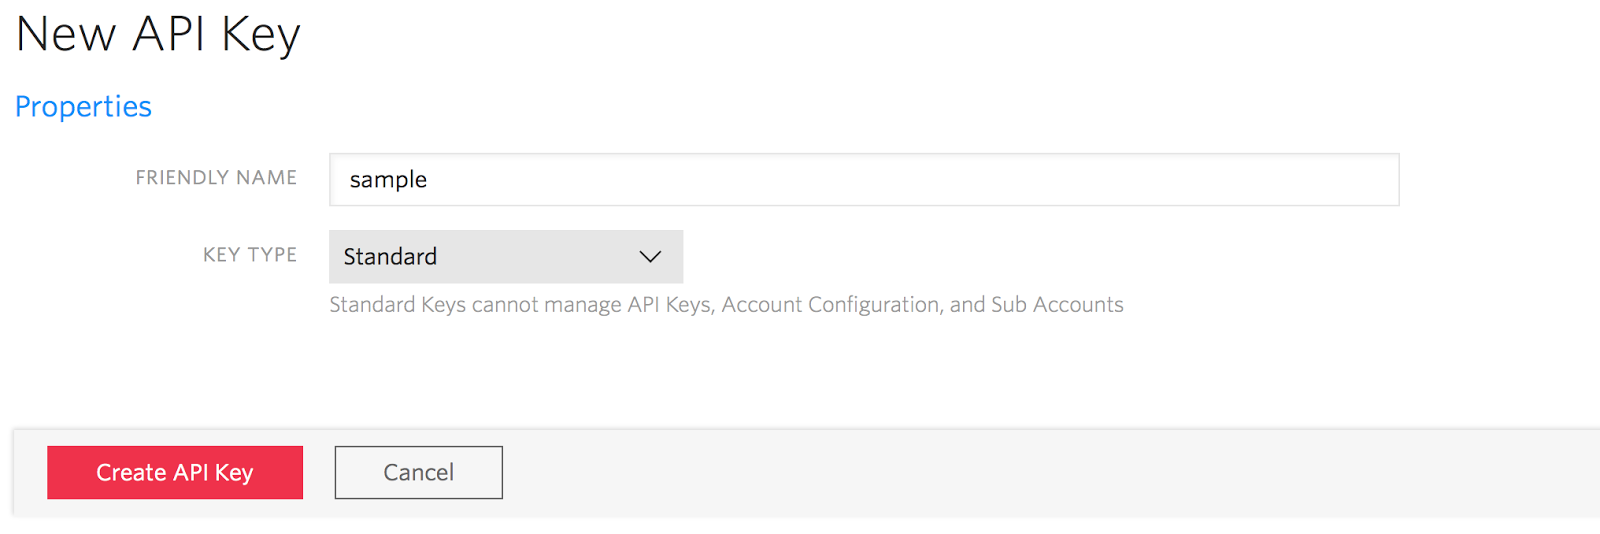
- On the new page that appears, click the Create new API Key button.
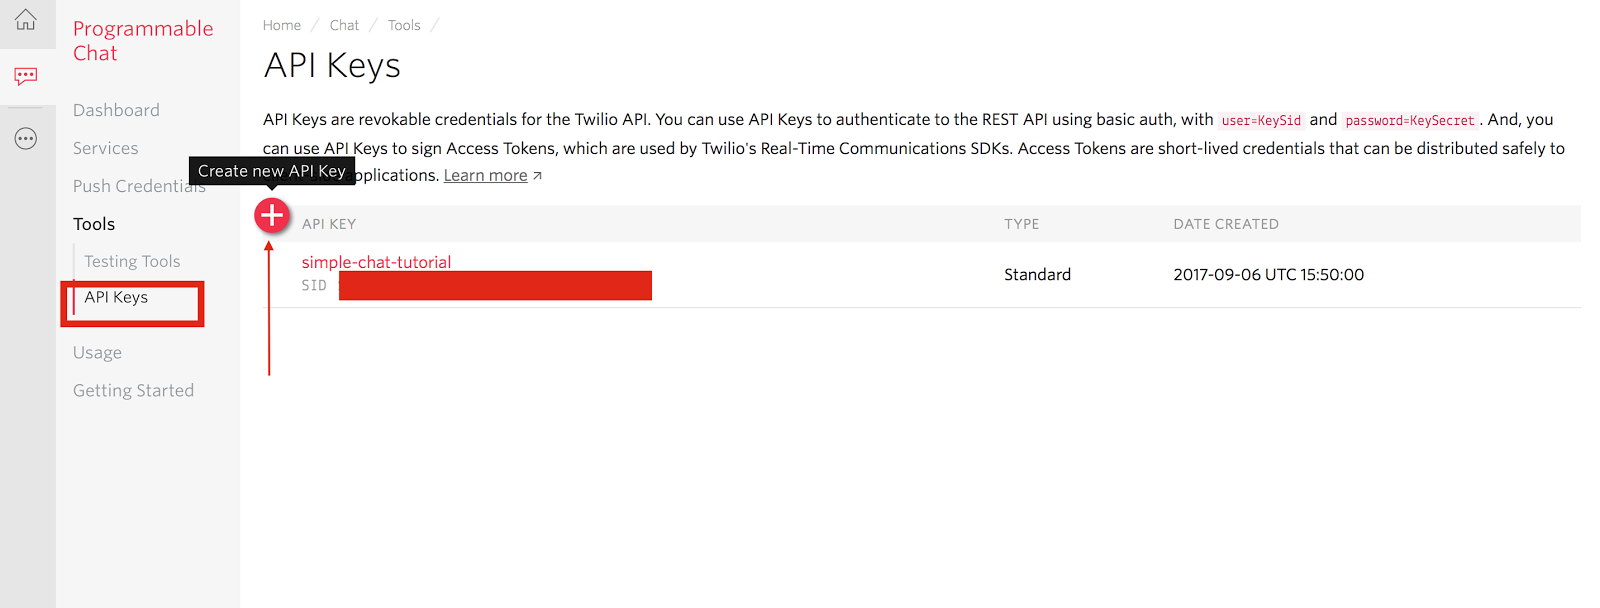
- Enter a name for the key and hit enter on your keyboard.
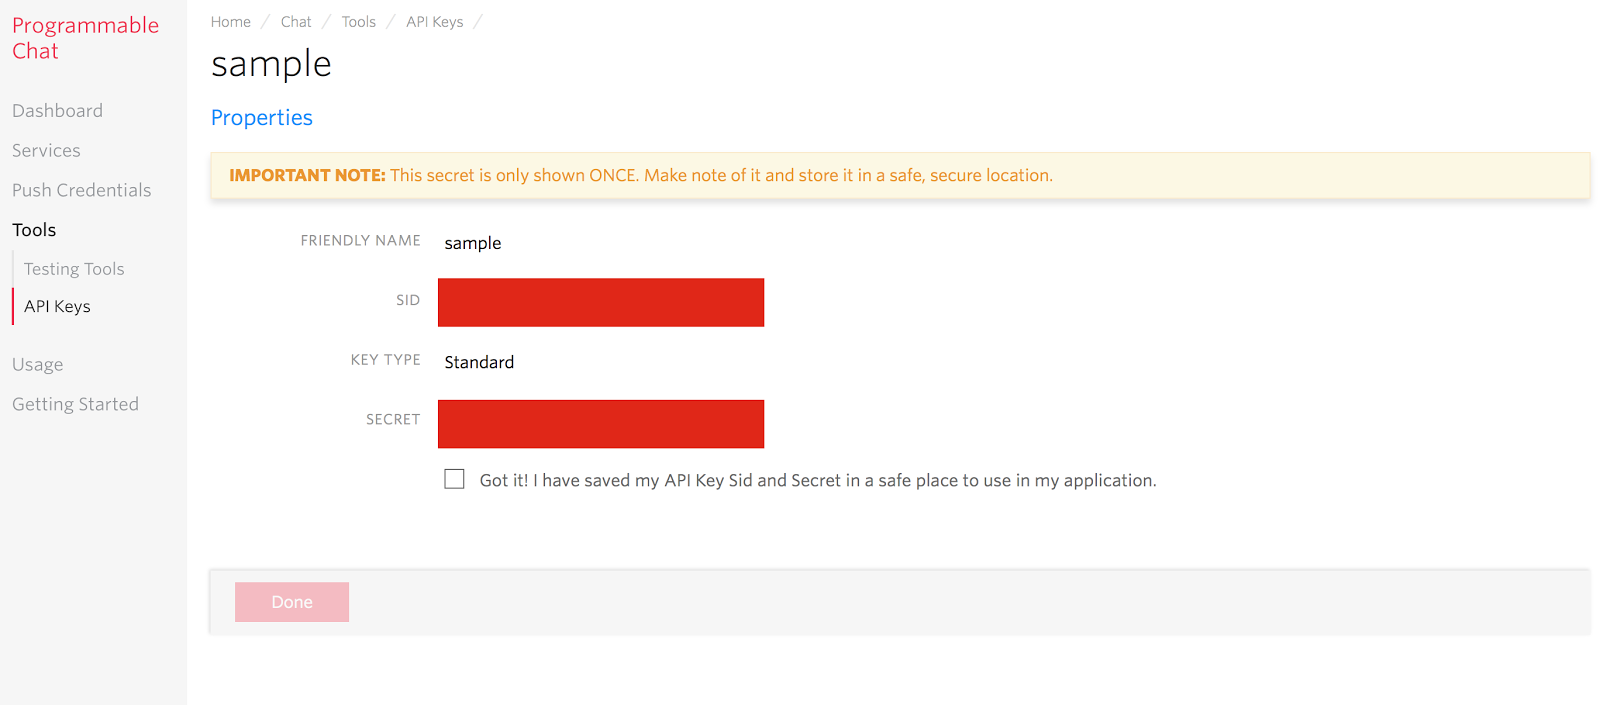
You should get a page showing your API key (SID) and secret. Save them in a safe place as you won’t be able to retrieve these values again. This page is shown only once.
Source Code
With the Service instance created on Twilio, we now need to write some code. Open the terminal or command prompt and run the following command
These pulls a set of files from GitHub with a defined html, css, and a server script for serving the files and responding to http request.
Run the command npm install to install express, the default package that comes with the source code.
Building the backend
We need to build the backend code that’ll generate and return access token to the frontend. Open the terminal (or command prompt on Windows) and run the following command in the project src directory:
In the src directory, open the file called server.js. It contains a predefined route to serve the files in the public folder. Our next step will be to define a route which will provide users with Access Token based on their identity. An access token is used by the twilio client SDK to interact with the Chat Service. We will generate this token with the help of the twilio library we installed in the last step.
To use this package, add a reference to it in server.js.
Define a route named /token with the necessary code to generate the token.
We initialise the AccessToken object with the necessary credentials which can be retrieved from the dashboard and the API secret from the the safe location you saved it in when we created an API Key at the beginning. Then we initialise a ChatGrant object with our chat service SID and add the grant to the AccessToken instance and return the generated token to the client. Take note of the variables which require your credentials from your account. Replace them accordingly.
Crafting the frontend
In the git repository we cloned, we already have some files with content in the src/public folder. If you open the index.js file, you’ll notice we referenced a couple scripts and styles in the header. Two important script files we’ll look at are, index.js and Twilio Chat client sdk (https://media.twiliocdn.com/sdk/js/chat/v1.1/twilio-chat.min.js). We also added a micro-template which will be used as a template for chat messages, a technique used by many javascript templating engines.


Related Resources
Twilio Docs
From APIs to SDKs to sample apps
API reference documentation, SDKs, helper libraries, quickstarts, and tutorials for your language and platform.
Resource Center
The latest ebooks, industry reports, and webinars
Learn from customer engagement experts to improve your own communication.
Ahoy
Twilio's developer community hub
Best practices, code samples, and inspiration to build communications and digital engagement experiences.