Build a WhatsApp Bot for Generating Lyrics using AI and Twilio
Time to read:
June 01, 2023
Written by
Reviewed by

The use of bots in messaging platforms has revolutionized the way we communicate, opening up a world of endless possibilities. In this tutorial, you will learn how to build a WhatsApp bot that generates lyrics using generative AI and Twilio.
The bot will be able to take a user's input and use it to generate original lyrics in response. You will be using Cohere AI’s Generate functionalities and Twilio's WhatsApp API to integrate with the messaging platform. By the end of this tutorial, you will have a fully functional WhatsApp bot that can generate lyrics on demand. This project is a great introduction to the world of generative AI and can be easily extended to other applications such as chatbots or language generation for other platforms.
Prerequisites
Before beginning this tutorial, you need:
- NodeJS v16+ installed on your development machine
- A free Twilio account
- A free Cohere AI account
- Ngrok installed and authenticated.
Build Your App
Express is an efficient framework that simplifies the process of creating web applications for developers. Launch your terminal and navigate to a suitable place. Execute the subsequent commands to create a directory for your project and initialize an npm project inside it.
Execute the following command to install the express framework.
Using terminal or your favorite text editor, create an index.js file in the root folder of your application and add the following code.
To start your local server on port 5555, run the following command in your terminal:
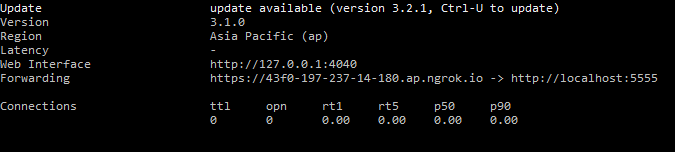
To enable integration with WhatsApp, your web application must be accessible through a public domain. To achieve this, use ngrok to expose your local web server by executing the following command in a new terminal window:
Upon execution, the aforementioned command will generate a public URL (the URL labeled Forwarding), which you should take note of for future reference.
Configuring Twilio
You will begin by installing twilio and the dotenv packages. In your terminal, navigate back to the window running your local server. Stop your server and then run the following command:
Create a tools.js file at the root of your project folder, open it, and import both packages by adding the following code at the top of the new file:
You will utilize the dotenv package later to load the environment variables.
Create a .env file in the root directory of your project, open it, and paste in the following code:
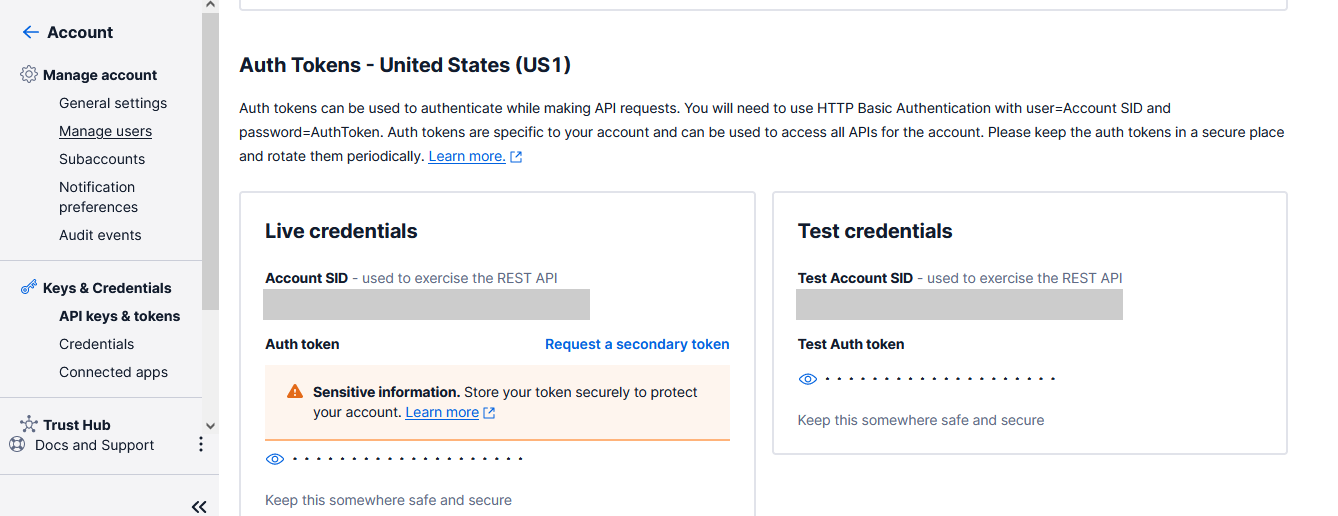
To obtain the values for these variables first log in to the Twilio Console. Once logged in, go to the API Keys and Tokens section located in the Account menu on the toolbar. Copy the test credentials, which include the Account SID and Auth Token. Paste them into the your .env file, replacing the respective placeholder values.
Send and Receive Messages
This section will explain the process of implementing the required logic for receiving and responding to messages sent through WhatsApp. To begin, head back the tools.js file you created earlier in your text editor. Beneath the existing code, add the following code to initialize the Twilio package and add the necessary functionality for replying to incoming messages:
In the code snippet above, TwiML (Twilio's Markup Language) is used to specify the desired response action to incoming messages received by Twilio. To simplify the process, the MessagingResponse helper class from Twilio's package is utilized to generate the TwiML.
To receive event notifications from Twilio, you must set up a route. To achieve this, revisit your index.js file, and paste the following code below the existing code in order to import the tools.js file and modify the route handler function:
Each time a user sends a message to your WhatsApp bot, the route handler is triggered, and the message object is received from Twilio. The request object is then utilized to extract pertinent information. For more information on what is sent to your web application, consult Twilio's documentation. The route handler must reply in XML format, and the message is formatted using TwiML before being returned.
Integrating Cohere AI
Cohere AI is an NLP platform that offers developers easy-to-use APIs to integrate Large Language Models (LLMs). LLMs are state-of-the-art algorithms that are trained on billions of parameters, allowing them to perform better on NLP tasks. For this tutorial, you need to integrate the Generate endpoint, which is used to generate new text based on a prompt.
Navigate back to your terminal window and install the cohere package by running the following command:
Login to your Cohere account and navigate to Dashboard > API Keys in the menu on the left side. Copy the trial key provided to you.
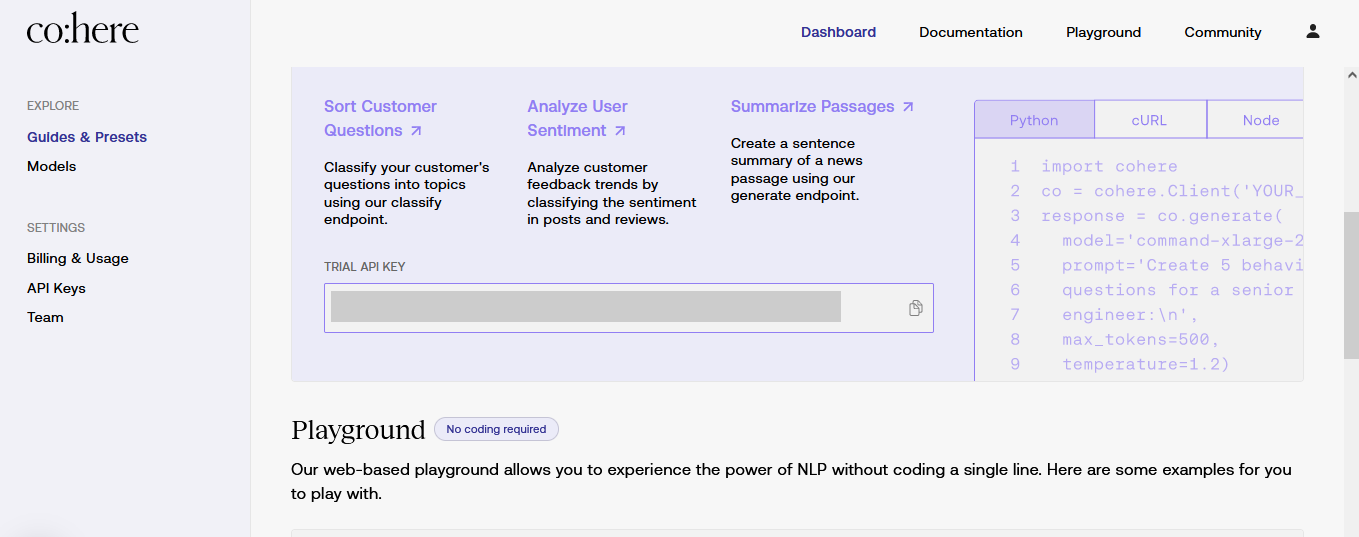
Add a new line in your .env file as shown below, taking care to replace the placeholder value with your actual Cohere API key:
Revisit your tools.js file. At the top of the file, where the other imports are, add the following code to initialize Cohere using your API key:
Edit your exported function to include the following highlighted lines:
The function above uses Cohere’s Generate API that’s responsible for generating raw text by using a provided prompt. It uses the following parameters:
model- the pre-trained LLM you need to use. For this tutorial, you usedcommand-xlarge-nightlysince you want to provide your prompt as a command.prompt- the text you provide as an input to the pre-trained model.max_tokens- the maximum number of words the model will generate in the outputtemperature- Introduces randomness in the generated text. It’s a value between 0 and 1frequency_penalty- reduce the possibility of words being duplicated in the generated text
Lastly, replace your existing route handler in the index.js file with the following code, taking care to adjust the highlighted line to your specifications.
Connect to WhatsApp
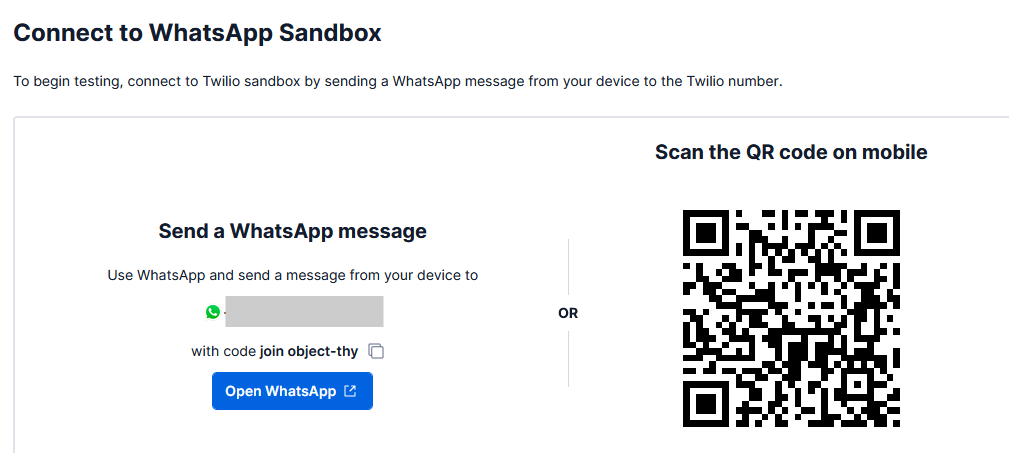
Navigate to the WhatsApp sandbox configuration page in the Twilio Console. On the Sandbox tab, make a note of the Twilio phone number and the join code.
You’re using the sandbox for this application because the sandbox facilitates testing of your application in a development environment without necessitating WhatsApp's approval.
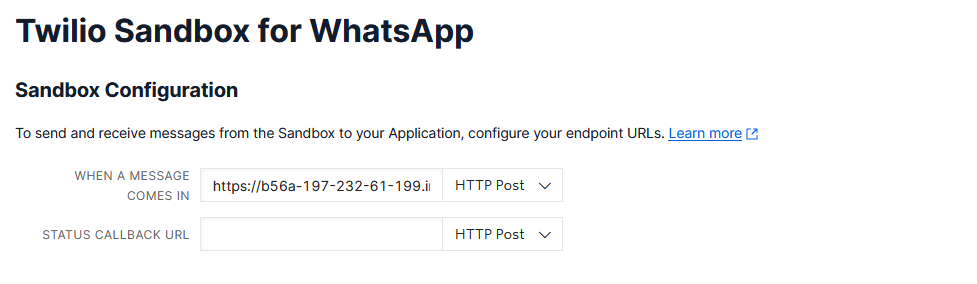
Proceed to the Sandbox Settings tab and set up the endpoint URL that Twilio will utilize to forward messages sent or received from WhatsApp. Make sure to copy and paste the public forwarding URL obtained earlier from ngrok into the WHEN A MESSAGE COMES IN field and then click the Save button.
Testing
Your application is now ready to be tested. Open WhatsApp on your personal device and begin generating lyrics for your favorite songs, but be sure to send your messages to the Twilio phone number obtained earlier from the sandbox. To join as a test user, start by sending a message that says Join <sandbox code>.
Conclusion
Well done on developing your AI-powered WhatsApp lyrics generator with NodeJS, Cohere AI, and Twilio. Through this project, you gained experience in creating web applications with the express framework and linking them to Twilio, making them accessible via WhatsApp. Furthermore, you discovered how to utilize natural language processing to generate text-based data through prompts. If you wish to further develop your chatbot and make it accessible to users in a production environment, we recommend referring to Twilio's documentation.

Related Resources
Twilio Docs
From APIs to SDKs to sample apps
API reference documentation, SDKs, helper libraries, quickstarts, and tutorials for your language and platform.
Resource Center
The latest ebooks, industry reports, and webinars
Learn from customer engagement experts to improve your own communication.
Ahoy
Twilio's developer community hub
Best practices, code samples, and inspiration to build communications and digital engagement experiences.