How to Send and Receive SMS with SAP CAP using Twilio
Time to read:
February 15, 2022
Written by
Reviewed by

The SAP Cloud Application Programming Model (CAP) describes itself as a framework of languages, libraries, and tools for building enterprise-grade services and applications. Its primary capabilities are database modeling via Core Data Services and other enterprise-grade features for localization, data privacy, authorization, and messaging. The framework offers a high abstraction for these services to relieve the coders from writing as much boilerplate code as possible. CAP provides the flexibility to include arbitrary JavaScript libraries in its lifecycle for all other service integrations, e.g., to bring the user experience to the next level. This post will demonstrate how to send and receive SMS with a CAP application using the Twilio JavaScript client and webhooks.
What are we building today?
We won't reinvent the wheel in this post and stick with the well-known hello-world-scenario used in CAP projects: The bookshop. Don't worry if you haven't used this one before. Bookshop examples are small CRUD web applications that use entities from a bookshop such as books, authors, orders, etc. The project that you will build is straightforward and only has a single entity: Books. All records of this entity will be exposed via a read-only REST endpoint. So it’s more of a RU (read and update) web app, without create and delete operations. Furthermore, the final application will accept HTTP POST requests to listen to incoming orders, reducing the "stock" field of the ordered book. With the help of some Twilio magic, we'll ensure the shop managers get notified when the stock of a given book runs low and provide an easy way to order more books from the suppliers.
What you need
To follow this tutorial, you will need:
- Sign up for a free Twilio account here - no credit card required
- A Twilio phone number from your country that can send SMS messages
- Node.js installed (version 14 or newer)
- ngrok installed
- CDS CLI installed
- SQLite binary installed (Unix users probably already have it)
- Optional: Visual Studio Code with the following extensions installed
Start a bookshop-project
The CLI comes with a convenient init command to bootstrap new projects. This will create all the needed files.
In the next step, you will invoke a command to start the webserver on your local machine. This command uses three options:
The in-memory option ensures that the database schema is deployed to the SQLite database, while the to option controls the web protocol used to expose the data services. And the watch option to restart the server automatically when file changes happen. For the last option, you need to add a new development dependency.
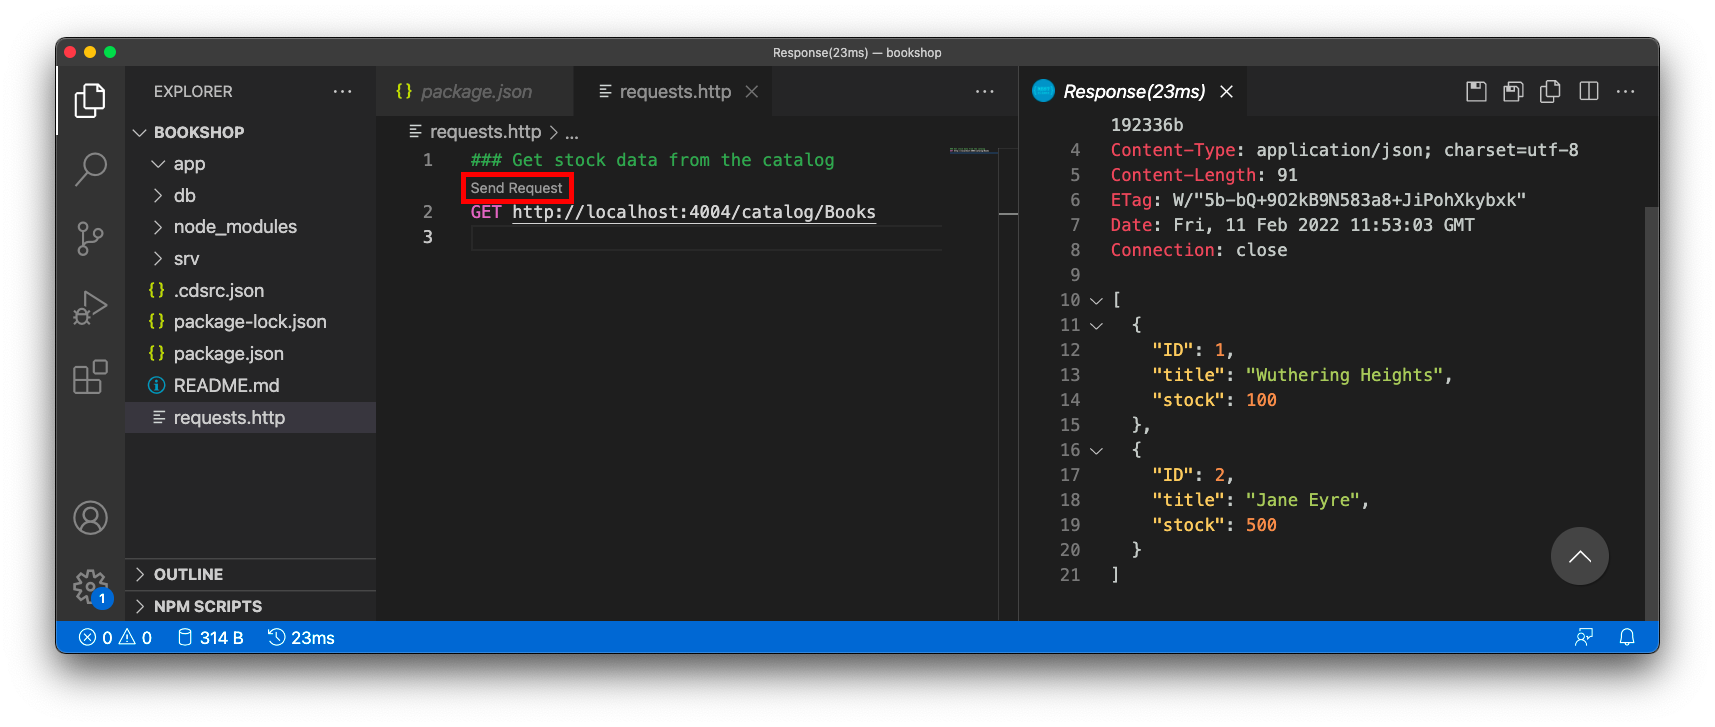
Now it's time to test this basic project by sending an HTTP GET request to http://localhost:4004/rest/catalog/Books. I recommend doing this with the REST Client extension for Visual Studio Code and a new file called requests.http:
VS Code will add a clickable "Rend Request" text above that definition. After sending the request, you should see the following response.
Alternatively, you can use curl to send this request as well.
In the next step, you'll add an action that defines a POST endpoint in your web service. For this, you need to add the following line in the catalog definition of srv/cat-services.cds.
And add the implementation of this action in a new file called srv/cat-service.js. As mentioned above, this action will parse the incoming request and use the parameters to reduce the value of the stock field. If the value of that field turns negative, the request needs to fail:
Thanks to the ' watch ' option, the service restarts automatically once you save the file.
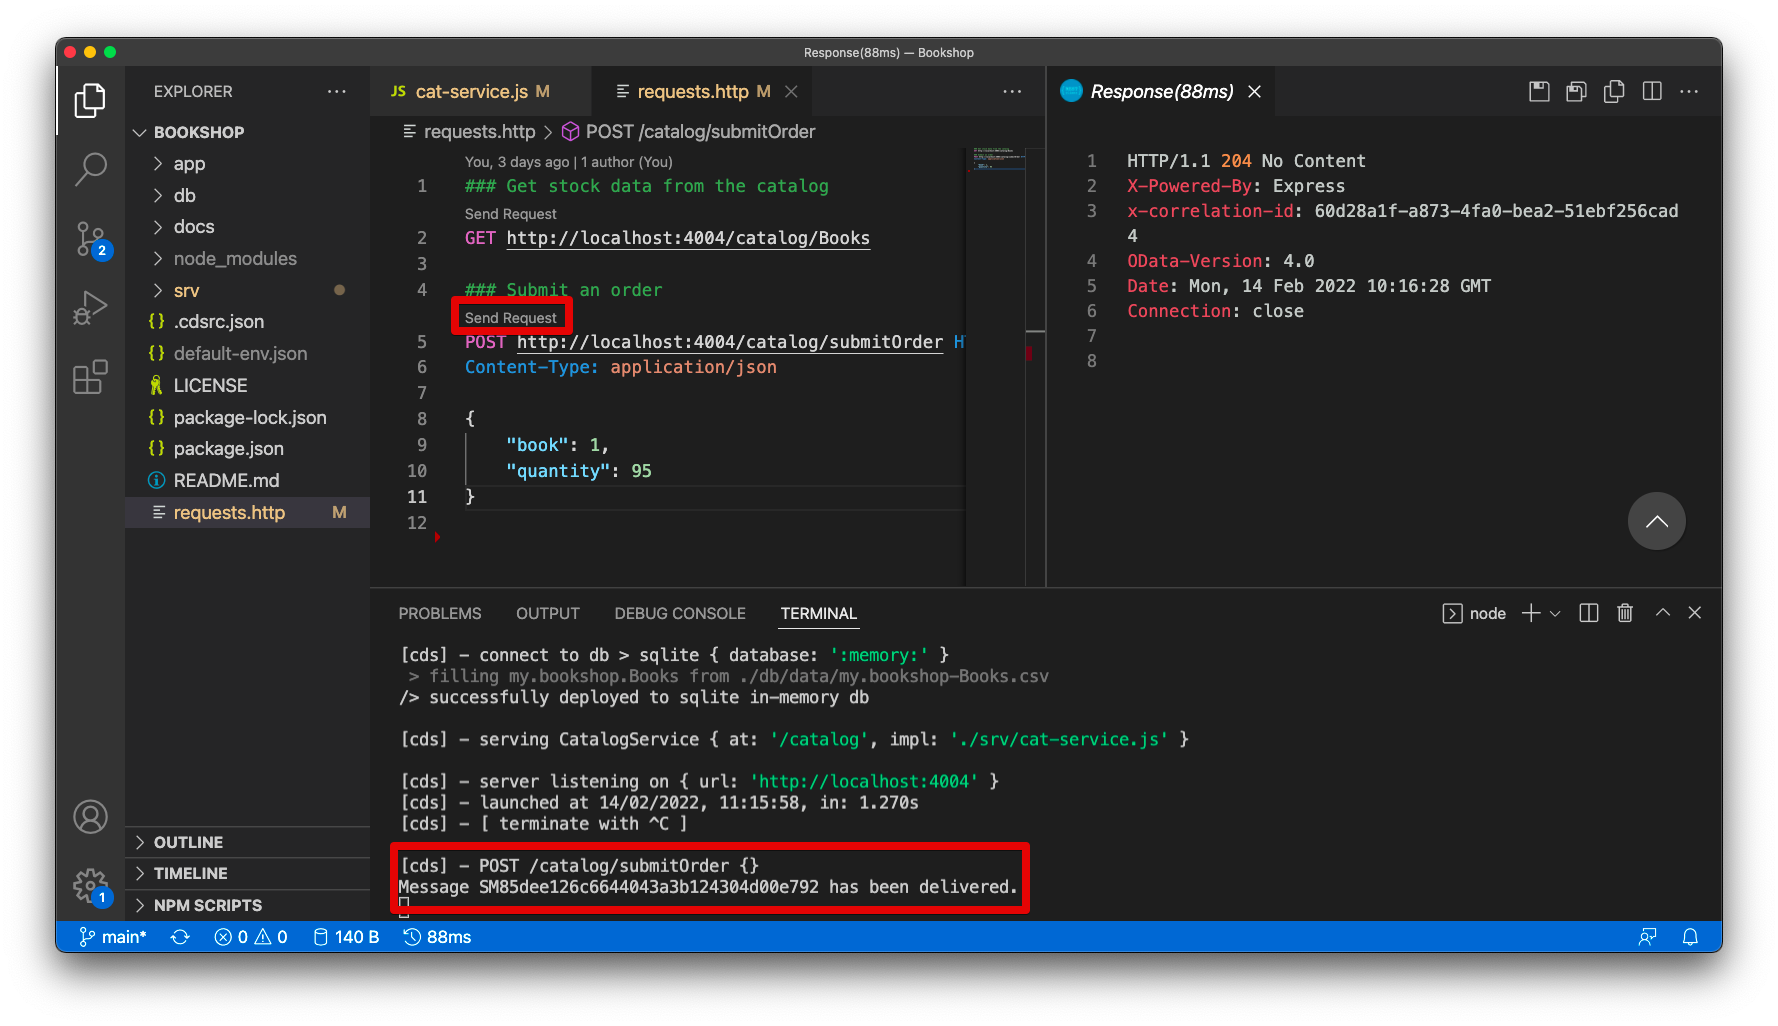
Append the following lines to the requests.http file to define the second request template:
Same as before, you can make use of curl here to send the request via the terminal.
The first request will return an empty, but successful, response. Additional requests will fail because the stock has been too low.
Send a message when the stock decreases significantly
In this section, you'll add basic SMS capabilities to your project. The Twilio API enables you to send SMS, and the Twilio client makes it possible to call the API with a single line of code.
Therefore, you need to add the Twilio Node.js client as a dependency to the project.
To connect this project to your Twilio account, you need to include the Account SID and the Auth Token. It's crucial to keep them private and exclude them from the codebase you check into a git repository. So it makes sense to keep them in the environment variables of the project. In any CAP project, the default-env.json file is the perfect place for these secrets as it's already on the .gitignore list, and all properties are automatically loaded in the environment variables during startup. For this application, replace all placeholder values such as the sender and receiver number of the text messages to the new file default-env.json as well:
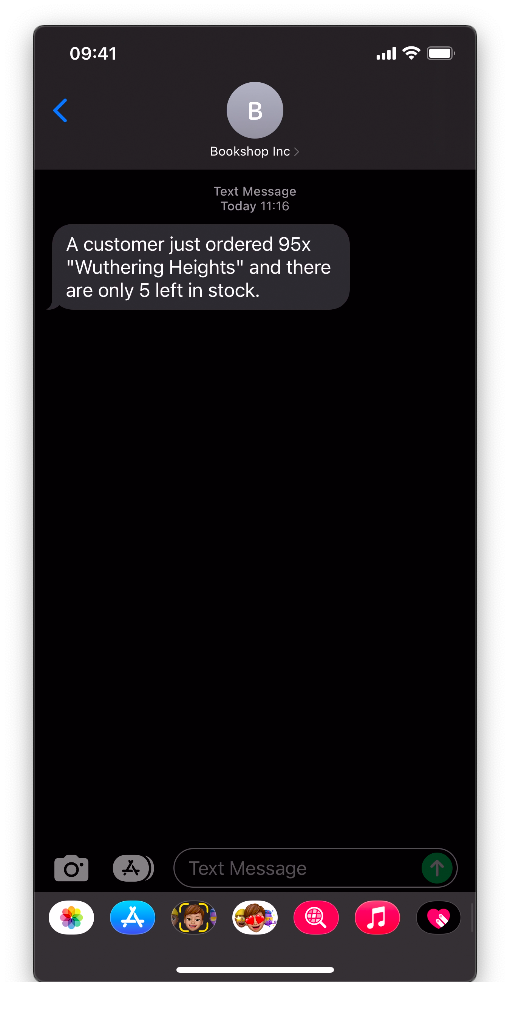
Now that you have prepared the runtime environment, it's time to initialize the Twilio client and send a warning message when the stock threshold is reached. Add the highlighted lines to the service implementation srv/cat-service.js:
Submit an order by triggering the second HTTP request.
You should now receive the following message on your phone.
Listen to inbound messages for restocking
The previous section established a one-way channel from your project to the mobile of the bookshop managers. This final section will turn it into a two-way communication channel that can read responses sent back by the managers. In the Twilio Console, you can define what happens when Twilio receives a message sent to your Twilio number. There are several options to react to this event. You can specify a static response, handle the request dynamically with a serverless Twilio Function, or forward the request to a webhook of your application. In our case, the last option makes the most sense. So we'll use a custom middleware to implement the webhook and deal with the message. As the application currently runs on localhost, you need to open a tunnel to route traffic to your machine from the Twilio data center. For this, you'll use ngrok.
Let's build this webhook step-by-step to understand what needs to be done.
To begin, tell the bookshop manager how they can respond to the initial text message. Therefore, change the following line in the service implementation srv/cat-service.js:
To create a middleware with CAP, you only need to create a file srv/server.js and listen to the bootstrap event before you can initialize the Twilio client. Also include the twilio.webhook() middleware to prevent misuse by making sure only servers in Twilio data centers can call this webhook in production.
Implement the middleware to parse the affected book, update the database record, and inform the bookshop manager whether it worked:
You probably already noticed that you called a function that is missing. Let's change that by adding the collectBookDetails function in srv/server.js that reads contextual data from the last message sent to the bookshop manager. Add the new function as an inner function right after the declaration of the twilioClient to make sure it is in scope.
Before you test this flow end-to-end, run it locally first. Add the following request to the file requests.http, replace the placeholder with your phone number, and trigger the request.
Note that you need to URL-encode the plus sign with %2b
You should now see a TwiML (Twilio Markup Language) response. This markup will tell the Twilio servers how to respond to the sender.
Use ngrok to open a tunnel from your local port 4004 to the internet.
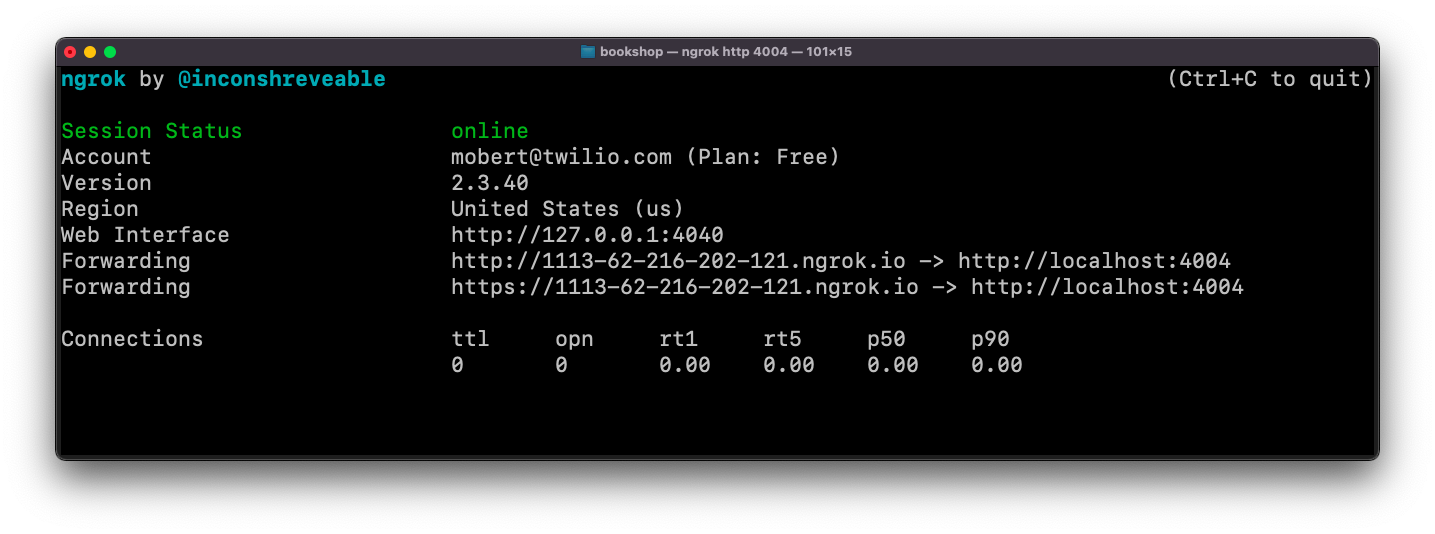
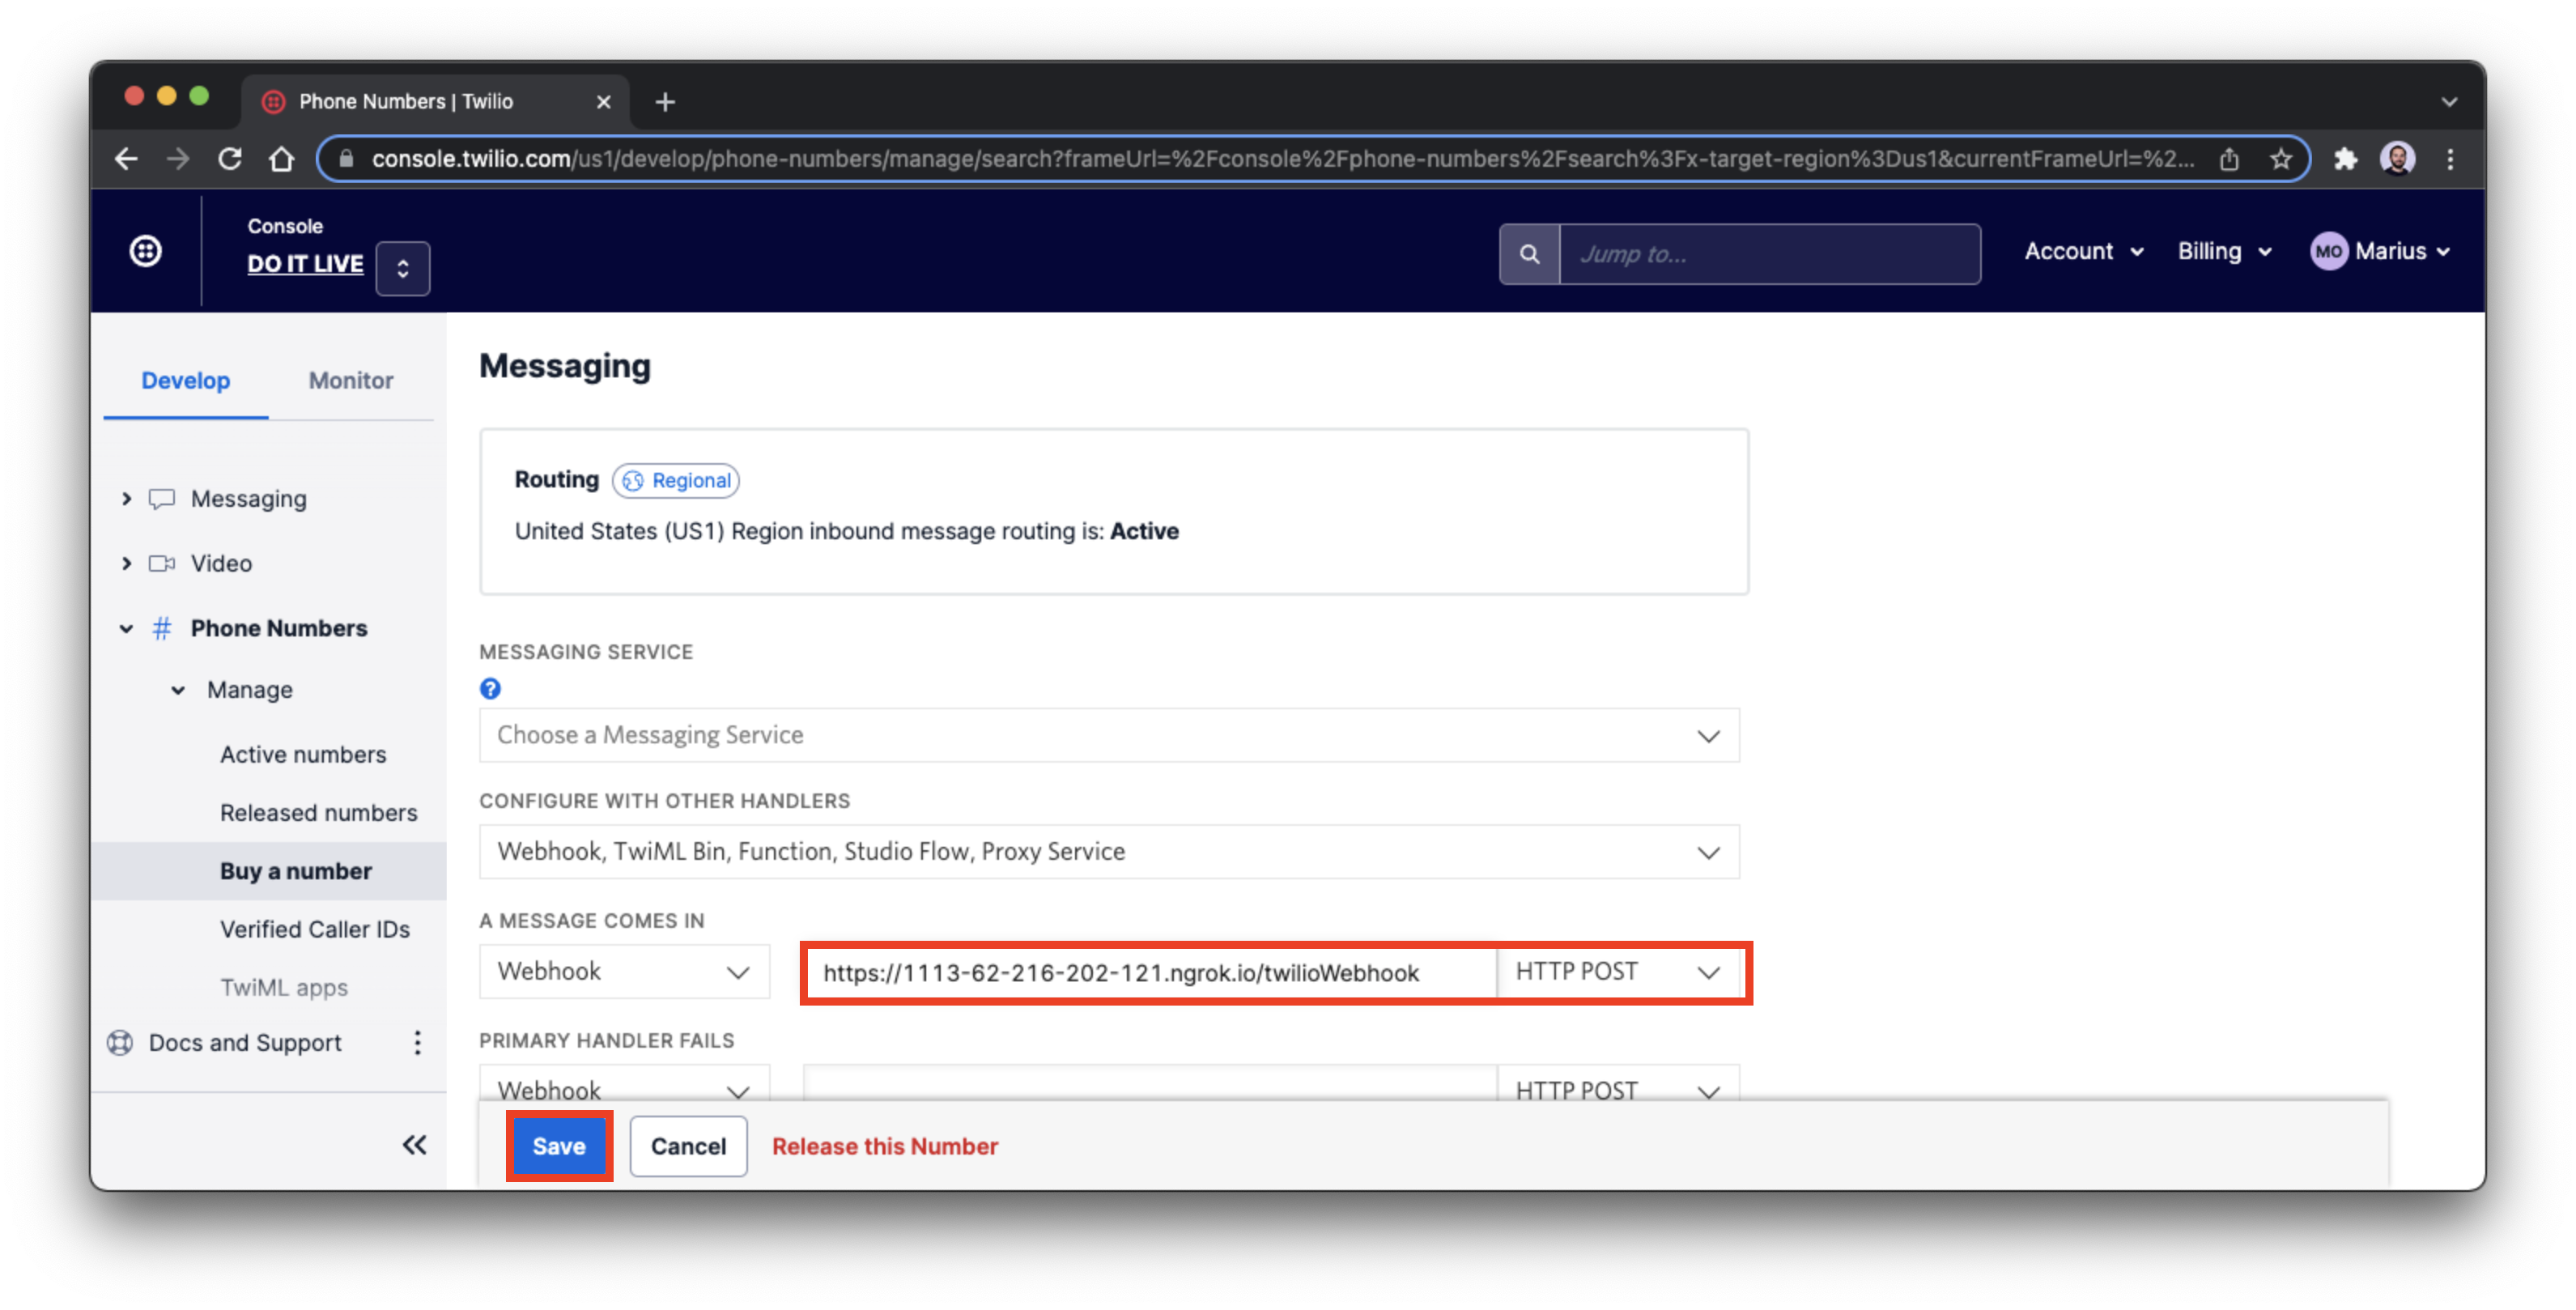
Go to the Twilio Console and navigate to your phone number. Add the HTTPS URL that the previous step printed with the /twilioWebhook suffix to the section “A message comes in”.
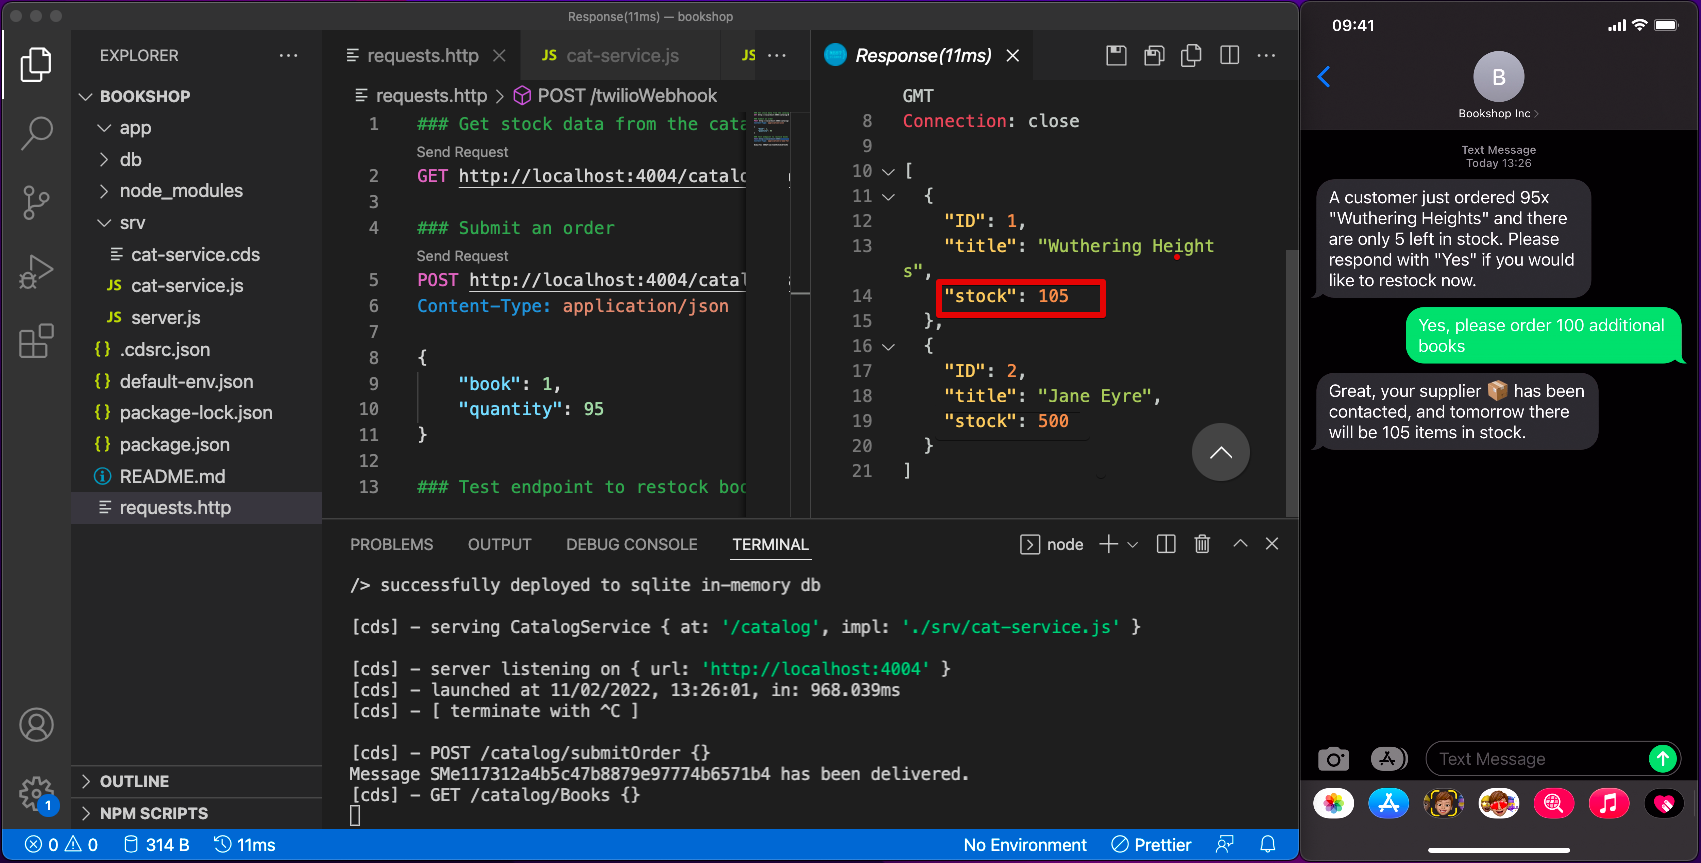
Let's give it a shot. Respond with "Yes, please order 100 additional books" to the message you received a few minutes ago. Now query the current stock info via the first HTTP request once more.
What's next
You did it. You added a two-way communication channel to a CAP bookshop application and improved the user experience of bookshop managers!
From here, you can extend the application in multiple ways. You can go down the rabbit hole and learn more about the SAP Cloud Application Programming Model to build enterprise applications or add additional communication channels such as Email, Whatsapp, Voice, or Video. Or you can upgrade your login mechanism with Twilio Verify to protect your web application from bots. For comparison, you can also find the entire source code on GitHub.
If you have questions regarding this application or any related topic, please get in touch with me via the following channels:


Related Resources
Twilio Docs
From APIs to SDKs to sample apps
API reference documentation, SDKs, helper libraries, quickstarts, and tutorials for your language and platform.
Resource Center
The latest ebooks, industry reports, and webinars
Learn from customer engagement experts to improve your own communication.
Ahoy
Twilio's developer community hub
Best practices, code samples, and inspiration to build communications and digital engagement experiences.