Passwordless Authentication in Go Using Twilio Verify
Time to read:
April 23, 2024
Written by
Reviewed by
Passwordless Authentication in Go Using Twilio Verify
Typing or generating a unique password for every new account or website login is a hassle. Although password managers help, they're not without their issues, adding layers of complexity. Passwordless authentication offers a more streamlined and secure alternative.
In this tutorial, you will learn about passwordless authentication, and build a Go app that uses Twilio Verify for authentication.
Prerequisites
Before we start, ensure you have the following:
- A Twilio account (either free or paid). If you are new to Twilio, click here to create a free account
- Go (version 1.22.0 or higher) installed on your system. If you haven't installed it yet, follow the official installation guide.
What is passwordless authentication?
Passwordless authentication is an authentication method where the user does not need a password in order to log into an app or system. In this authentication method, users are authenticated using other unique and more secure alternatives like one-time-passwords (OTP), SMS, Passkeys, Silent Network Authentication, Voice, or Email notification.
How passwordless authentication works
Passwordless authentication represents a modern approach to accessing systems, departing from the conventional reliance on passwords. By integrating Go with Twilio Verify, the authentication process becomes smoother and more secure, relying on the user's mobile device to receive a one-time code instead of a static password.
Here's a breakdown of how it works:
- User Initiation: When a user attempts to log in, instead of entering a password, they provide their phone number as their unique identifier.
- OTP Generation and Delivery: Upon receiving the phone number, the server initiates an OTP (One-Time Passcode) generation request through Twilio Verify. Twilio Verify then swiftly dispatches a unique, temporary code via SMS to the user's provided phone number.
- User Verification: The user receives the OTP on their mobile device. They then input this code into the application.
- Validation by the Server: The Go server verifies the entered OTP against the one generated and sent by Twilio Verify. If the codes match, the user is successfully authenticated and granted access.
This approach significantly enhances security by leveraging the inherent security features of the user's mobile device. It also eliminates the need for users to memorize passwords, thereby simplifying the authentication process and enhancing user convenience. Twilio Verify seamlessly integrates with Go, providing a robust and reliable solution for implementing passwordless authentication.
Passwordless authentication has so many advantages and uses including the following:
- Enhanced Security: Reduces the risk of password-related breaches.
- User Convenience: Eliminates the need for users to remember and manage multiple passwords.
- Reduced Friction: Streamlines the login process, improving the user experience.
- Scalability: Easily scalable with Twilio's infrastructure.
Implement passwordless authentication
Set up the project
Let’s start by creating the project directory and integrating Twilio Verify in our Go application. Open your command prompt and run the following commands to create a new directory for your project and initialize a new Go module:
Next, install Twilio's Go Helper Library by running:
You can now open the project in your preferred text editor.
Set the required environment variables
Dotenv files, commonly named .env, are used to store sensitive information your app needs during development. This is used to separate your app’s sensitive configurations from the code. Typically, that information should not be seen by the user e.g., database login credentials, API keys, and in this case your twilio credentials (Account SID, Auth Token, and Service SID).
In your project's top-level directory, create two files named .env and main.go. You can do this using a text editor or by using terminal commands. Inside the .env file, add your environment variables by pasting the code below into the file
In your main.go file, you can load these environment variables using the GoDotEnv package. Import the package into your app by adding the code below inside the main.go file:
Now, to load the environment variables, create a main() function and add the code below:
It is very important that you ensure to replace the placeholder values in the .env file in the example above with your very own correct Twilio credentials. Keep the .env file secure and never commit it to version control systems like Git.
With this done, you have successfully set up your Twilio credentials as environment variables.
Retrieve your Twilio credentials
Sign into the Twilio Console, scroll down to the bottom of the page, and you should see your Account SID and Auth Token, as shown in the image below.

Copy these values and keep them in a safe space for now. Next, navigate to Explore Products > User Authentication & Identity > Verify. Now, on this page, click Create new. Then, fill out the initial form with the configuration values shown in the screenshot below, and click Continue.
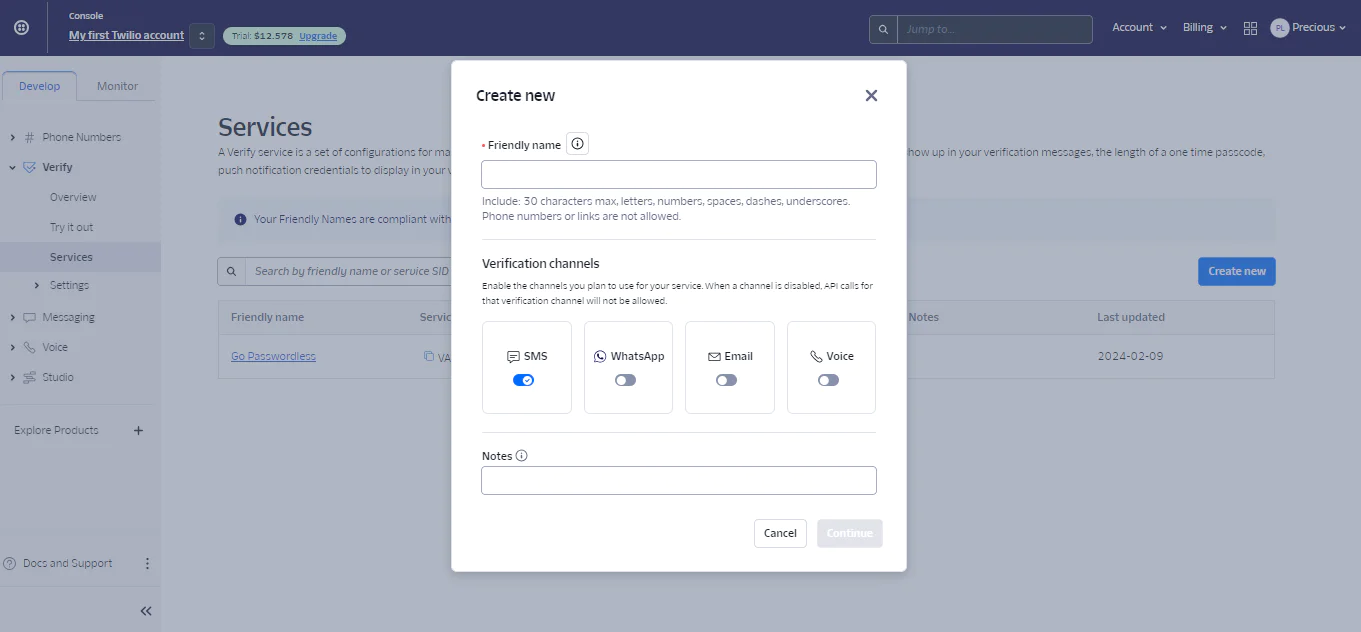
In the next step, leave Enable Fraud Guard set to Yes and click Continue to finish creating the service. After creating the service, copy the Service SID and keep it safe as well.

Set up the web server
Now, let's set up a basic web server using Go's net/http package. This web server will have four routes:
- "/": This one is for displaying the sign-in form where users can enter their mobile number.
- "/send-otp": The second one is used to process the sending of the code to the user’s submitted phone number
- "/verify": Here is the third route to display the verification form after the OTP must have been received, and users can enter the OTP they received.
- "/verify-otp": The last route is used to process the OTP verification after submission.
Update the code in main.go to exactly what we have below:
Add the ability to send an OTP
Next, add the functionality to send an OTP. For simplicity, the example below will directly include this logic within the main.go file. Ensure you have set your Twilio credentials as environment variables
Add the following function after the main() function.
The function above handles the task of sending a One-Time Passcode (OTP) to the provided phone number. It achieves this through a straightforward process. First, it checks if the HTTP method used is POST, indicating that the form has been submitted.
If so, it then extracts the user-provided phone number from the submitted form data. Following this, the function initializes a Twilio client using the provided account SID and authentication token.
With the client set up, it proceeds to create a new verification request using Twilio's CreateVerification() method, specifying the phone number to which the OTP will be sent and the communication channel (in this case, SMS). Lastly, if the verification request is successful, the function redirects the user to the verification page ("/verify"), passing the phone number as a parameter.
Add the ability to verify an OTP
Similar to sending an OTP, we'll now add the functionality to verify the OTP. This function handles the "/verify-otp" route. Add the function below right after the sentOTP() function in main.go.
This function checks if the user-entered OTP is correct. Firstly, it confirms if the HTTP method is POST and extracts the phone number and OTP from the form data, similar to the sendOTP() function. Then, it sets up a Twilio client using the provided Twilio Account SID and Auth Token.
Next, it sends a verification check request using Twilio's CreateVerificationCheck() method, including the phone number and OTP. Finally, it checks if the OTP matches the one generated by Twilio. If it matches, a success message is displayed; otherwise, a failure message is shown.
With all of these updates, your final main.go file should be similar to the one in this GitHub repository.
Test that the app works
Finally, it's time to test that the code works as expected. Start the application by running the following command.
Your server will start on port 8080. You can now navigate to http://localhost:8080 to test your passwordless authentication flow.
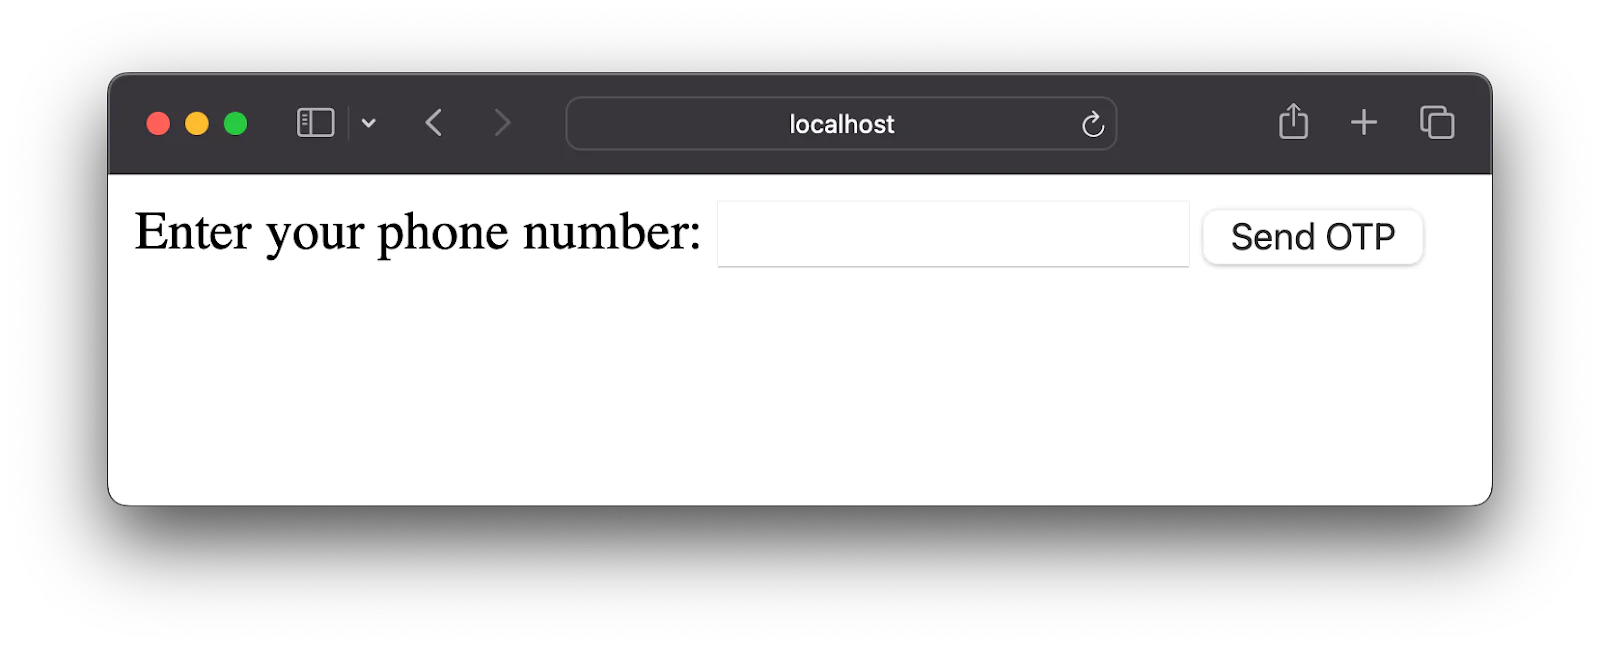
As shown in the image above, the user enters the phone number they used for registering on the app, and clicks the Send OTP button and an OTP is sent to this number.
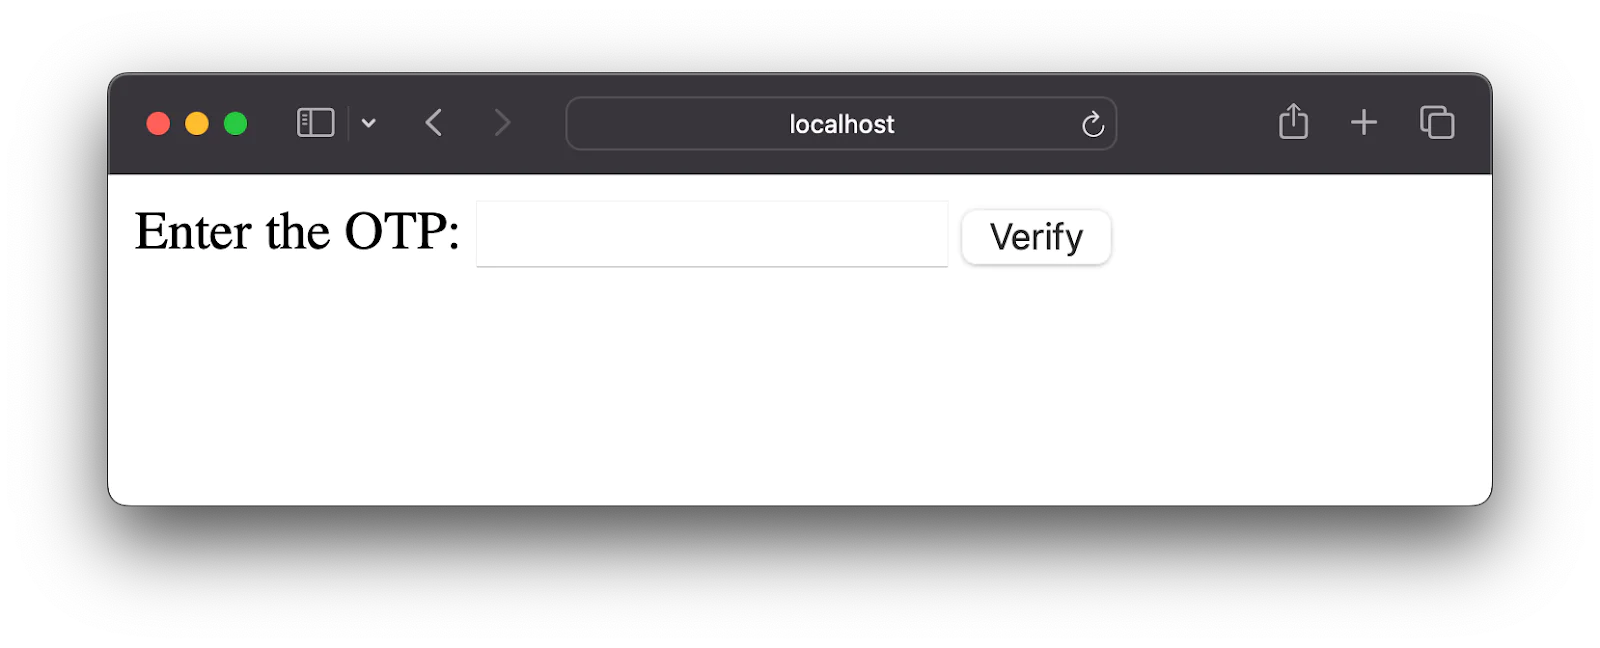
Next, they are redirected to a new page to enter the OTP as shown in the image below.
Finally the app runs a verification to confirm if the entered value matches the sent OTP. The user is granted access into the application after a successful verification.
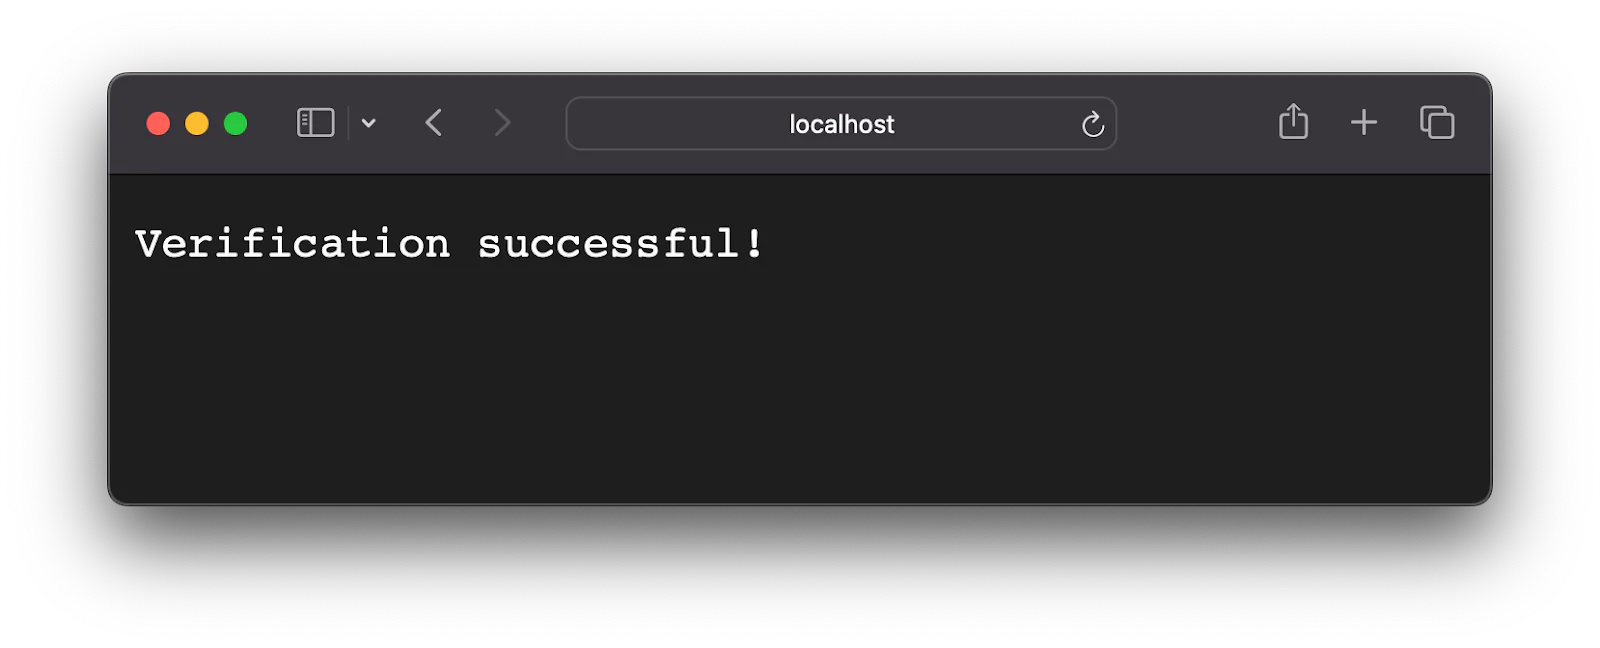
Through this process, the user does not have to go through the hassle of remembering a password.
That's the essentials of implementing passwordless authentication in Go using Twilio Verify
Passwordless authentication using Go and Twilio Verify presents a compelling alternative to traditional password-based systems. It offers a blend of enhanced security and user convenience, making it an attractive option for modern applications.
While it introduces certain dependencies and complexities, the benefits, especially regarding security and user experience, are significant. As technology evolves, passwordless authentication is poised to become a standard for secure and efficient user access.
By certain dependencies and complexities, we are referring to extra software parts and possible complications that might arise due to other functionalities your app might have. Despite these challenges, the advantages of improved security and user convenience which passwordless authentication provides outweighs any of these difficulties.
Precious Longe is a software engineer and technical writer who loves learning new things and sharing this knowledge with other developers and enthusiasts.

Related Resources
Twilio Docs
From APIs to SDKs to sample apps
API reference documentation, SDKs, helper libraries, quickstarts, and tutorials for your language and platform.
Resource Center
The latest ebooks, industry reports, and webinars
Learn from customer engagement experts to improve your own communication.
Ahoy
Twilio's developer community hub
Best practices, code samples, and inspiration to build communications and digital engagement experiences.