How to Manage Media Files Using Spring Boot and Amazon S3 Buckets
Time to read:
April 22, 2023
Written by
Reviewed by

The ability to upload and download files is a need for practically all applications. It should be possible for users to upload their profile images and occasionally share files. File storage options range widely:
- Direct file storage is possible on the server hosting the program.
- Files can be stored in a database as a blob.
- Files can be stored on some cloud storage for example AWS S3, Google Cloud Storage, or Dropbox.
Direct file storage on your application server or in a database that requires you to self-manage your files' storage, file size, and location. This can quickly get you into trouble. Using cloud storage allows you to outsource file management to a third-party platform that specializes in file management.
Amazon Simple Storage Service (Amazon S3) is a battle-tested cloud storage service. You can work with Amazon S3 using the AWS Management Console, AWS CLI, AWS SDKs, and REST API. Amazon S3 can store files up to 5 TB.
In general, once your file size reaches 100 MB, consider using the multipart upload service, which is also available on AWS S3). Each file on Amazon S3 must be contained within a bucket. Each bucket is known by a key (name), which must be unique.
In this article, you will learn how to use the AWS S3 SDK in a Spring Boot project to upload and download files from an Amazon S3 bucket.
Tutorial Requirements
- Refer to this document on the AWS website to create and activate a new AWS account.
- Refer to this Twilio article to set up a Java Spring Boot application that can be hosted on the web.
- IntelliJ IDEA Community Edition for convenient and fast Java project development work. The community edition is sufficient for this tutorial.
- Java Development Kit 17 and Maven 3.6.3. I recommend using sdkman, it helps switch between Java and Maven versions on your computer.
- ngrok, a utility for connecting your Java application server to a public URL that Twilio can access.
- Postman desktop application to test the APIs. During installation, create a free account when prompted.
- A web browser. You can download either Chrome or Mozilla Firefox for free.
Set up AWS S3 SDK in Spring Boot Project
Our project requires the following dependencies:
- AWS Java SDK BOM (Bill of Materials). We are going to use this to control the version of the AWS S3 Java SDK that we will use in this project.
- AWS S3 Java SDK. We need this to be able to programmatically perform file operations on AWS S3.
- jaxb-api. This dependency provides APIs and tools that automate the mapping between XML documents and Java Objects. The AWS S3 SDK requires this dependency to be able to serialize and deserialize XML documents.
- commons-io. We need this dependency to perform operations on multipart file objects in our project. Files are uploaded as a multipart file object in SpringBoot.
- The Spring Web - The Spring Web Starter dependency enables you to create a Java web application.
- Lombok - Lombok provides you with boilerplate code for example getters, setters, hashcode and equals methods can all be included in your application by just setting an annotation.
- Validation - Spring Bean Validator provides you with an out-of-the-box validator for Spring Beans (Spring managed classes).
To add dependencies to your project, open the pom.xml from your project root directory. Create dependencyManagement> and /dependencyManagement> tags in the pom.xml file in your project. In between the <dependencyManagement></dependencyManagement> tags you just created, create <dependencies></dependencies> tags and in between these <dependencies></dependencies> tags, add the AWS Java SDK BOM.
The <dependencyManagement></dependencyManagement> tags of your pom.xml should now be as follows:
Next, add the following dependencies to the dependencies between the <dependencies></dependencies> tags.
Save the file.
Open the terminal in your IntelliJ IDEA and run the mvn clean install command to install the dependencies that you just added.
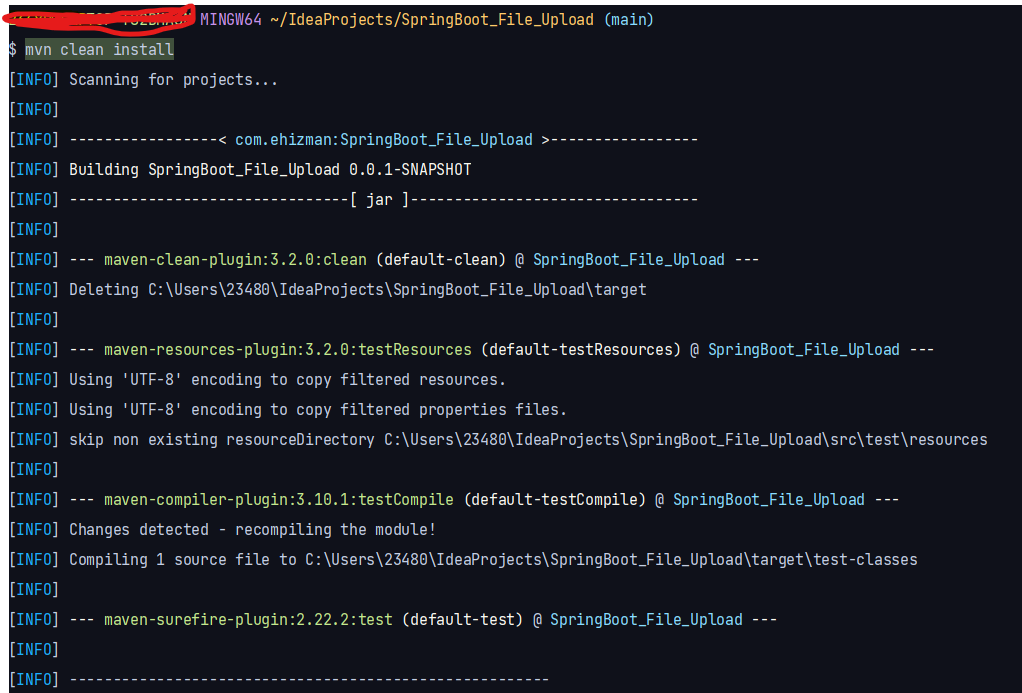
Build Project
Create S3 Bucket
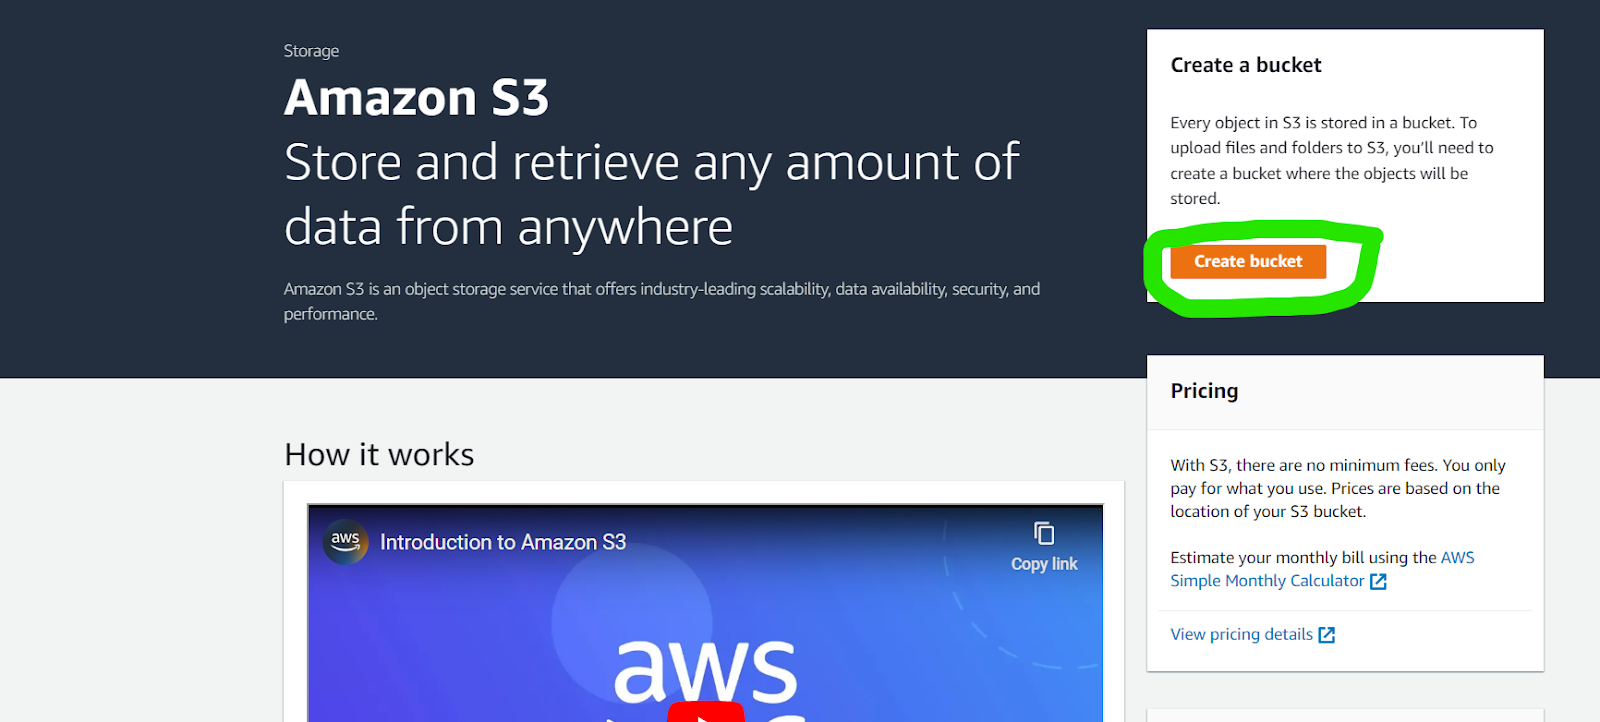
Go to your AWS management console and search for "S3" in the Search bar at the top of the page. This takes you to a page that contains a table of S3 buckets that you previously created. If you have not created any S3 buckets, then the table is empty.
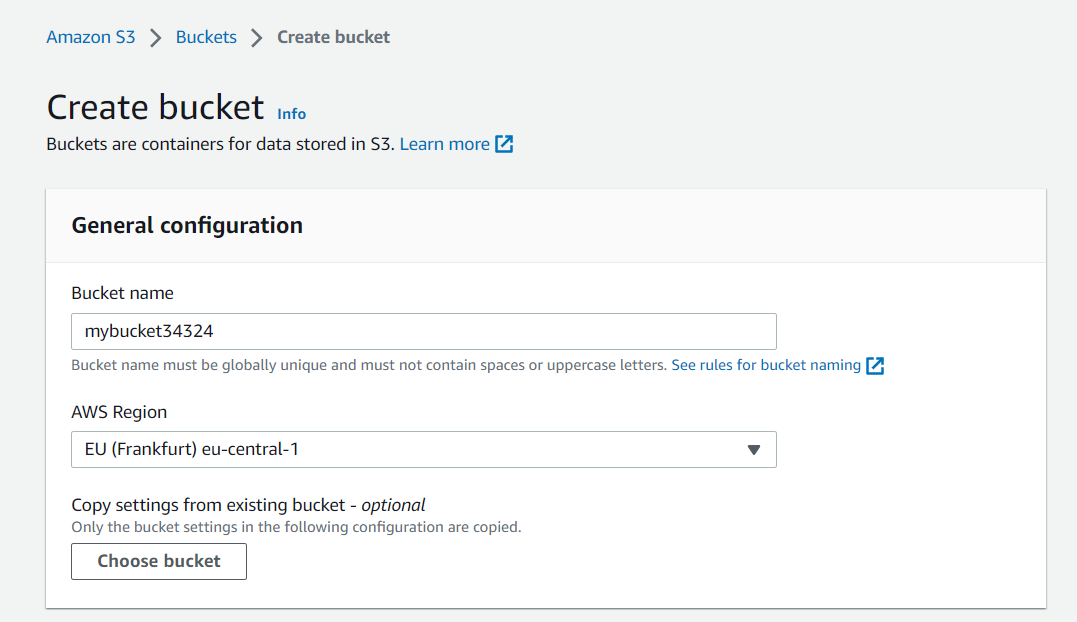
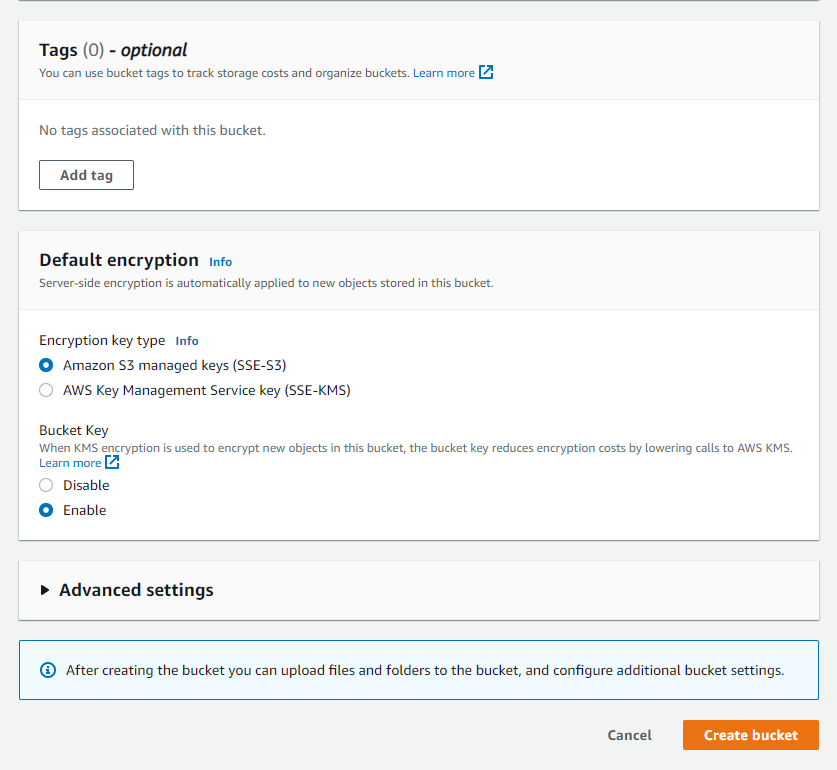
Click on the orange-coloured Create bucket button. Enter a unique name for the bucket such as "mybucket34324" and choose an AWS region. AWS provisions resources in availability zones and regions around the world. Choose a region that is closest to you.
Take note of the name of your bucket and its availability zone. This will be used to configure our Amazon S3 client later in the project. You can select a region from this list of availability zones.
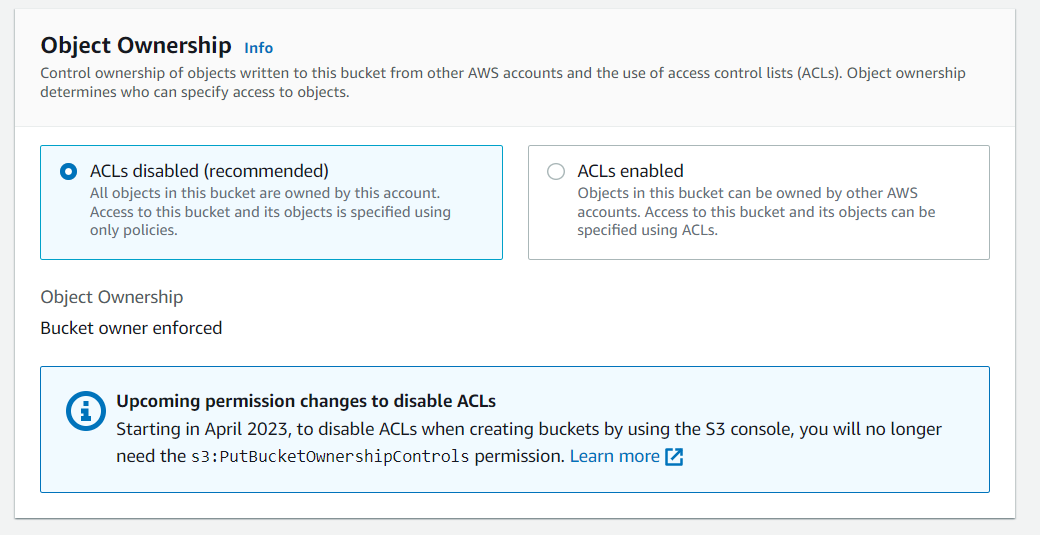
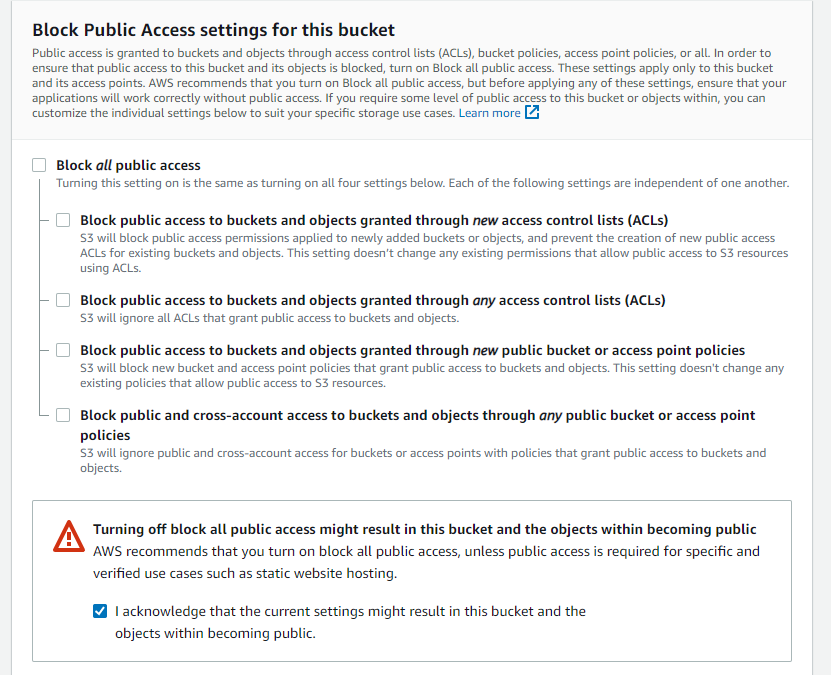
Disable ACL and public access to the bucket. This keeps your bucket truly private and prevents security risks. If a bucket contains image files that the public can view, such as portfolio images on a website or user profile images, then public access should only be enabled in those cases.
Your bucket has now been created, but you must grant access before it can be used. Your root access keys can access the S3 bucket, but it's a good idea to make a separate IAM account and give it access to just the S3 bucket. This is useful so that if your keys are compromised, an intruder can only access your S3 bucket and not your entire AWS account.
Create IAM User
Log in to your AWS Management Console. Search for IAM in the search bar at the top of the management console.
Configure the IAM user account.
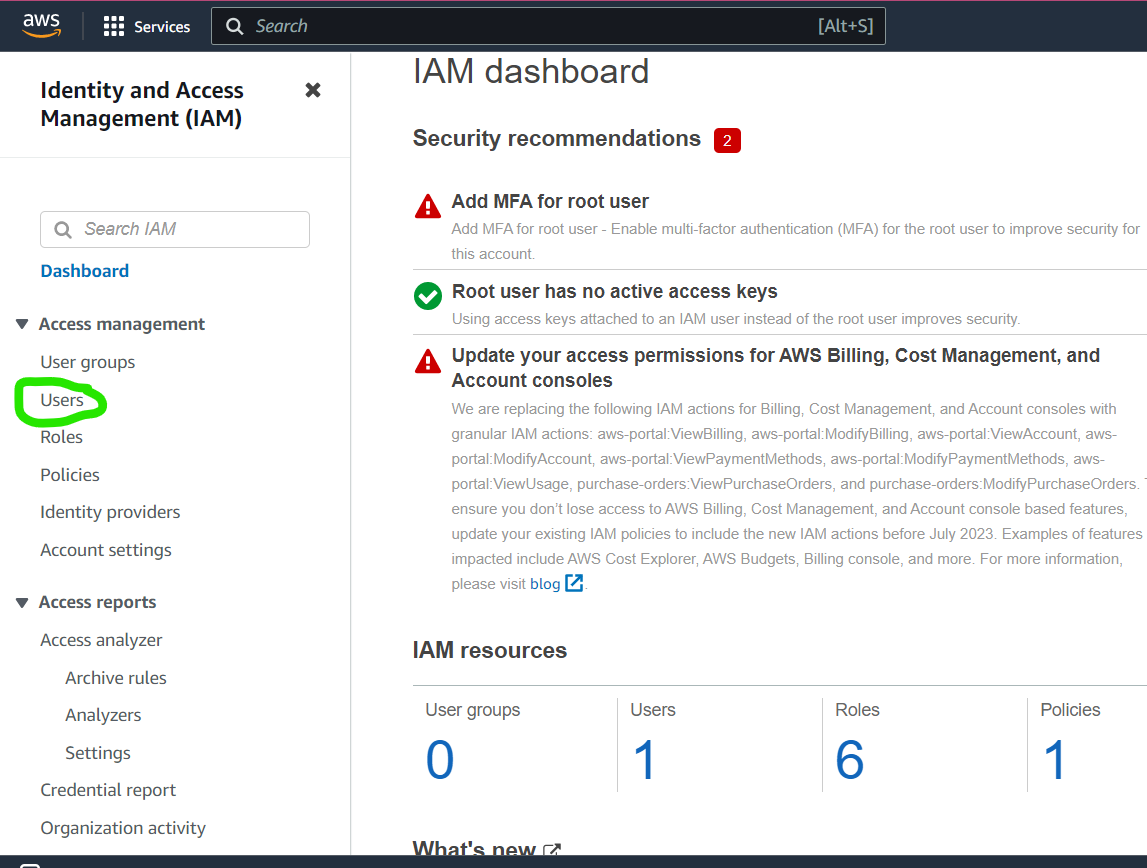

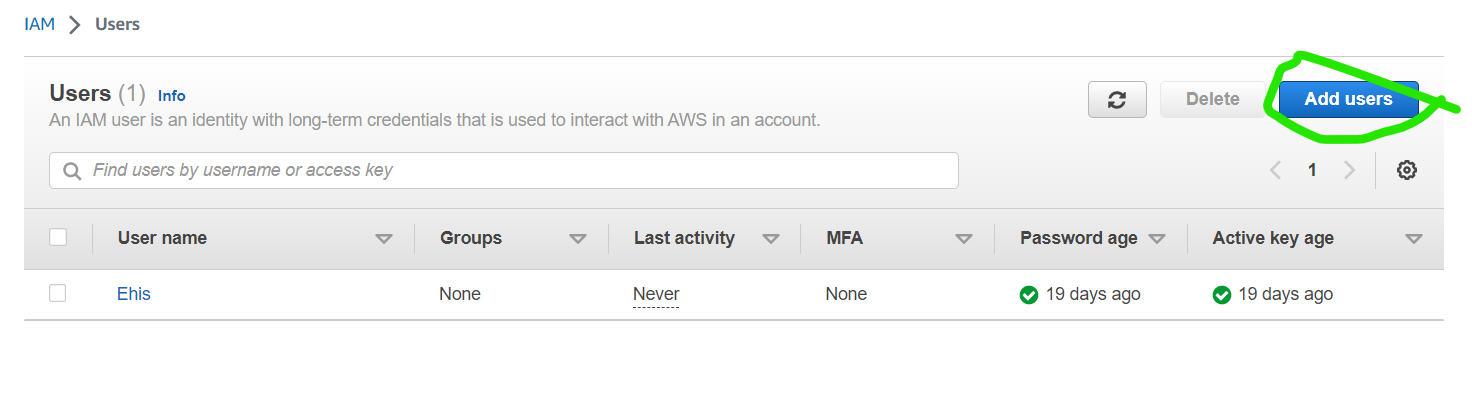
Click on Users in the navigation pane of the IAM page, and then click on Add users. Enter a username for the IAM user.
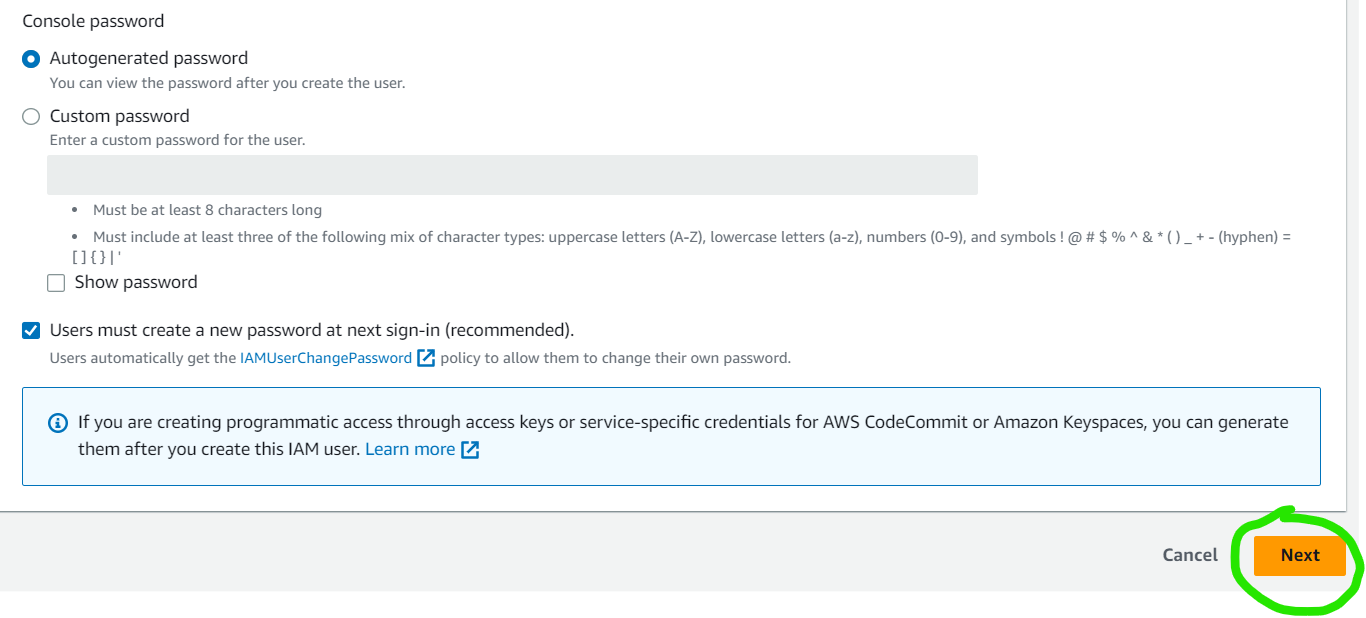
Check the box that says, Provide user access to the AWS Management Console and when asked if you want to provide console access to a person, select the I want to create an IAM user checkbox. In the Console password options, select Autogenerated password.

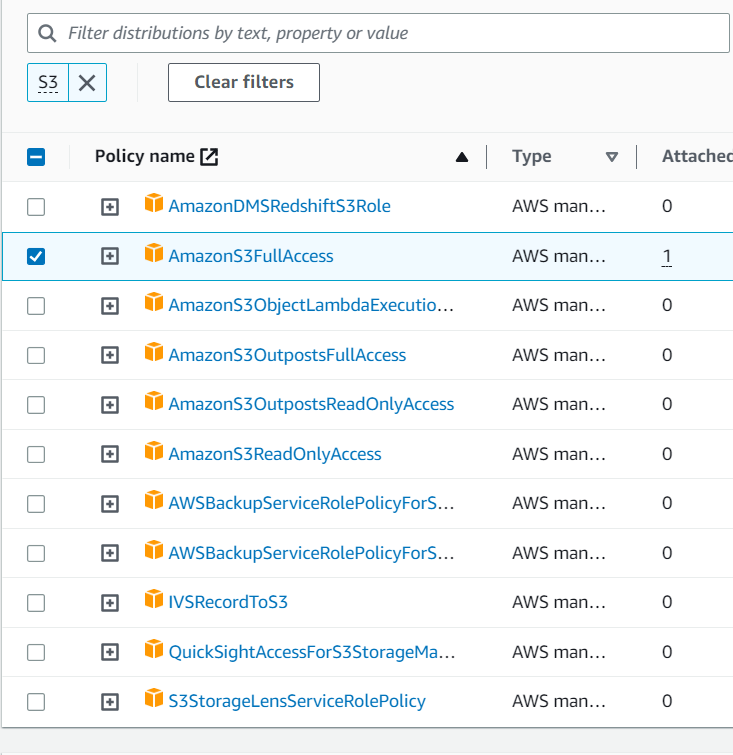
Select Attach policies directly then type "S3" in the search field. Pick "AmazonS3FullAccess" from the list of discovered permissions. You can add an optional tag to the IAM user.
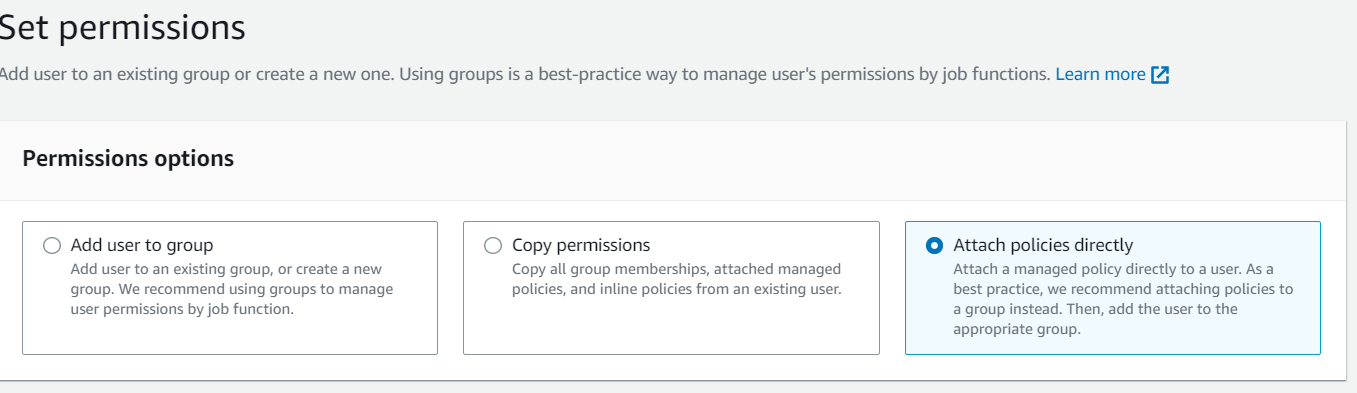
Click on the Next button to review and create the user.
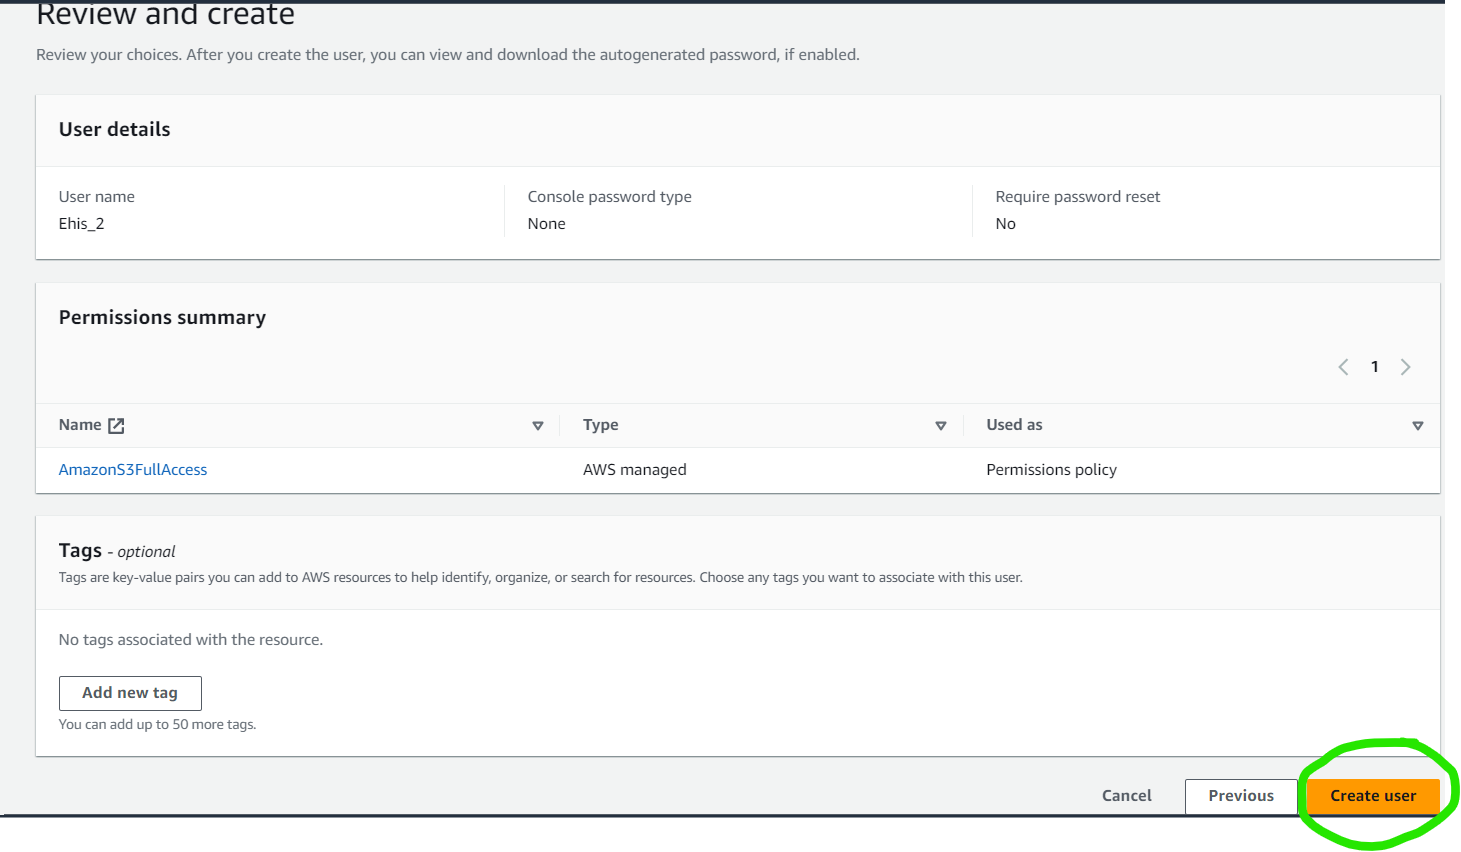
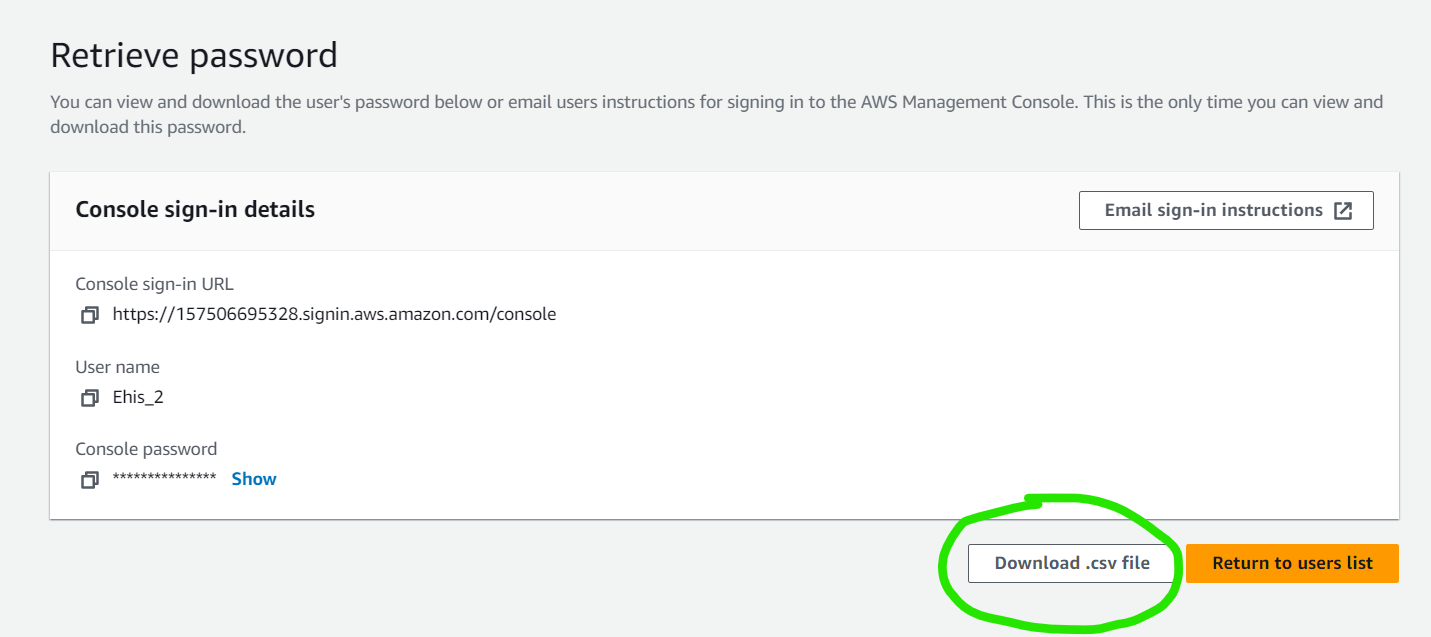
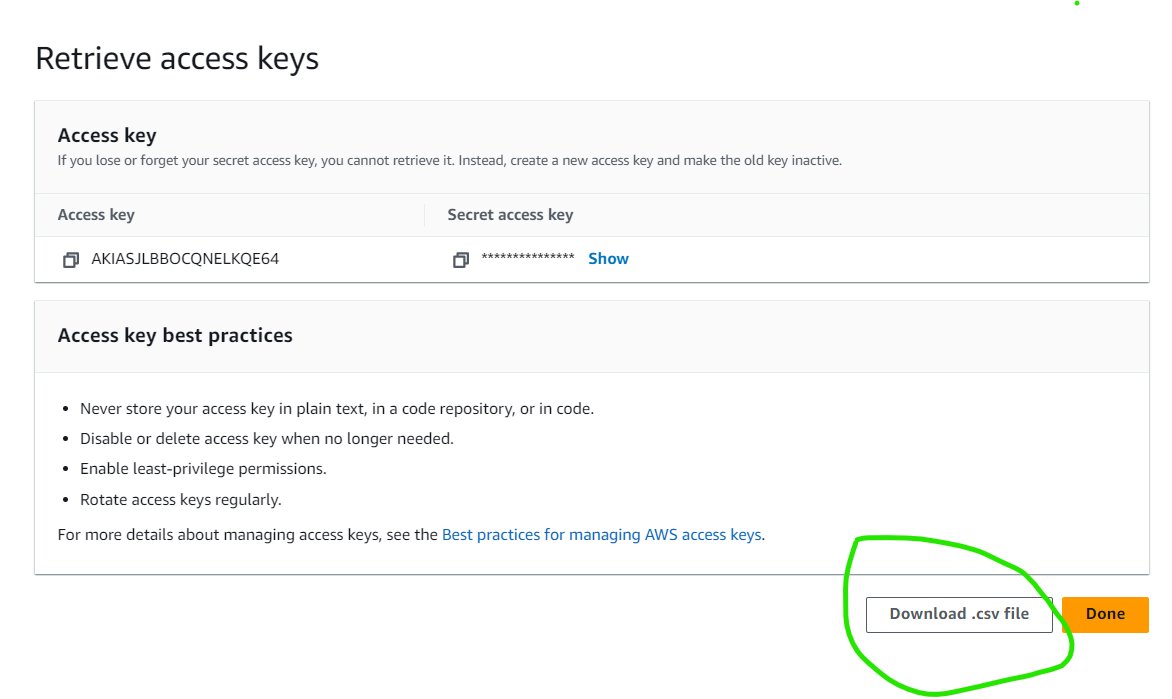
Click on Create user. This leads you to a page on which you can download your user security credentials. Your security credentials include your username, password, and AWS sign-in URL.
Click on the Download.csv to download your security credentials.
Create an access key for the new user.
An access key allows programmatic calls to AWS from an AWS SDK. You can have a maximum of two access keys linked to your account at a time.
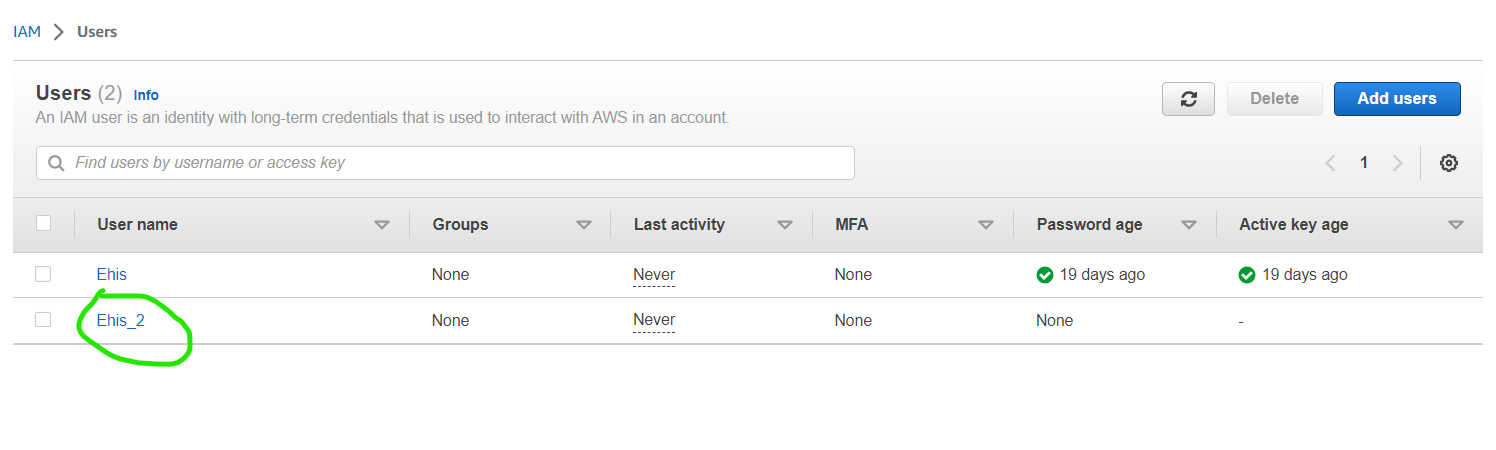
To create an access key for a user, click on the user in the users dashboard.
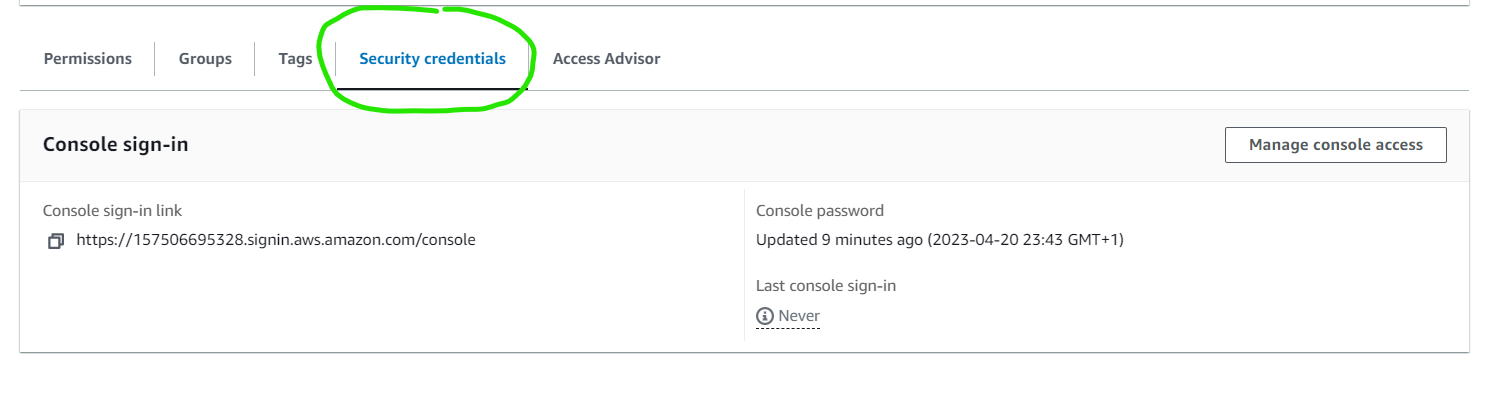
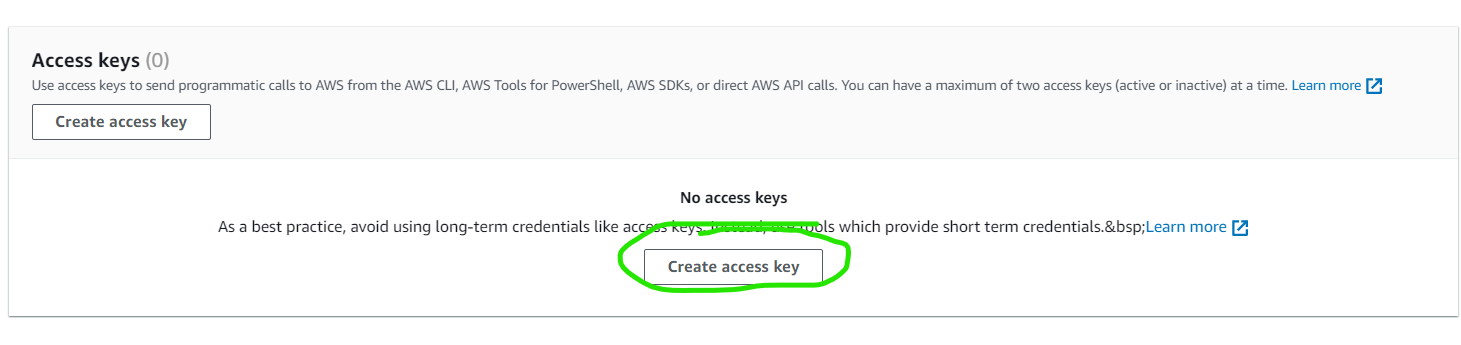
Right below the Summary tab, select Security credentials. This opens the Access keys tab. Under the Access keys tab, click on the Create access key button.
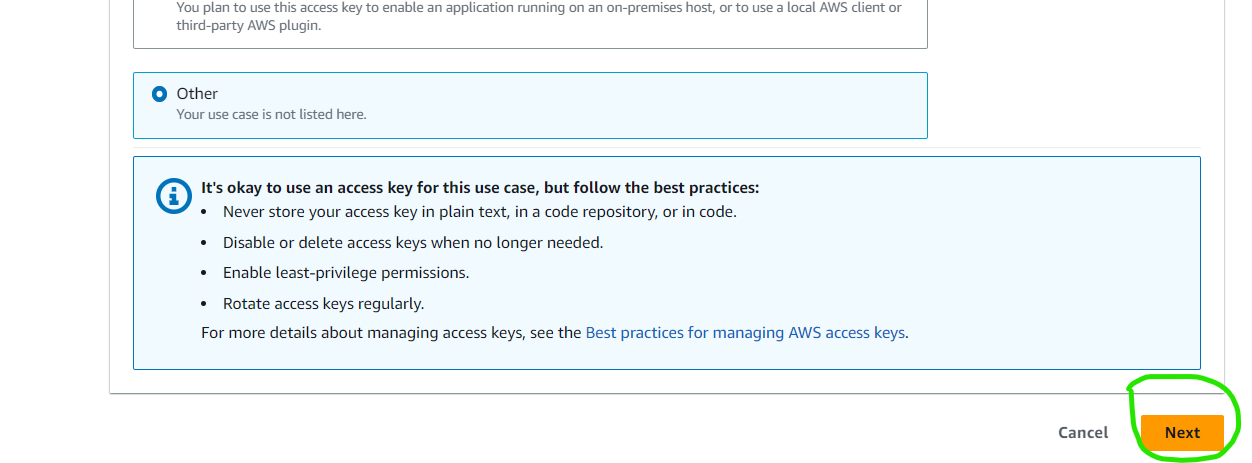
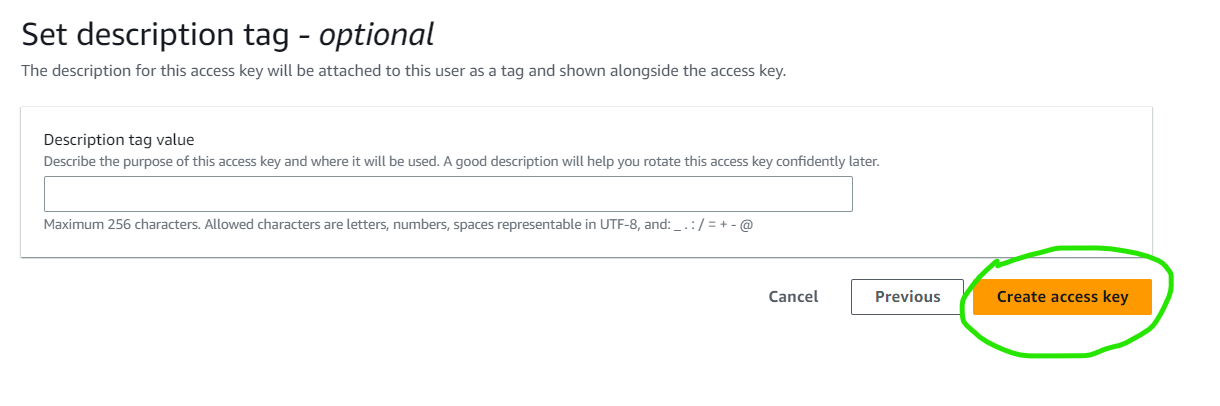
Under Access key best practices and alternatives, select other. Click on Next and then on Create access key to create the access key.
We are going to use Spring Profiles to segregate parts of our project configuration. This means that we can have different configurations for the different environments in which our application will run.
For our local environment, create an application-local.properties file in the /src/main/resources directory that contains our local configuration. For our production environment, create an application-prod.properties file that contains our production configuration still in the /src/main/resources directory.
The application.properties file will be used to let Spring know our active environment using the spring.profiles.active property. This allows us flexibility between environments and enables us to properly secure our credentials.
Create an application-local.properties file and paste your access key and secret key into it. Your application-local.properties file should be similar to:
When in production, our application can read the property keys off the cloud server. To do this, create an application-prod.properties file and refer to the server environment variables as follows:
You must add an ACCESS_KEY environment variable that is mapped to your actual IAM user access key. To give you an idea, consider the following screenshot from a Heroku server.
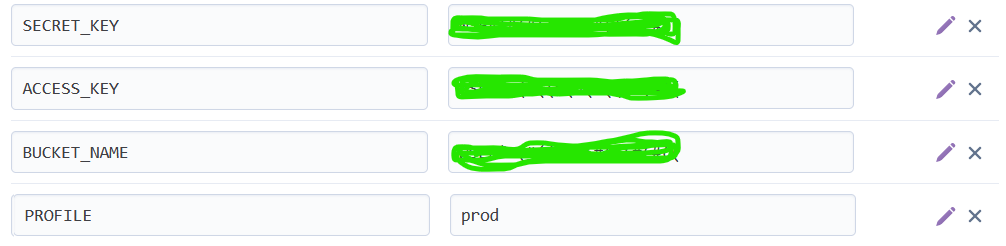
Locate the application.properties file in your project and add the following line:
On the production server, we will have a PROFILE variable set to prod. This lets Spring know to use the application-prod.properties file when in production and the application-local.properties file when running locally.
We are also setting the maximum file size that can be uploaded and downloaded to 10 MB using the spring.servlet.multipart.max-file-size and the spring.servlet.multipart.max-request-size properties. Because these properties exist in the application.properties file, they are extended to both the application-local.properties and the application-prod.properties file.
Uploading files greater than 10MB in our project throws the following exception:
Add sub-packages to the project
Create the additional packages by right-clicking on the java.com.example.x subfolder within main where "x" stands for the name of the project, such as "springboot_s3". Select New > Package and repeat the process for each of the following package names:
- config
- exceptions
- service
- web
- web.controller - this is a subpackage under the web package
These sub-packages will help organize the project’s code structure.
Create S3 Client Configuration Class
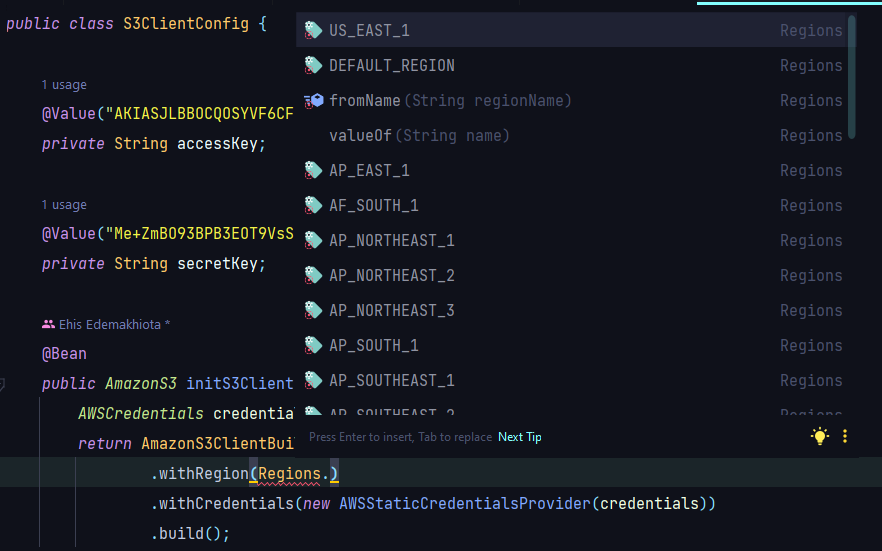
Right-click on the config subfolder and create a new Java class named S3ClientConfig.java. In this class, we will build our AWS S3 client. The AWS S3 Client gives access to methods that can be used to perform file operations on S3. Copy and paste the following code into the file:
Replace AWS_S3_REGION with an enum representing the region that you selected when creating your S3 bucket. IntelliJ auto-suggests regions when you put a “.” after Regions in the above code snippet. Find your region on the list.
The @Configuration annotation makes S3ClientConfig.java a configuration class. This means that the Spring container can process the S3ClientConfig.java file and generate a Spring Bean to be used in the application, which in this case is a bean of com.amazonaws.services.s3.AmazonS3.
The initS3Client method uses the access key and secret key read from our properties file by the @Value annotation to build an S3 client.
Create custom exceptions
We want our application to fail gracefully whenever the user makes a bad request while attempting to upload or download a file. For this to happen, we need to create the following custom exceptions:
- SpringBootFileUploadException.java
- FileUploadException.java
- FileDownloadException.java
- FileEmptyException.java
Under the exceptions package of your project folder, create a class named SpringBootFileUploadException.java. This will be our project’s base exception class, from which all other exception classes will extend. Add the following code to the contents of the SpringBootFileUploadException.java class:
The SpringBootFileUploadException.java class extends from the Exception class and takes an error message as a parameter in its constructor.
Next, create the FileUploadException.java, FileDownloadException.java, FileEmptyException.java exception classes in the config package with their respective code:
FileDownloadException.java
FileUploadException.java
FileEmptyException.java
Create the service class
Under the service package, create an interface named FileService.java. Add the following method specifications to the code in FileService.java:
Following the strategy design pattern, create a FileServiceImpl.java class that implements FileService.java under the service package of your project. The Strategy design pattern allows us to write loosely coupled code that is not bound to AWS S3.
If we decide to use Dropbox in the future instead of AWS S3, all we need to do is create a new class that implements FileService.java which will contain Dropbox-specific code for uploading files and downloading files.
Open the FileServiceImpl.java class and add the following to its content:
@Service is the Spring annotation that marks this class as a service component. @Slf4j annotation allows us to use the Lombok logger in our class. A private final AmazonS3 object is created and injected as a dependency within this class using the @RequiredArgs annotation.
@Value reads the bucket name and the AWS bucket base URL properties from the active properties file (application-local.properties when running locally or application-prod when running in production). The values in our properties files are always strings by default.
Now let's break down this code by analyzing the individual file operations.
Upload a file to the Amazon S3 bucket
Files uploaded to S3 should be in the form of a java.io.File object or a java.io.FileOutputStream object, which the AWS S3 Java SDK can process. File and FileInputStream object types support mark and reset operations, which make them more resilient to network connectivity and timeout issues. When a network failure occurs, mark and reset procedures allow the AWS S3 Java SDK to retry the failed file transfers by marking the input stream before a transfer begins and then resetting it before retrying.
If the file is not in the form of a java.io.File object or a java.io.FileOutputStream object, you run the risk of encountering a RestException when the AWS S3 Java SDK retries the file upload.
The following lines inside the FileServiceImpl.java file convert the org.springframework.web.multipart.MultipartFile object into a java.io.File object:
Next, we generate a unique name for a file by calculating the number of milliseconds since January 1, 1970, 00:00:00 GMT, to the present date and then append the result to the file’s original name. The generated file name then can be saved into a database and later used to retrieve the file.
Now we upload the file to S3 by creating a PutRequestObject using the bucket name, the generated file name, and the File object. We also add some file metadata, such as the content type, title, and file length. Once this is done, we perform the upload by calling the putObject method on the Amazon S3 Client.
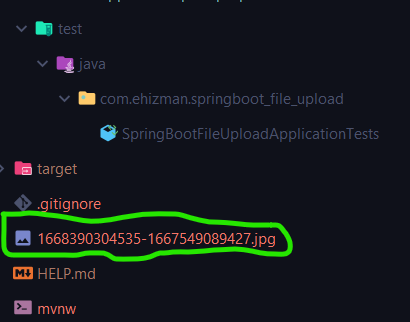
Upon testing this method, you will notice that the file is present in our project folder.
Download a file from the Amazon S3 bucket
Now that we can upload files to our S3 bucket; let's try downloading them.
Before downloading a file from an S3 bucket, we must first check that the bucket exists and is not empty. This is achieved by the following lines inside the FileServiceImpl.java file:
If the bucket does not exist or is empty, then we throw our custom FileDownloadException. If the bucket is not empty, we get the file from S3 and then convert it to an org.springframework.core.io.Resource object, so that it can be downloaded locally.
Delete a file from the Amazon S3 bucket
Every time we download a file from S3, we create a Path object. This means a copy of the file now exists in our project root folder. We don’t want this to happen, which means every time we download a file from S3, we must call the delete method to delete the file from the project’s root folder.
Deleting a file from the project’s root folder is achieved by the following method, which deletes a file if it is present in the project’s root directory.
Create an API response class
Before we proceed to write our controller class, let’s create a class that defines API responses for the REST APIs we will be creating in the controller class.
Under the web package of your project folders, create a class named APIResponse.java and add the following lines to its content.
We apply Project Lombok's @Builder fluent APIs and @Data annotation to help with the routine tasks of creating an overloaded constructor, getters, and setters for our APIResponse.java class.
Create the controller class
Create a class named FileUploadController.java under the web.controller package created earlier and add the following code to the file:
Let's break down the code. The @RestController annotation on the class tells Spring Boot that this class is a controller. A private final FileService object is created and injected as a dependency within this class using the @RequiredArgs annotation.
Several routes are created in this controller file, each starting with "api/v1/file" in the URL slug.
When the user creates a POST request to the api/v1/file/upload route, it is expected to upload a file to an S3 bucket. A @RequestParam annotation is included in this function that extracts a file uploaded as an org.springframework.web.multipart.MultipartFile object. We ensure that the multipart file is not empty and has an extension that is in our list of supported extensions. Our list of supported extensions includes pdf, txt, epub, csv, png, jpg, jpeg, and srt.
If the file passes all checks, we proceed to upload the file by calling the uploadFile method from the FileService interface. If the upload to S3 is successful, then the file URL is set in an APIResponse object that is returned to the user along with a 200 status code. If the upload was not successful, then an error message is set in an APIResponse along with a 400 status code and sent back to the user.
Furthermore, a GET request to the api/v1/file/download route is expected to download a file to the browser. If the file is downloaded successfully then it is sent to the browser to download by using a Content-Disposition response header.
A DELETE request by the user to the api/v1/file/delete route is expected to delete a file from the project’s root folder. If the delete is successful, then we build an APIResponse object with a success message and return it to the client along with a 200 status code. If the delete is not successful, then we build an APIResponse object with an error message and return it to the client along with a 404 status code.
Handle exceptions with Amazon S3 buckets
You may have noticed that we throw a bunch of custom exceptions in our service methods, and our controller methods are not wrapped around try-catch blocks. A lot of try-catch blocks can make code hard to read, so let’s create a global exception handler using SpringBoot’s @ControllerAdvice.
The S3 Client throws two unchecked exceptions: The AmazonServiceException and the SdkClientException. The AmazonServiceException is thrown whenever a call was transmitted successfully, but Amazon S3 couldn't process it, so it returned an error response. The SdkClientException is thrown whenever Amazon S3 couldn't be contacted for a response, or the client couldn't parse the response from Amazon S3. We will handle both of these exceptions in our exception handler.
Create a new file named SpringBootFileUploadExceptionHandler.java under the java.com.example.x subfolder within main where "x" stands for the name of the project and copy and paste the following:
Run the Spring Boot application
Navigate to your Application.java file under the java.com.example.x subfolder., and click the green play button next to the public class definition. Choose Run from the menu.
Allow the project to build, download its dependencies, and compile for a short while.
For your reference, you can find the finished code in a GitHub project here.
Execute operations in a client application
To test the APIs, we need a web browser and the Postman desktop application. Install Postman on your computer and create a free account if you do not have one already. Each workspace may contain one or more collections that contain folders that have a defined set of APIs.
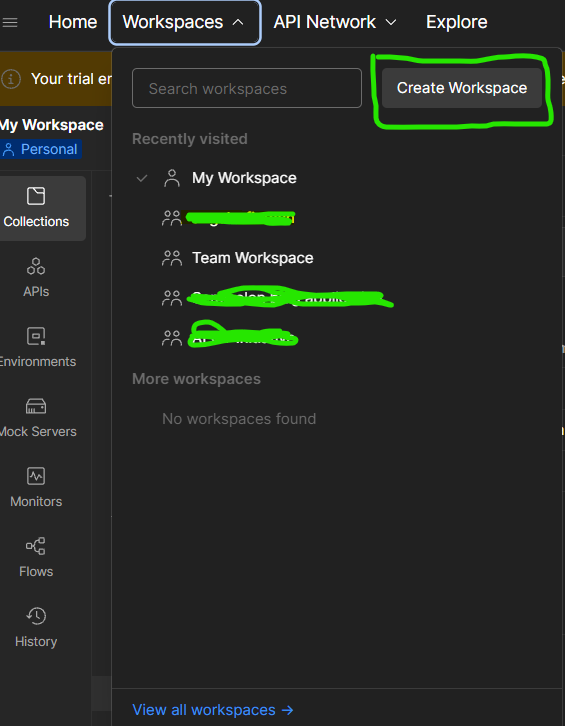
To create a workspace, select Workspaces from the dropdown and then click on Create Workspace.
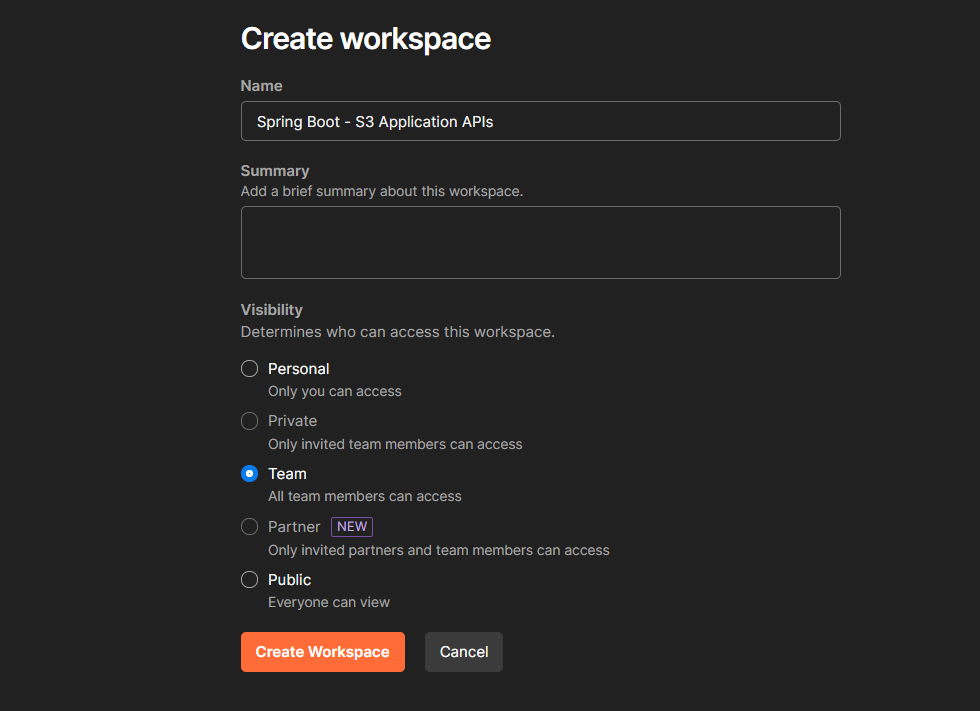
Enter a name for your workspace, such as "Spring Boot -- S3 Application APIs."
Under the Visibility area, you can decide whether you want to make the workspace visible to your coworkers or only to you. For this article, you can select either choice. Click on the Create Workspace button located in the bottom-left corner to create the workspace.
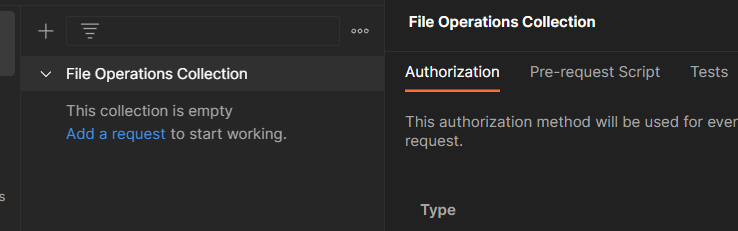
Now create a collection for your request by clicking on the Create Collection button.
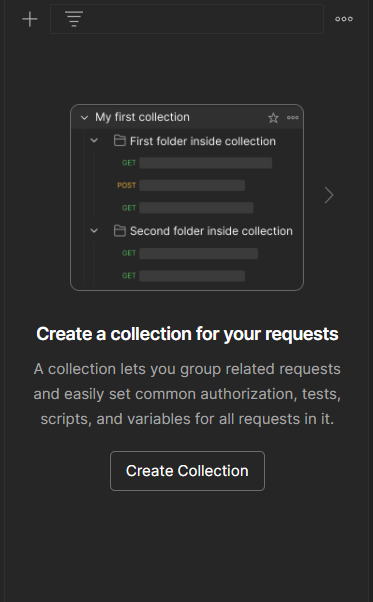
Enter the name of the collection.
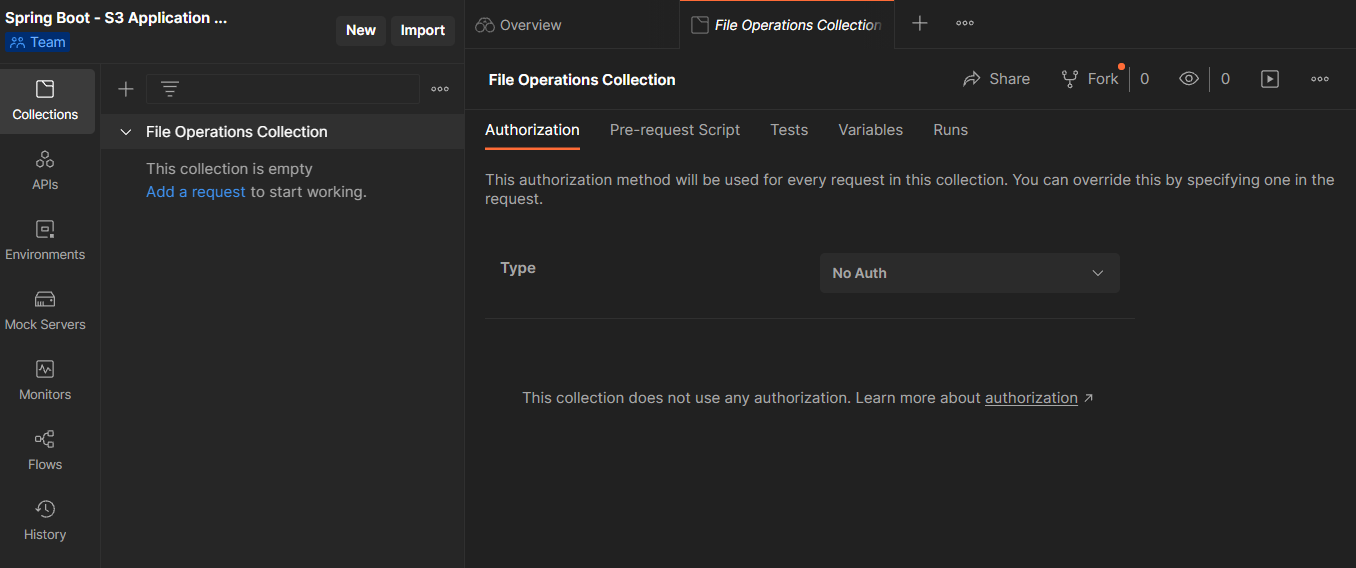
Next, you’ll create and test requests in your collection for each of your application’s REST APIs.
Create and test the upload file request in Postman
Create a request by clicking the Add a request.
Give the request a name such as “upload file request” and change the HTTP method to POST. In the Enter Request URL field, enter “http://localhost:8080/api/v1/file/upload”. The endpoint /quotes, is preceded by the server and port where the application is running. If the application is running on a different port, replace 8080 in the URL.
Click on Body below the Enter Request URL field, and then select form-data.
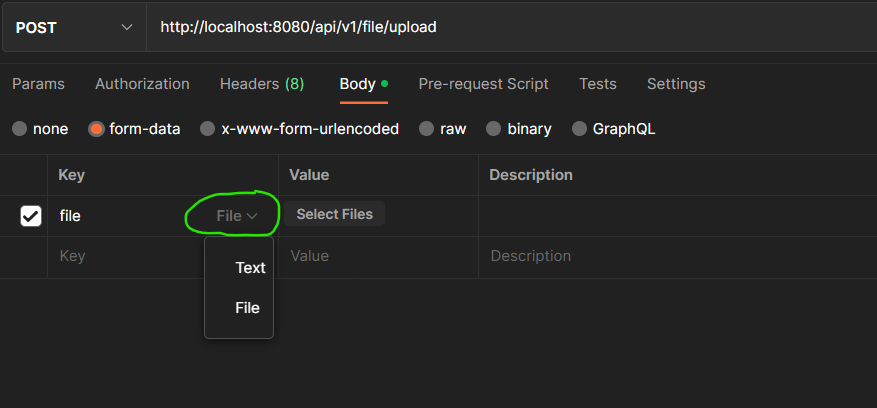
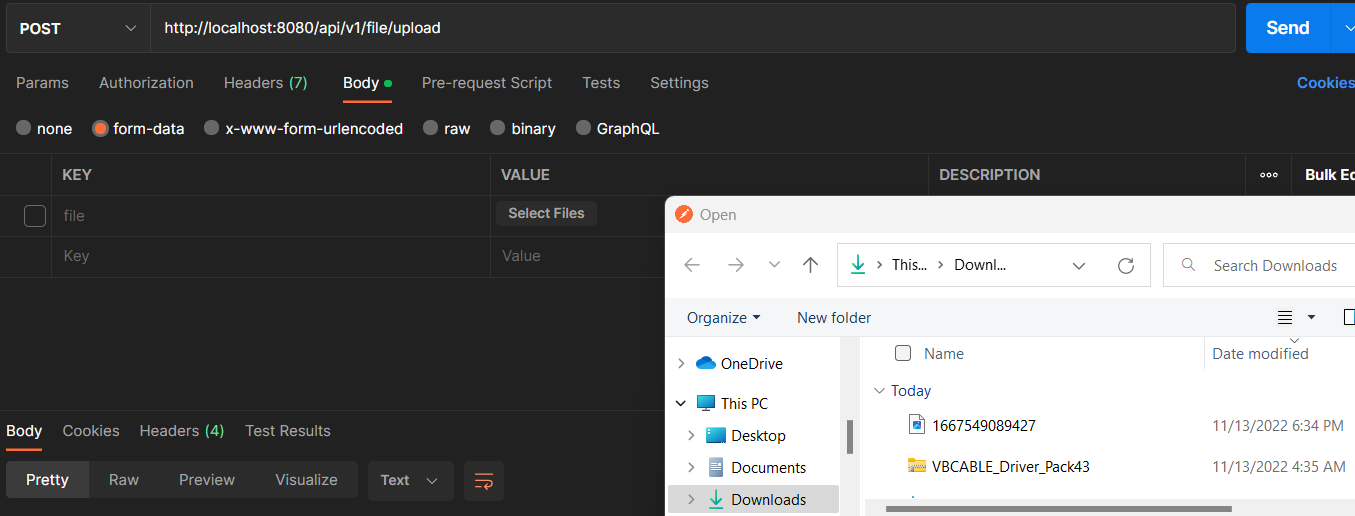
Under the KEY column, create a key named file and hover over the Key row to select File as the type. Under the VALUE column, select the file that you want to upload.
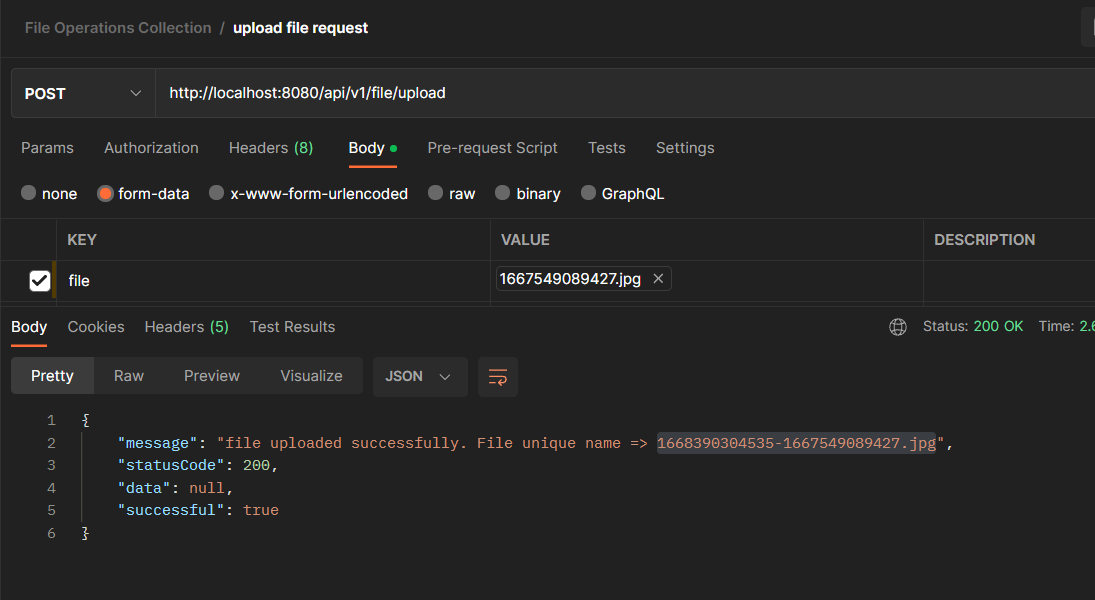
In this tutorial, we are uploading a file named 1667549089427.jpg:
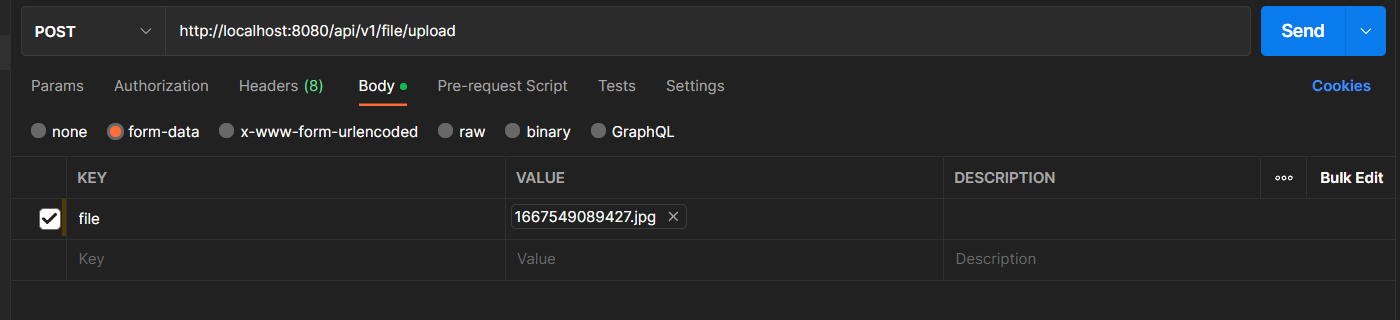
Click Send.
If the file has a supported extension, then we get the following response:
Navigate to your S3 bucket on the AWS management console, and you should find your file sitting in there.

The “File unique name” returned as part of the message attribute can be saved into the database and used to retrieve the image. Notice in the image above that the number of milliseconds from January 1, 1970, 00:00:00 GMT, to the present date is appended to the file’s original name. This enables us to achieve uniqueness when we upload the same file multiple times.
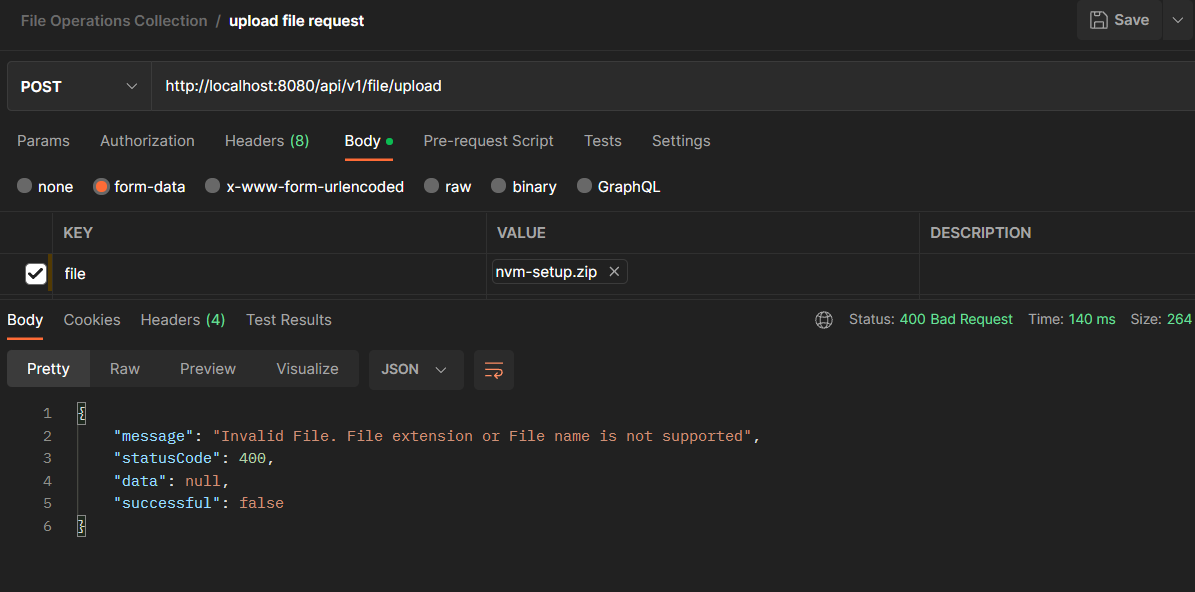
If the file does not have a supported extension, then the following response is returned:
Create and download file request in the web browser
To download a file, extract the name of the file from the response of the /api/v1/file/upload from when the file was uploaded. Then add it as a request parameter in a new api/v1/file/download request.
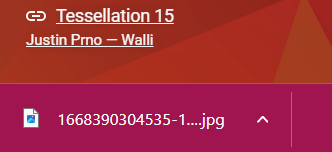
Navigate to your browser and paste “http://localhost:8080/api/v1/file/download?fileName=x” in the address bar, where “x” is the name of the file you want to download. In this article example, the URL is "http://localhost:8080/api/v1/file/download?fileName=1668390304535-1667549089427":

The file should be downloaded to your device.
Create and delete file request in Postman
As mentioned earlier, whenever we download a file, a copy of the file sits in our project’s root folder. Performing numerous file uploads can lead to a problem where our project folder becomes too heavy. Hence, whenever we upload a file, we must subsequently delete the file from the project’s root folder.
To do this, let’s call the api/v1/file/delete route in Postman to delete the file from our project’s root folder.
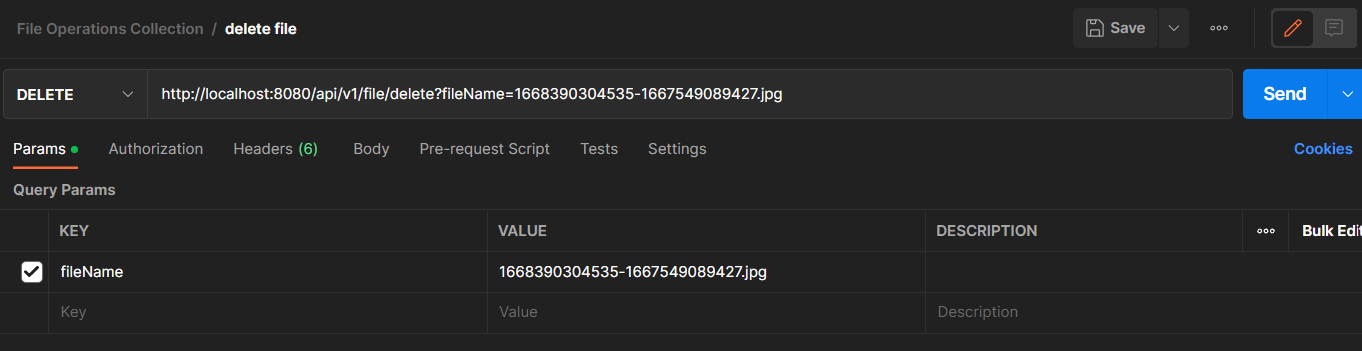
Create a new request in Postman named “delete file”. In the Enter request URL field, enter the “http://localhost:8080/api/v1/file/delete?fileName=” route, create a request parameter named "fileName" which is set to the name of the file that you want to delete and set the HTTP method to DELETE.
In this tutorial, we are deleting a file that the AWS S3 bucket named 1668390304535-1667549089427.jpg:
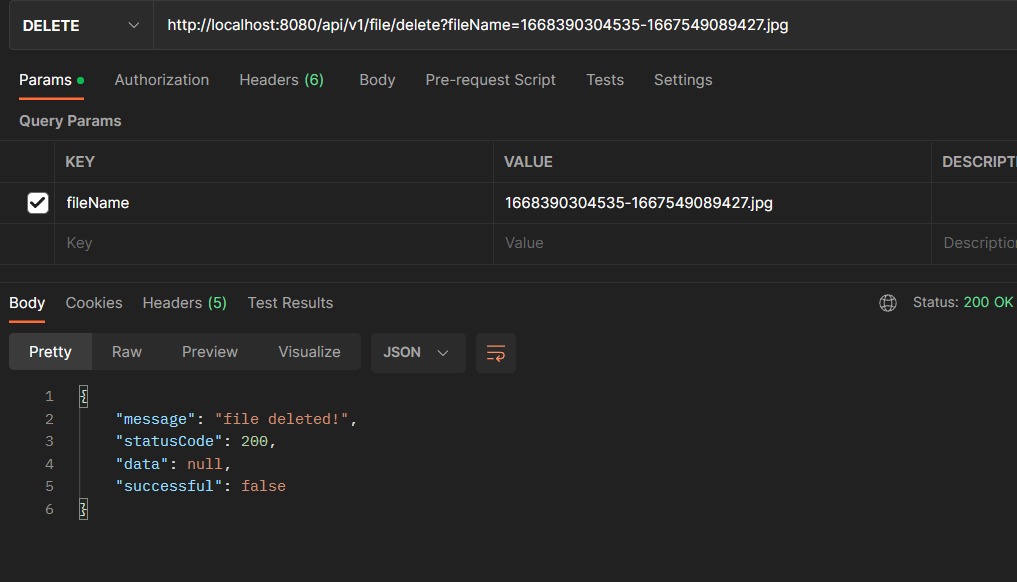
If the file exists in the project’s root directory, then you should get the following response:
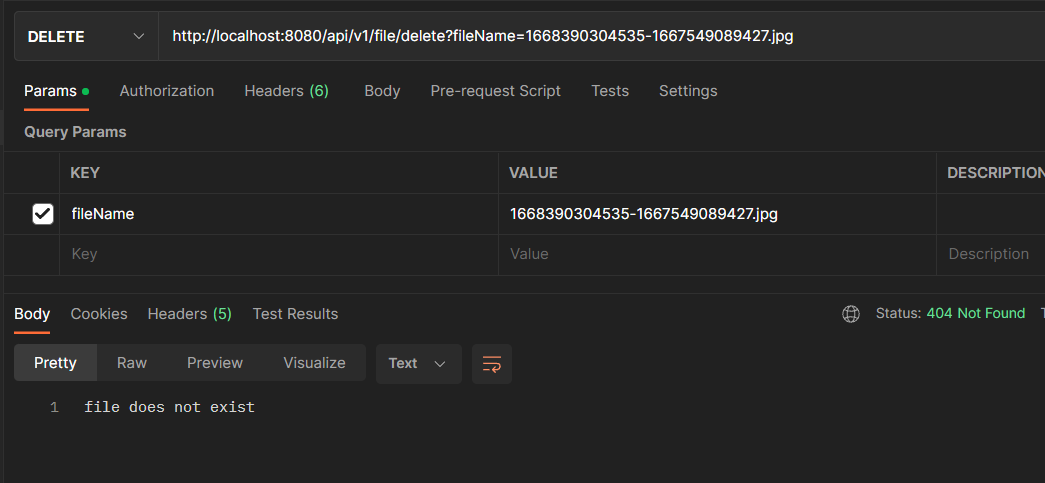
Else, if the file does not exist in the project’s root directory, then you should get the following response:
What's Next for Uploading and Downloading Files to an AWS S3 Bucket Using Spring Boot?
Congratulations on learning how to upload files to and download files from an AWS S3 bucket. Challenge yourself by expanding on this project directory. Set up a MySQL database in this project to store the file names that are returned whenever you upload files to S3. You can also create a secured presigned URL for uploading files to and downloading files from an S3 bucket that can be handed to a mobile or frontend client application to perform the file upload or download within a time limit. You should also learn about best practices for AWS object storage.
Let me know what you're building with Twilio and Java by reaching out to me over email.
Ehis Edemakhiota is a software engineer at Angala Financial Technologies. He is currently learning about how to architect multitenant systems and about advanced data structures and algorithms. He can be reached at edemaehiz [at] gmail.com, on Twitter, or on LinkedIn.


Related Resources
Twilio Docs
From APIs to SDKs to sample apps
API reference documentation, SDKs, helper libraries, quickstarts, and tutorials for your language and platform.
Resource Center
The latest ebooks, industry reports, and webinars
Learn from customer engagement experts to improve your own communication.
Ahoy
Twilio's developer community hub
Best practices, code samples, and inspiration to build communications and digital engagement experiences.