Sending Scheduled SMS using Twilio and Digital Ocean Functions
Time to read:
July 10, 2023
Written by
Reviewed by
This tutorial will teach you how to run a scheduled task using DigitalOcean Functions. We’ll build a JavaScript application that sends you random motivational quotes through Twilio Programmable SMS, deploy this app as a serverless function to DigitalOcean, and then configure the function to run on a daily basis.
Technical requirements
To follow along, you’ll need the following:
- A free Twilio account - you can sign up here.
- A Twilio number - Read our docs here on how to obtain a Twilio number
- A DigitalOcean account - you can sign up here.
- doctl version 1.82.0 or higher – DigitalOcean’s command line interface tool. You can read more about setting it up here.
Creating a DO Function
To get started with creating a DO Function, you will be making use of the doctl command line tool. However, you first need to install support for serverless functions. You can do that by running the following command:
This will install and download the serverless extension. Once that is completed, you are now ready to initialize a new function project using a helper command that the doctl tool provides.
To work with DigitalOcean Functions via the command line using doctl, you need to connect doctl to a Functions namespace. Namespaces are used to isolate and organize functions and their settings. If this is your first time working with DO Functions, you’ll need to create a namespace before you can connect it and start deploying Functions. You can do this by running the following command:
The --label flag is used to specify the name of the namespace while the --region flag indicates which region the namespace should be in. You can learn more about creating namespaces here.
After doing that, you can now connect to the namespace by running the command below:
You can now create functions and deploy them to your namespace.
Next, from the directory where you want your project to reside, run the following to initialize a sample function project.
This will create a twilio project directory that contains a project.yml configuration file, a packages directory containing the sample package, and a hello function directory which contains a hello.js file.
Here’s an outline of what the current directory structure looks like:
This is good for a start, however, you’ll need to rename some of the directories and files to align with the purpose of the scheduled sms function.
- Rename the
samplepackage totwilio - Rename the
hellofunction directory tosms - Rename the
hello.jsfile tomain.js
Here’s an outline of what the new directory structure is supposed to look like:
Next, replace the project.yml file at the root of the project’s directory with the following:
The packages and actions names are now consistent with the naming used for the directories. You’ve also added the environment variables the function needs to run. The environment variables will be fetched from a .env file you’ll be creating shortly using Templating.
To schedule a function, you can make use of a trigger and define schedules using the normal cron syntax. Using the triggers key, we’ve assigned a trigger to the sms function that will run every day by 8 am. A function can have multiple triggers, each with its own schedule and payload. You can read more about triggers here.
Add the following code to the main.js file:
Let’s go over what’s happening within the code you just pasted. The first argument args to the main() function is typically an HTTP request event or web event that contains information about the request. Next, within the main() function, the Twilio Client object that was initialized earlier with your Account SID and Auth Token is used to send an SMS message with an inspiring quote to a predefined number.
The fetchQuotes() function is responsible for making a call to ZenQuotes to generate a random inspiring quote using the https://zenquotes.io/api/random endpoint.
Deploying a DO Function
Before deploying, you need to add a package.json file to list all the external dependencies the function needs to run. Within the packages/twilio/sms directory, create a package.json file and add the following to the file:
Environment Variables
Head over to your Twilio Console and click on Phone Numbers. If you already have one or more phone numbers assigned to your account, select the number you would like to use for this project. If this is a brand new account, buy a new phone number to use on this project.
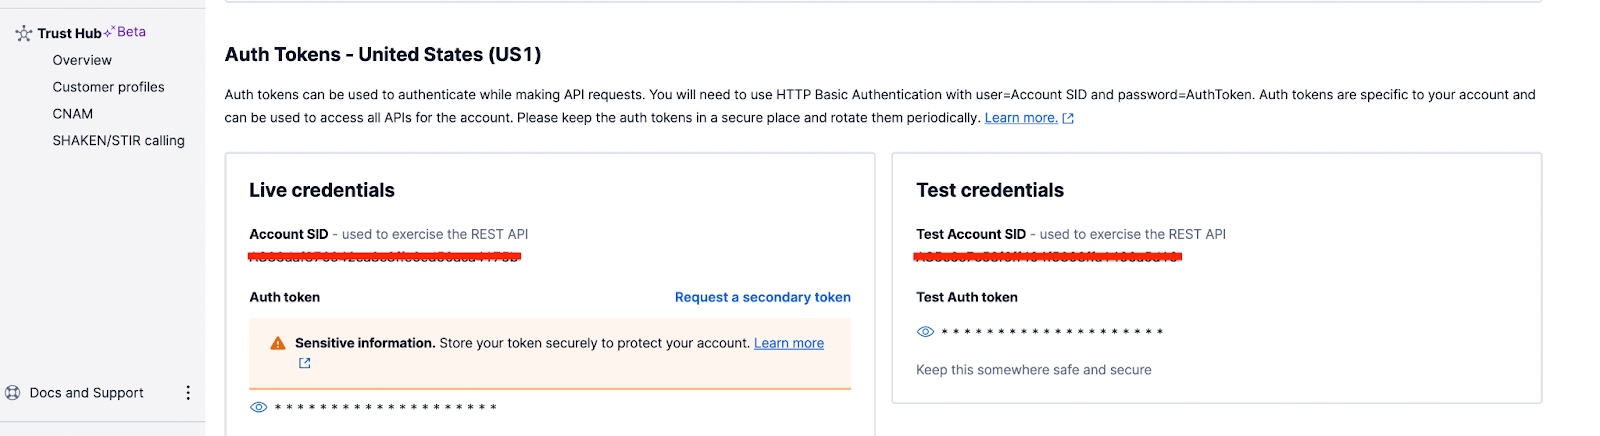
On your Twilio Console, take note of your Account SID and Auth Token. You are going to need these values to authenticate with the Twilio service.
Head back to the root of the project’s directory and create a .env file. Edit the file with the following credentials:
The TO_NUMBER here refers to the actual number that will be receiving the SMS and should be in the canonical E.164 format.
Now, run the following command below to deploy the function:
Once the function has been successfully deployed, you can now fetch the URL where the function was deployed by running the command below:
The command will output the URL details which should look something like the following:
To confirm everything works as expected, you can make a request to the function URL and the number you configured earlier should receive a motivational quote.
Conclusion
In this tutorial, you’ve seen how to get started with DigitalOcean Functions and deploy a serverless function. You’ve also seen how by using Twilio SMS and a DigitalOcean trigger, we can schedule a function to run on a predefined interval.
Dotun is a backend software engineer who enjoys building awesome tools and products. He also enjoys technical writing in his spare time. Some of his favorite programming languages and frameworks include Go, PHP, Laravel, NestJS, and Node.
Website: https://dotunj.dev/
GitHub: https://github.com/Dotunj
Twitter: https://twitter.com/Dotunj_


Related Resources
Twilio Docs
From APIs to SDKs to sample apps
API reference documentation, SDKs, helper libraries, quickstarts, and tutorials for your language and platform.
Resource Center
The latest ebooks, industry reports, and webinars
Learn from customer engagement experts to improve your own communication.
Ahoy
Twilio's developer community hub
Best practices, code samples, and inspiration to build communications and digital engagement experiences.