How to Send an Email with Go and SendGrid using Dynamic Templates
Time to read:
May 08, 2024
Written by
Reviewed by
How to Send an Email With Go and SendGrid Using Dynamic Templates
SendGrid gives us the possibility to use email templates, and use our code to dynamically embed data in them depending on our needs. You can have templates to welcome new users to your app, to send purchase confirmations, for marketing purposes, and much more.
This can save us a lot of time in coding HTML, and designing a good-looking email that business users, product owners, or even you can modify as needed without touching the code, making it a lot cleaner.
This tutorial can be seen as a complement to Matthew Setter’s How to Send an Email with Go and SendGrid in 30 Seconds, but takes advantage of this great feature, sending an email as if we had a store and wanted to send our customers a purchase receipt. For this, we will also be using the official Twilio SendGrid Golang API library.
Prerequisites
For this tutorial, we will need the following:
- A SendGrid account (free or paid). Click here to create an account if you do not have one already.
- Go version 1.20 or above
- An email address to receive the email
- An email address to send the email with a verified sender identity
Create a dynamic template
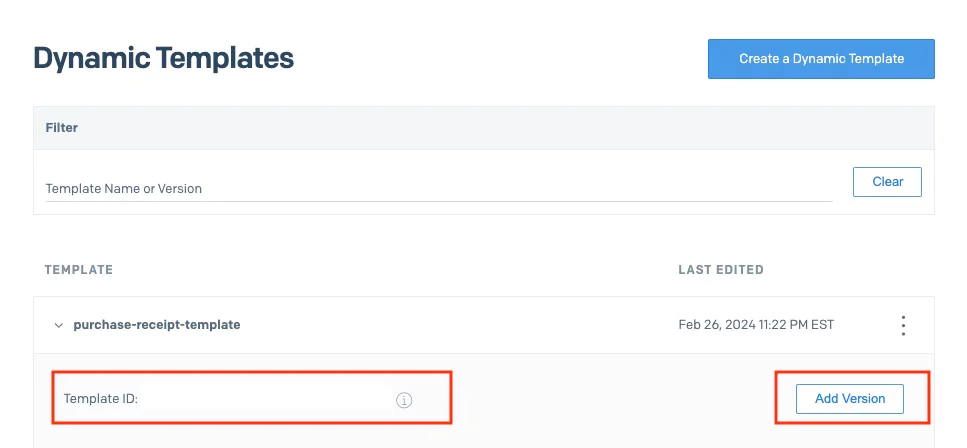
Look for Email API > Dynamic Templates on the left side, and then click on Create a Dynamic Template and set a name like "purchase-receipt-template". The template will be added to the top of the TEMPLATE list, or be the only one in the list if you have not created any already. Expand it, make a copy of the Template ID, and keep it somewhere safe for later. Then, click "Add Version".
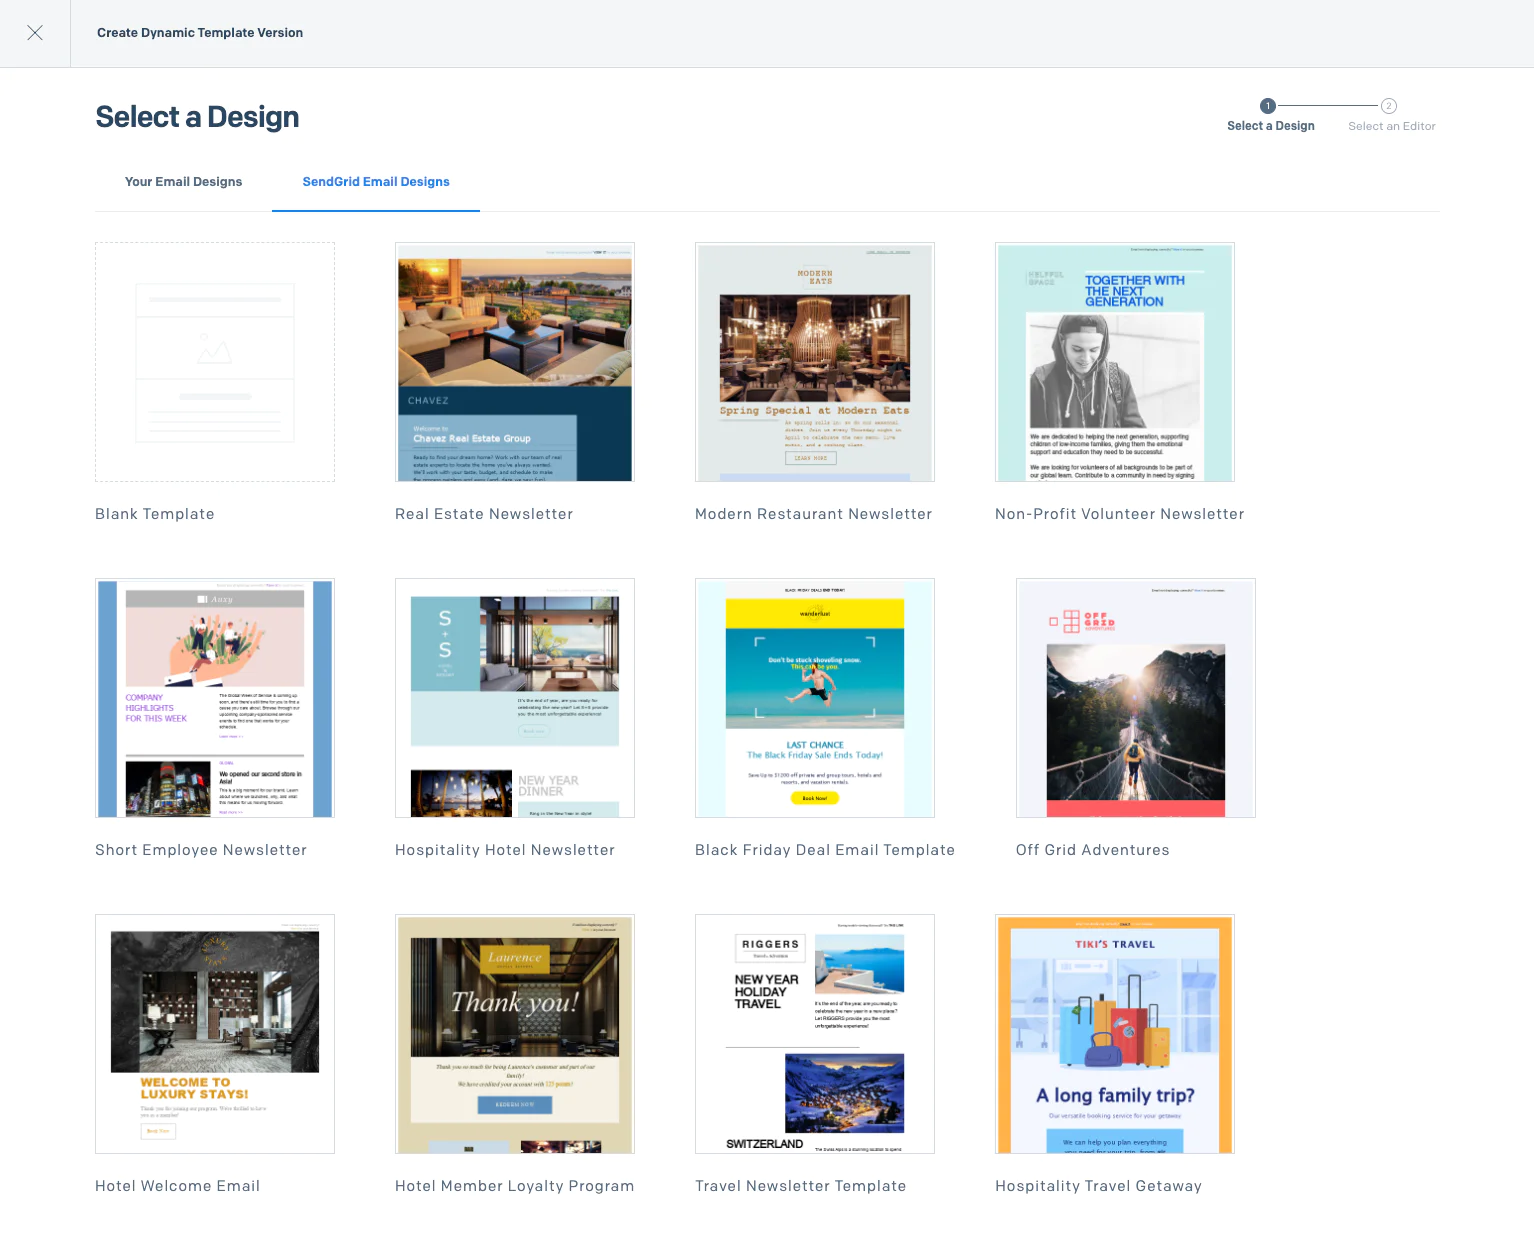
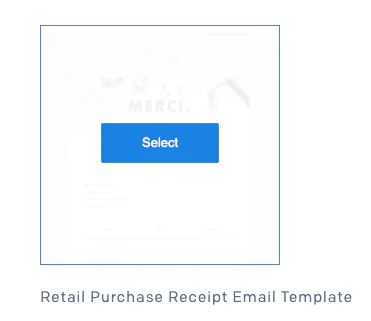
In the Select a Design wizard, choose "SendGrid Email Designs". Then, scroll down to "Retail Purchase Receipt Email Template", click it, and click Select.
After that, under Select Your Editing Experience select the "Code Editor" option.
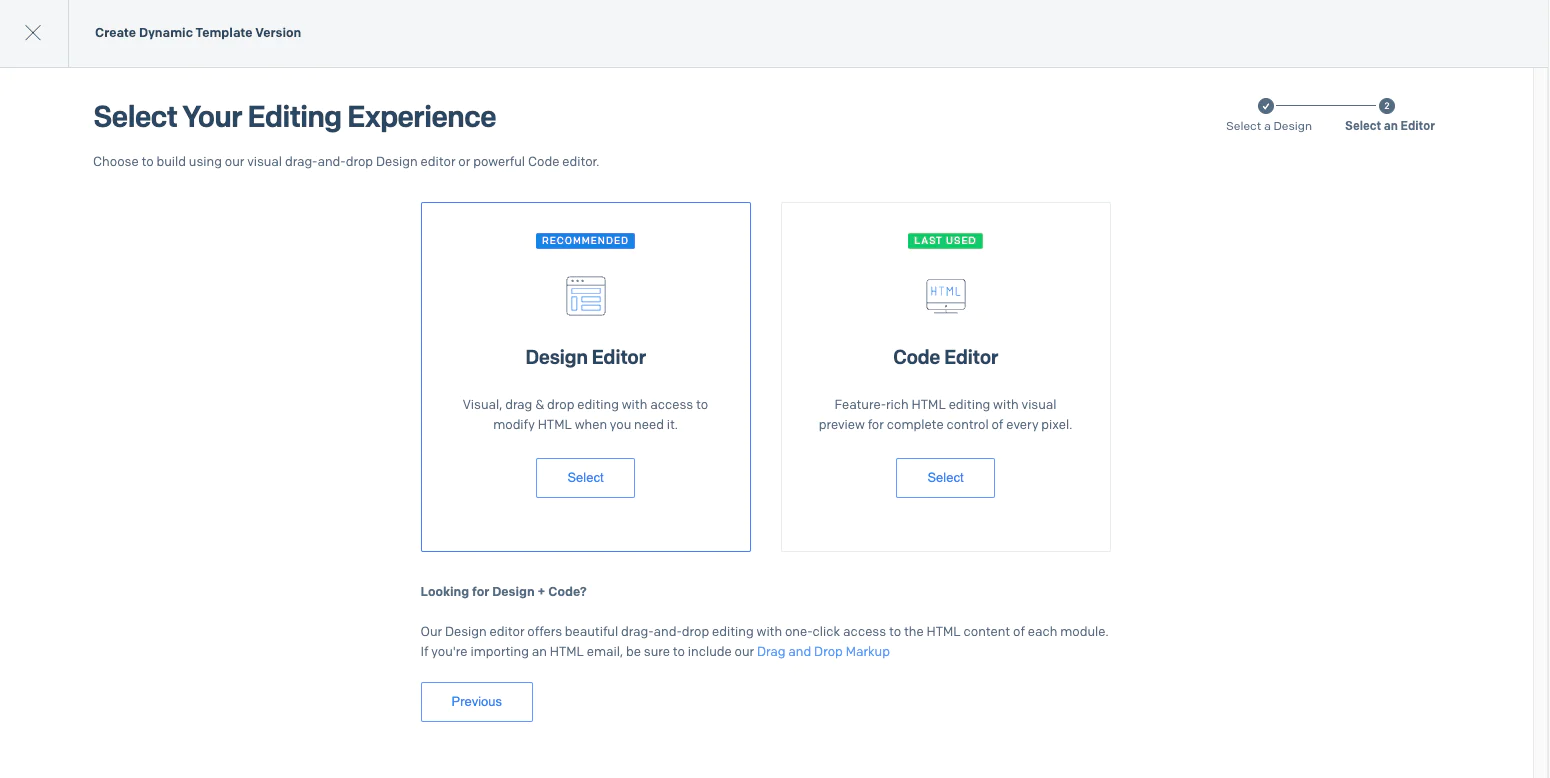
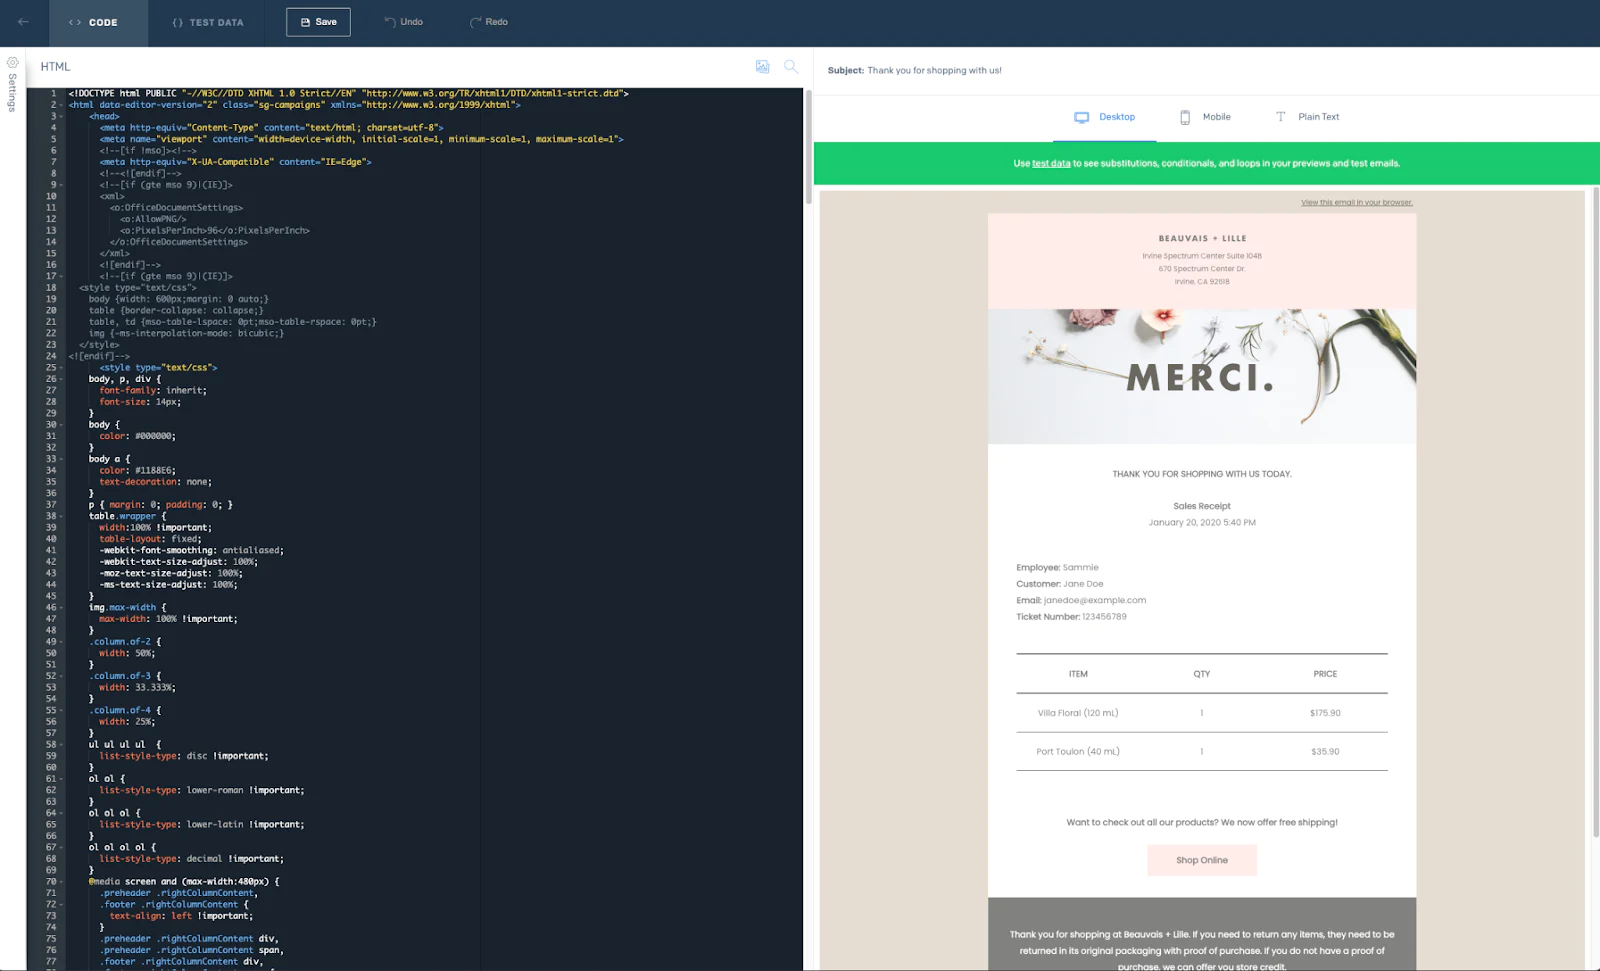
We now have our template created with the HTML editor on one side and the design on the other.
Customize the template
Let’s now make use of Handlebars to customize the template so that it includes dynamic data e.g., purchase date, name of the customer, email, and ticket number, from our code.
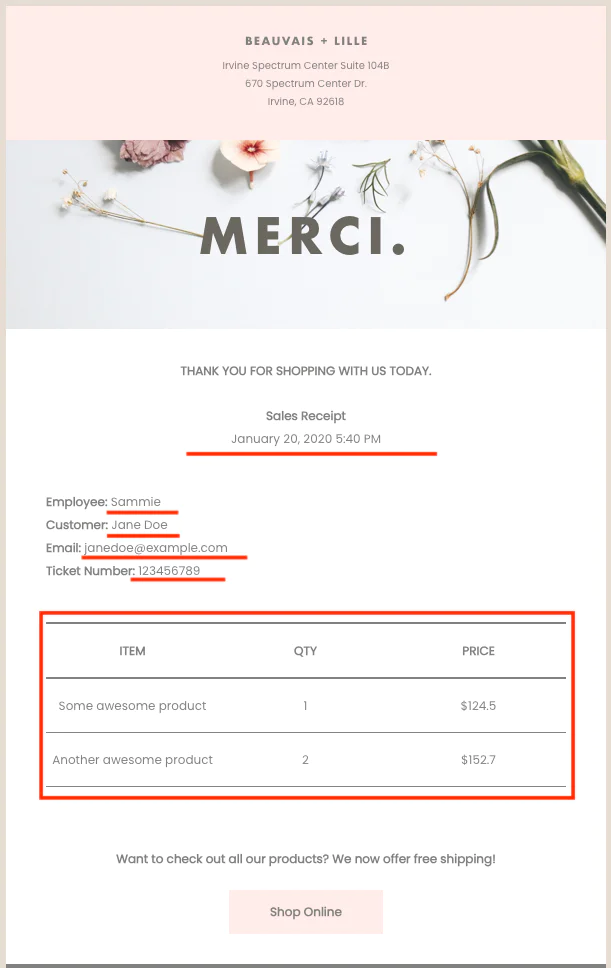
Click on the date on the design side, which will take you to the exact location on the code. Replace the current value (January 20, 2020 5:40 PM) with {{purchase_date}}.
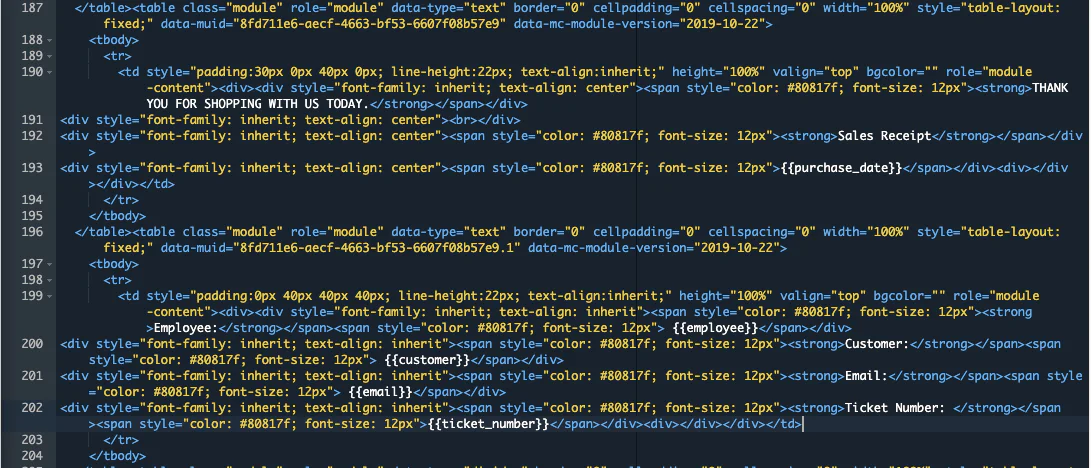
Let’s do the same for the rest of the data, replacing their static values with handlebar variables. Click the employee name in the design, and replace its existing value with {{employee}}. Then, doing the same for the remaining three elements:
- Customer -
{{customer}} - Email -
{{email}} - Ticket Number -
{{ticket_number}}
When finished, the applicable section of the email template should look like the screenshot below.
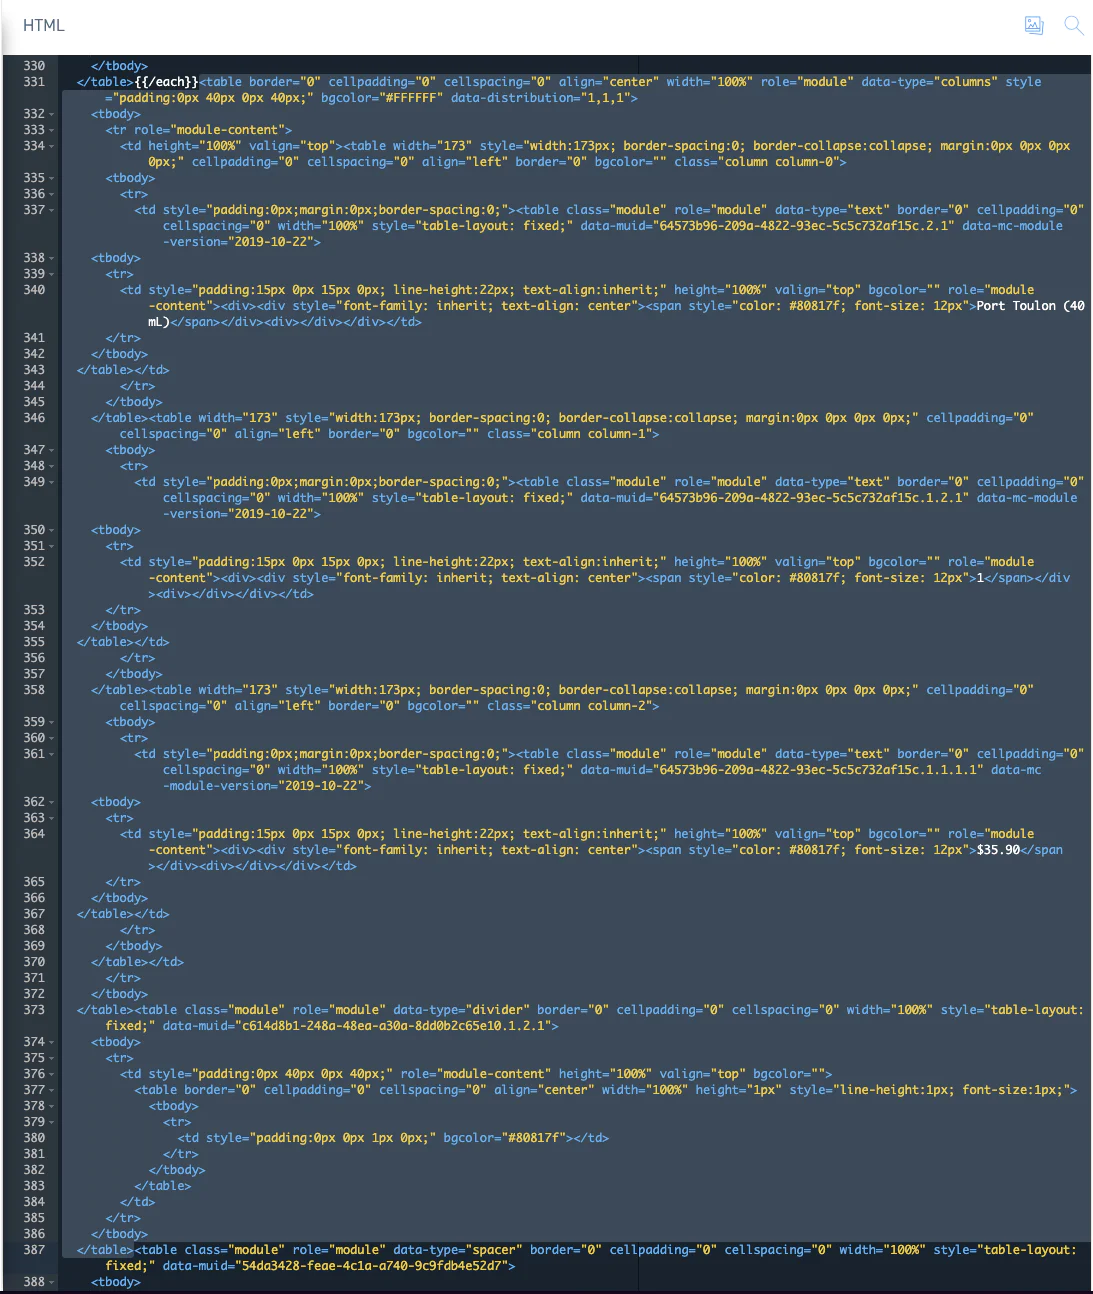
Finally, we are going to customize the purchased items table using iterations. Click on the first item in the list in the design view to go to the relevant section of code. Now, add {{#each items}} before the table tag where this item is, and {{/each}} just before the table tag where the next item is.
Now, we are going to replace the item info with the following handlebars:
- Villa Floral (120 mL) -
{{this.item}} - 1 -
{{this.quantity}} - $175.90 -
${{this.price}}(without removing the dollars sign)
The piece of modified HTML code should look like this:
Now, remove the entire piece of code where the second fixed item is (right after our {{/each}} handlebar, as we won’t be using this anymore, as all the data will be filled dynamically as we send it from our code. You can see it highlighted in the screenshot below, and you can also find the entire template code here.
Finally, click Save to save your template. The core of your design view should now look like the example below.
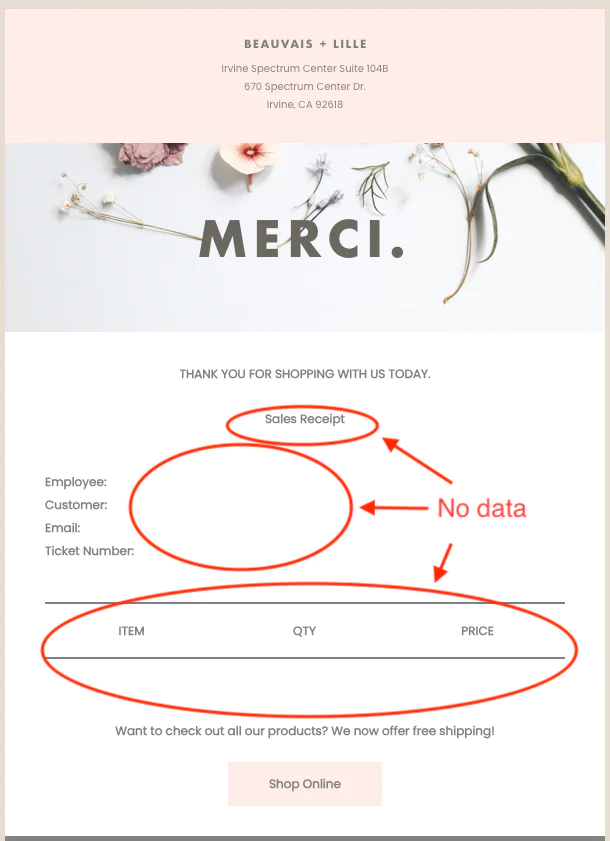
Test the template
In order to make sure our dynamic template is working properly, we can test it with some data. Let click on "{ } TEST DATA", in the top-level navigation bar, and add the following JSON:
The data should be filled on the design view.
Build the app
Create the project directory
Create a new directory called send-email-with-template in your workspace.
Import dependencies
You will need a couple of Go packages:
- GoDotEnv, to be able to read environment variables
- SendGrid’s official Go library to send your mail
First, you need to initialize your Go module with go mod init inside your new directory:
Then you will install your dependencies using the go get command:
Set the required environment variables
Create a new file named .env and paste the configuration below into it.
This is where you will store your SendGrid API Key (which you'll create next), and your Template ID from before. Replace the final four placeholders with what you want to use. Then, replace YOUR TEMPLATE ID with the Template ID value which you retrieved earlier.
Create a SendGrid API key
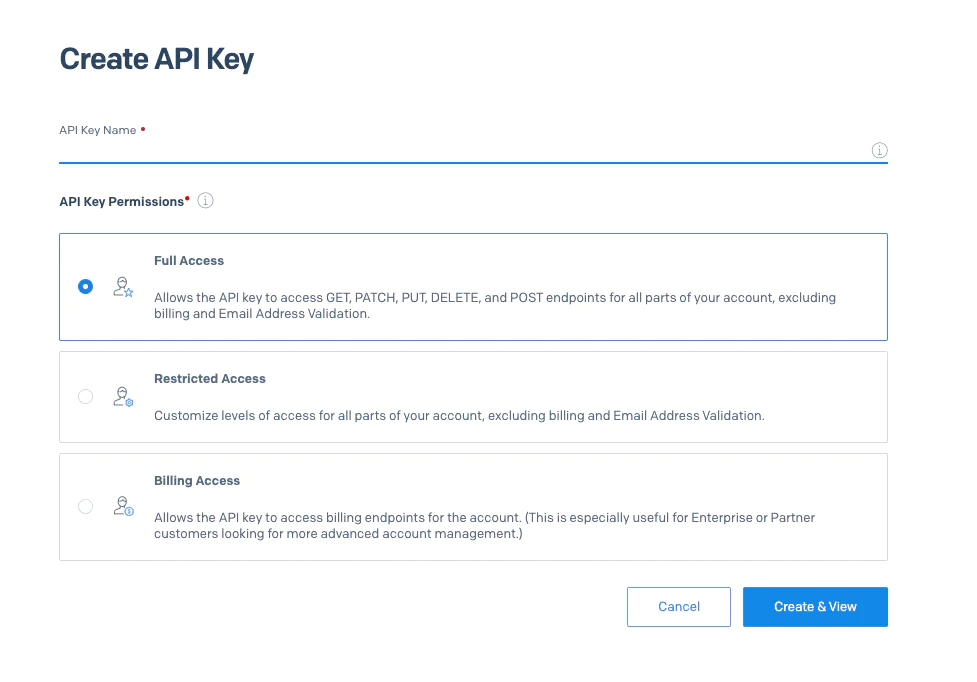
Now, go back to your SendGrid account, click on "Settings > API Keys", and then click "Create API Key". Set a name for the API key. For API Key Permissions choose "Full Access". Then, click on "Create & View". Your API Key will be shown and you will not be able to see it again in the future. Replace the placeholder YOUR API KEY with the newly created key.
Write the code
With the environment variables created, let’s create a Go file named send-email.go and paste the code below into it.
Here is what’s happening in the code above. The email variables are being initialized, and a new email service from SendGrid is being created, specifying our Template ID. Then, the dynamic template data is being set for an HTTP Request and a REST API Client to be defined. Finally, the email is sent and either an error is logged, or a success message is printed.
Test the code
Now, you need to build and execute your code. You can do that in one step with the go run command and passing the Go file name as an argument, by running the command below:
You should see the confirmation message, "email successfully sent..." printed to your terminal.
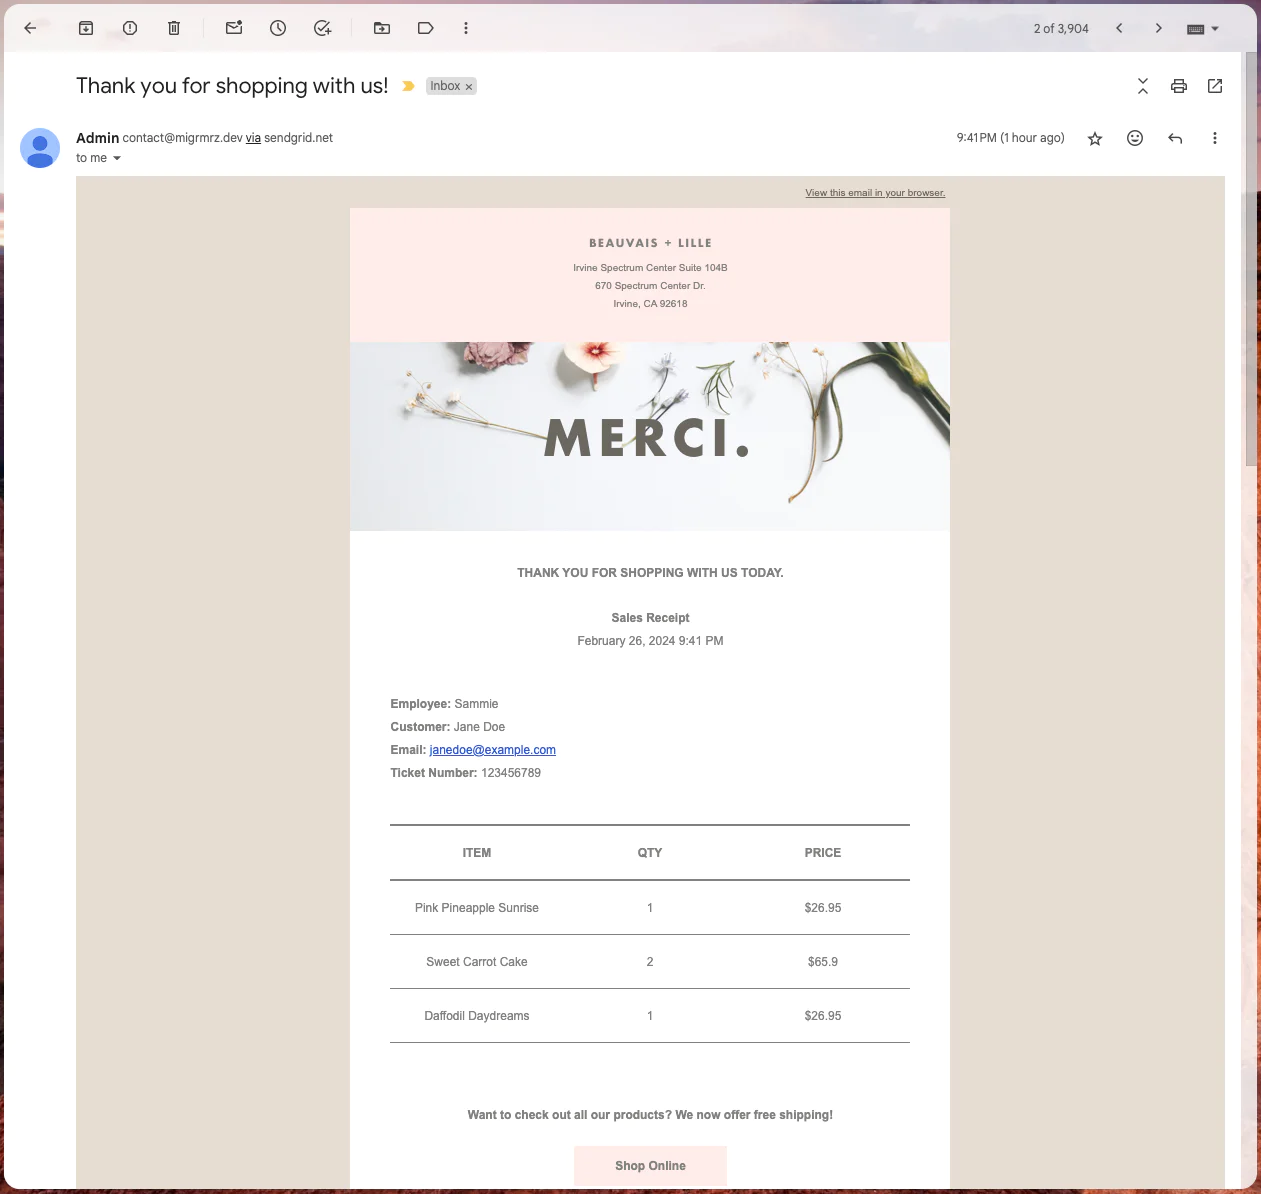
Check your email
You should’ve gotten an email with all the data we sent from our code.
Conclusion
Using SendGrid’s dynamic templates is a great way to avoid writing custom data into our code that might need to change over time, allowing us to just take care of the logic, and leave the design to the power of SendGrid.
Miguel Ángel is a Software Engineer that enjoys solving problems, writing (code and experiences), music and beer. You can find him on migrmrz.dev, LinkedIn, and GitHub.


Related Resources
Twilio Docs
From APIs to SDKs to sample apps
API reference documentation, SDKs, helper libraries, quickstarts, and tutorials for your language and platform.
Resource Center
The latest ebooks, industry reports, and webinars
Learn from customer engagement experts to improve your own communication.
Ahoy
Twilio's developer community hub
Best practices, code samples, and inspiration to build communications and digital engagement experiences.