Conference Monitoring à la Iron Man
Time to read:
May 20, 2016
Written by
This post is part of Twilio’s archive and may contain outdated information. We’re always building something new, so be sure to check out our latest posts for the most up-to-date insights.

Even in a place like the Marvel universe communication is key in resolving conflicts and team performance. Get Tony Stark, Steve Rogers and the other Avengers in a conference call and who knows, the whole Civil War thing might have been avoided.
With conference events, we can build a dashboard how Iron Man would have probably built it for the Avengers to monitor their conference calls.
No worries there will be no spoilers! ;)
Mission Briefing

There is no successful mission without a proper briefing. For this mission we will be using the following tools:
- Node.js and NPM which you can get here: https://nodejs.org/en/
- A Twilio Account to get a Twilio Phone Number – Sign up for free!
- ngrok – You can read more about ngrok here.
Additionally our dashboard will be using AngularJS. While this project doesn’t require any substantial AngularJS knowledge you can brush up your AngularJS skills in this article: Build a Video Chat using AngularJS
Alright we should be properly prepared to start coding. Ready? Let’s go!
Systems Setup

Our core mission is to add a dashboard to an existing conference call phone number. Start by cloning this project:
This will install all necessary dependencies for us and provide us with a basic server to work on.
Copy the .env.example in the main directory to a new file called .env and add the credentials of your Twilio account from the Console.
Now we are ready to run the server. For this, we can either type node index.js from the main directory of the project or use the npm run dev script. The latter uses nodemon to make sure that the server is reloaded every time we do a code change.
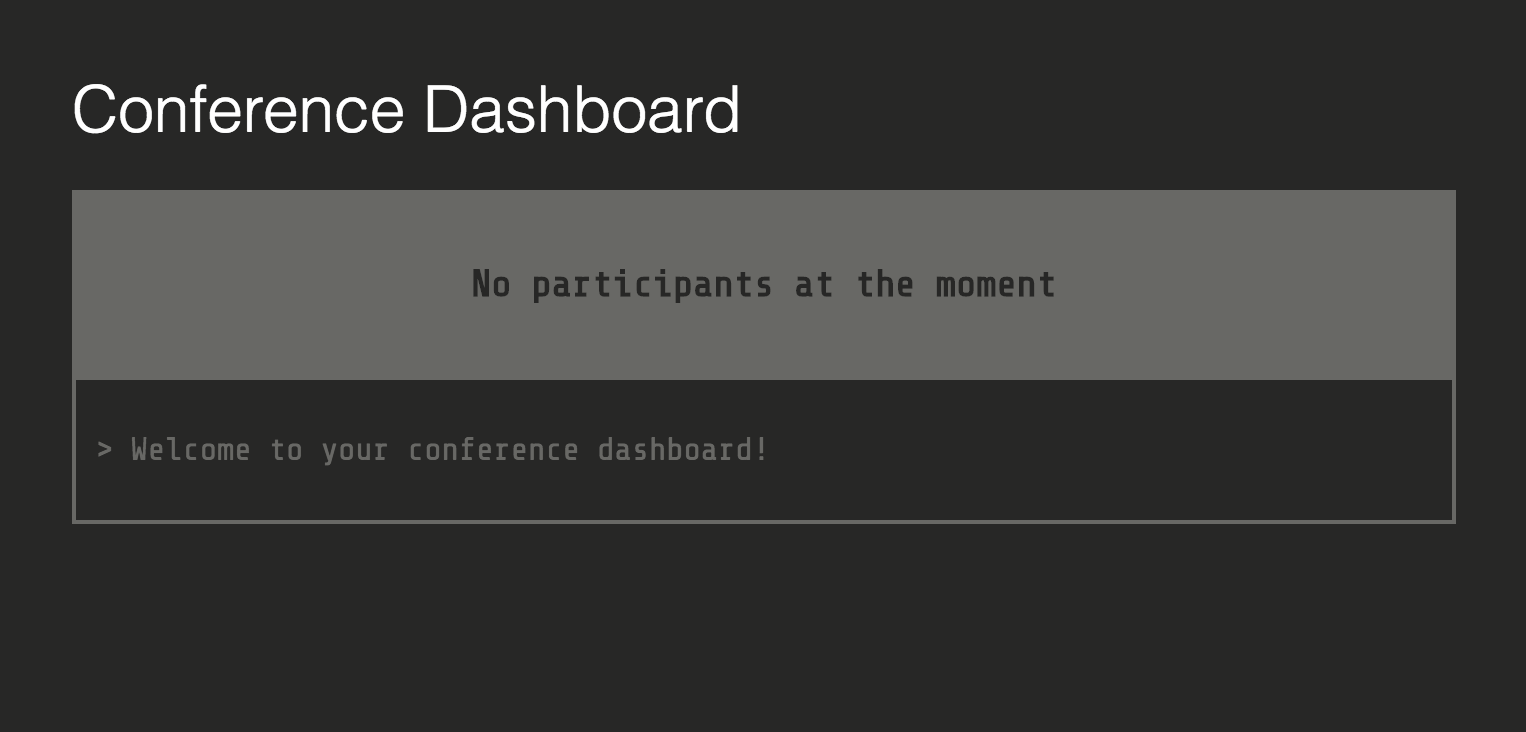
You can verify if everything works by opening http://localhost:3000 in your browser. You should see a screen that looks like this:
Now that we have our application running we need to connect a Twilio phone number to it so we can dial into the conference. For this we first need to expose our application to the internet via a public URL. This is where ngrok comes into play.
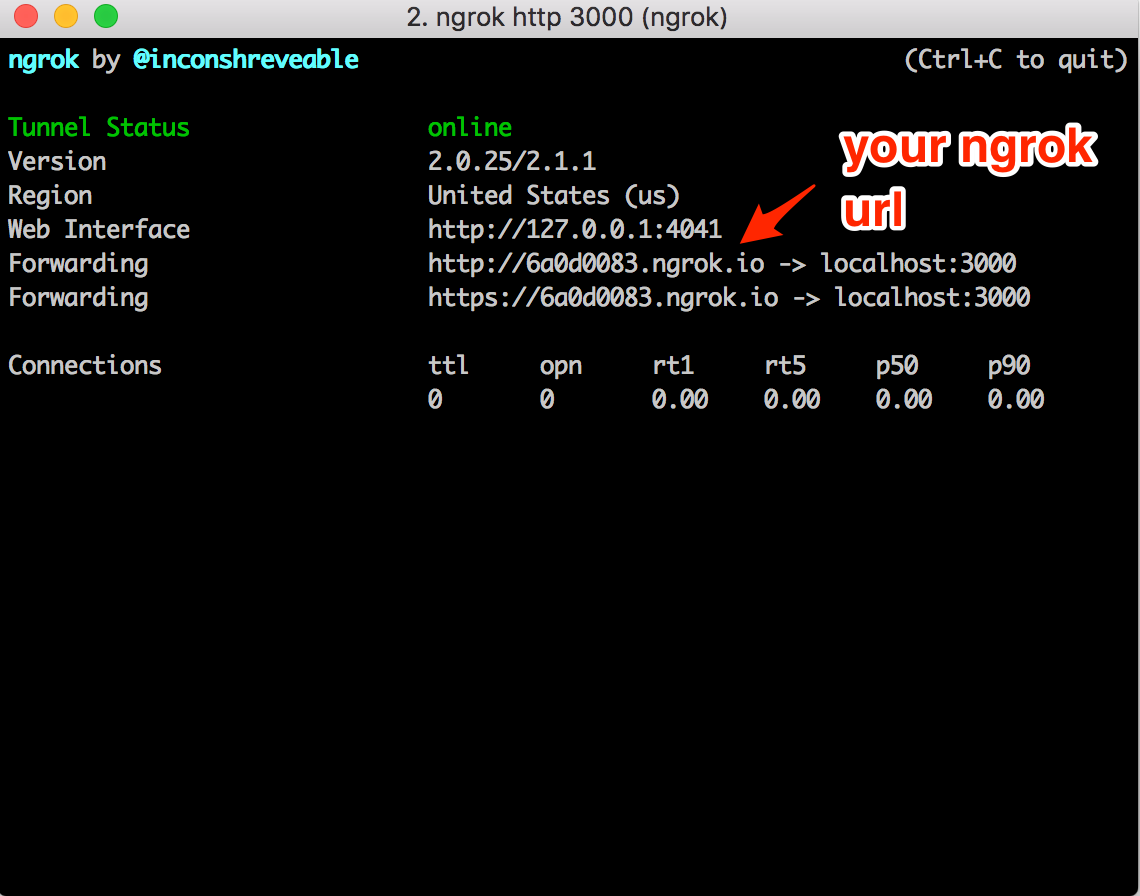
Run ngrok http 3000 in a separate terminal and keep it running. You will get an ngrok URL that we will use with our Twilio phone number.
Navigate to http://.ngrok.io/voice and make sure that the TwiML returned looks like this:
This TwiML instructs Twilio to first respond to every call with a voice saying “Welcome to the conference!” using the <Say> verb. Afterwards, it uses the <Dial> to direct the call into a <Conference>. The waitUrl attribute specifies which webhook Twilio should contact for instructions what to do while the call is waiting for the conference to start. In our case, we use a Twimlet that plays a song for us.
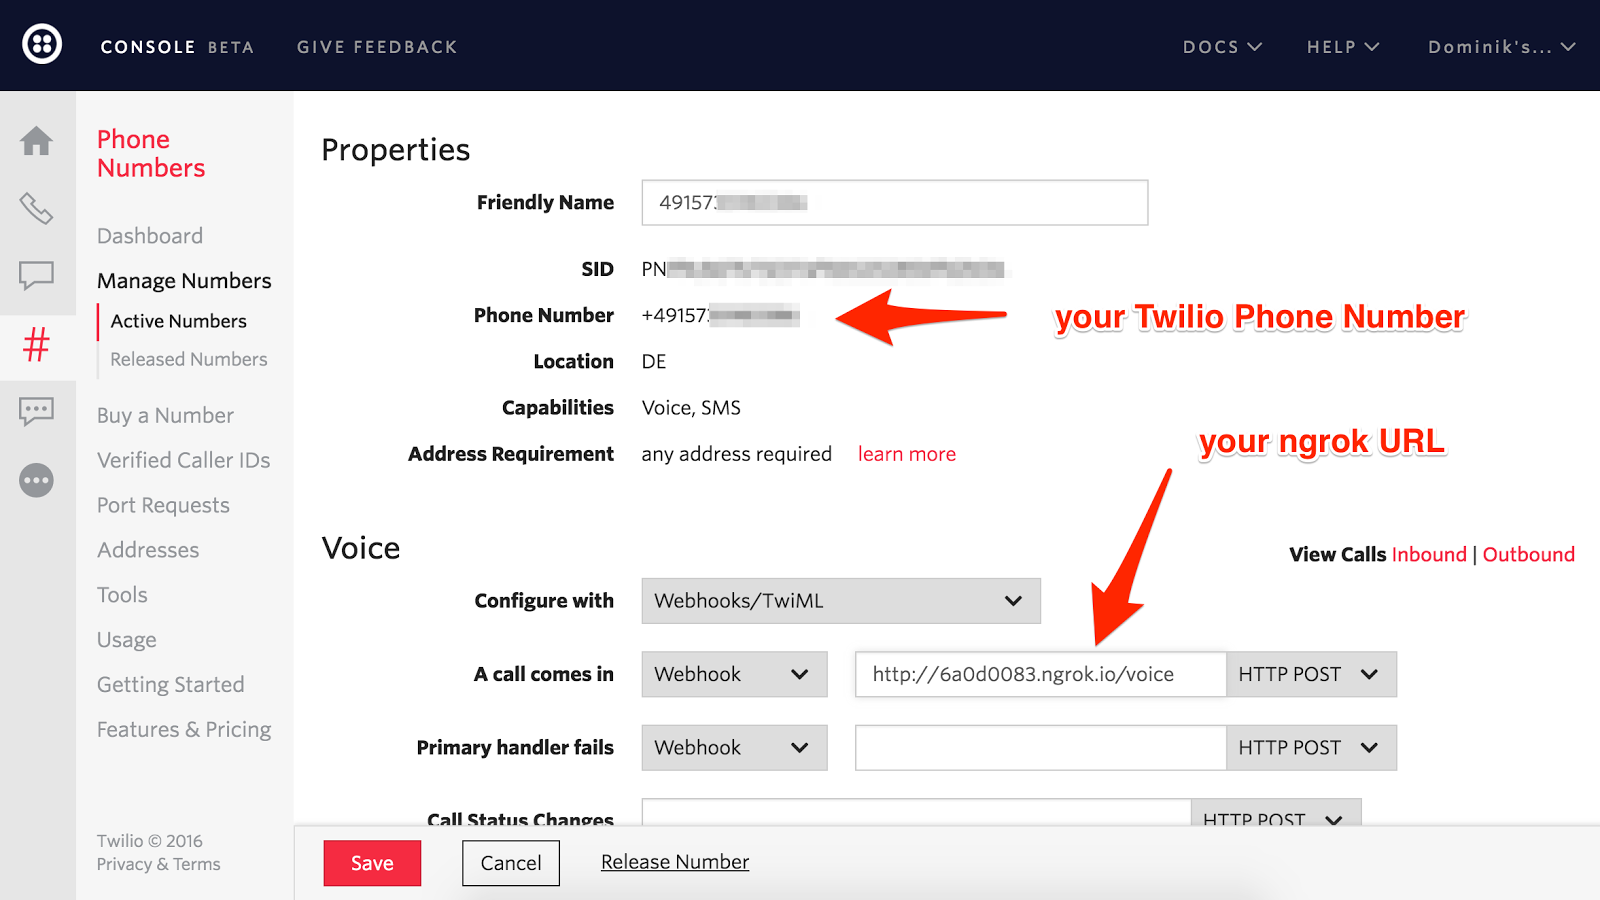
In the Console locate one of your existing phone numbers or buy a new number and add the ngrok URL as the Webhook value:
Call the phone number and you should be able to hear “Welcome to the conference” followed by some music. That’s awesome, however, we are not done yet.
Receiving Status Updates from HQ
We want to receive updates whenever the status of the conference changes. For this we need to add two new attributes statusCallback and statusCallbackEvent to the <Conference> element.
Open voice.js in the lib folder and add the two new properties to the conference TwiML:
We’re telling Twilio that when the start, end, join, leave and mute conference events happen, we want it to make an HTTP request to the /status route of our application.
Reload http://.ngrok.io/voice and you should be able to see the updated XML.
Now lets create that new /status route back in our Node application. Create a new file named status.js in the lib folder. Export a new request handler that for now just logs the request body:
Next add the /status route to index.js:
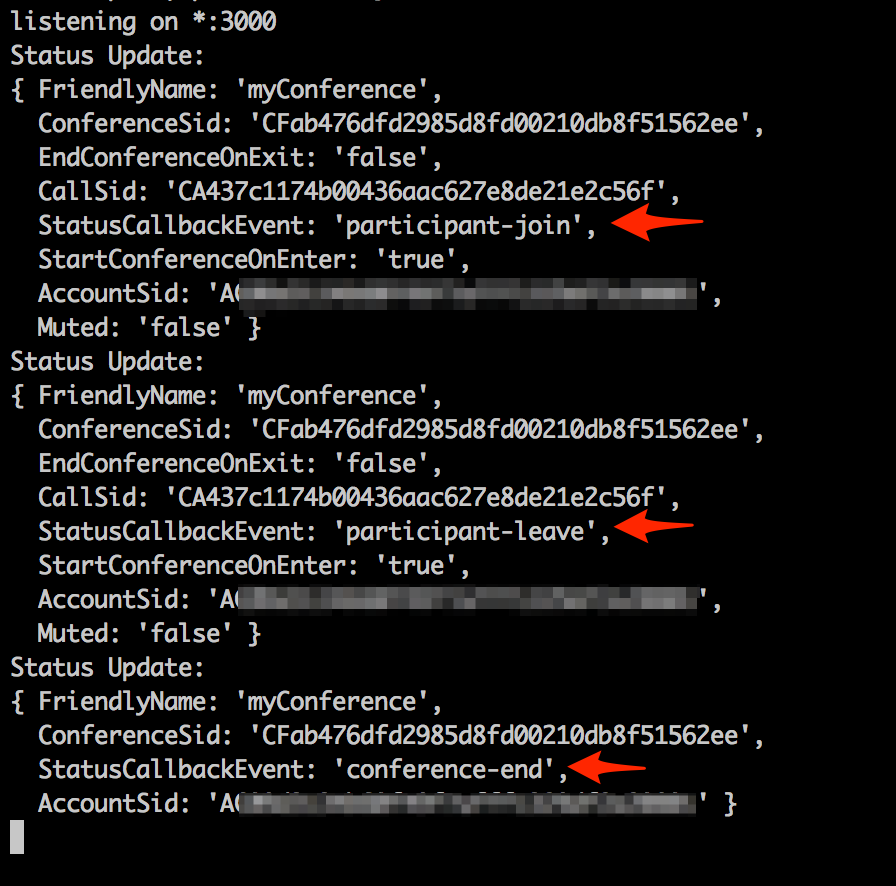
That’s it! Give your number another ring and you should be able to see events being logged in the console. Make sure to wait until the music starts before you hang up in order to properly join the conference. The events you should see pop up in the console are participant-join, participant-leave and conference-end. There is no conference-start event since the conference will only start once at least two participants are in.
Gathering Caller Intel
If we have a close look at the data we receive in the statusCallback request, we get data about the conference like the callback event, conference friendly name, and the conference SID. We’ll store those in a variable named data and for use in our dashboard. One thing we don’t get is much about the actual caller, like their phone number. To get that we can use the Twilio Node.js helper library and the CallSid to look up the Call resource.
Dial the number again and you now have the phone number of the caller which you can use to locate even more information from a source like a local database. Say for example we wanted to find out which superhero was calling into the conference. You could use the handy database of superhero phone numbers that you keep, or you could just use the one I’ve included in the project.
Use it by calling PeopleService.get(callSid).then() to retrieve a profile:

Now that we have all the caller data collected we need to send it to our dashboard whenever there is a new conference event. To do this we will use a WebSocket wrapper called Socket.IO.
Require the Socket.IO module in our index.js and pass it an HTTP server instance. We are returned an io instance that allows us to send messages and listen for events. Because we want to send those messages to the dashboard when Twilio requests the /status route, we’ll pass the instance of Socket.IO into that route handler.
Change the function export to accept the instance of Socket.IO and then use that instance to pass our dashboard client the conference event data. Additionally change the route handler to return the caller data via a Socket.IO message instead of an HTTP response by using the emit method:
The last thing we need to do is to listen for the respective events in our dashboard. For this, we need to open the conference.service.js file in the public folder. I already made sure to include the Socket.IO client library in the index.html and added it to Angular’s dependency injection. So we are ready to use it and populate the initialize function of the service.
Since we need to perform some basic actions for every event we will maintain an array of all events we are listening on and loop over them. The events we are interested in are:
For each of the events, we create a new eventData object that contains the event name, the data it sent as well as a readable message that we generate with getEventMessage(event, data). Additionally, we maintain an object containing all participants. This object has to be updated depending on the message.
Once we have all necessary data we broadcast it in order to inform components such as our controller that there has been an update. For this we use the $rootScope.$broadcast function of AngularJS.
Stitching all of this code together we end up with the following code in our public/conference.service.js:
That’s it. The connection is established and the data is being piped through. If you navigate to in your browser to http://localhost:3000/ and start calling into the conference with a couple of phones you should be able to see your dashboard being populated with the team and the respective log messages!

We did it! We have not only a way to easily get everyone in the same conference call but a way to monitor status changes in the conference. Building a dashboard using these events is just the beginning and I’m curious to hear what you build with it! Talk to me on Twitter @dkundel, via email at SIGNAL.
If you didn’t register yet for SIGNAL, there is still time! Iron Man didn’t RSVP yet but there will be certainly enough bots and you shouldn’t miss $bash. Use DKUNDEL20 to get a 20% discount when registering. I’m looking forward to seeing you there!
Related Posts


Related Resources
Twilio Docs
From APIs to SDKs to sample apps
API reference documentation, SDKs, helper libraries, quickstarts, and tutorials for your language and platform.
Resource Center
The latest ebooks, industry reports, and webinars
Learn from customer engagement experts to improve your own communication.
Ahoy
Twilio's developer community hub
Best practices, code samples, and inspiration to build communications and digital engagement experiences.