Build Video Chat using AngularJS 1.x
Time to read:
May 05, 2016
Written by
This post is part of Twilio’s archive and may contain outdated information. We’re always building something new, so be sure to check out our latest posts for the most up-to-date insights.
Warning: The code in this blog post is outdated as our Video SDK was in BETA at the time of writing.
Check out our getting started section instead if you want help using Twilio video. If you choose to follow this tutorial you’ll need to make significant edits to the code to run.
AngularJS is a popular JavaScript framework for building client side applications. Using it steers you towards creating well-factored apps with clear Separation of Concerns (SoC). To demonstrate how Angular does this let’s convert the existing JavaScript Quickstart for Video into an Angular application.
If you want to skip ahead and grab the source for this post, it’s all on Github. Otherwise let’s get started.
Setting It All Up
Before we jump into the code we’ll need to do some setup. First, if you don’t already have a Twilio account hop on over to twilio.com and create a new one. It’s easy and free for development.
Once you have an account we need to set up a new Api Key and Secret which we’ll use in a bit to authenticate with the Twilio API. Create a new Api Key by heading into the developer console and select the Create an Api Key option.
Make sure you put the Api Secret some place safe because you won’t be able to see it again once you leave the Key page.
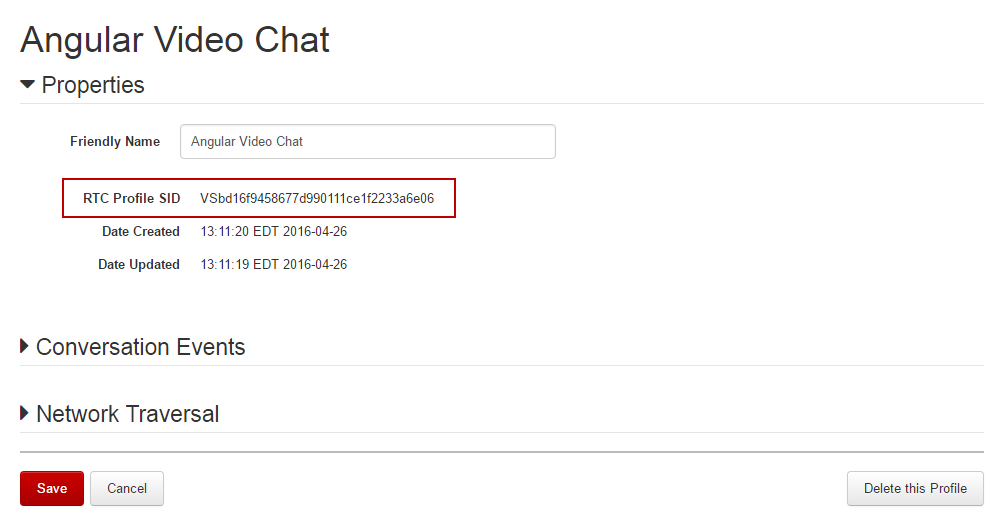
Next, create a new Configuration Profile for our application. The Configuration profile is a collection of configuration values specific to the Twilio Video service. For our app we just need to create a new one and grab the Configuration Profile SID.
With the Api Key and Configuration Profile created we can starting writing some code. As the base for our application we’ll use a Twilio Video for JavaScript Quickstart application. These applications are intended to get you to a working video application in just a few minutes and are available with server sides in a variety of programming languages.
Download the starter app that matches the backend language you are most interested in and follow the setup instructions for setting up your Account SID, Api Key and Secret and Configuration Profile SID in the app.
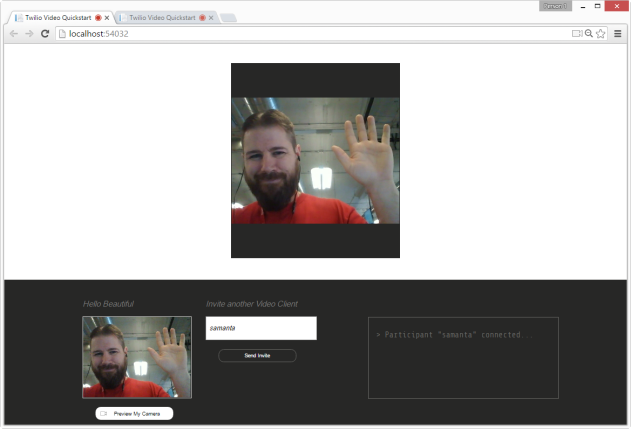
When you’re ready, give the app a spin and wave to yourself in the camera!
Approaching Angular
With the Video Quickstart running, it’s time to start converting the client side to Angular.
Start by adding the Angular library to the application view. For most of the quickstarts this means locating and opening the index.html file included in the project. For .NET developers you are looking for Index.cshtml.
Once you’ve opened the file add a

In the controller create a property named previewMedia that will hold an instance of the LocalMedia object.
|
1 2 3 4 5 | function VideoChatController($scope, $log) { var vm = this; vm.previewMedia = null; } |
Next, define a new function named previewCamera. Inside this function, create an instance of LocalMedia and call its getLocalMedia function. Use the addStream function to add the returned media to the LocalMedia instance.
|
1 2 3 4 5 6 7 8 9 10 11 12 13 14 15 16 17 18 19 | function VideoChatController($scope, $log) { var vm = this; vm.previewCamera = function () { vm.previewMedia = new Twilio.Conversations.LocalMedia(); Twilio.Conversations.getLocalMedia().then(function (mediaStream) { $scope.$apply(function () { vm.previewMedia.addStream(mediaStream); }); }).catch(function (error) { $log.error('Unable to access local media', error); }); }; vm.previewMedia; } |
Notice that addStream is called inside of Angular’s $apply function. Later in the post we’ll hook a watch up to the previewMedia object but because getUserMedias promise callback happens outside of the scope of Angular’s digest loop we have to explicitly tell Angular that we want to apply a change. You will use the pattern in multiple places as you move through the code in this post.
Finally, add a click event to the button-preview button using Angulars ng-click attribute:
|
1 |
Run the application and press the preview button. You should get prompted for microphone and camera access. However, nothing else happens because we have not attached the media streams to any UI element. Let’s handle attaching media streams to UI elements next.
Directing Directives
LocalMedia has an attach method that creates new HTML elements and automatically attaches their media streams for us, but to use it I have to pass attach a DOM reference which breaks my seperation of concerns. To keep my controller clean I don’t want it to have any DOM references. Angular Directives are great ways of building intermediaries between a controller and view.
Create a new file in the app directory named video.directive.js and define the new directive in it:
|
1 2 3 4 5 6 7 8 9 10 | (function () { 'use strict'; angular .module('app.core.directives', []) .directive('twilioVideo', twilioVideoDirective); function twilioVideoDirective() { } })(); |
Restrict the directive to match only an element name, define the directive scope with a single media property and create the template our directive will output.
|
1 2 3 4 5 6 7 8 9 10 | function twilioVideoDirective() { return { template: '', restrict: 'E', replace: true, scope: { media: '=', } } } |
Finally, add a $watch to the directives media property. This will let us check to see if there is a new media stream to attach to the div in our template.
|
1 2 3 4 5 6 7 8 9 10 11 12 13 14 15 16 17 | function twilioVideoDirective() { return { template: '', restrict: 'E', replace: true, scope: { media: '=', }, link: function (scope, element, $attributes) { scope.$watch('media', function (newval, oldval) { if (scope.media) { scope.media.attach(element[0]); } }, true); } } } |
Back in the view add another

Bam! Multiple participants in a single Angular powered video chat!
Wrapup
Clean separation between views and our controllers is just one of the reasons I really like AngularJS. Isolating DOM and controller interactions in directives lets me keep my code well factored and clean.
There is so much more we could do with this app. The UI for remote participants could be enhanced, we could add more controls like mute or pause camera buttons, or even add an audio meter to the UI.
Building apps with Twilio Video is so much fun and combining it with AngularJS makes it even better. Grab the code from Github and start video conferencing today.
Show me what you’re making with Twilio Video or AngularJS. Send me an email at devin@twilio.com or hit me up on Twitter @devinrader.
Related Posts
Related Resources
Twilio Docs
From APIs to SDKs to sample apps
API reference documentation, SDKs, helper libraries, quickstarts, and tutorials for your language and platform.
Resource Center
The latest ebooks, industry reports, and webinars
Learn from customer engagement experts to improve your own communication.
Ahoy
Twilio's developer community hub
Best practices, code samples, and inspiration to build communications and digital engagement experiences.