Building a fully featured burner phone with Kotlin
Time to read:
July 12, 2017
Written by
This post is part of Twilio’s archive and may contain outdated information. We’re always building something new, so be sure to check out our latest posts for the most up-to-date insights.

You walk into your favourite coffee shop and today they ask you if you’d like to register for a loyalty card. All they need is your name and phone number.
On the way back you stop for groceries and the cashier asks if you’d like to enter a prize draw. All they need is your name and phone number.
It’s finally time to put that lawn mower you’ve not used in years on Craigslist but at the end of the ad, it asks you to enter your phone number so buyers can contact you directly.
You need a burner phone!
Let’s look at how we can use Kotlin and Twilio to build and deploy a burner phone application so that we can use multiple phone numbers for these situations. If you just want to download the code you can have a look at this repo or deploy it to Heroku using the button below.

Our tools
- I will be using IntelliJ IDEA for the code but feel free to use your preferred IDE as long as it works well with Gradle.
- One or multiple Twilio Phone numbers for creating various burner phones. You can get them here.
The project
Let’s start by creating a new Gradle project in IntelliJ and adding Kotlin (Java) as the library.
I have described the entire process on the first part of Send and Receive SMS messages with Kotlin. You can follow it here. Alternatively you can just clone the repository as follows.
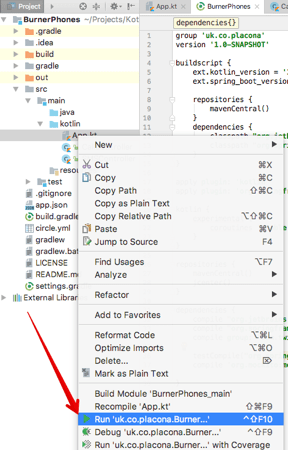
With that project open on IntelliJ, start by right clicking on App.kt and choosing “Run”.
In your browser go to http://localhost:8080/sms/ and you will see the default controller displayed.
Let’s change one configuration in App.kt so the application knows where to forward the SMS messages and calls to. Inside the main function add the following:
I have my telephone number set as an environment variable on my computer. My colleague Dominik wrote a nice article explaining how to set environment variables on Mac, Windows and Linux.
Once you have the “MY_NUMBER” variable set correctly for your environment with your own telephone number we’re ready to start building the application.
Forwarding SMS messages
We still want to get every SMS message sent to our burner phones, but we want them redirected to our own number. The beauty of doing this is that if we ever get tired of being spammed from a certain number, we can just discard that number on the Twilio console and be done with it.
Open SMSController.kt and create a new mapping called forwardSMS just below the one that is already there.
This new mapping will tell Twilio to forward any inbound SMS to our own number. It will forward the message so we still know whose number originally sent it.
It is useful to know who sent the message so you can respond if you need or just as easily add a condition to the top of the mapping to block any messages from that specific sender.
Restart the application and test it out by sending a POST request to it with cURL for example:
And the result should be the TwiML that will tell Twilio to forward the message.
Before we configure our Twilio numbers let’s add call forwarding to our application.
Forwarding Calls
To forward calls we will use the same principle as above but will have it in a different controller to keep things neat. If you cloned the starter application you should already have that controller.
Create a new Kotlin controler called CallController.kt alongside SMSController.kt if you don’t already have one.
In that controller add the highlighted code or just copy everything if you still have an empty controller.
Just like before, we are adding information about the caller for when the call is forwarded. So when you get a call to this Twilio number you hear a message that tells you the number that is calling.
You can also test that this is working correctly by making a POST request to it and checking that the TwiML returned looks right.
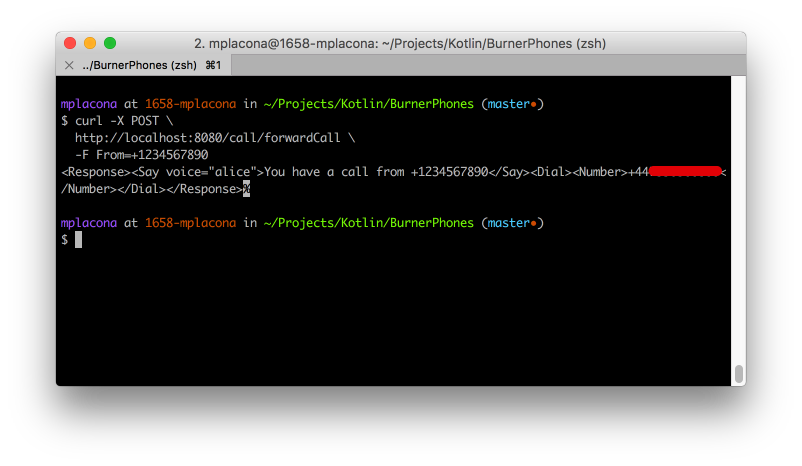
Before we configure our Twilio numbers to use the application we need to deploy it somewhere. Let’s look at how to do this with Heroku.
Deploying your Kotlin application to Heroku
If you haven’t yet create an account on Heroku. Once you have an account and installed the heroku toolbelt, go to your terminal and login from there.
Still in terminal create a new Heroku application.
If you haven’t created this application from scratch but cloned the starter-application repository, you will now need to merge it into master as follows:
You can skip the step above if you created the project from scratch, just make sure you in master and we’re ready to push this to Heroku.
This will take a few seconds and when it’s complete you should see a message that looks like this on your terminal.
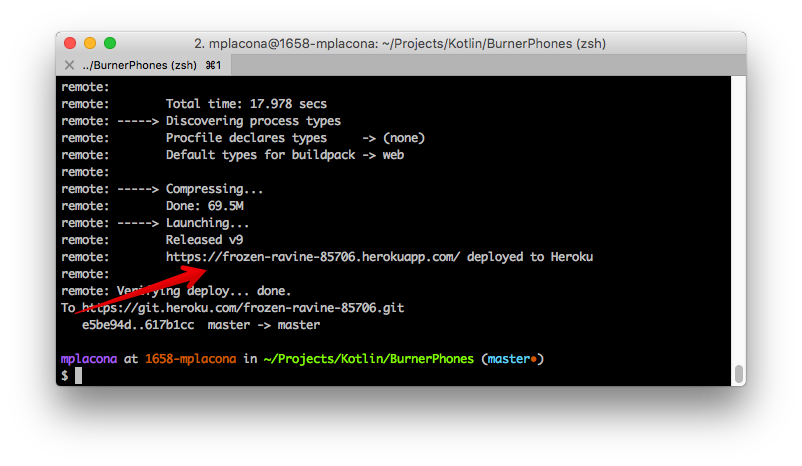
Copy this URL as we will use it later on to configure our Twilio numbers.
Just like in our local environment we need to set a phone number as an environment variable for this deployment. You can do this by running the following on your terminal:
Make sure you use your own telephone number as the value for MY_NUMBER. Now we’re ready to configure our burner numbers.
Creating burner numbers
The beauty of this application is that because we’re not hard-coding anything in the application itself, it can be used for as many Twilio numbers as we want. In our case we could have one number for loyalty cards, one for prize draws and one for selling things on the internet.
Head to the Twilio console and get as many numbers as you like, then configure and save them all as follows:
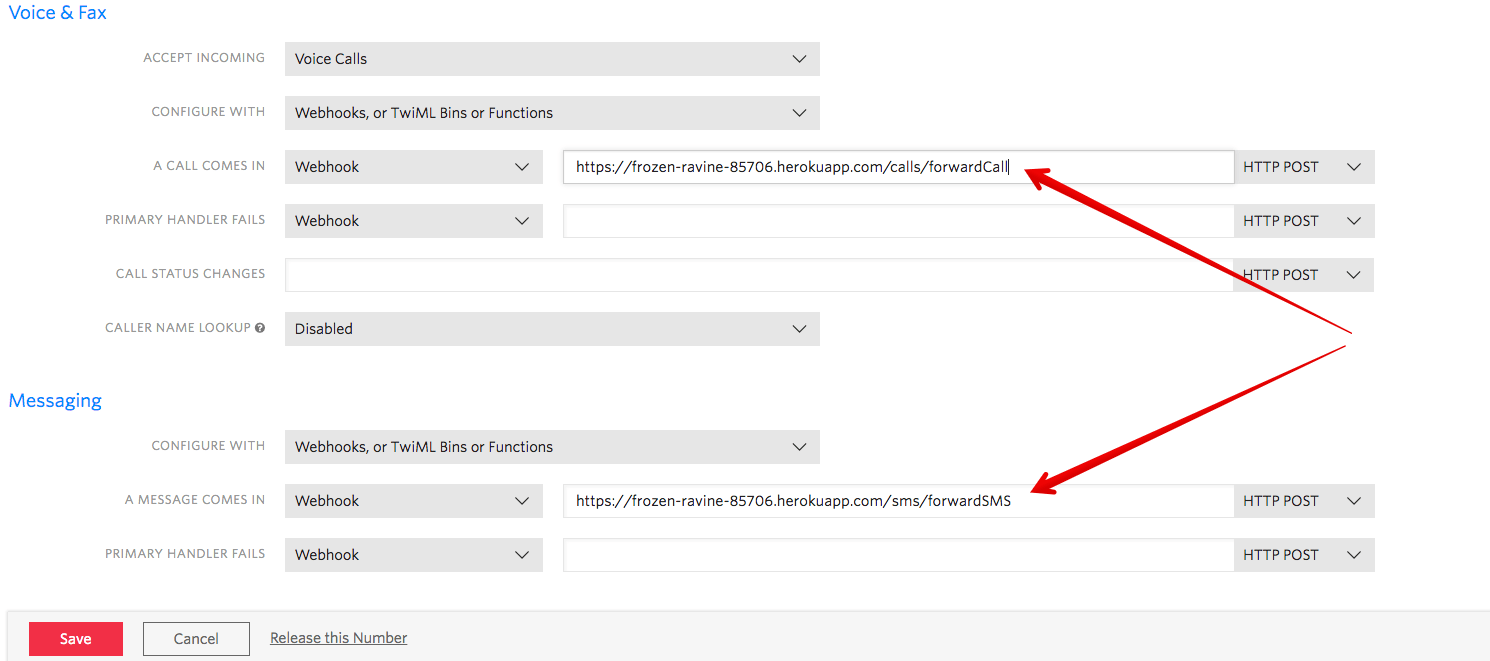
Make sure you change the application URL to match what you copied earlier when you deployed your application to Heroku.
Give those numbers away instead of your own number now and just wait for all the messages and calls to start coming in.

Having burner phones that can just be created and disposed of when they’re no longer needed has never been so easy.
I personally have each one of my burner numbers added to my contacts so they display nicely when I get a call or text message and I know roughly what to expect.
A nice addition to this application would be to add a way of blocking senders before messages or calls are forwarded to us, or adding a voicemail system for certain numbers to make sure we never miss any calls.
I would love to see what new features you add to it. Hit me up on twitter @marcos_placona or send me an email on marcos@twilio.com to tell me more about it.


Related Resources
Twilio Docs
From APIs to SDKs to sample apps
API reference documentation, SDKs, helper libraries, quickstarts, and tutorials for your language and platform.
Resource Center
The latest ebooks, industry reports, and webinars
Learn from customer engagement experts to improve your own communication.
Ahoy
Twilio's developer community hub
Best practices, code samples, and inspiration to build communications and digital engagement experiences.