An Introduction to Building Desktop Applications with Electron
Time to read: 9 minutes
November 13, 2020
Written by
Reviewed by
Slack - (almost) the defacto team collaboration software, Visual Studio Code - one of the most popular code editors on the market at the time of writing, and the desktop version of WhatsApp all have one thing in common: they were all built with Electron.js. With these powerful companies adopting Electron.js over native desktop software development methods, Electron.js has established itself as a trustworthy framework for developing desktop applications.
In this tutorial, you will learn what Electron.js is all about and how you can use it to power your next amazing idea.
At the end of this tutorial, you will have developed a desktop application that:
- Is built from the ground up with web technologies
- Communicates between the Main and the Renderer processes
- Makes use of Electron.js APIs to access features that are not available in the browser API
- Displays desktop notifications
Project Requirements
Get to Know Electron.js
Simply put, Electron.js is an open-source framework that enables developers to build desktop applications with web technologies like HTML, CSS, and JavaScript. With this, building desktop applications is no longer an exclusive capability of developers who write C++, C#, or Java as web developers can now transfer their skills to rolling out industry-standard desktop software.
Using a combination of Chromium (the open-source version of the Google Chrome browser) and the Node.js JavaScript runtime, web developers can wrap their existing web applications with Electron.js to produce desktop applications and generate installers for Windows, macOS, and Linux platforms.
Electron.js is maintained by Github, making it a dependable project that’s backed by a formidable team of engineers.
Why Use Electron.js
Before Electron.js, if an application needed to be installed on two or more different desktop operating systems (e.g. Windows and Mac), you would need to develop the application separately for both platforms using platform-compatible languages i.e C# or Visual Basic for Windows and Objective-C for Mac. If the developer decided to go the Java route (developing cross-platform desktop software using Java), the user of such an application would need to install a Java-runtime on both platforms to run the application.
However, with a single code-base, Electron.js can generate installers for all platforms without any installation dependency. Thus, a single development team can develop an application for targeted platforms. Another major advantage is that if you can build a website, you can build a desktop app with Electron.js, thus, existing web developers/web development teams can easily translate into developers of desktop software.
Prerequisites for Building an Electron.js Application
These are the things you’ll need to begin building apps with Electron.js:
- Basic knowledge of HTML, CSS, and JavaScript
- Node.js installed on your system
- Basic knowledge of Node.js
Structure of an Electron.js App
How an Electron.js App is Structured
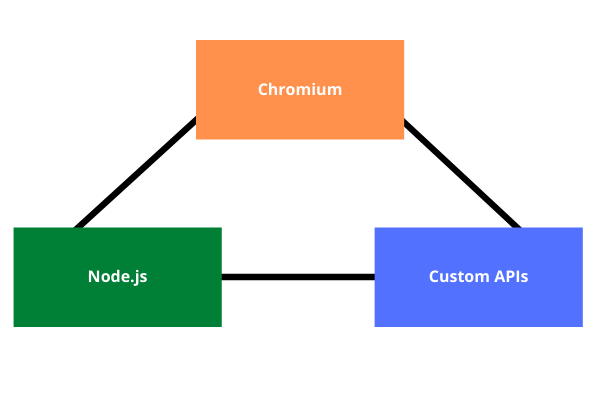
Structurally, Electron.js is made of three major parts:
- Chromium: This is the component in the Electron.js structure that is responsible for creating and displaying web pages. Web content is displayed in Electron.js’s Renderer process (more on this later) and due to the Chromium environment, you have access to all browser APIs and development tools just like operating in a typical Google Chrome browser.
- Node.js: This is the component in the Electron.js structure that gives you access to system capabilities. Electron.js runs Node.js in its Main process (more on this later) giving you access to all that Node.js offers like interacting with the filesystem, operating system, etc. and more…
- Custom APIs: To enable developers to create common desktop experiences and work easily with native functionalities, Electron.js has an API of easy to use libraries that help you perform tasks like creating and showing a context menu, displaying desktop notifications, working with keyboard shortcuts, etc.
The Main and Renderer Processes
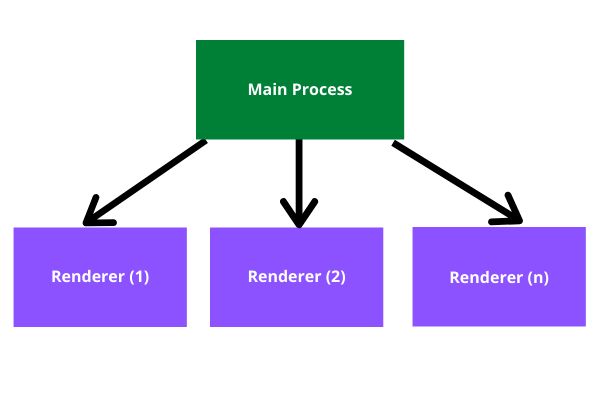
A running Electron.js app maintains two types of processes, the Main process, and one or more Renderer processes.
The entry point of an Electron.js application is the Main process, which is simply a Node.js environment. This is where all the interaction with native functionality occurs.
The Main process is responsible for creating web pages. It does this by creating a new instance of the Electron.js BrowserWindow object. This creates a new web page that runs in its own Renderer process. The Main process can create more than one web page each running in its own Renderer process.
Typically, Electron.js applications boot up with a default web page which is the app’s startup screen. You can then create more screens if your application requires it.
Each Renderer process manages its own web page and is completely isolated from other Renderer processes and the Main process itself. Thus, if one Renderer process terminates, it does not affect another Renderer process. A Renderer process can also be terminated from the Main process by destroying its BrowserWindow instance.
Out of the box, the Renderer process only has access to browser APIs like the window and document objects, etc. This is because the Renderer process is simply a running Chromium browser instance. It can, however, be configured to have access to Node.js APIs such as process and require.
Communication Between the Main and Renderer Processes
Oftentimes, you’ll want to use native functionality in your Electron.js application in response to events, like a user clicking a button. However, because the Renderer process and Main process are completely isolated from each other, native functionality cannot be accessed directly from the web page.
To make this possible, Electron.js provides an IPC (Inter-Process Communication) channel that allows the Renderer process to communicate with the Main process and vice-versa.
Using the ipcMain and ipcRenderer modules for the Main process and Renderer process respectively, you can emit events from one process and listen for events in the other process. You can also pass data from one process to another. In the exercise done later in this tutorial, you will use these modules to communicate between the Renderer and the Main processes.
Build a Simple Electron.js Project
Now it’s time to do some coding and get some hands-on Electron.js experience! In this tutorial you will be creating a simple desktop application that adds items to a task list. The goal is to create a desktop application from scratch and run it successfully.
Scaffold the Application
To begin, run the following commands from your preferred parent directory to create a folder for the project, and then change directory into the new folder:
Because an Electron.js app is, at heart, a Node.js application running web pages, you’ll need initialize the app and create a package.json file by running the following command:
Next, create the application home page by creating an index.html file at the root of the project folder and add the following code:
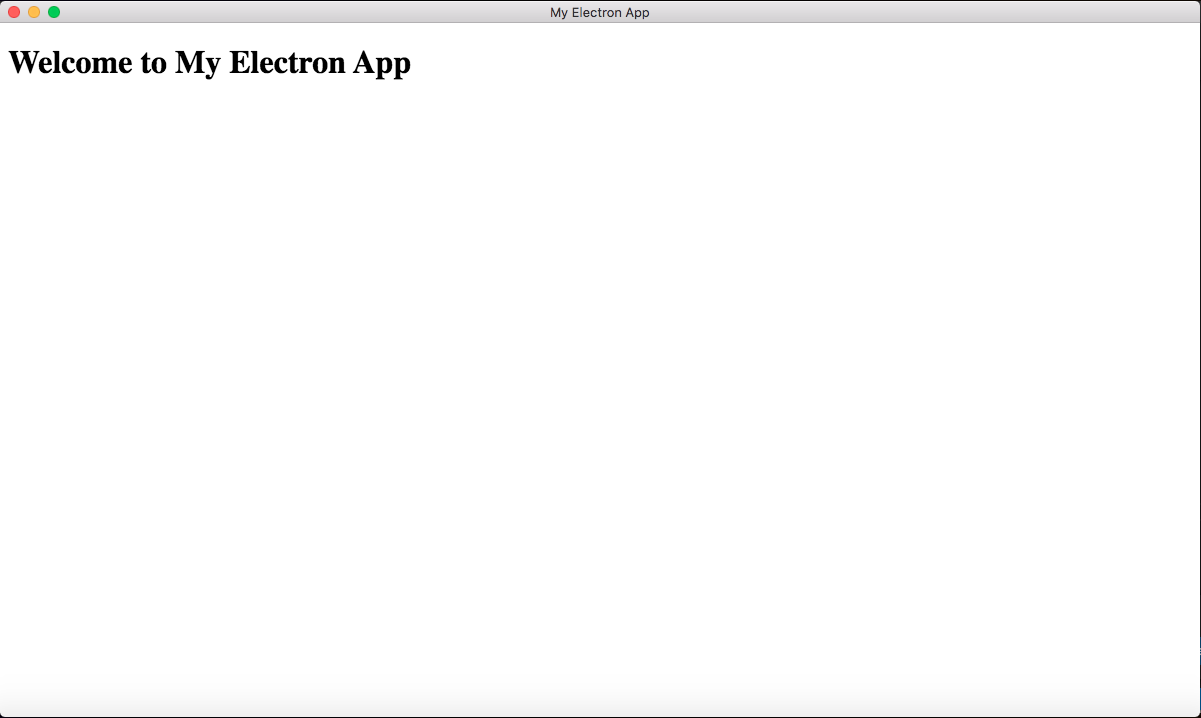
The HTML code above creates a simple webpage with a title that reads “My Electron App” and an h1 tag in the body with the text “Welcome to My Electron App”.
At this point you have a basic Node.js application. The next step is to convert your app into a desktop application using Electron.js.
Start by installing the Electron.js library. Back in your command prompt, still in your project’s root directory, run the following command:
Once the installation is complete, create a new file called main.js. This will be the entry point into the application: it’s the Main process script. This script will do the following:
- Create a web page for the application home screen
- Load the application home screen when the Electron.js app is booted up
- Load the home screen when the app’s icon is clicked if the app’s windows are closed but the app is still running
In your new file, main.js, begin by importing the necessary packages and then creating a function whose job is to create a new web page for the application home screen:
In the code block above, app (the Electron.js application object) and BrowserWindow (the Electron.js module for creating and loading web pages) are imported from the Electron.js package. The path module is also imported, enabling you to work with the project directory.
After the imports, you create the loadMainWindow() function. This function uses the BrowserWindow object to create a new 1200px by 800px browser window that loads the index.html file from the project’s root.
Next, beneath the existing code, add a call to the loadMainWindow() function so that the function is invoked immediately after the app boots up:
The next step is to take care of an issue on some operating systems where the application still remains active even after all windows have been closed. This often occurs on non-MacOS platforms. To fix this, add the following below the existing code in main.js:
This code instructs the app to listen for the window-all-closed event, which is fired when all windows created by the Main process have been closed. It then checks if the platform is MacOS and if not, it explicitly quits the application, ending the Main process and thus terminating the application.
The final step in this file is to ensure that the application boots up when its icon is clicked in the operating system’s application dock when there are no windows open. To achieve this, add the following code at the end of the file:
This code listens for the activate event on the app. When the event is emitted, this code checks if there are any windows currently open that belong to the application. If not, the home screen is loaded by calling loadMainWindow().
That’s it for the main.js file.
Configure the Application
You’ll need to make some changes to your package.json file to ensure that it’s configured correctly to work with Electrion.js.
Open your package.json file. Change the value of the main key to main.js as shown below:
Next, add a start script to the scripts section like below:
Save and close the file. At this time, you can run your new Electron.js application with the following command:
This will boot up the application and load the home screen.
Create a Simple Task List System
In order to learn some other features of Electrion.js, you will be creating a bare-bones task list system.
To begin, you’ll add some basic content to your app’s home screen.
Open the index.html file and add the Bootstrap library just below the meta tags in the head section as shown below:
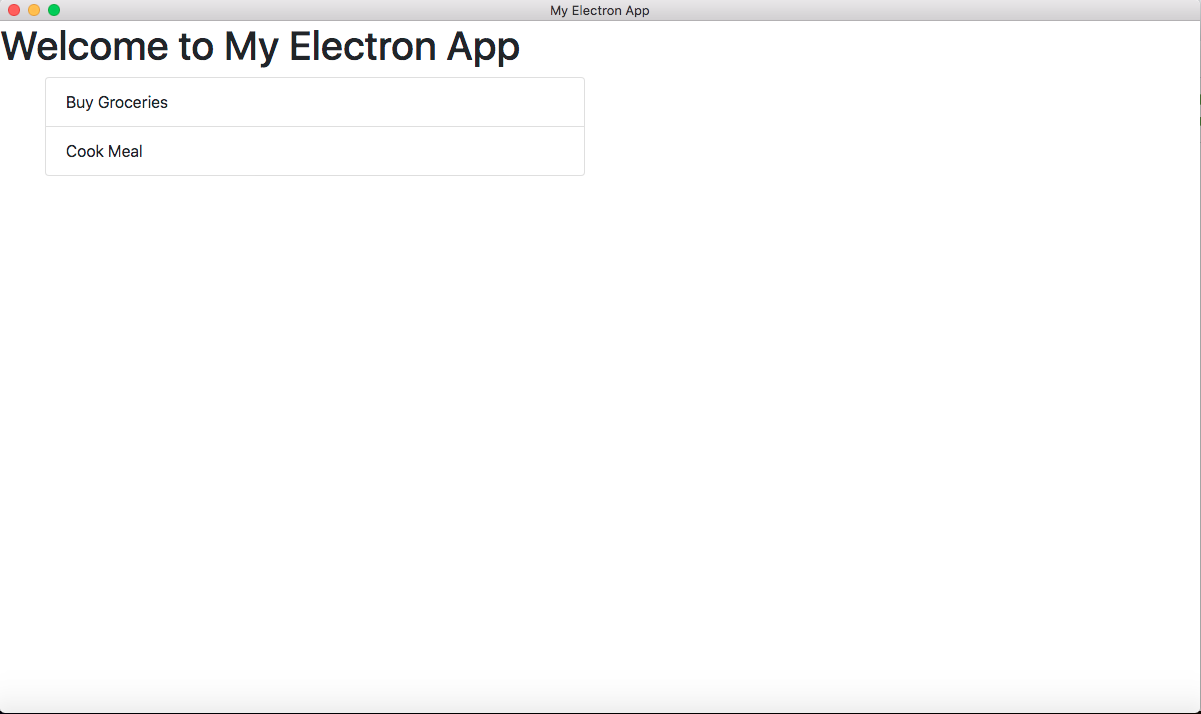
Next, inside the body element, below the h1 tag, add the highlighted lines to create a two-column layout. The first column will contain the task list:
If the app is currently running, close it by pressing Ctrl+C in your command prompt and restart it by running npm start. You will see the screen below:
Display Desktop Notifications Using Electron.js APIs
In this section, you'll create the functionality to add a new item to the task list and then display a notification when a new item is added. The aim of this section is to demonstrate communication between the Renderer and the Main processes.
Add a New Item to the Task List
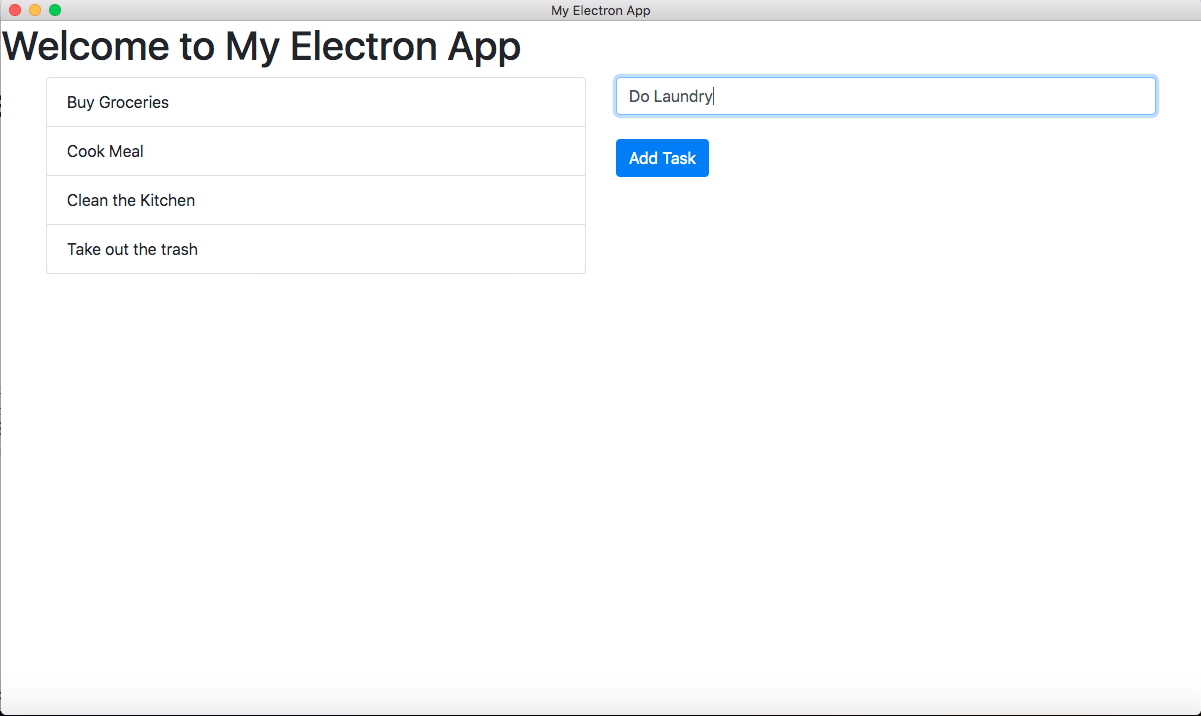
In your index.html file, add a form input and button element. The user will interact with these elements to add new items to the task list. To add these elements, copy and paste the highlighted lines into the second column of the two-column grid:
Now, create a new JavaScript file called script.js at the root of the project and import it into the index.html file as shown below:
Inside the script.js file, add the following code:
In the code above, a click event handler is added to the button element you added in index.html. When the button is clicked, the value of the input field is inserted into a new <li> element, which is appended to the task list.
Now, quit the application and restart. Try adding a few new items by typing in the input field and clicking the Add Task button.
Showing Notifications for Newly Added Items
The final functionality you’ll add to the application is desktop notifications. A notification will display every time a new item is added to the list. Even though Electron.js can create notifications using the HTML 5 Notifications API from the Renderer process, you will be using the Electron.js Notification module which is only available in the Main process. Thus, the Renderer process will need to communicate with the Main process for the notifications to work.
To achieve this, we will be using the ipcRenderer and ipcMain modules. The ipcRenderer module is used here to send a show-notification event to the Main process with the task as payload. Refactor your script.js file to reflect the changes highlighted below:
The Main process needs to respond to this event by displaying a notification with the new task.
First, change the first line in main.js to the following:
This adds imports of the ipcMain and Notification modules from the Electron.js package. Next, below all the existing code in main.js, add the following:
The code above uses ipcMain to listen for the show-notification event sent from the Renderer process to create a notification and display it.
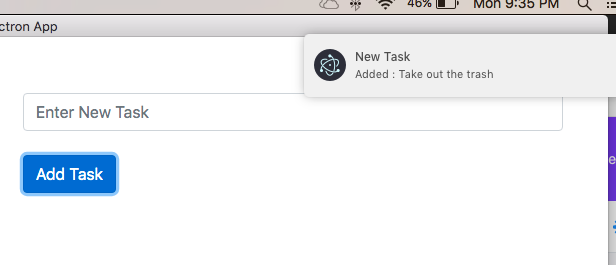
Testing
To test all the code written so far, quit the application and restart it. Once the app loads successfully, add a new task item. You will see a notification pop-up at the top right corner of your screen like below:
Conclusion
Electron.js is a game-changer in the world of application development as it gives immense power to web developers to enter the native application development space with their existing set of skills.
In this tutorial, you have learned:
- What Electron.js is and why you should use it
- The structure and inner workings of an Electron.js project
- The prerequisites to building an Electron.js project and how to build one
- How to use native platform features in your Electron.js projects
Next Steps
To go further, you can expand this application by doing any of the following:
- Adding authentication functionality for authenticated usage of the app (check outTwilio Verify)
- Add voice capabilities to your desktop app (check out Twilio Programmable Voice)
Fikayo Adepoju is a full-stack web and mobile developer with 10+ years of experience. Currently, he works as a full-time technical content creator writing technical articles for various blogs and creating video courses. Because of his passion for teaching and helping developers, Fikayo hopes to continue as a full-time technical author. He is just a DM away on Twitter @coderonfleek
Articles: https://github.com/coderonfleek/articles-by-fikayo
Twitter: https://twitter.com/coderonfleek
Related Resources
Twilio Docs
From APIs to SDKs to sample apps
API reference documentation, SDKs, helper libraries, quickstarts, and tutorials for your language and platform.
Resource Center
The latest ebooks, industry reports, and webinars
Learn from customer engagement experts to improve your own communication.
Ahoy
Twilio's developer community hub
Best practices, code samples, and inspiration to build communications and digital engagement experiences.