Build a Video App with JavaScript and the Twilio CLI in 9 Minutes
Time to read: 3 minutes
May 28, 2020
Written by
Reviewed by

With many of us now working remote, video chats are so in right now. Here’s how to get up-and-running with a video chat room in nine minutes using Twilio Programmable Video and the Twilio Serverless Toolkit in JavaScript.
Setup
To build a Twilio Programmable Video application, we will need:
- A Twilio account - sign up for a free one here and receive an extra $10 if you upgrade through this link
- Account SID: find it in your account console here
- API Key SID and API Key Secret: generate them here
- The Twilio CLI
Save your API Keys somewhere to use them soon and then install the Twilio Serverless Toolkit via the Twilio CLI if you haven't already by running
You can then see what commands the Serverless Toolkit offers by running
Make a Serverless Project
Create a Serverless project using a blank template by running on the command line
Replace {insert-project-name} with your project name--I called mine tfvideo. When the command completes, a directory with the project name will be created under your current directory.
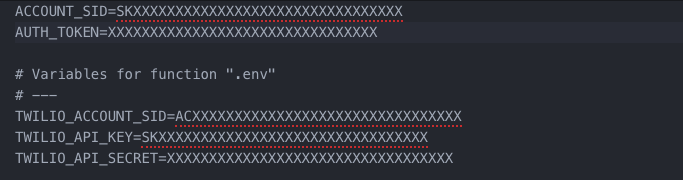
The project directory contains some ready-made folders. In functions, add a file called video-token.js and in assets add two files: video.html and index.js. Set your environment variables in .env. You can leave the first two lines containing ACCOUNT_SID and AUTH_TOKEN alone. Below them, add your Account SID, API Key, and API Secret:
You can delete or ignore functions/blank.js which was deployed with the new assets.
Generate an Access Token
In functions/video-token.js add the following code to generate an access token. Here we set environment variables, a fixed room name, and the ACCESS_TOKEN_IDENTITY which will be different for every user. All users will be granted access to the room tf. This code was modified from this page which also contains more information on Access Tokens.
Make the Video Web Page
Now open the blank assets/video.html file you made. We're going to write some bare-bones HTML including buttons for joining and leaving the room, a video tag that will automatically display a preview of the user's camera, and the Axios and Twilio Video.js libraries and assets/index.js file we're about to make via script tags:
Build the Video App
In assets/index.js add the following code. In a nutshell, this copy-and-pasteable script will:
- set the serverless domain name (this will be the base URL) as whatever you called your project with the CLI template
- set the name of your room name, and some variables
- get the video element and display it in the preview screen
- generate an access token via
axioscall to thefunctions/video-token.jsfile when a user joins the room - connect users to the
tfroom when they clickbutton-join - disconnect users from the room when they click
button-leave - display a remote participant's video by attaching an event listener to subscribe or unsubscribe their tracks to the
tfroom. If they are already in the room, we iterate over the existingparticipantsand attach an event listener totrackSubscribed.
Lastly, if you change the room name, you must also change the token that's generated.
Yes, this has been Programmable Video demystified and simplified!
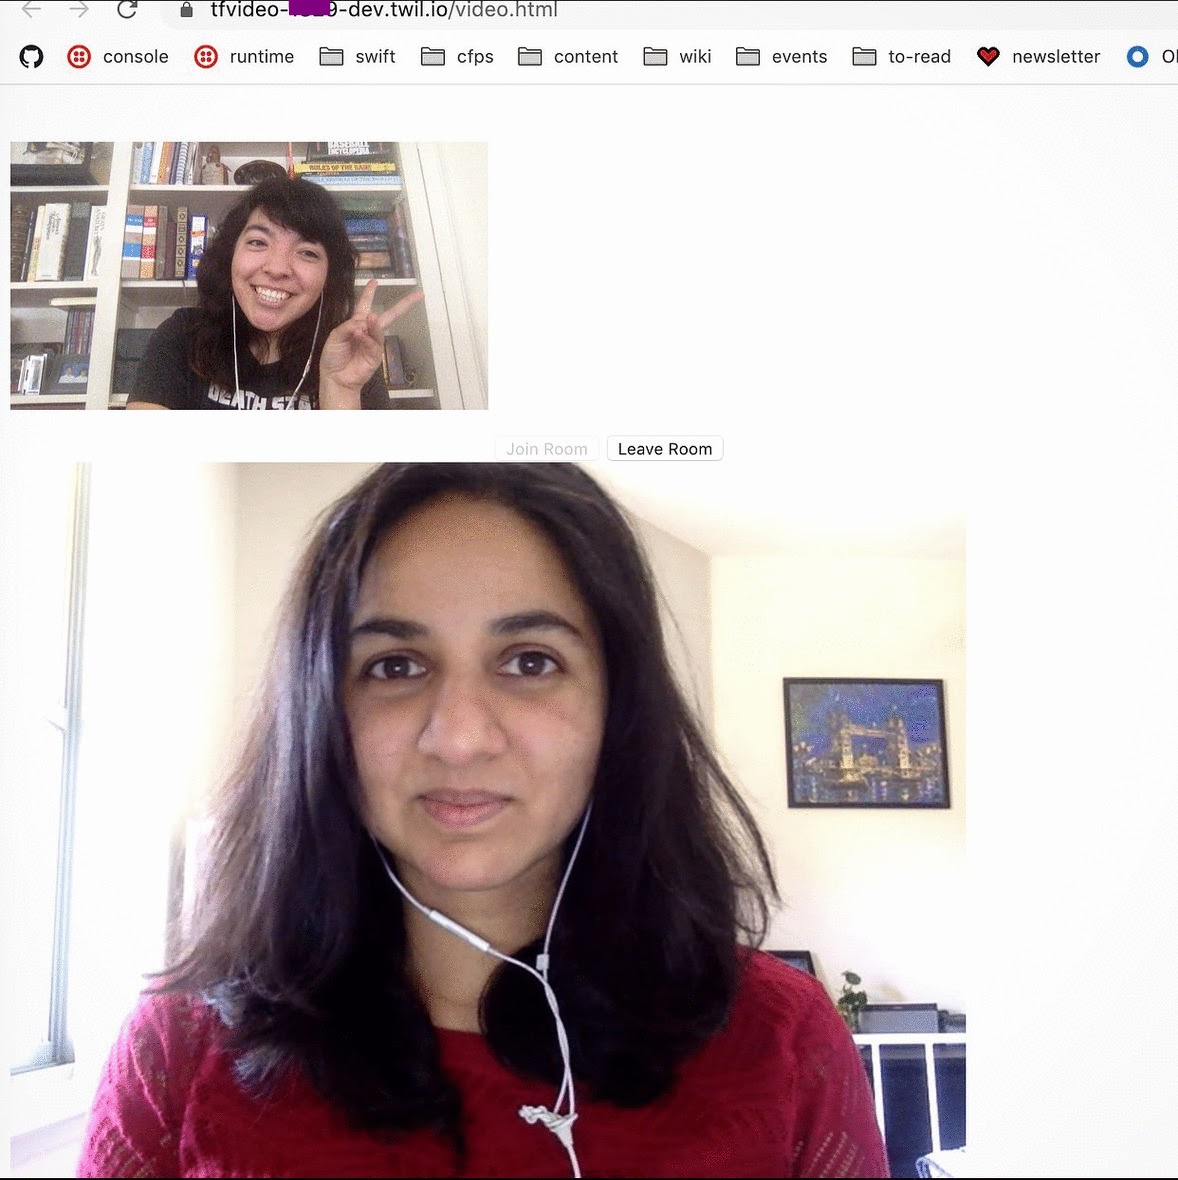
On the command line, run twilio serverless:deploy. The CLI will congratulate you with Serverless project successfully deployed and some other deployment details. Grab the assets/video.html URL under Assets, share it with your friends, and tada! You have your own video room to use and share when you need a quick video call.
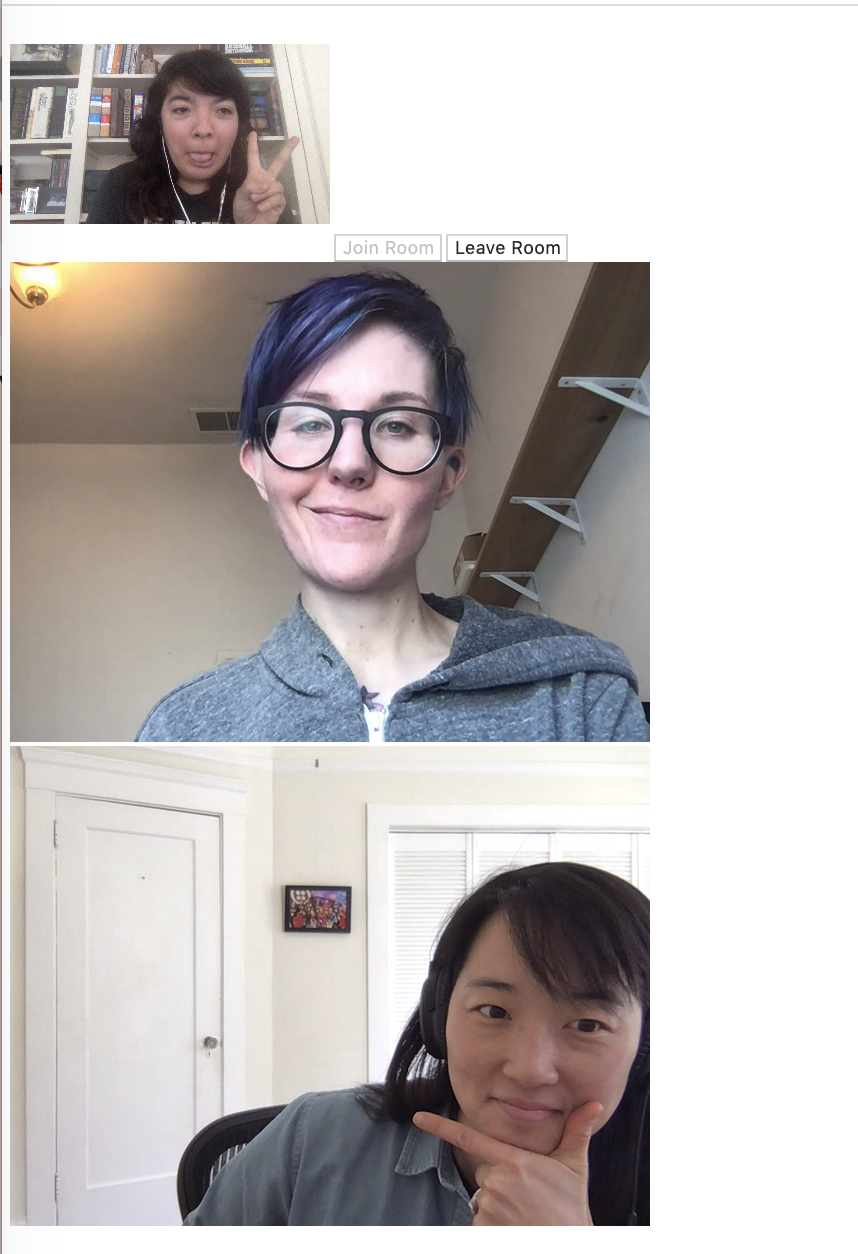
This app is pretty bare-bones but definitely decent given the lack of CSS written, eh? The complete code can be found here on GitHub.
What's Next
Twilio's Serverless Toolkit makes it easy to host apps and get them up-and-running quickly. Next you can write some more CSS to prettify the app, add a programmable chat feature or more Twilio Video features, get users' names and display them when they are in the chat, and more. Let me know online or in the comments what you're building.
- Twitter: @lizziepika
- GitHub: elizabethsiegle
- email: lsiegle@twilio.com


Related Resources
Twilio Docs
From APIs to SDKs to sample apps
API reference documentation, SDKs, helper libraries, quickstarts, and tutorials for your language and platform.
Resource Center
The latest ebooks, industry reports, and webinars
Learn from customer engagement experts to improve your own communication.
Ahoy
Twilio's developer community hub
Best practices, code samples, and inspiration to build communications and digital engagement experiences.