Display Local Time in Multiple Timezones in Flex Insights
Time to read: 3 minutes
October 06, 2021
Written by
Reviewed by

Flex Insights currently supports only one reporting timezone per account (reporting workspace). That means that if you have multiple contact centers around the world, then only locations with the reporting workspace timezone will see conversations and activities in their time. Other locations would need to use external tools (e.g., API export, Excel, Google Sheets) to convert the timestamps into their local date and time.
In this blog post, I will help you create a custom metric to display the time of a conversation or activity in the local timezone. However, there is no way to show the date due to the different number of seconds in each month and year.
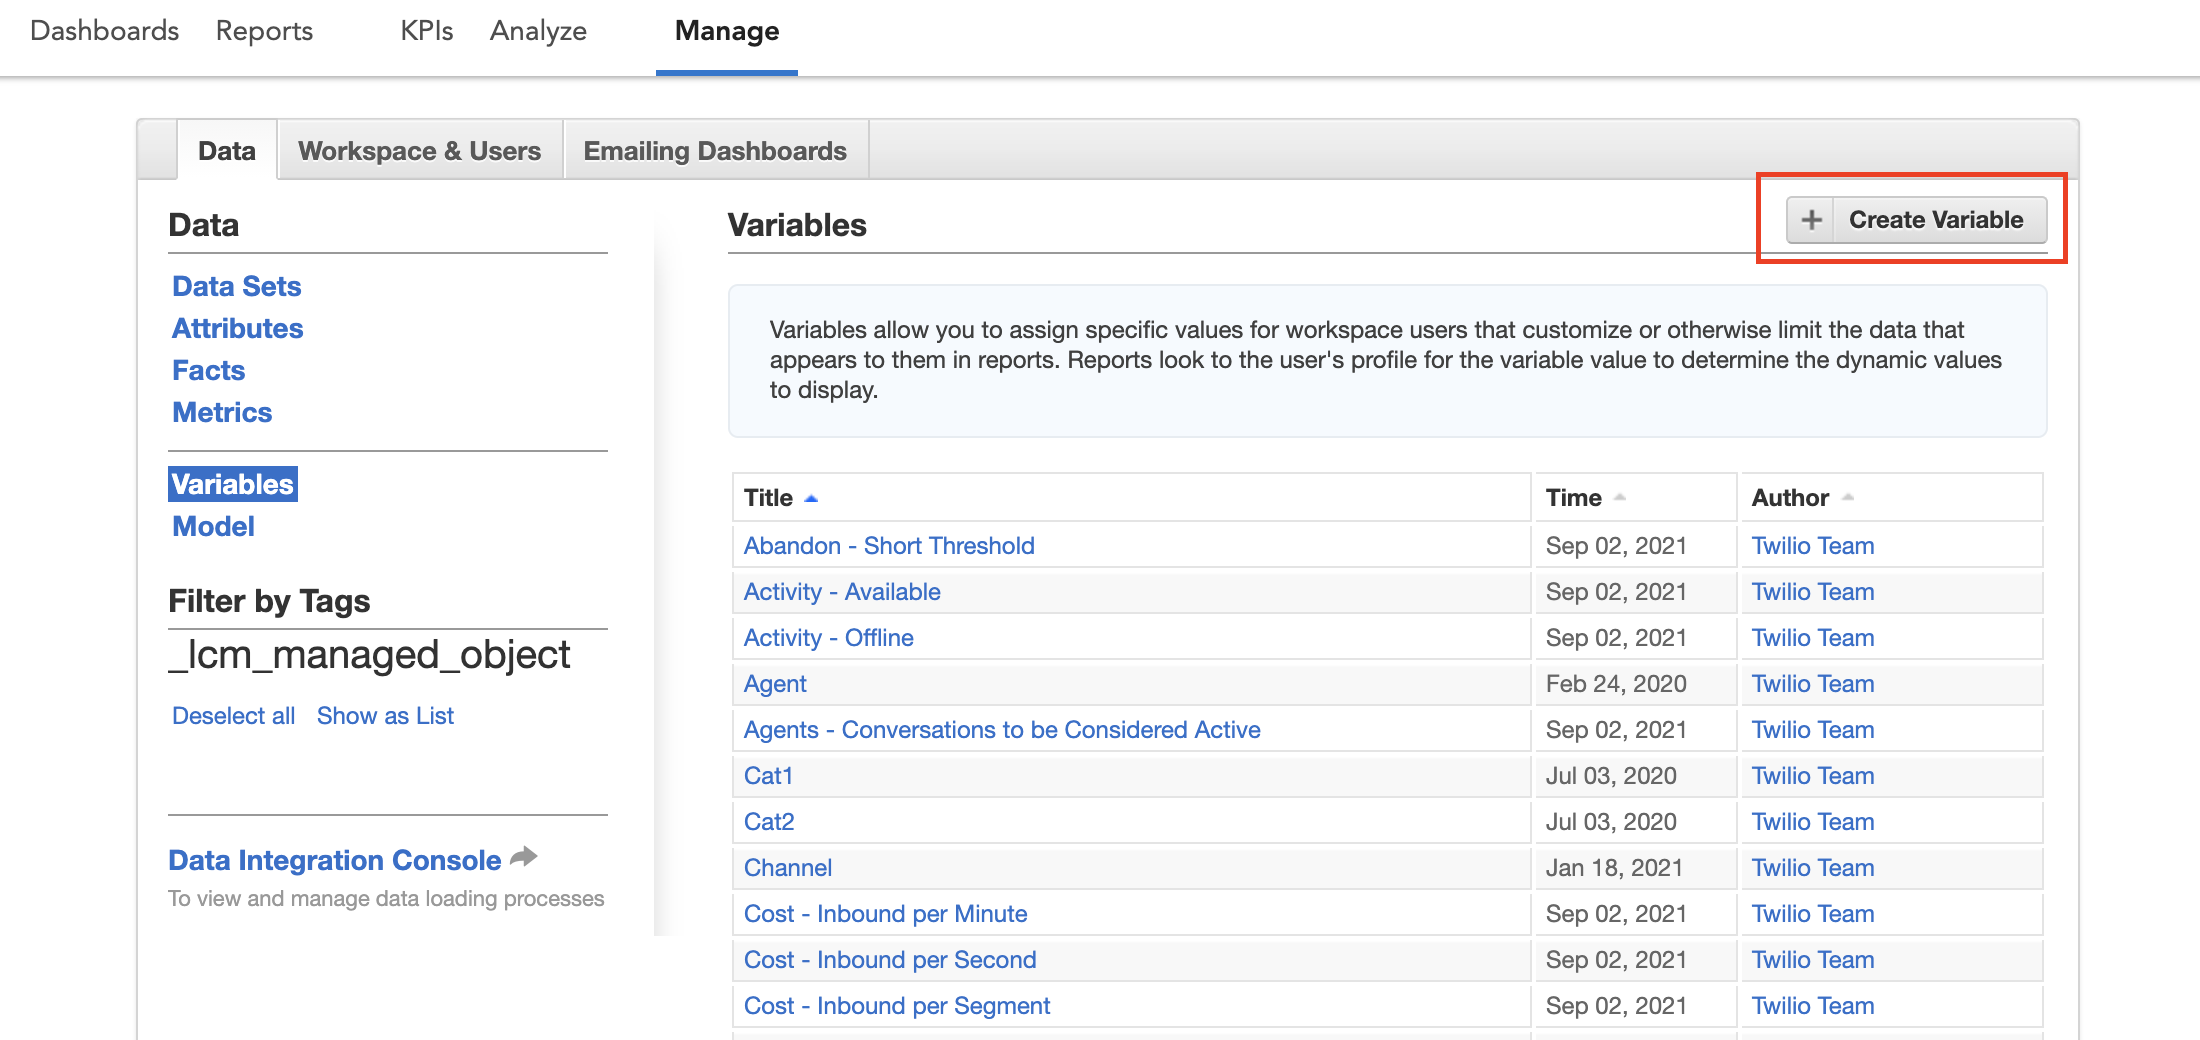
Prerequisite: Get access to variables
As a first step, you need to get access to variables in Flex Insights Analytics Portal.
To get the access, please open a support ticket in your Console or through the Twilio Help Center. Our support engineers set a special role for a given user, and they can add the proper flag on your account.
After getting the special role, you should be able to see the Create Variable button on the following screen in Analytics Portal > Manage > Variables:
Configuring User-Based Variable Values
Imagine that we have three call centers. The main one is in the UTC timezone, which is also the Flex Insights workspace reporting timezone. The second branch is in the United States - San Francisco (UTC -7), and the third one is in Australia - Melbourne (UTC +11).
We would first create a new variable called "Timezone" with UTC's default value "0".

Assign a numeric value to each supervisor from the US (-7) and Australia (11). You can keep the default value for all UTC supervisors.
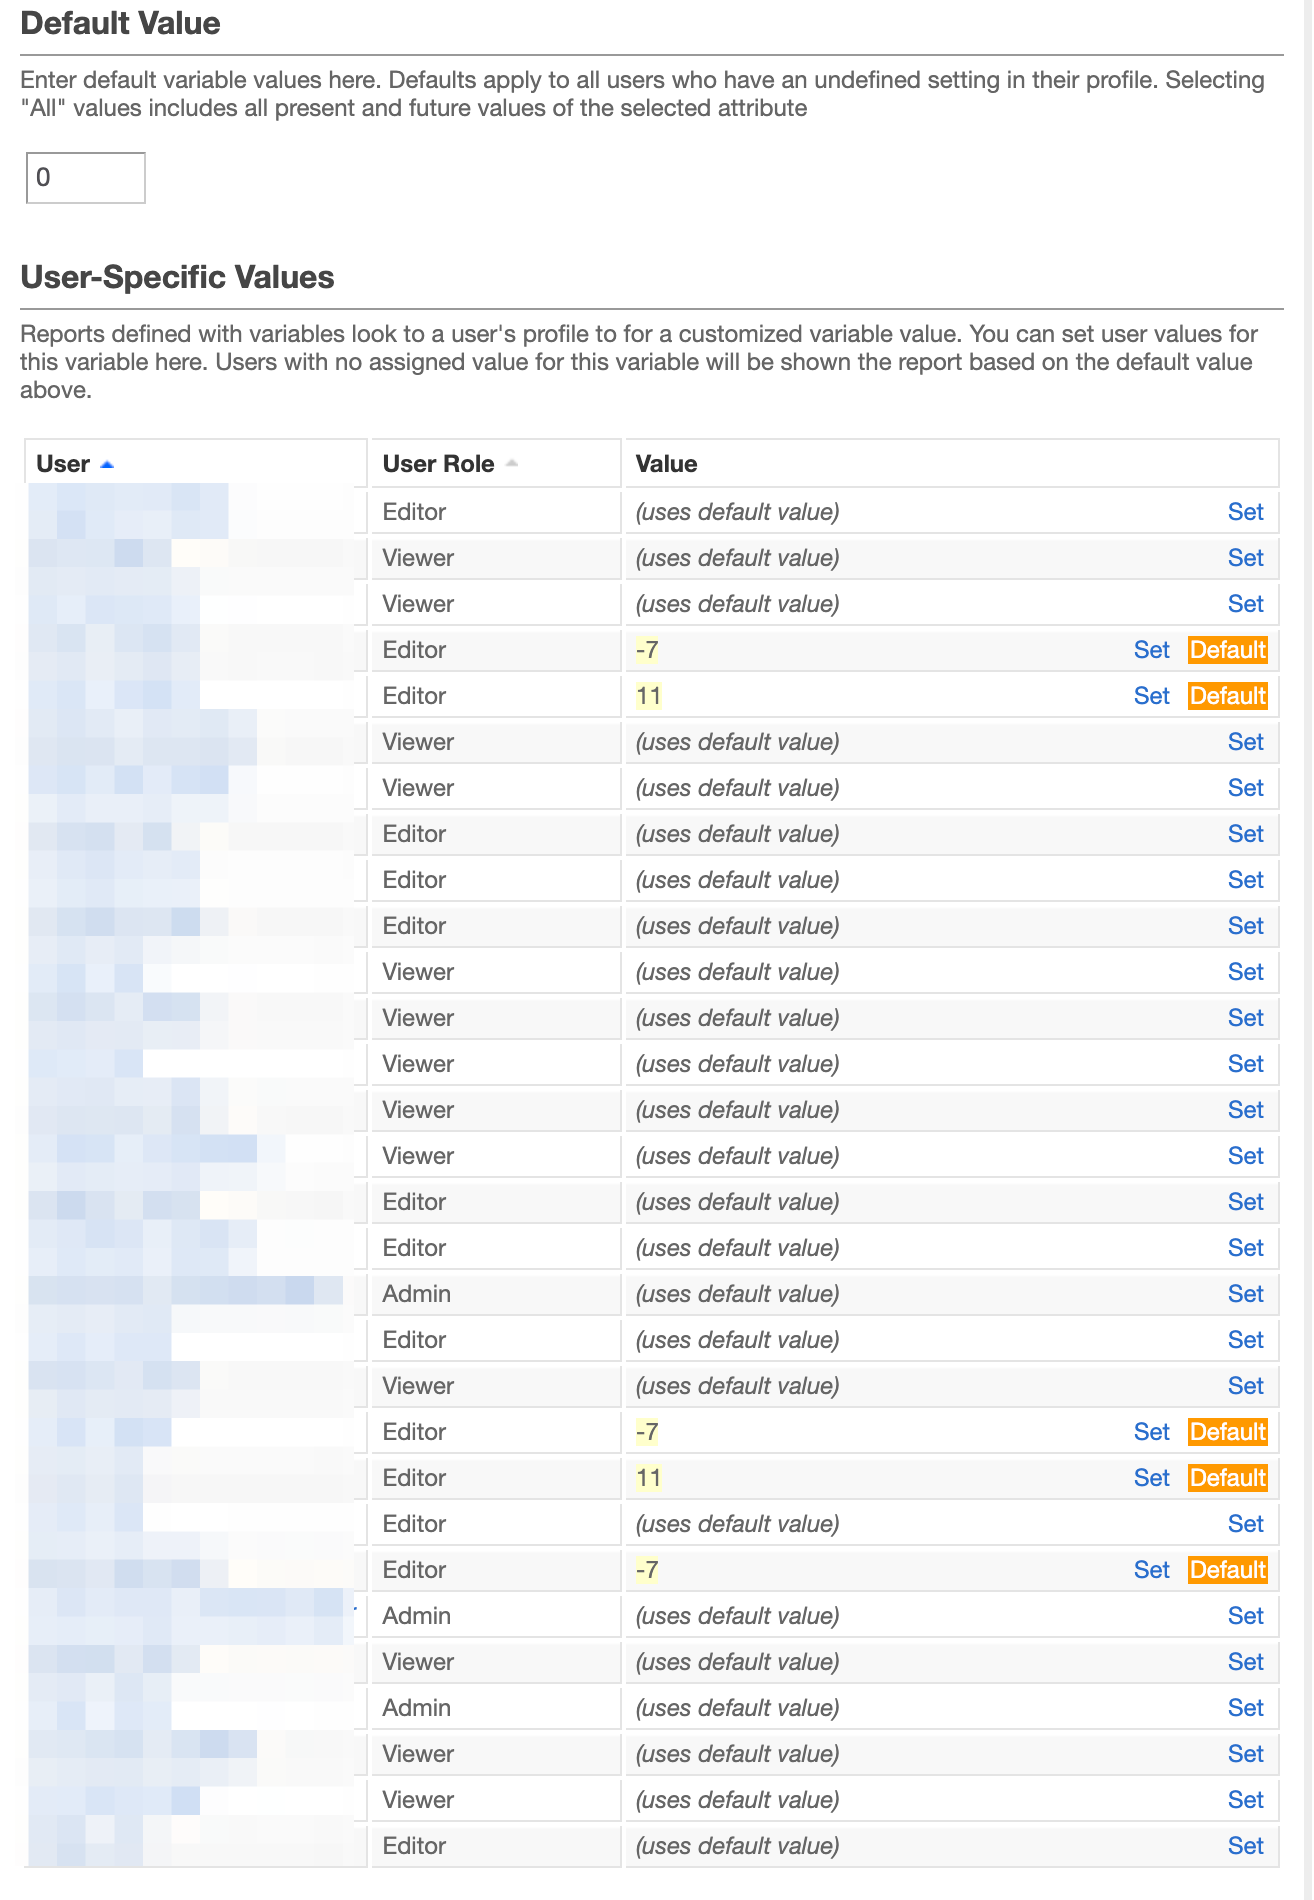
Don't forget to save changes on top of the variable edit window.
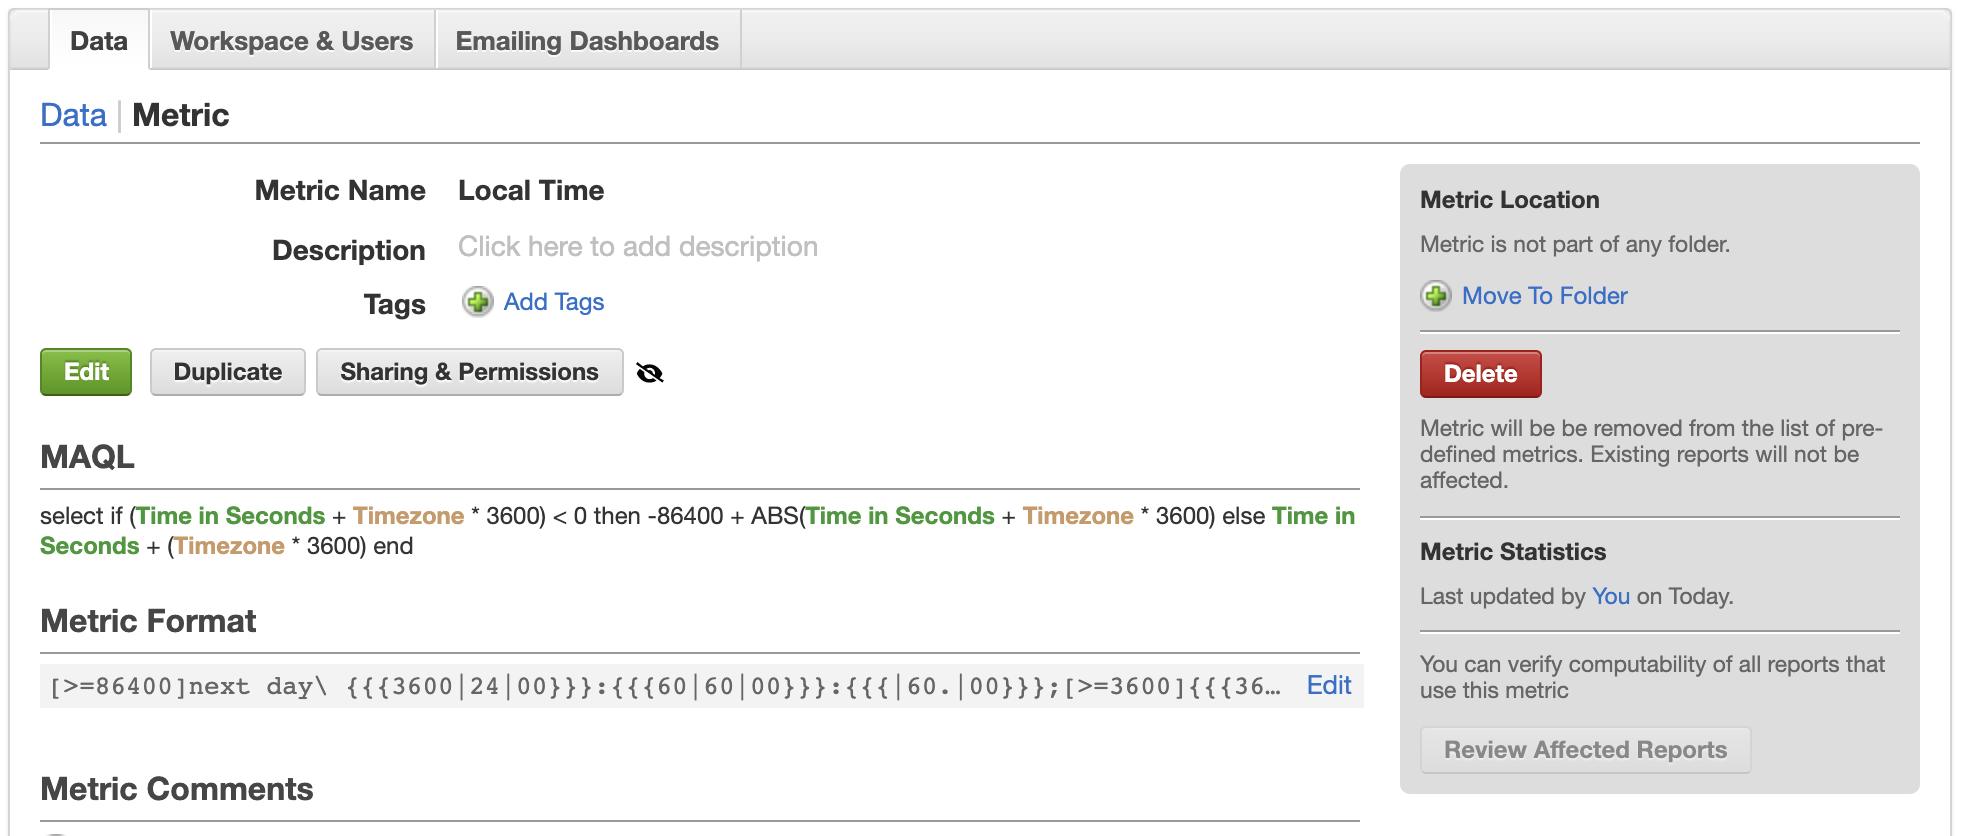
Create a New "Local Time" Metric
As a next step, we create a new metric in Analytics Portal > Manage > Metrics. Click Create Metric and name it (for example, "Local Time"):

The definition of the metric is:
select if (Time in Seconds + Timezone * 3600) < 0 then -86400 + ABS(Time in Seconds + Timezone * 3600) else Time in Seconds + (Timezone * 3600) end
Please note that the metric Time in Seconds and the variable Timezone need to be selected from respective menus on right side.
Let's change the metric format to:
[>=86400]next day\ {{{3600|24|00}}}:{{{60|60|00}}}:{{{|60.|00}}};
[>=3600]{{{3600|24|00}}}h {{{60|60|00}}}:{{{|60.|00}}};
[>=0]{{{3600|24|00}}}h {{{60|60|00}}}:{{{|60.|00}}};
[<0]previous day\ {{{3600|24|00}}}h {{{60|60|00}}}:{{{|60.|00}}};
This is how the metric should look now:
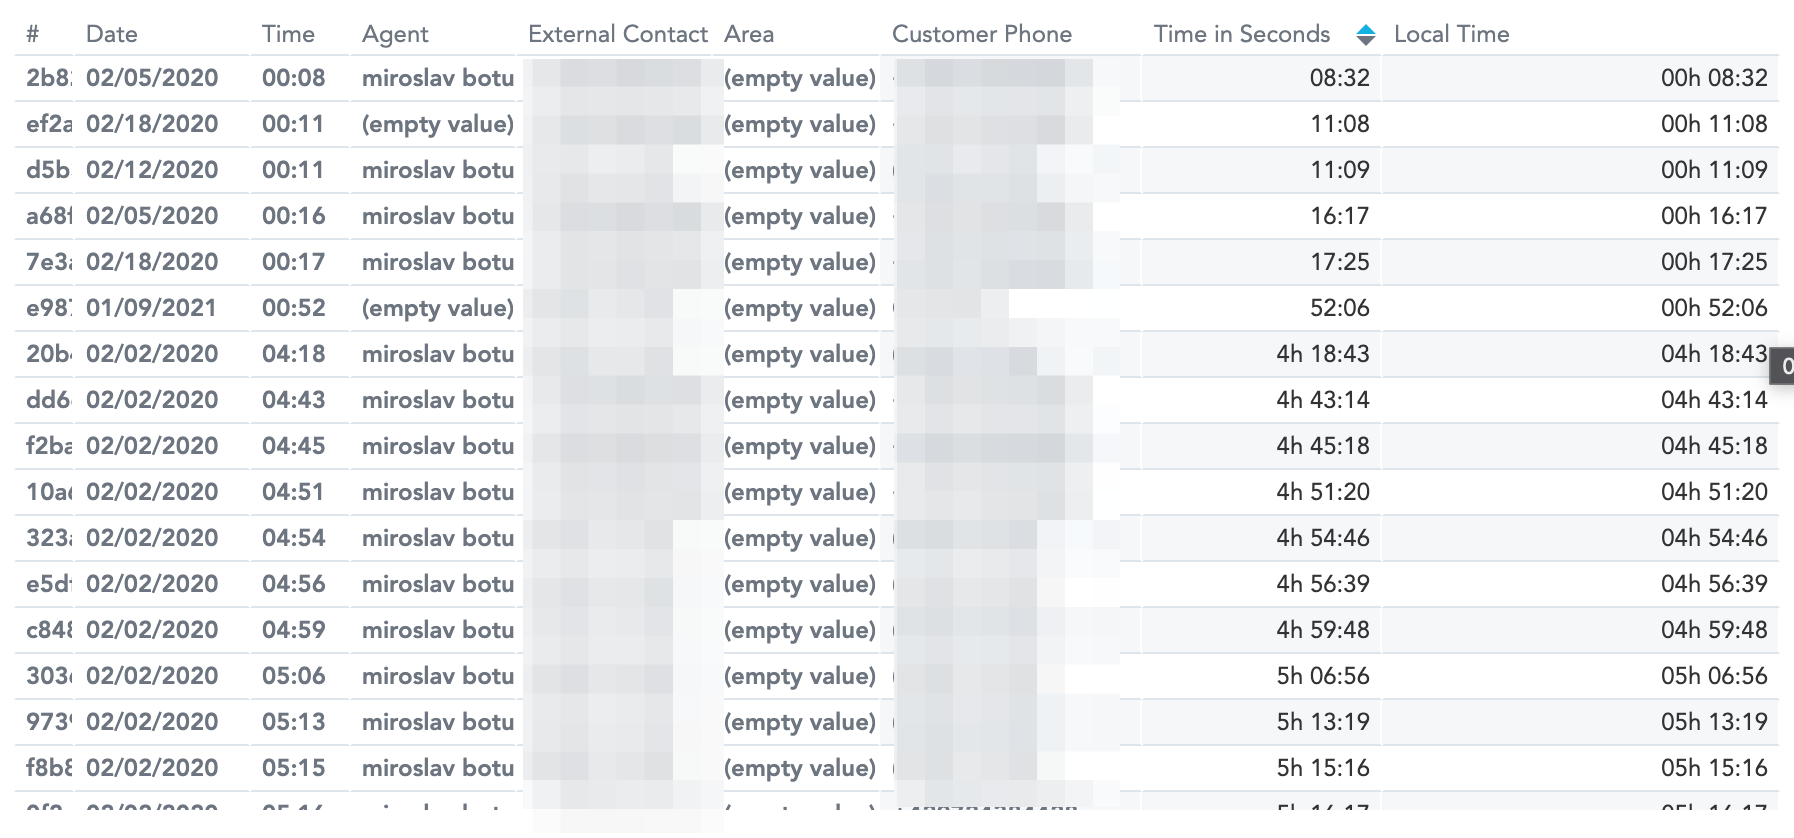
Use the "Local Time" Metric in Report
Based on the Supervisor logged into the system, let's create a simple report where we list all conversations together with the main timezone and converted time.
Navigate to Analytics Portal > Reports, click Create Report button.
In the Filter section, select Virtual = No to only display conversations.
In the How section, select Segments (mandatory), optionally select Date, Agent, Queue.
In the What section, select Time In Seconds (local time in HH:MM:SS format) and your new metric Local Time.
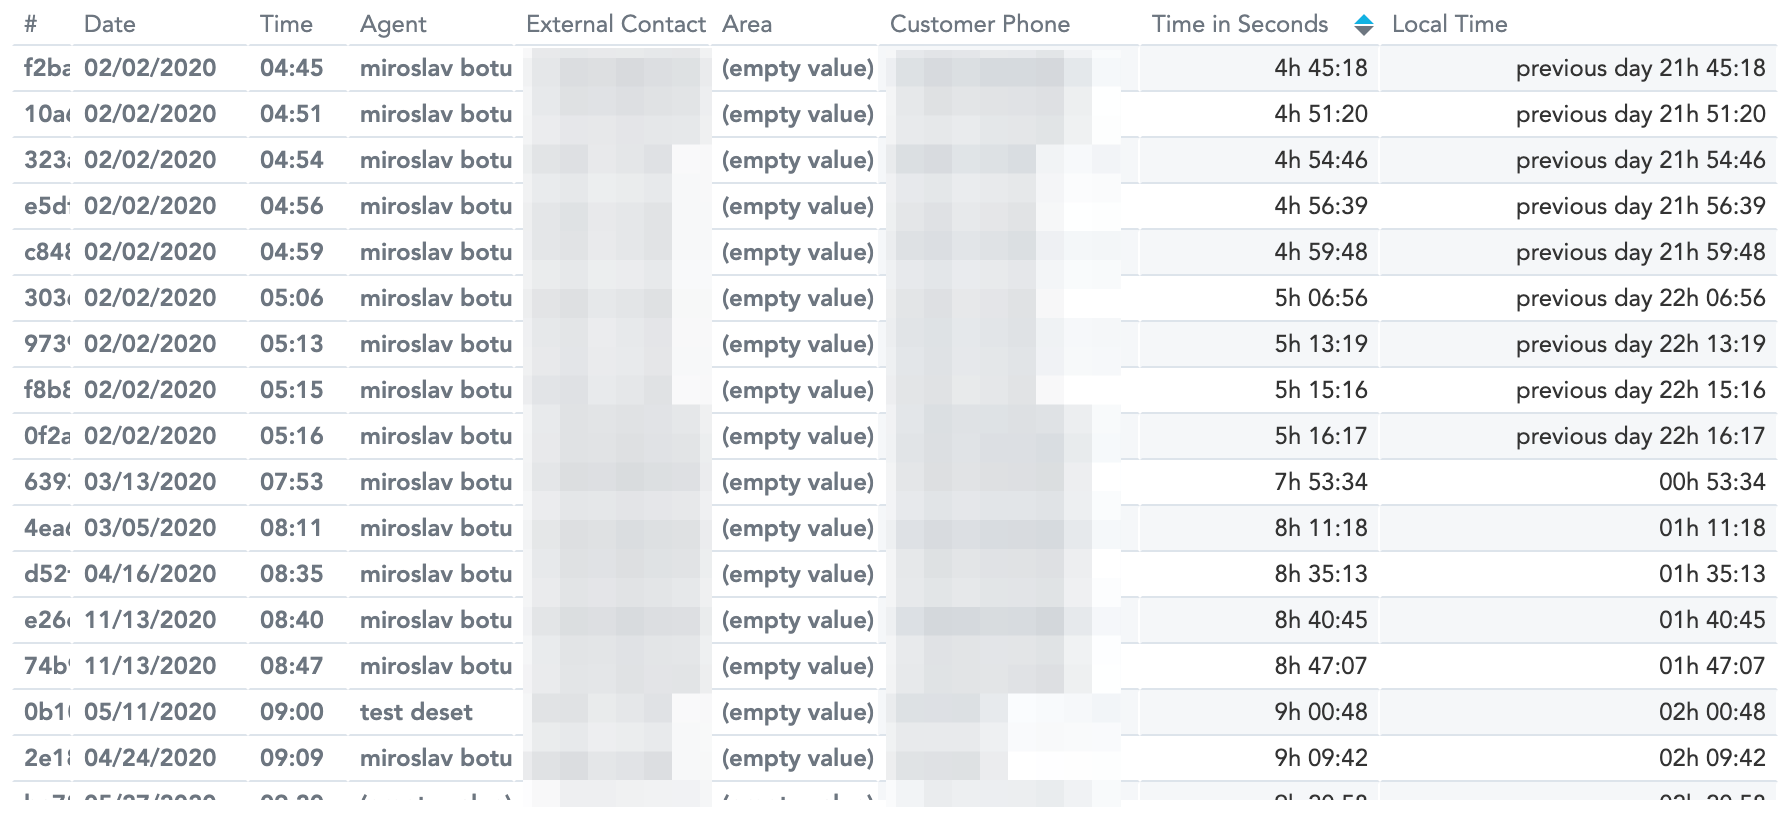
If we login to Flex Insights with a user that works in UTC (variable Timezone is set to default 0), then both times will be the same:
If we log in to Flex Insights with a user who works in San Francisco (variable Timezone is set to -7), we can see Local Time shifted back by 7 hours. If it goes across midnight, we are adding a "previous day" tag:
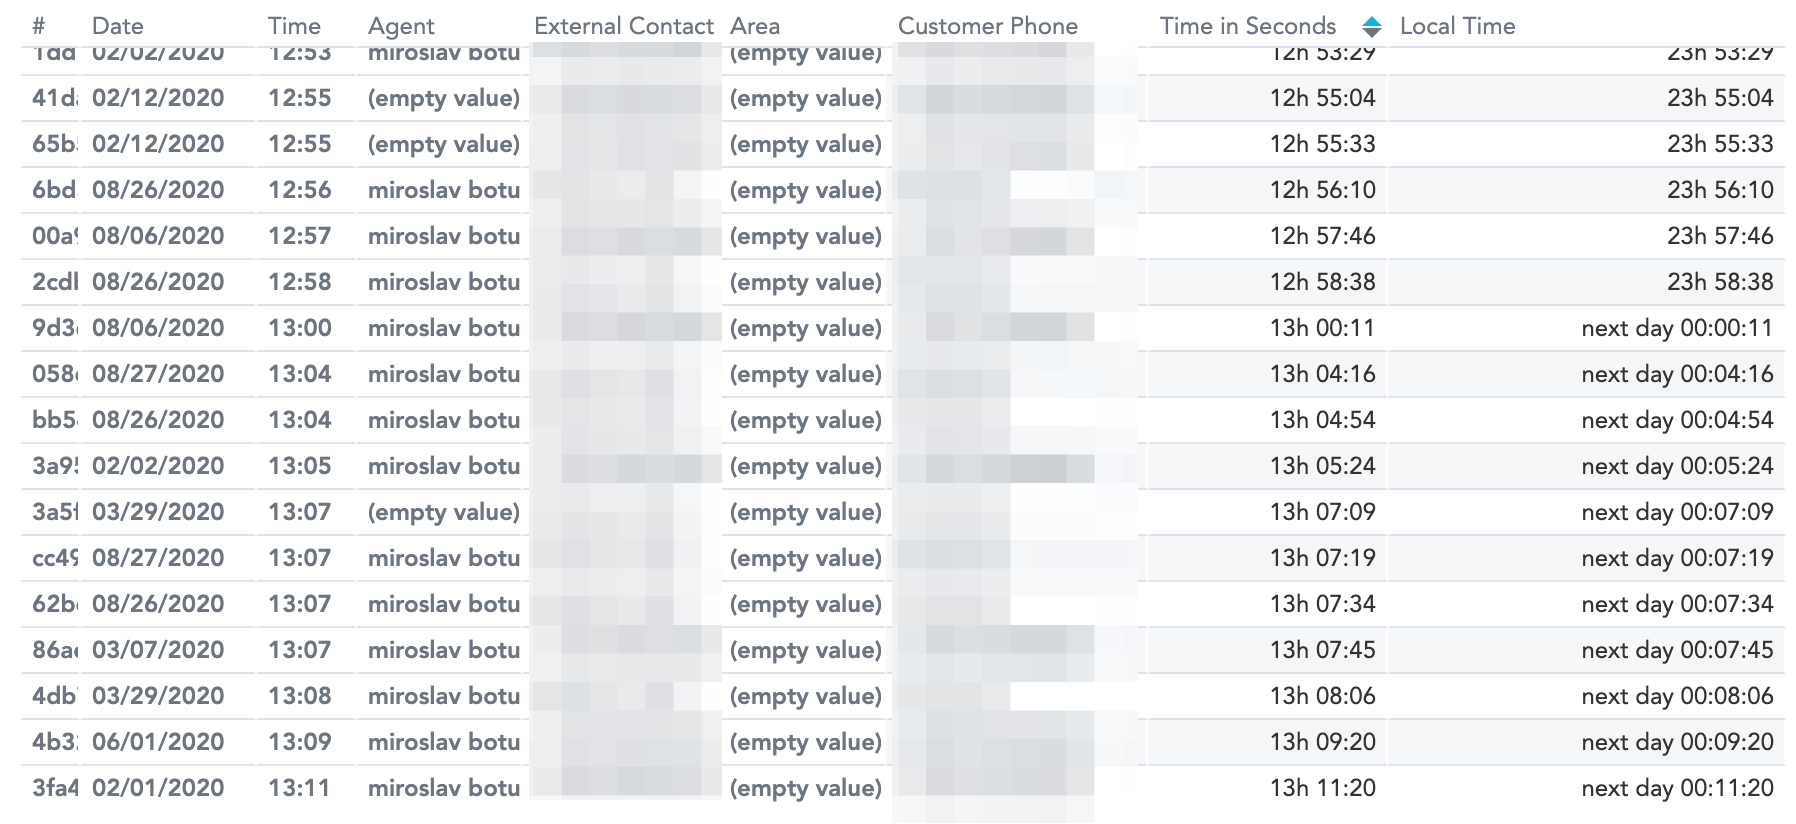
If we log in to Flex Insights with a user who works in Sydney (variable Timezone is set to 11), we can see Local Time shifted forward by 11 hours. If it goes across midnight, we are adding a "next day" tag:
Displaying local times in multiple timezones in Flex
Awesome! Now you have a custom variable in Flex which gives you the ability to display time in any timezone you wish. Although it doesn't give you the ability to filter or slice by the date attribute in different timezones, your supervisors do not have to export tables to Excel to see local time anymore. Additionally, the time value changes based on a logged user so you do not have to create a report for each timezone.
Now that you are displaying local dates and times, see our guide on how to build on Flex Insights.
Miroslav Botur is the Solution Architect of Twilio Professional Service. He is focused mainly on Flex Insights and enhancing analytics data by using Flex plugins, Functions and advanced Studio flows.
Related Resources
Twilio Docs
From APIs to SDKs to sample apps
API reference documentation, SDKs, helper libraries, quickstarts, and tutorials for your language and platform.
Resource Center
The latest ebooks, industry reports, and webinars
Learn from customer engagement experts to improve your own communication.
Ahoy
Twilio's developer community hub
Best practices, code samples, and inspiration to build communications and digital engagement experiences.