Blink an ESP8266 LED in Real-Time using Twilio’s Sync for IoT
Time to read:
October 02, 2017
Written by
This post is part of Twilio’s archive and may contain outdated information. We’re always building something new, so be sure to check out our latest posts for the most up-to-date insights.

If you’re anything like me, you’ve got an entire desk drawer full of hardware dev boards and sensors waiting patiently for a project. (Okay, fine, a garage storage rack.)
That’s why I was so excited when we announced we’re bringing Twilio’s Sync to IoT devices. Sync is Twilio’s real-time state synchronization product, allowing you to persist, update, and check variable state from anywhere the internet is found. We added MQTT over TLS support to Sync, opening up Sync’s super-scalable architecture to many of those aforementioned drawer hardware devices.
If you can’t tell, I’m over the moon at this development. Follow along with this blog post; we’re going to use an Espressif ESP8266 Dev Board, Sync for IoT, the Arduino IDE and billions of electrons to blink an LED from the command line.
Sync-ing Our Capabilities
Sync for IoT is currently in Developer Preview, so you’ll first have to register your interest. (Tell them Paul sent you!)
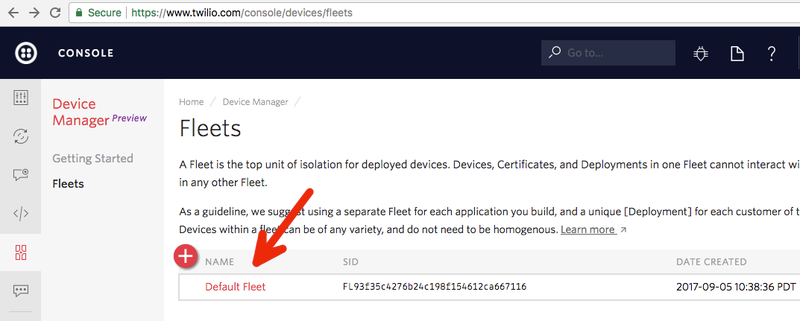
Once you’re in, hop on over to the new Device Manager in the console.
Your IoT Devices are managed as “Fleets” in the Device Manager and Twilio has provided one by default. Visit your Default Fleet to continue (just click it to enter).
You’ll note that Twilio has thoughtfully already created a default “Deployment” and a default “Service Instance” for you. Service Instances in Sync isolate your application data – any primitives that you create will only work for the devices (or computers) you flag into this Instance.
Inside the Fleet, click on the ‘Configure the Deployment’ link. You’ll see a ‘Sync Service Instance’ field with a variable starting with ‘IS’. Don’t worry, you won’t need to save this – you can use the alias of default for this demo.
Tagging Your ESP8266 Into a Sync Deployment
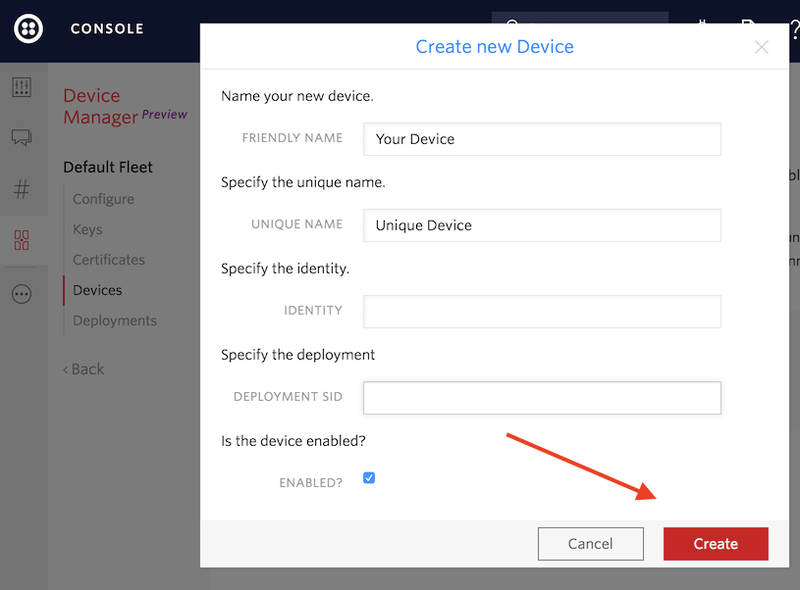
Now click on ‘Devices’ in the left sidebar of the console, then ‘Create’ a new device. Give a creative unique and friendly name – say, ‘ESP8266’ and ‘ESP8266’, then hit the red ‘Create’ button to continue.
Preparing to Authenticate…
Sync for IoT supports two methods of device authentication – X.509 Client Certificates, and Key/Password pairs. While we suggest using certificates wherever possible, today we’ll use a Device Key to authenticate with the ESP8266. Click on the ‘Keys’ link, then ‘Create a Key’ and (after providing a key name) finally ‘Create’.
After creating the key, you’ll be presented with a screen that looks like this:
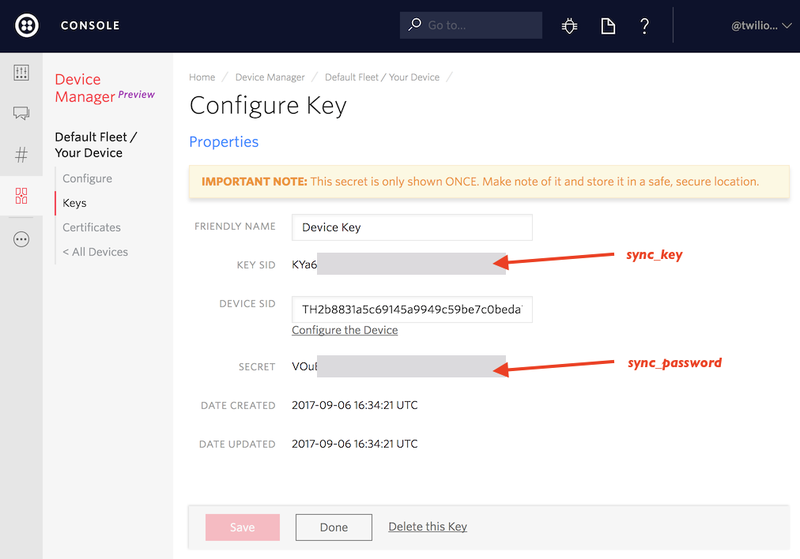
In your favorite text editor (mine’s ed), paste your Key Sid and Secret – you’ll need them soon on the ESP8266.
Document Your State!
Sync’s Primitives are powerful real-time data structures types that will integrate easily into your application. For blinking an LED, we’ll use the most basic primitive, the Document.
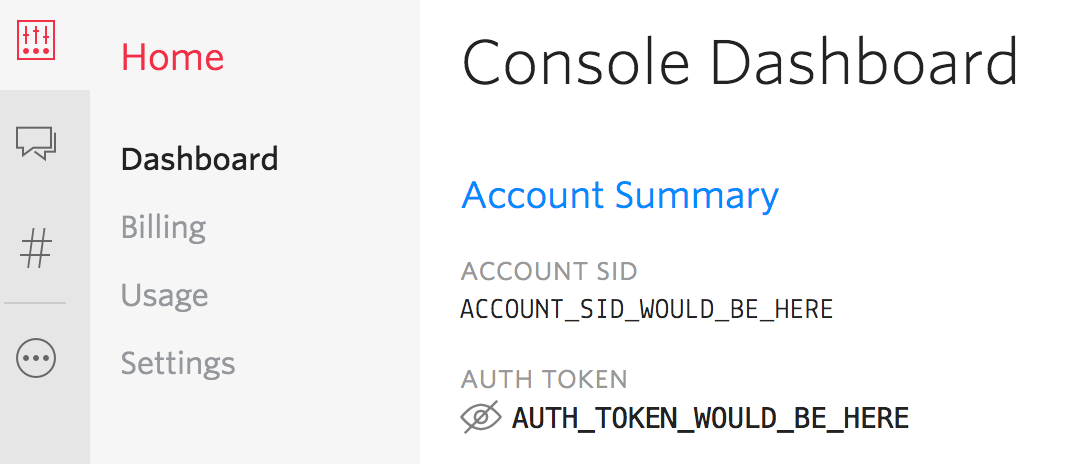
In the Twilio console, grab your Account Sid and Auth Token (click the eyeball icon):
From the command line, create a new Document called ‘BoardLED’ (match my capitalization) and initialize the key ‘led’ to ‘OFF’. Here’s how to do it on *NIX:
Excellent! You’ve taken your first step into a larger, real-time led-blinking world.
Read the Sync Instance’s Document with an ESP8266
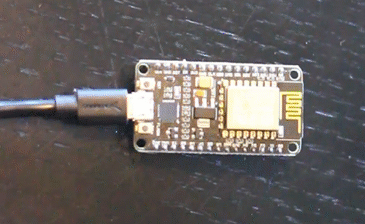
We’re using a NodeMCU ESP8266 Dev Board to blink an LED today. Any dev board, module or bare ESP8266 with an LED attached will work – just make sure you adjust the code to address your particular LED.
Download our code from Github and load it into the Arduino IDE.
In the IDE, install two libraries using the Arduino Library Manager:
- ArduinoJSON (by Benoit Blanchon)
- PubSubClient (by Nick O’Leary)
Assuming you’ve correctly named your Sync Document ‘BoardLED’, you’ll only have to change a few lines in our code.
Change ssid and password to the SSID and Password of a friendly (in-range!) wireless network. Change sync_key and sync_password to the Device Key credentials you copied above.
Compile and flash your ESP8266 and open a serial monitor.
Look at that – you’ve now connected to Sync over MQTT! And the LED is off!
Do Something About the Dark LED…
All this work and no electrons flowing? Let’s fix that.
From the command line, send an update to the BoardLED Document setting the key ‘led’ to ‘ON’. Using cURL, it will look like this:
And… what?? Would you look at that:
That’s how you use the internet to say “Hello, World!” in real-time on hardware!
And Now, For Your Next Synchronized Hardware Trick…
Now that you’ve got a blinking light, you’re only a few steps away from blinking a lighthouse, building a real-time dashboard, or building a real-life multiplayer game. Whichever direction you take your IoT project, Sync is ready for you to build up or scale out.
Want to build something more than a flashing internet-connected LED? Check out the GPS Tracker (and pub visiting!) demo we put together for SIGNAL London. Maybe start digging through our extensive documentation and plan the next billion dollar IoT product. Or, continue the LED flashing theme with one of our other Sync for IoT Quickstarts and put other desk-drawer boards synchronized online.
Whichever path you choose, Twilio and Sync for IoT have your back. We can’t wait to see what you build – LED-related or otherwise!


Related Resources
Twilio Docs
From APIs to SDKs to sample apps
API reference documentation, SDKs, helper libraries, quickstarts, and tutorials for your language and platform.
Resource Center
The latest ebooks, industry reports, and webinars
Learn from customer engagement experts to improve your own communication.
Ahoy
Twilio's developer community hub
Best practices, code samples, and inspiration to build communications and digital engagement experiences.