Getting Started with Gradle and the Spark Framework
Time to read: 6 minutes
September 03, 2015
Written by

One of the worst phrases I hear at student hackathons is “I can’t build a cool web app because I only know Java”. I see two solutions to this dilemma. We can either agree to hunker down and get started learning Ruby or Python or we can embrace existing knowledge and dissolve this misconception. Even a veteran might not associate Java with quickly spinning up a web app, but today I’m going to show you how easy it can be with the Spark Framework. Spark is a Java micro web framework similar to Ruby’s Sinatra or Python’s Flask. With 7 simple lines of code and a small config file we can get spun up serving totally rad caffeinated HTTP requests.
The Kit
I’ll be doing all of this with the Java IDE IntelliJ IDEA because of its excellent integrations. You can grab a free copy of the Community Edition here.
We’ll use ngrok to safely expose our app to Twilio. Check out Kevin’s tutorial if you haven’t used it before.
Along with Spark, we’re going to see how easy it is to incorporate the Twilio Java helper library to receive calls in your app. If you don’t already have a Twilio account, you can create one free here. We’ll also need a phone number capable of voice and SMS.
We’ll also need a build tool to tie everything together. This is certainly one of the biggest barriers to entry when you’re stepping outside the realm of smaller Java projects. I’ll be using Gradle but feel free to use Maven or something you’re more comfortable with.
Let’s begin by making sure we have the Java 8 SE Development Kit (JDK) installed.
Verify we’re good by running the below command from your shell or command prompt.

Phew. Now that we’re all set up it’s time for the fun part!
Hello Spark
Start by creating a new Gradle project. Fill in whatever you want for GroupId and ArtifactId. On the next screen make sure to check “Use auto-import”, “Create directories for empty content roots automatically”, and “Use default gradle wrapper”.
Gradle uses Groovy syntax as opposed to the traditional XML that you’d find in Maven or Ant. I find it to be much more approachable than the alternatives. Configuration files can certainly be intimidating so we’ll step through and explain this one thoroughly. You can find the completed file at the end.
Open the created file named build.gradle and change its contents to the following.
Here we are defining what Gradle plugins to include. The Java plugin is what we need to compile and build our Java code. The Application and Shadow plugins are optional, but make it super easy for us to build an uber-jar (a portable executable that contains all of our dependencies).
This specifies that we require Java 8 and declares the entry classname for our application.
Configures Gradle to download our dependencies from the Central Maven Repository.
Finally we declare the dependencies that we want Gradle to include at compile time. This is where you’d include any other dependencies you’d like in the form of “GROUP:NAME:VERSION”.
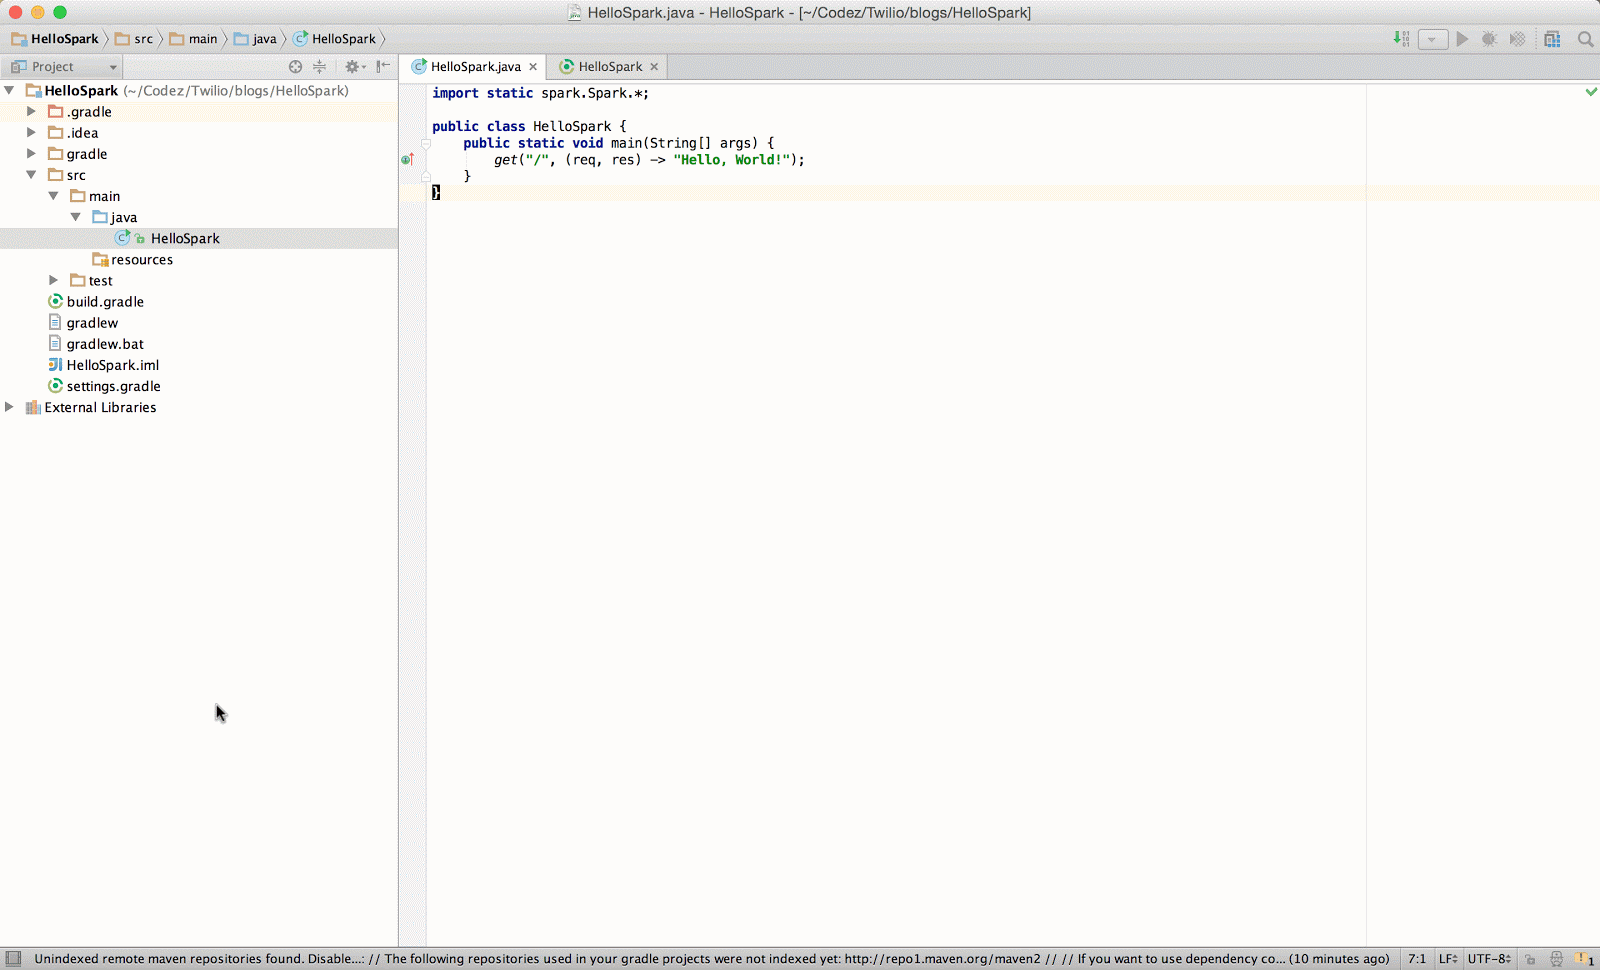
Now we can create our main class with the name of “HelloSpark” under src/main/java.
Not your typical Java web app, huh? Spark is incredibly friendly to work with even if you don’t know much Java. Whenever a GET request is made to the root URL of your app, a simple lambda function will be called and return the string “Hello, World!”
To spin it up quickly, you could right click inside our class file and then select “Run ‘HelloSpark.main()’” but instead let’s build our uber-jar by double clicking the Gradle HelloSpark/Tasks/shadow/shadowJar task from the Gradle menu on the right (note: if you don’t see the Gradle menu, click the square in the bottom left corner to make it appear).
If you’re using Gradle without IntelliJ you’ll need to run the following.
You can find the built JAR at build/libs/HelloSpark-all.js and run it by right clicking it and selecting ‘Run HelloSpark-all.jar’. Now visit http://localhost:4567 in your browser and smile at your first running Java web app.

Kick it Up a Notch
Now that we have a working web app let’s kick it up a notch! We’re going to tweak our code to be able to receive an SMS that contains the name of a song. We’ll then respond with a phone call and use the Spotify API to play a snippet of the song.
Add the following dependency to your build.gradle file.
We’re using Unirest because it really simplifies making HTTP requests in Java.
Add the following method to the bottom of your HelloSpark class.
This method will take in the body of the SMS that comes into our server from Twilio. It then makes the API request to Spotify and traverses the JSON response to find the preview_url. If for some reason it can’t, it prints out the stack trace and returns null.
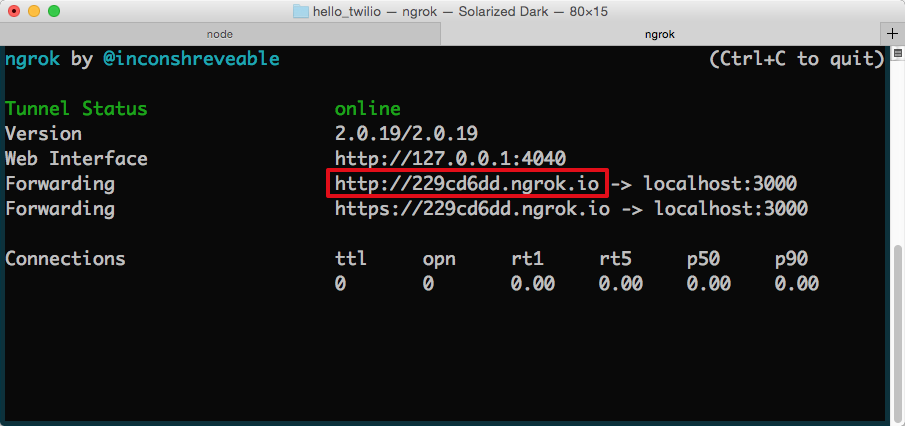
Now we’re going to need your ngrok URL. Start it up by running the following and grab your URL.
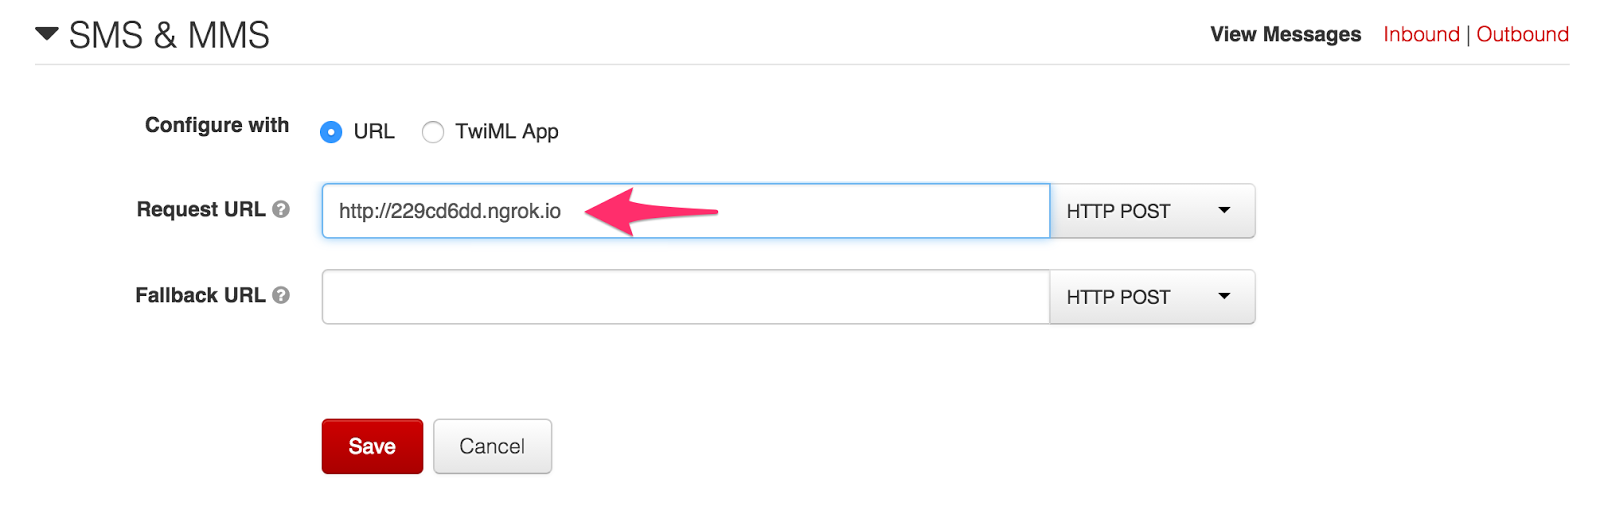
Configure your Twilio phone number with this URL and add /sms to the end so SMS’s will be sent to our app.
Now inside your main method, add the following route. Be sure to replace the ngrok URL, Twilio phone number, and account credentials with yours.
When a new SMS comes into our phone number Twilio will send us a POST request with information about it. We create a URL to the next route we’re going to write, adding the name of the song we’re looking for to the query string. We then use the Twilio-Java SDK to create a phone call with that URL as instructions on what to do when the user answers. We also respond with some TwiML to tell Twilio to send an SMS back to the user using the verb.
Finally, add the following route below the one we just wrote.
This endpoint responds with some TwiML to tell Twilio how to handle the phone call we just placed. It pulls the track name out of the URL and calls our getTrackUrl method with it. It then either adds a instruction with that URL or a instruction with a message.
Our completed code (with imports) should look like the following.
Run the class or build the uber-jar and run it. If all goes well, you should be able to text your Twilio phone number a song name and receive a call shortly after with some groovy bumpin’ jams.

CONGRATS! You have made a complete web app using the Spark Framework, Twilio, and Spotify. Thanks to great libraries like Spark and Unirest, our code is nearly as terse as similar apps written in Ruby or Python. Gradle made is super easy to download the dependencies and compile everything. The config file isn’t scary and can be reused for future projects. Remember that our uber-jar contains everything required to run our app, making it super easy to deploy just about anywhere. Hopefully you’ll consider using Java for your next project after building this totally tuneular web app.


Related Resources
Twilio Docs
From APIs to SDKs to sample apps
API reference documentation, SDKs, helper libraries, quickstarts, and tutorials for your language and platform.
Resource Center
The latest ebooks, industry reports, and webinars
Learn from customer engagement experts to improve your own communication.
Ahoy
Twilio's developer community hub
Best practices, code samples, and inspiration to build communications and digital engagement experiences.