Getting started with Web Components building a Video Chat widget
Time to read: 8 minutes
June 06, 2016
Written by

Component based UI libraries are a popular way of building modern applications. Angular and React are the heavyweights at the moment, but the humble browser and its native APIs are never far behind. Web Components were first introduced in 2011 and are the browsers’ attempt to bring componentisation to the web platform.
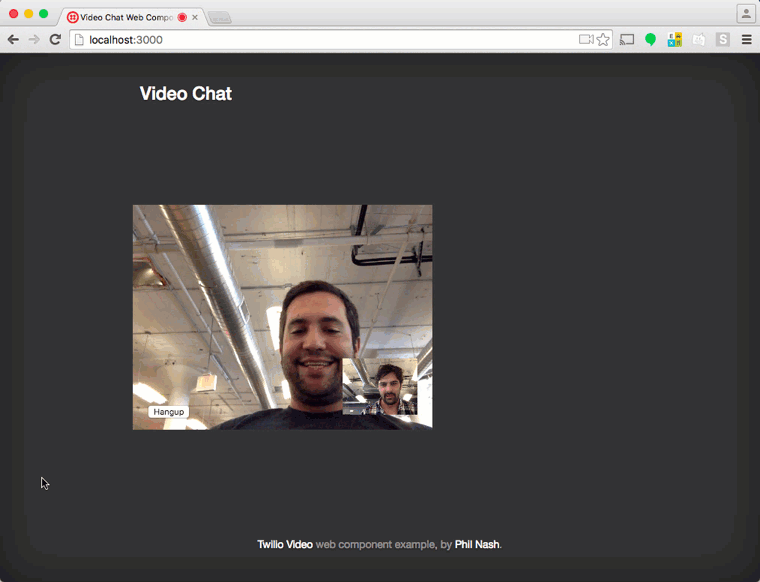
There are a few libraries available for writing Web Components, most notably Google’s Polymer, but also X-Tag and Bosonic. To really get a grip on what the platform can achieve on it’s own, I’m going to show you how to build a Web Component using the APIs available in browsers today. There are many “hello world” examples of Web Components, so we’re going to build something a bit trickier today, a video chat widget using Twilio Video. By the end of the post it will look a bit like this:
More importantly, once we’ve written our component, using it will only need the following HTML:
So what are Web Components anyway?
Web Components are made up of four complementary browser capabilities, Custom Elements, HTML Imports, Shadow DOM and Templates. Together, they can create reusable user interface widgets that encapsulate a behaviour and can be used, as displayed above, by importing the component and placing a custom element in an HTML page. We’ll see how these technologies fit together as we build up our video chat component.
If you just want to see the completed component and how to use it, check out the repo on GitHub. Otherwise, let’s get building.
Tools for the job
To build our video chat component, we’re going to need the following:
- A Twilio account – you can sign up for a free Twilio account here
- Node.js – we’ll be running a server to create tokens to authenticate with the Twilio platform
- Chrome – different browsers support different elements of the various Web Component features, but Chrome currently supports them all
Got all that? Let’s get started then.
Setting up our server
To get this project going, I’ve built up a basic server which you’ll need to get running. First of all, clone or download the repo.
Once you’ve done that, you’re going to need some Twilio credentials so that the application works. Grab your Twilio Account SID from your account dashboard, generate a Video Configuration Profile and take note of the SID and finally generate an API Key and Secret. Once you have all of those we can add them to the project.
Make a copy of the .env.example file and call it .env. You can do this in the terminal like this:
Open up .env and fill in all those credentials.
Now, install the dependencies for the project and start the server.
The app is now running on localhost:3000. Open it in Chrome and check out the page we have to work with.
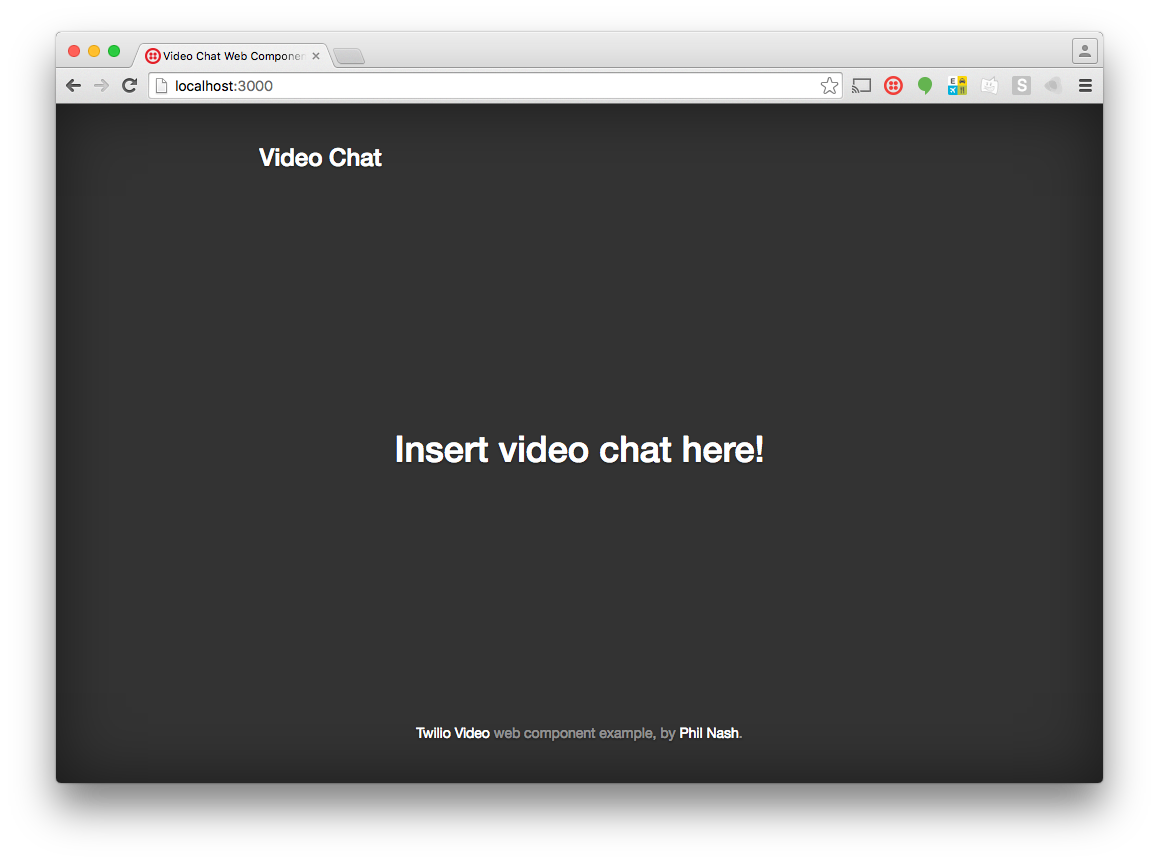
Not much going on at the moment, right? Let’s change that; let’s build a Web Component.
HTML Imports
When you build a component, it lives in its own file and can be imported. This keeps all the code encapsulated nicely. Let’s start our component by creating the HTML import for it.
In the public directory, create a file called twilio-video.html. It doesn’t need anything in it just yet.
Now, in public/index.html add the following at the bottom of the element:
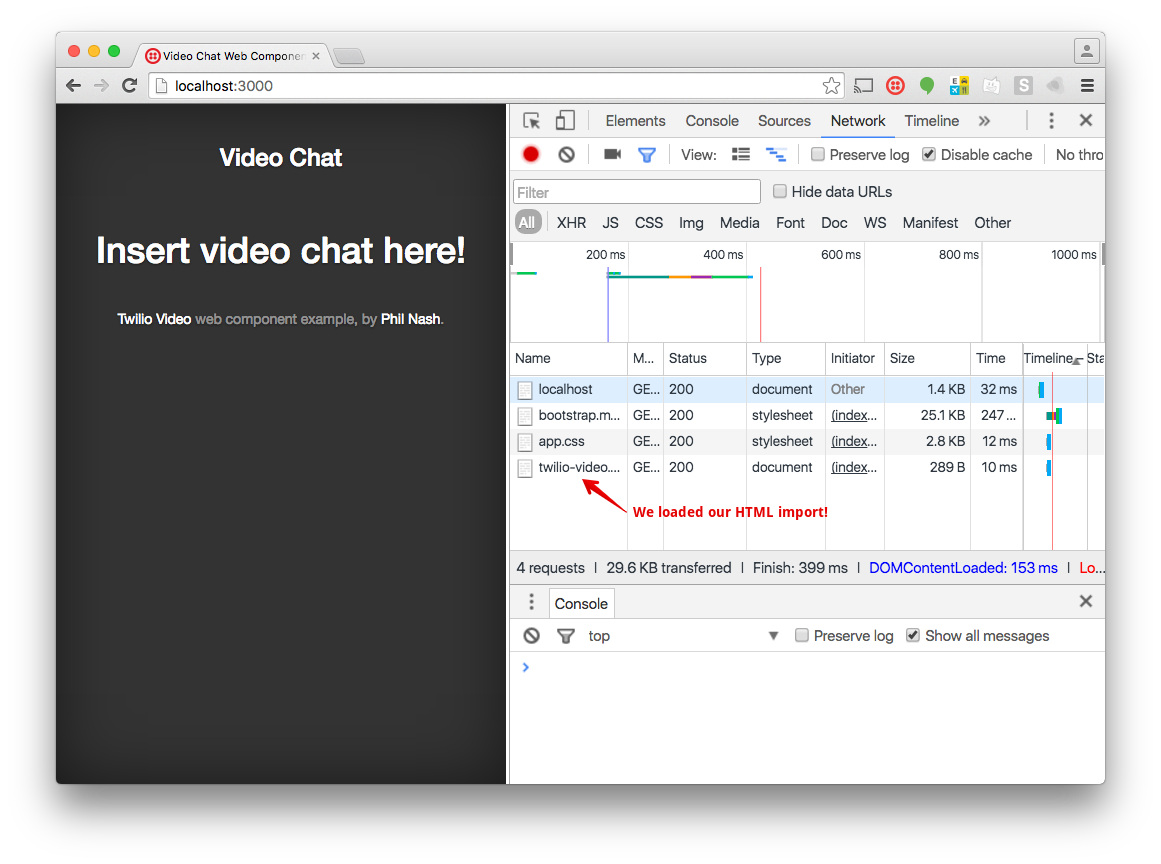
Refresh the page and nothing new happens! Well, that’s not strictly true. Open up the dev tools console on the Network tab (Cmd + Opt + I on a Mac or Ctrl + Shift + I on Windows) and you’ll see that we loaded our new HTML document.
To really get the most out of our HTML import let’s build our component in it.
Custom Elements
Our aim is to make creating a video chat as easy as dropping an HTML element onto the page, the element. Let’s add it to index.html now. Replace the
on the page with:
Refresh the page and the title has disappeared, replaced with our custom element. Except that element doesn’t do anything… yet. Let’s go into our HTML import and start building our custom element.
The first thing we need to do here is to register our element. To do this we need to write some JavaScript. In the twilio-video.html file write:
document.registerElement takes the name of the element we want to register, in this case “twilio-video”. Note, we need to use a name with a hyphen in, this separates custom elements from browser defined elements.
It also takes an optional object of options. This object defines what our custom element is based on. We’re using prototype and we supply a new prototype based on the HTMLElement prototype, the base object for all HTML elements. We’ll be extending this prototype as we go on with this project.
Reload the page and… nothing else happens. All we’ve done so far is create a blank element. By default it is an inline element with no content and no behaviour. Using the prototype we defined earlier, we can add both content and behaviour. But first we need to learn about custom element lifecycles.
The lifecycle of a custom element
Custom elements have a number of functions that get called throughout their lifecycle. These callbacks are useful for adding and removing behaviour, markup and content. They are:
createdCallbackfor when an instance of the element is created-
attachedCallbackfor when the instance is inserted into the document detachedCallbackfor when the instance is removed from the documentattributeChangedCallbackfor when an attribute on the element is updated
We’re going to use the createdCallback to define the contents and behaviour of the element and the detachedCallback to tear things down again.
To get into the contents of our element, we need to learn about the last two facets of Web Components.
Templates
It might be tempting to generate the HTML contents of our custom element in JavaScript, but in reality that’s unwieldy and there is a better way. HTML Templates are inert pieces of HTML that can be included onto a page and then instantiated in JavaScript. They are inert because inside of a template <script>s won’t execute, <link>s and resources, like <img>s, won’t be fetched until the template is instantiated.
We’ll set up the content that we need in our element with a template. Then, when we receive the createdCallback lifecycle function, we pour in the content. We start with a <template> element at the top of our twilio-video.html file.
The styles within the template will all be scoped to the element itself. Now we have our HTML, let’s add it to our custom element.
We’ve used a couple of new things here.
document.currentScript.ownerDocument refers to the HTML file we’re writing this all in, rather than the document that imports it. This way we can refer to elements within our file, such as the template.
Then, using that document, we get a reference to our template and clone it using importNode which creates a clone of the HTML in the template. We clone so that the original HTML remains in the template. We then append that clone to our custom element.
Refresh the application and check the inspector.
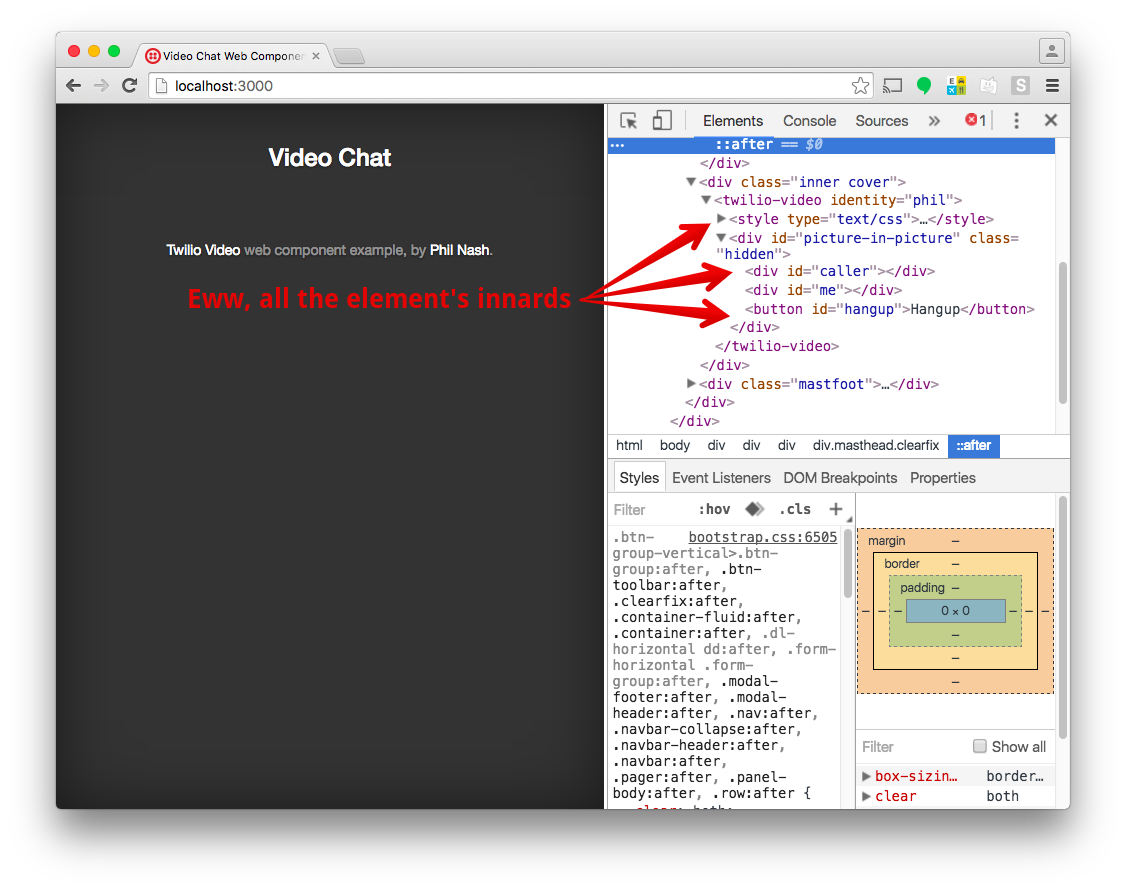
Our custom element now has some contents. This is a bit messy though, those contents are accessible from the rest of the page. We don’t really want that to happen, the beauty of Web Components is that we can encapsulate all the behaviour. So we turn to our final feature of Web Components, the Shadow DOM.
Shadow DOM
The best way to explain the Shadow DOM is to see it in action. Open up a page with an HTML5 video element on it, if you can’t think of one, this should do. Inspect the video element, all you see is the <Video> tag and the elements inside.
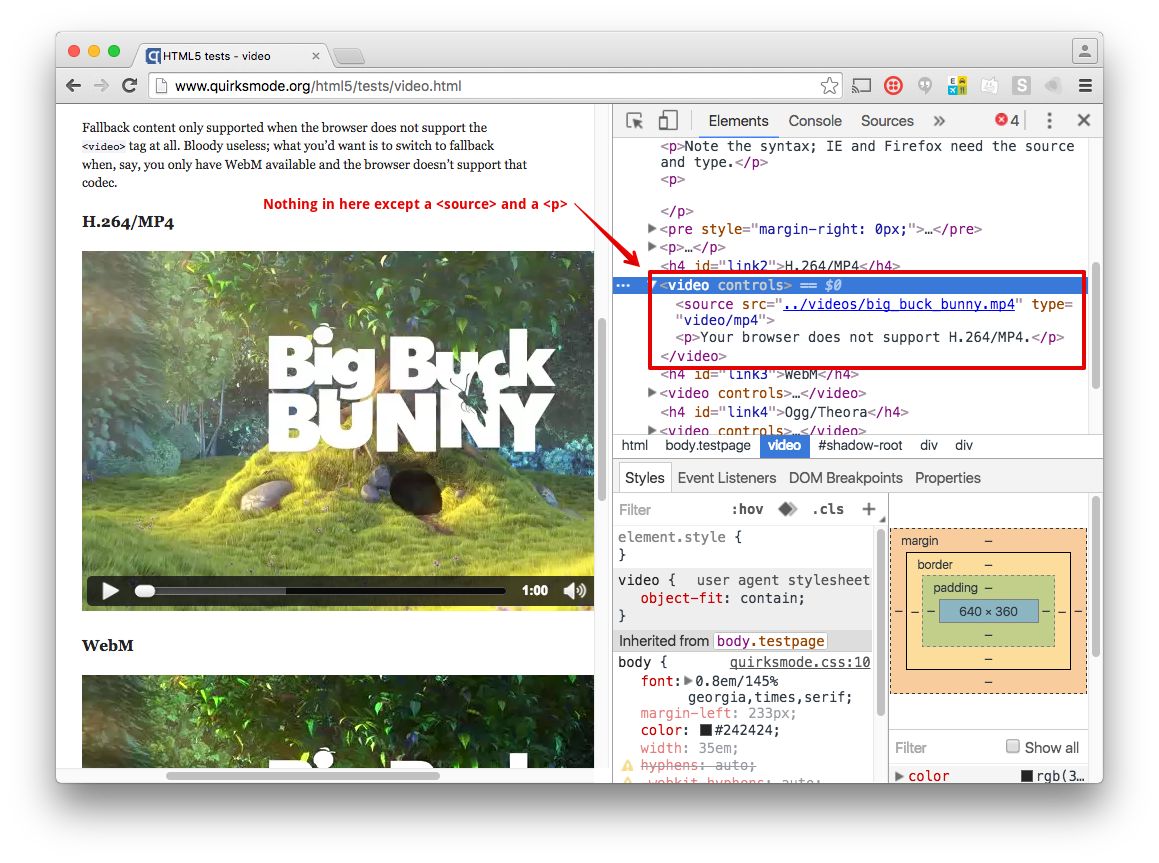
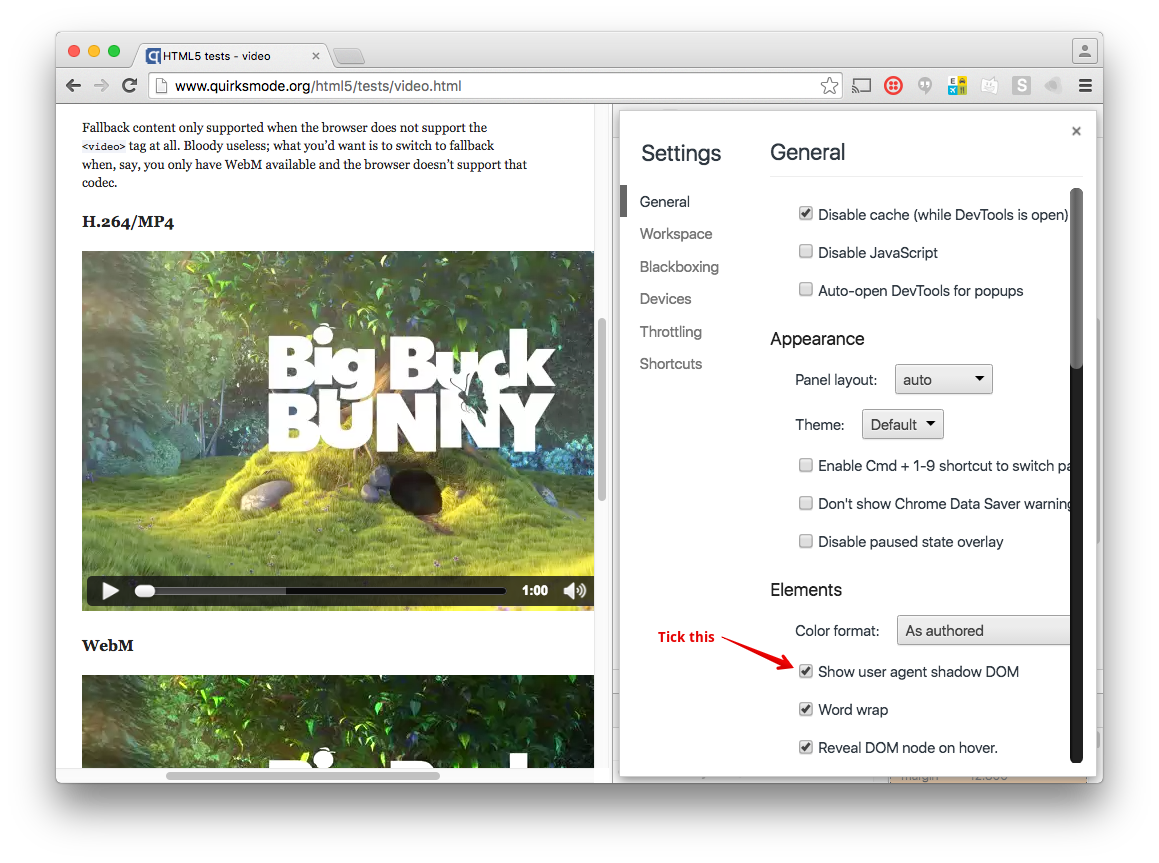
Now, as we’re using Chrome, open up dev tools settings and find the “Show user agent shadow DOM” checkbox and tick it.
Inspect that video again and you will see a #shadow-root element which you can open and inspect all the HTML inside.
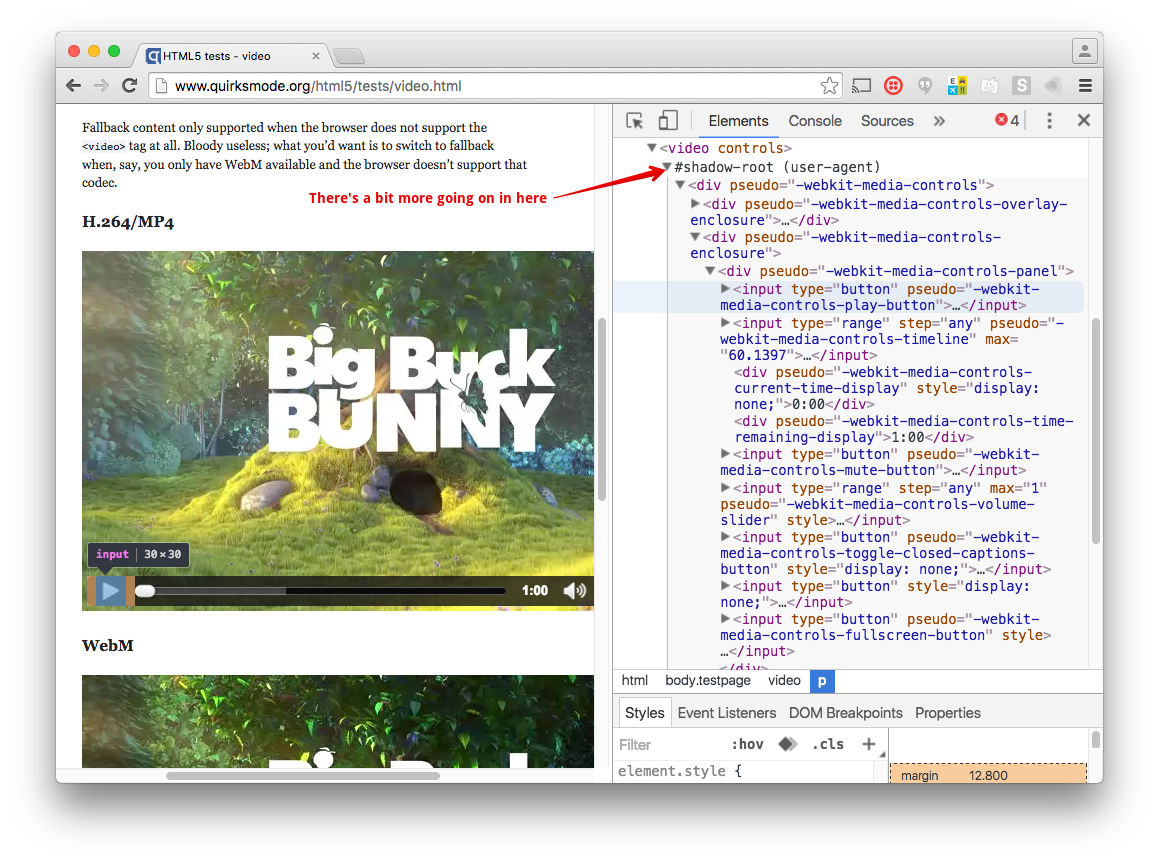
That is the shadow DOM. It keeps the internal structure of our custom element private and we’re going to update our custom element to use it. To do so, make the following change to our JavaScript.
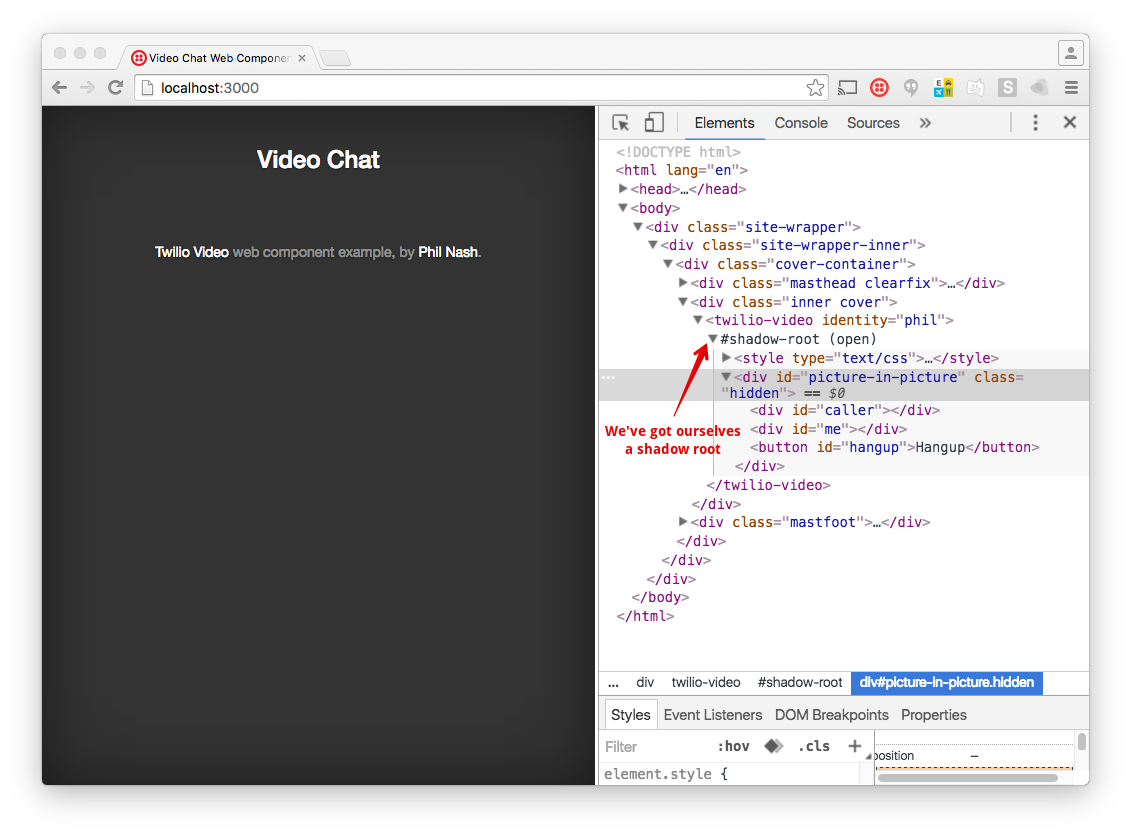
Instead of appending our template clone to the element itself we create a shadow root for the element. Then we append our template clone to that. Refresh the page and check out our new shadow root.
The video chat
We’ve done a lot of setup to get our Web Component together. All that’s left to do is implement our video chat. If you have read Sam’s post on getting started with the JavaScript Video SDK or gone through the JavaScript Video quickstart then you will recognise most of this. Let’s add the Twilio Video scripts to the top of our component:
Then, within the <script> element we’ve been working in, we’ll need the following functions.
fetchToken which uses the Fetch API to generate an access token from our Node.js server, parse the json and return a Promise.
createClient sets up an AccessManager with the token we retrieve from the server, then instantiates a Conversations.Client and starts to listen for incoming connections.
setupClient runs once the conversation client is listening for incoming connections. It starts listening for incoming invites.
When an invite is received, inviteReceived is called we accept it, which returns a promise.
When the promise resolves, we call setupConversation which shows the elements within our custom element, displays our local media stream, listens for clicks on the hangup button and handles connections and disconnections from other participants.
On receiving the participantConnected event we show the new participant’s media stream too.
When a participant disconnects we hide the whole chat, remove our local media stream and stop listening to events on the hangup button.
If the hangup button is pressed, we disconnect the call ourselves. This function is also used when the element is removed from the page, so we check to see if there is a live conversation at the moment.
Our createdCallback that we started earlier now handles setting up the template, adding it to the shadow root and querying the shadow root for the elements we’ve been using in the functions above. It also checks for the identity attribute on the component using this.getAttribute("identity"). As we saw earlier, I defined the element as <twilio-video identity="phil"></twilio-video>, so this will get the identity “phil” and send it to the server to generate an access token for that identity using fetchToken.
Finally we have the detachedCallback which disconnects from any live conversations and stops the conversation client from listening to more incoming connections.
Add all that to the <script> element in our component, refresh the page and wait for an incoming call. I’ve made that nice and easy for you, just open up http://localhost/caller.html. There’s no UI on this page, but it does generate a call to your component (as long as you kept the identity as “phil”, if you changed it, you can change the line conversationsClient.inviteToConversation("phil"); in caller.html to use the identity you chose).
When the page loads you will receive a permissions request for access to your video and microphone on each page. Granting the request will connect the call and you’ll see you Video Chat Web Component come to life.

Check out all the code for this Web Component on GitHub.
Reduce, reuse, recycle
With just under 130 lines of HTML, CSS and JavaScript we have created, without using a framework, a reusable Web Component that can receive incoming video calls. Now, with just these two lines of code (and a /token endpoint to generate access tokens) we can use this anywhere.
Well, OK, it will only work in Chrome today. But there are polyfills available that we can use to make it work in every browser (though do watch out for the slight differences in the API).
I’d love to hear about your uses of Web Components. Have you built your own or used someone else’s? Get in touch in the comments below or drop me a line on Twitter or email.


Related Resources
Twilio Docs
From APIs to SDKs to sample apps
API reference documentation, SDKs, helper libraries, quickstarts, and tutorials for your language and platform.
Resource Center
The latest ebooks, industry reports, and webinars
Learn from customer engagement experts to improve your own communication.
Ahoy
Twilio's developer community hub
Best practices, code samples, and inspiration to build communications and digital engagement experiences.