How to Send an SMS from Android
Time to read:
May 19, 2016
Written by

We talk a lot about how to send SMS Messages from web applications, but how to send an SMS message from Android? There are a couple of extra considerations for that. Still, we’ll be have it shipped in 15 minutes. Let’s go!
The Problem
While Twilio is a REST API and theoretically you could make an HTTP request to it directly, you would need to store your Twilio credentials inside your app which poses a serious security issue. An attacker could decompile the application, extract your credentials and use your Twilio account for anything they liked.
To avoid this we will create a backend application that implements the Twilio REST API, wraps up your credentials and sends SMS messages for you. Then you can call your backend application from your Android application and send SMS messages without distributing your credentials.
Our tools
For our app to be able to send a text message using the Twilio REST API we will need the following:
- Your favourite IDE for Android development. I will be using Android Studio.
- A Twilio Account and a Twilio Phone Number – Sign up for free!
- A secondary choice of language to create our backend. I will use the Twilio Java library with IntelliJ IDEA, but feel free to use any of our other libraries.
- ngrok – You can read more about ngrok here.
If you just want to skip to coding your mobile app, feel free clone this repository with the backend, or just deploy it to Heroku.
You will also find the entire Android application in this repository.
Creating our backend
Because I’ll be using Java to create this backend, I’m gonna start by opening IntelliJ IDEA and creating a new Java project there. We wrote a Getting Started with Gradle and the Spark Framework tutorial in the past in case you need help setting things up.
Now that our project is created, open build.gradle and add the following plugins and dependencies to it.
Create a new class in SMSMobileBackend/src/main/java called SMSBackend and add a Main method to it.
Run the application by opening the Gradle tab, double-clicking shadowJar and running the generated jar file in SMSMobileBackend/build/libs.
When you load up http://127.0.0.1:4567 on your browser you should see a hello world message.
Let’s make sure this application is also available externally with the help of ngrok so our mobile app can get access to it. In your terminal run:
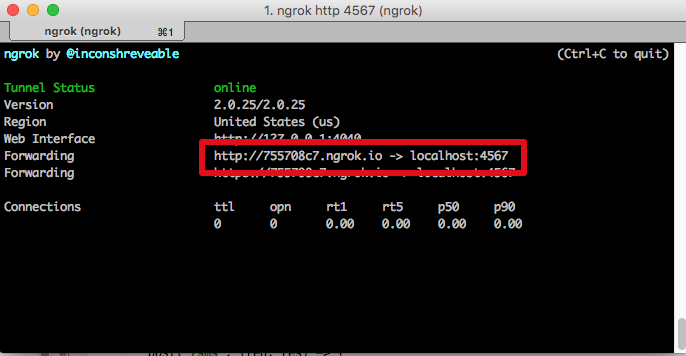
Now that you know your setup is correct and copied the URL ngrok generated for you, go back to the SMSBackend class and create a new endpoint to handle sending SMS messages. Our android application will then be able send requests to it. Your class should end up like this:
Just make sure you replace the Account Sid, Auth Token, and Twilio phone number with the ones you can get from the dashboard. Restart the application and we should be all set with this.
Creating our App
Now that we have our backend running head to Android Studio or your favourite Android IDE and create a new project called Twilio SMS.
When the project is finished loading, open the app’s build.gradle and add the dependency OkHttp to it. OkHttp is an open source project by Square that makes it really easy for us to make an HTTP request to our Java backend.
When you save the file, your IDE will ask you to sync the dependencies of the project. Go ahead and let it do its thing. Once it completes, you will have the dependency downloaded.
Open AndroidManifest.xml and add the Internet permission to your app. We will need that to make HTTP requests to our backend app.
Let’s create our layout by opening res/layout/activity_main.xml and add two text fields for telephone and message, and a button to send it.
If you run the application now, you will see that your app looks like this:
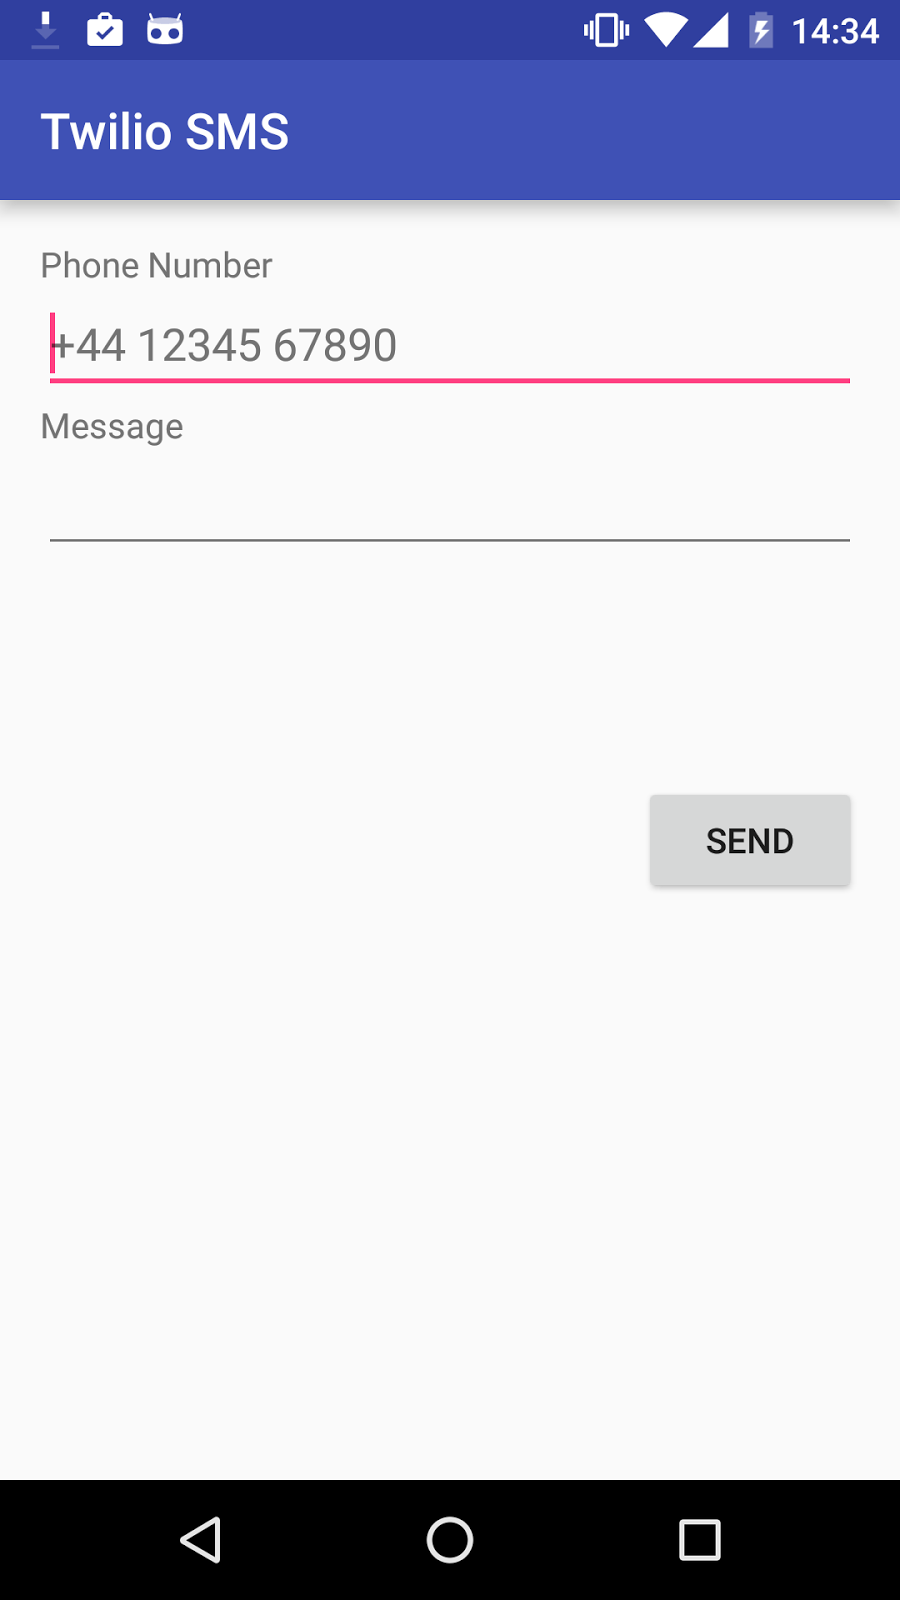
If you enter a message and hit Send however, you will notice that nothing happens. That’s because we’re still not making a request to our backend. Let’s do this now.
Open MainActivity.java and add the following member variables and imports to the top of the class:
In the body of the onCreate method, initialise the widgets so we get references to our UI.
Now create a new method in this class called post. This method will return the response from the HTTP request we will make to our backend application.
The code above will take a URL and a callback as arguments, and will build a new multipart form body for us, which we will then pass along to a new asynchronous request.
The last thing we need to do now is hook this up to our button, so when we press it, the post method gets called and the SMS message is sent.
Back on the onCreate method, paste the following code just under the send variable.
We use the onClick listener method on the button to to know when to make a request to our post method.
Run the application again, and when the Send button is clicked we pass on the URL we want to post our data to, and upon getting a callback we either show an error message, or display a Toast on the screen saying the SMS message was sent.
Your app is now safe
There’s a warm feeling about knowing that we were able to squash at least one vulnerability from our app by just following a few simple steps. It is also great to now have a backend we can use with other other platforms as we can just perform direct HTTP requests to it.
Using a pattern like this, we could also add phone number lookups to an application or generate phone calls. If you want to use IP Messaging, Video or Client, you’ll want a server to generate access tokens for those services too. Get your backend right and you’re ready to do anything with Twilio in your application.
I would love to know more about the apps you’re building. Hit me up on Twitter @marcos_placona or by email on marcos@twilio.com to tell me more about them.

Related Resources
Twilio Docs
From APIs to SDKs to sample apps
API reference documentation, SDKs, helper libraries, quickstarts, and tutorials for your language and platform.
Resource Center
The latest ebooks, industry reports, and webinars
Learn from customer engagement experts to improve your own communication.
Ahoy
Twilio's developer community hub
Best practices, code samples, and inspiration to build communications and digital engagement experiences.