How to set up domain authentication for Twilio SendGrid
Time to read: 3 minutes
November 24, 2021
Written by
.png")
When working with Twilio SendGrid APIs such as Inbound Parse, one of the first steps after creating a free account is to set up domain authentication. This can be a tedious process, but once you are finished you will be able to write code to receive emails.
Let's walk through how to authenticate your domain with Twilio SendGrid step-by-step so you can get on to important things like writing code.
Tutorial Requirements
To follow this tutorial you will need to have the following items:
- A Twilio SendGrid account — If you are new to Twilio SendGrid you can create a free account, which allows you to send 100 emails per day forever.
- A domain on which you will receive emails. For the purposes of this article, I’m going to use yourdomainhere.com. You will need to replace it with your own domain name.
With that taken care of, let's move on.
Initiate domain authentication
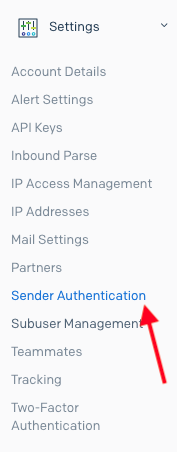
Start by logging in to your SendGrid account. In the left-side navigation bar, open “Settings” and then select Sender Authentication.
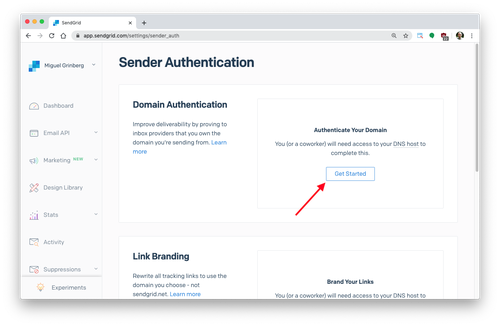
In the Sender Authentication page click the “Get Started” button in the “Domain Authentication” section.
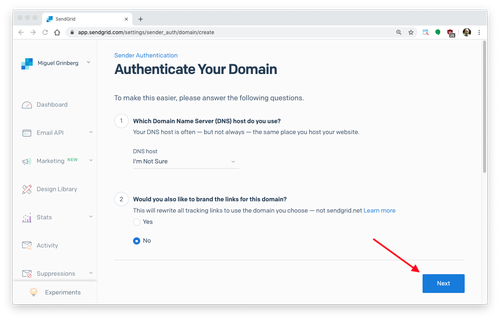
In the first prompt you need to select your DNS provider, which in most cases is the company from which you purchased the domain. Do not worry too much about this question, if your provider does not appear on the list, or if you don’t know who your provider is just select “I’m Not Sure”.
The second prompt is about adding branding to links that appear in outgoing emails. Since we are not really concerned about outgoing emails at this time you can select “No”. You can always enable this option later if you decide that you’d like to use it.
After you make your selections on this screen click the “Next” button.
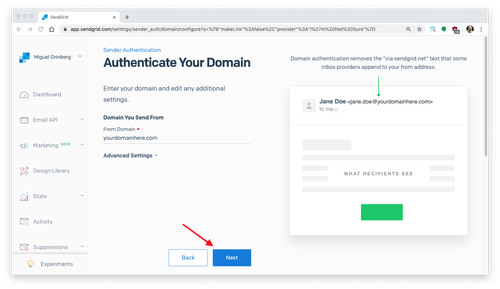
In the next screen you will be prompted to enter your domain name. In my case I entered yourdomainhere.com, you will need to enter your own domain name. You do not need to change anything in the "Advanced Settings'' section.
Click the “Next” button to continue.
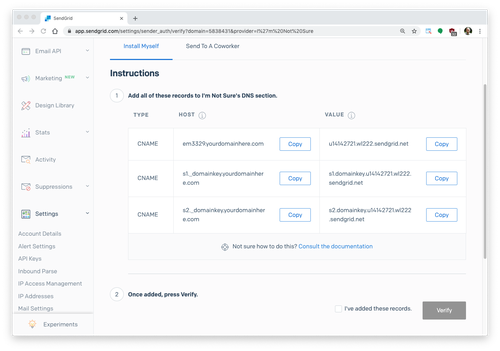
SendGrid is now going to show you three DNS records that you need to add to your domain. Each DNS record has a type, a host and a value. Below you can see the settings I was given. Yours are going to be similar, but they are going to have your own domain name in them:
Adding DNS entries to your domain
You have to go into your domain provider’s administration page to add these DNS records. This is going to be different depending on which provider you are using, so you will need to visit the control panel offered by your provider and locate where the DNS settings for your domain are.
In this example I'm using Google Domains. You can see below how I added the first of the three DNS records. Note that the @, ftp and www records are unrelated to this tutorial and were already set on my domain.
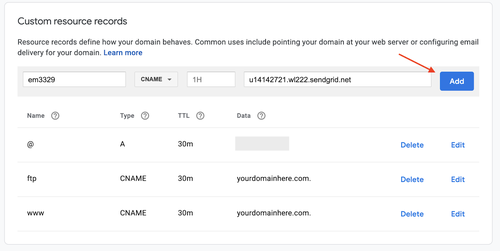
One tricky aspect here is figuring out that you need to remove the domain name from the hosts provided by SendGrid, since Google Domain adds that automatically as a suffix to all DNS records. For example, when I was asked by SendGrid to enter em3329.yourdomainhere.com I had to enter just em3329. This varies across domain providers, so make sure you do this according to the rules set by your own provider.
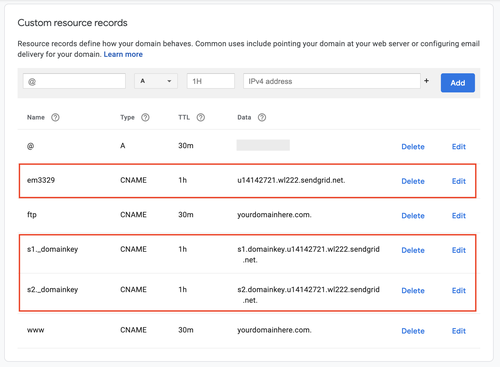
After I added the three records my DNS configuration looked like this (the three new records are highlighted in red):
Verifying your domain
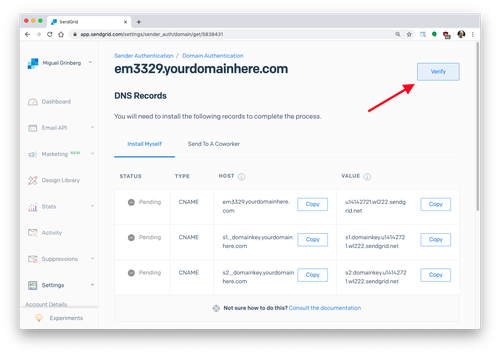
When you have your new DNS entries in place, go back to the SendGrid Sender Authentication page. You will now see an entry for your domain showing as pending. Click on it to proceed with the authentication process.
The next page will show again the three DNS records that you needed to add to your domain. On the top right of the page you will see a “Verify” button. When you click this button, SendGrid is going to pull the DNS record from your domain and verify that you have added the requested entries.
If SendGrid is able to verify your domain, you will get an “It worked!” page:
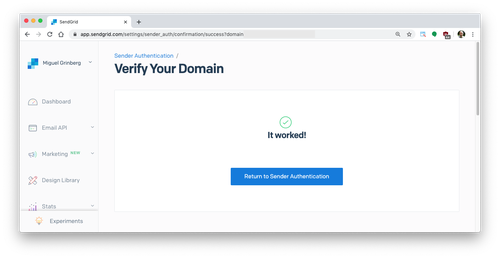
If SendGrid cannot verify your domain, you will need to try again later. Every time DNS changes are made, these changes need to be propagated across DNS servers worldwide, so if you get a failure immediately after editing your DNS entries, wait some time and then hit the “Verify” button again. In extreme cases it can take up to 48 hours for DNS to fully propagate.
Congrats on authenticating your domain
Once you get the “It worked!” page, pat yourself in the back because now you can move on to actually working with Twilio SendGrid APIs like Inbound Parse! I’m looking forward to seeing what you build. Feel free to reach out and share your experiences or ask any questions.
- Email: sagnew@twilio.com
- Twitter: @Sagnewshreds
- Github: Sagnew
- Twitch (streaming live code): Sagnewshreds
Related Resources
Twilio Docs
From APIs to SDKs to sample apps
API reference documentation, SDKs, helper libraries, quickstarts, and tutorials for your language and platform.
Resource Center
The latest ebooks, industry reports, and webinars
Learn from customer engagement experts to improve your own communication.
Ahoy
Twilio's developer community hub
Best practices, code samples, and inspiration to build communications and digital engagement experiences.