How to Use Image Recognition on Twilio WhatsApp API
Time to read:
May 21, 2021
Written by
Reviewed by

The concept of recognizing images might seem like a challenge, but with the help of Clarifai's image recognition API, the code can predict the contents of a given image and figure out the concepts to describe the picture, as well as the prediction value of how accurately the image is classified.
In this article, we’ll walk you through how you can develop a functional Python program to identify media content using Twilio WhatsApp API, Clarifai API, and Flask.
Tutorial Requirements
In order to build this project, you will need to have the following items ready:
- Python 3.6 or newer. If your operating system does not provide a Python interpreter, you can go to python.org to download an installer.
- ngrok is a handy utility to connect the development version of our Python application running on your system to a public URL that Twilio can connect to. This is necessary for the development version of the application because your computer is likely behind a router or firewall, so it isn’t directly reachable on the Internet. You can also learn how to automate ngrok.
- Clarifai account. Sign up for a free account to generate an API key.
- A free or paid Twilio account. If you are new to Twilio get your free account now! (If you sign up through this link, Twilio will give you $10 credit when you upgrade.)
Configuration
We’ll start off by creating a directory to store the files of our project. Inside your favorite terminal, enter:
Since we will be installing some Python packages for this project, we need to create a virtual environment.
If you are using a Unix or MacOS system, open a terminal and enter the following commands:
NOTE: Depending on your active version of Python, you might have to specify python3.
If you are on a Windows machine, enter the following commands in a prompt window:
For more information about the packages, you can check them out here:
- The Flask framework, to create the web application that will receive message notifications from Twilio.
- The python-twilio package, to send messages through the Twilio service.
- Clarifai Python gRPC Client to interact with the Clarifai API for image recognition.
- The python-dotenv package, to read a configuration file.
Configure the Twilio WhatsApp Sandbox
Log onto the Twilio Dashboard to view your Programmable Messaging Dashboard. Look at the sidebar to click on Try it Out and reveal the Try WhatsApp entry. Select it to learn how to set up your sandbox.
The sandbox is provided by Twilio, however, once you complete your app, you can request production access for your Twilio phone number.

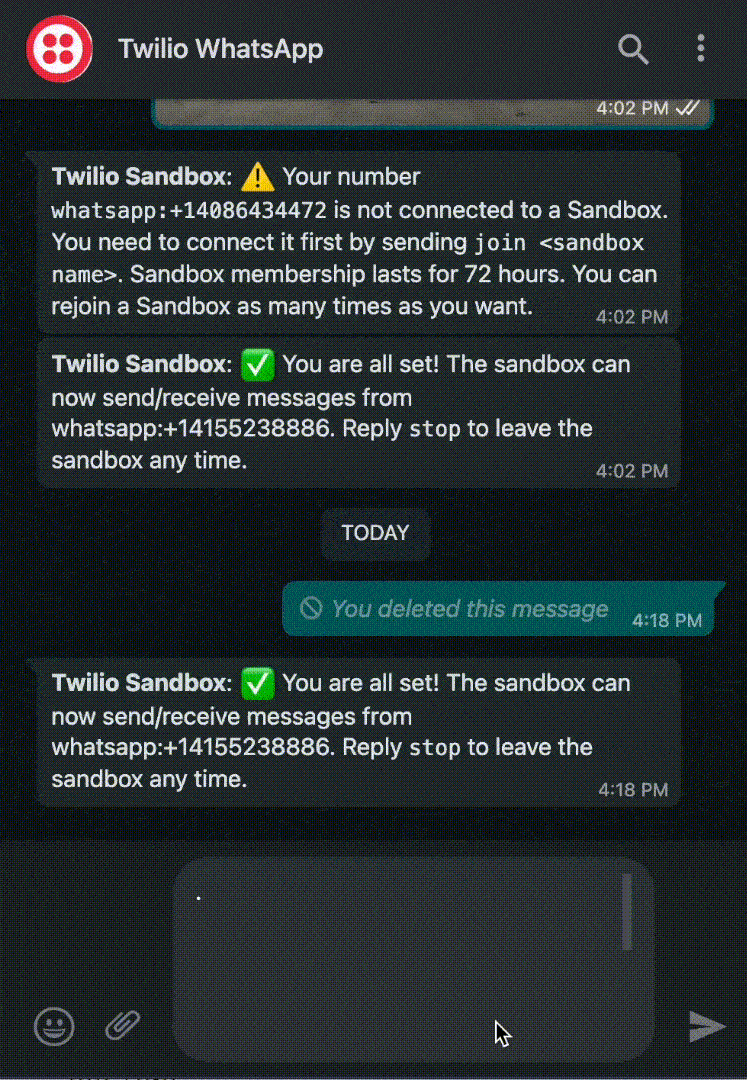
To enable the WhatsApp sandbox for your smartphone, send a WhatsApp message with the given code to the number assigned to your account. The code is going to begin with the word "join", followed by a randomly generated two-word phrase. Shortly after you send the message you should receive a reply from Twilio indicating that your mobile number is connected to the sandbox and can start sending and receiving messages.
If you intend to test your application with additional smartphones, then you must repeat the sandbox registration process with each of them.
Authenticate against Twilio and Clarifai Services
We need to safely store some important credentials that will be used to authenticate against the Twilio and Clarifai services.
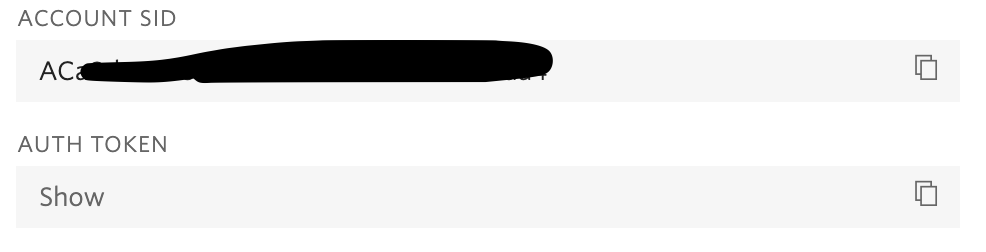
Create a file named .env in your working directory and paste the following text with your own Twilio credentials obtained from your Twilio Console:
To use the Clarifai API, you need to make an account and create an application to generate an API key for your project.
Add the following line to the .env file. The Clarifai API key will be a random string of alphanumeric characters. It is crucial that the phrase "Key" is inside the string when setting the API key as seen below.
Set up a development Flask server
Make sure that you are currently in the virtual environment of your project directory. Since we will be utilizing Flask throughout the project, we must set up the development server. Add a .flaskenv file (make sure you have the leading dot) to your project with the following lines:
These incredibly helpful lines will save you time when it comes to testing and debugging your project.
FLASK_APPtells the Flask framework where our application is locatedFLASK_ENVconfigures Flask to run in debug mode
These lines are convenient because every time you save the source file, the server will reload and reflect the changes.
Then, type flask run in your terminal to start the Flask framework.
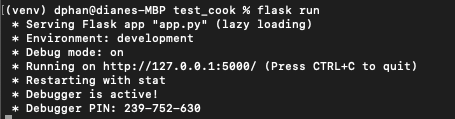
The screenshot above displays what your console should look like after running the command flask run. The service is running privately on your computer’s port 5000 and will wait for incoming connections there. You may also notice that debugging mode is active. When in this mode, the Flask server will automatically restart to incorporate any further changes you make to the source code.
Set up a webhook with Twilio
Since this is a tutorial to create a WhatsApp chat bot, we will need to use a webhook (web callback) to allow real-time data to be delivered to our application by Twilio.
Open up another terminal window in your project directory. While Flask is running in one terminal window, start ngrok with the following command to temporarily enable the Flask service publicly over the Internet:
Ngrok is a great tool because it allows you to create a temporary public domain that redirects HTTP requests to our local port 5000.
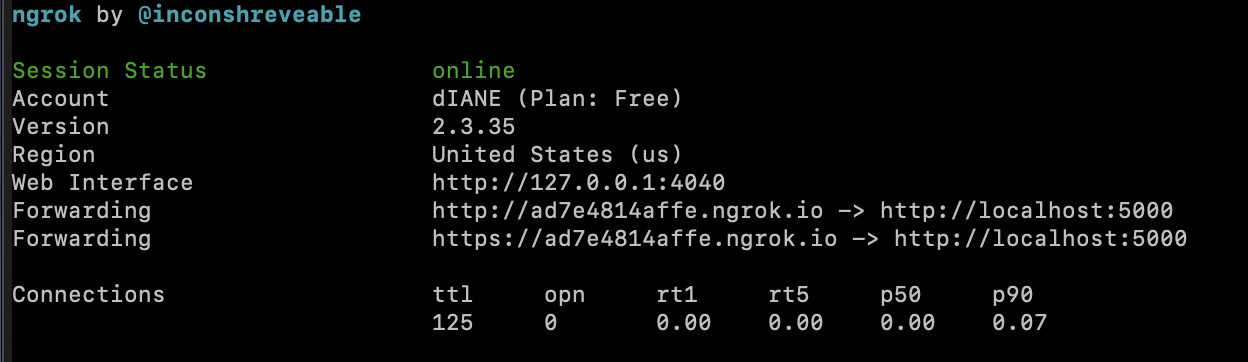
Your ngrok terminal will now look like the picture above. As you can see, there are URLs in the “Forwarding” section. These are public URLs that ngrok uses to redirect requests into our Flask server.
Copy the URL starting with https:// to the clipboard and then return to the Twilio Console. Navigate to the Programmable Messaging dashboard and look at the sidebar for Programmable Messaging to find WhatsApp Sandbox Settings under the Settings option. This is where we tell Twilio to send incoming message notifications to this URL.
Paste the URL copied from the ngrok session into the “WHEN A MESSAGE COMES IN” field and append /webhook, since that is going to be the endpoint that we will write later in the Python application. Here is my example for reference:
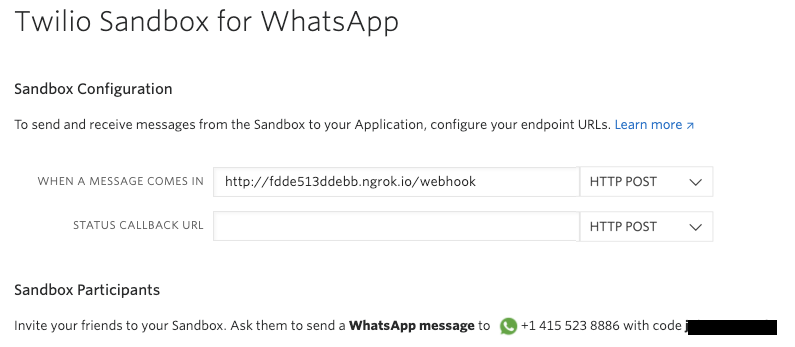
The URL from ngrok in my example is “http://ad7e4814affe.ngrok.io/webhook” but again, yours will be different.
Before you click on the “Save” button at the very bottom of the page, make sure that the request method is set to HTTP POST.
Integrate Clarifai API to your application
This project is a great opportunity to test out the Clarifai API and see how it works against user inputs. Using computer vision and artificial intelligence, Clarifai scrapes and analyzes the image to return tags or "concepts" associated with the image, such as "outside", "cloud", or "sky" if you send in a picture of the sky. This API will be used to help our app identify what's going on in the picture by setting a tag and a prediction value of how likely the associated tag is true to the picture.
With that said, let’s create a new Python file. I created image_classifier.py to store the code that uses Clarifai’s API. Copy the following code into the file you just created:
The get_tags function makes a request to the Clarifai API to analyze the picture sent in through WhatsApp. The response is parsed so that only the tags for the picture are saved in the relevant_tags list. These descriptive tags will have the concept.value set to them, which stands for the prediction values for the concepts. Alternatively, you can use another data structure to store all the tags. Using a dictionary allows you to expand on the project if you need to, especially if you need to detect a particular word.
For the sake of returning a nicely formatted list of tags, each concept.value is rounded to two decimal places. Feel free to change it accordingly to return the results you want to see.
Receive and respond to messages with Twilio
The goal of the app is to send in a picture through WhatsApp and have Clarifai API return the list of tags associated with the picture.
Create a file named app.py and copy and paste the following code in order to import the functions and necessary modules to run the Flask app, as well as the webhook:
As you can see, a new function respond() is created and called throughout the project. This function sends a response to the user. By calling this function, it also helps our app return the output to the user.
The webhook is short - the user will text in a picture that they want to view the image classification tags. The pic_url is passed to the get_tags function defined from the image_classifier.py file. The results from that function are stored in the relevant_tags object to return to the user over WhatsApp.
Run the WhatsApp Image Recognition App
It’s time to wrap things up and test out the code. Make sure you have one tab running flask and one tab running ngrok. If you closed it for any reason, start it again now with the following commands in their respective tabs.
And in the second tab:
Furthermore, make sure that your ngrok webhook URL is updated inside the Twilio Sandbox for WhatsApp. Each time you restart ngrok, the URL changes, so you will have to replace the URL. Remember to add the /webhook at the end of the ngrok forward URL.
Take your WhatsApp-enabled mobile device and send an image to your WhatsApp sandbox. Wait a minute and see the results as shown below:
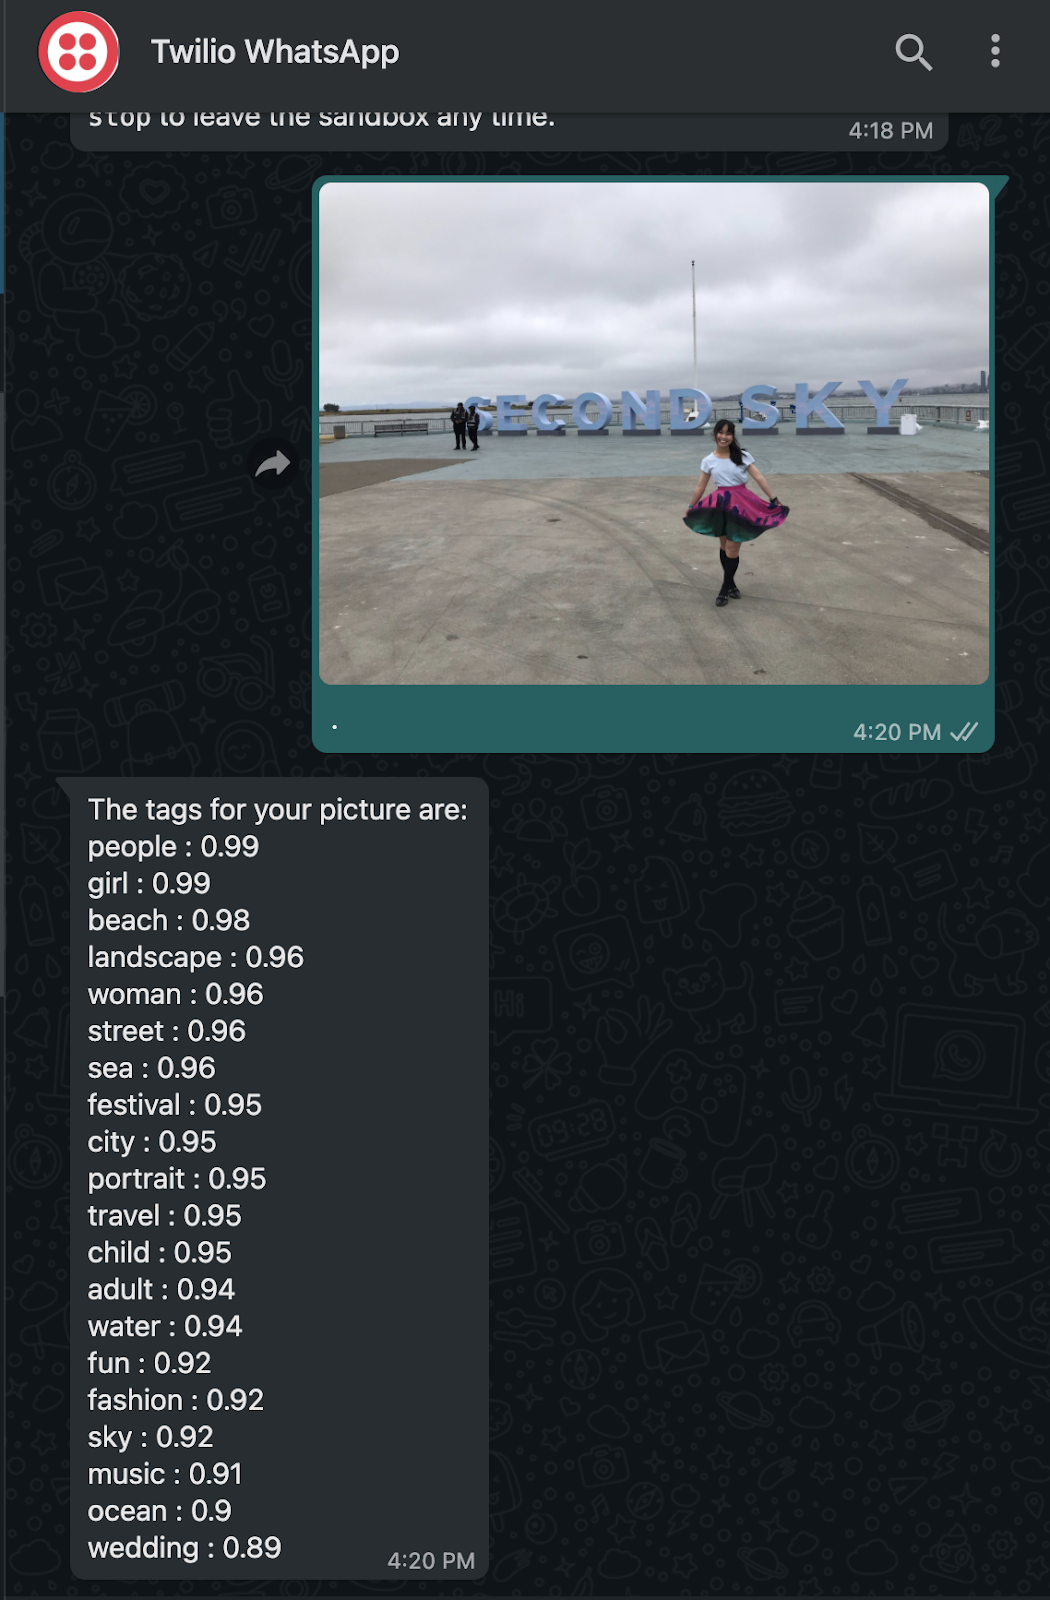
Tada! The tags related to your picture are not only printed on the console, but returned as a WhatsApp message as well. Seems like the Clarifai API didn't do so bad identifying the picture of me standing at Porter Robinson's Second Sky music festival!
What’s next for image recognition projects?
Congratulations! You successfully identified the contents of an image sent to your WhatsApp sandbox number using the Twilio WhatsApp API, Clarifai, Python, and Flask.
How accurate were the predictions and what will you do with this new information that you can retrieve from WhatsApp media images? If you're looking for more image recognition projects, check out these:
- Start an Instagram Food account using Twilio WhatsApp API, OpenAI's GPT-3 Engine, and Clarifai API
- Create a data visualization project with WhatsApp, Google Maps, and Clarifai
- Build a food sharing app with friends using Twilio WhatsApp API and Clarifai
Let me know what you'll build next by reaching out to over email!
Diane Phan is a Developer for technical content on the Twilio Voices team. She loves to help beginner programmers get started on creative projects that involve fun pop culture references. She can be reached at dphan [at] twilio.com or LinkedIn.
Related Resources
Twilio Docs
From APIs to SDKs to sample apps
API reference documentation, SDKs, helper libraries, quickstarts, and tutorials for your language and platform.
Resource Center
The latest ebooks, industry reports, and webinars
Learn from customer engagement experts to improve your own communication.
Ahoy
Twilio's developer community hub
Best practices, code samples, and inspiration to build communications and digital engagement experiences.