Build an IoT Mailbox Sensor with a Twilio SIM and M2M Commands
Time to read: 5 minutes
May 06, 2020
Written by
Reviewed by

The other week, I talked to Stacey Higginbotham about how to get started in IoT. According to Stacey, a lot of people ask her about building mailbox sensors that tell you when the mail has come. This kind of hack is especially useful for those with mailboxes far from their front doors.
If your mailbox is far away, there’s a good chance your Wi-Fi won’t reach, and neither will your power. We can build a battery-powered cellular device that you can put in your mailbox that senses when your mail is here and texts you when someone has opened it.
Enter: the MailPig
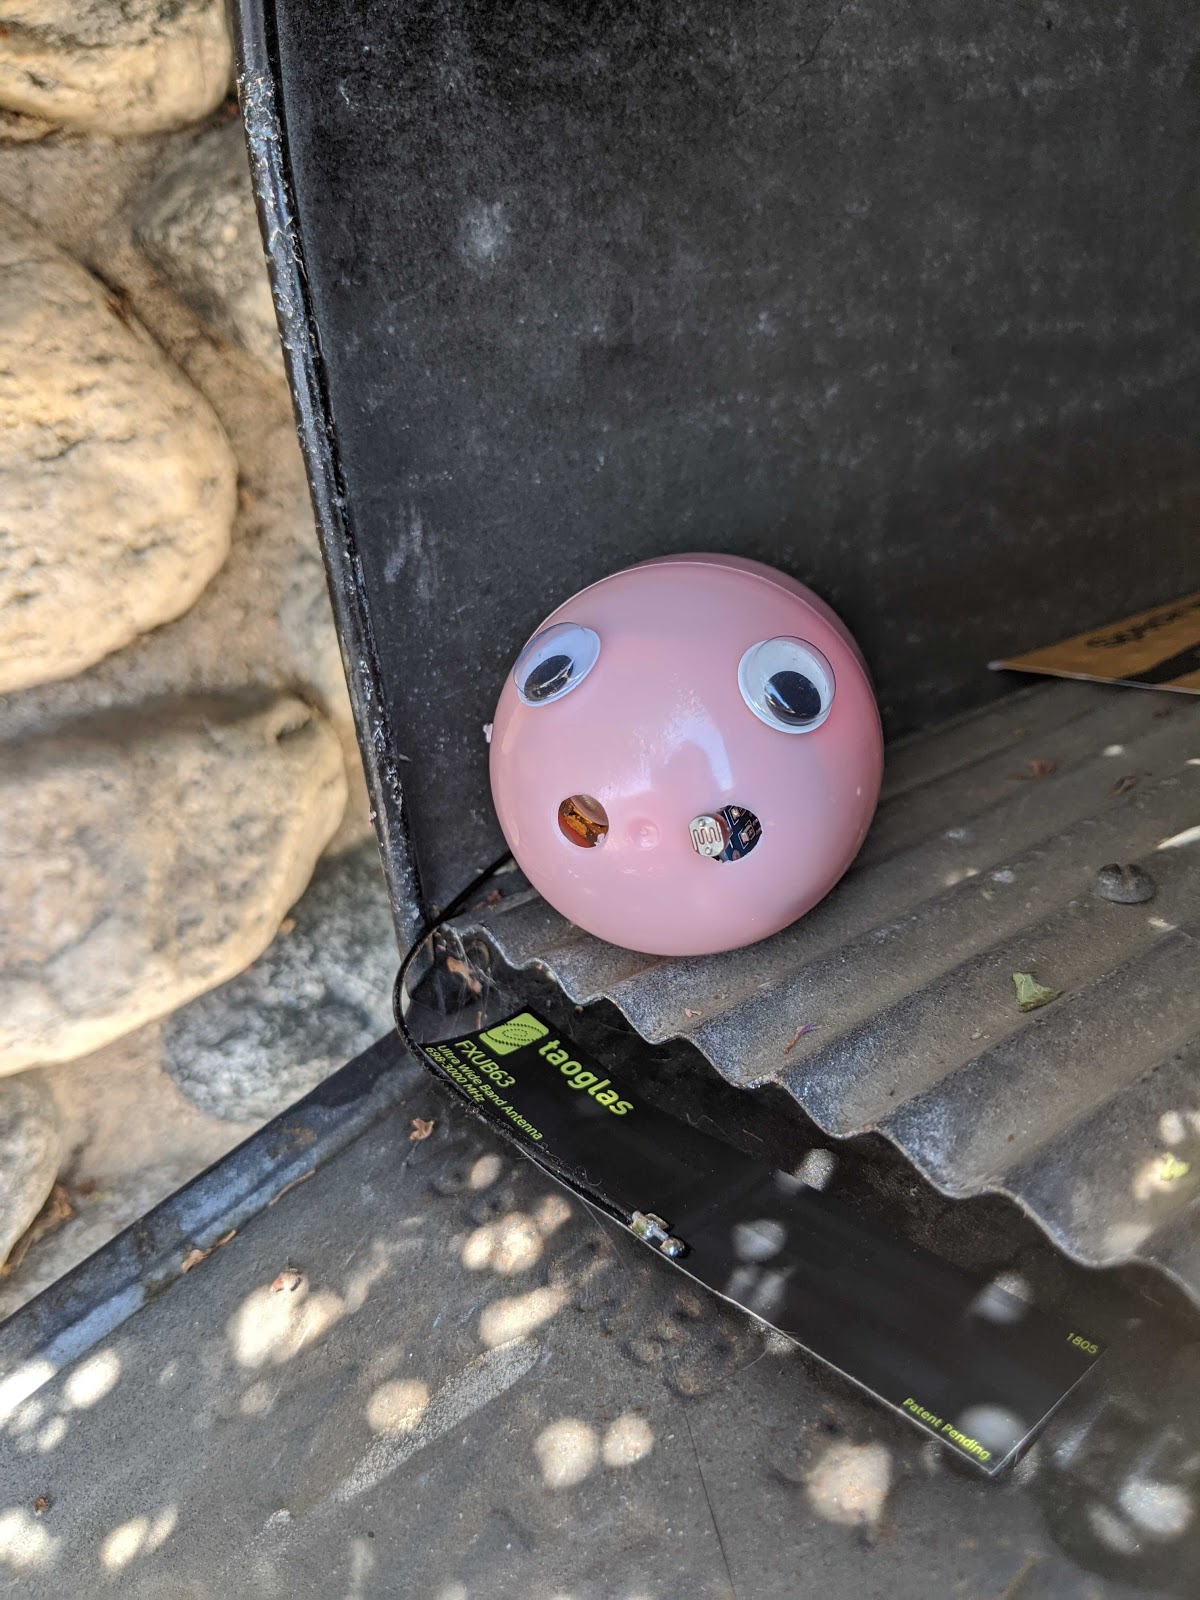
MailPig waits for someone to open your mailbox and then sends you a text about it. You can configure the number (or numbers) to text and the message you want MailPig to send in the using Twilio Functions.
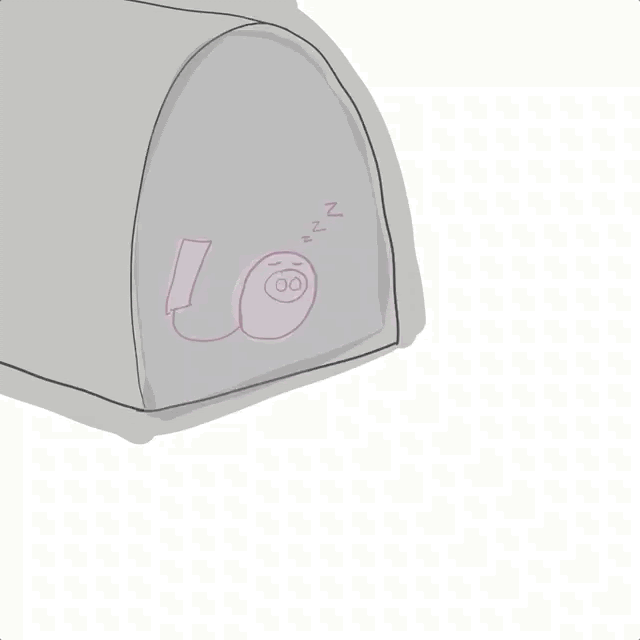
MailPig sleeps until it senses light, then it sends you a message
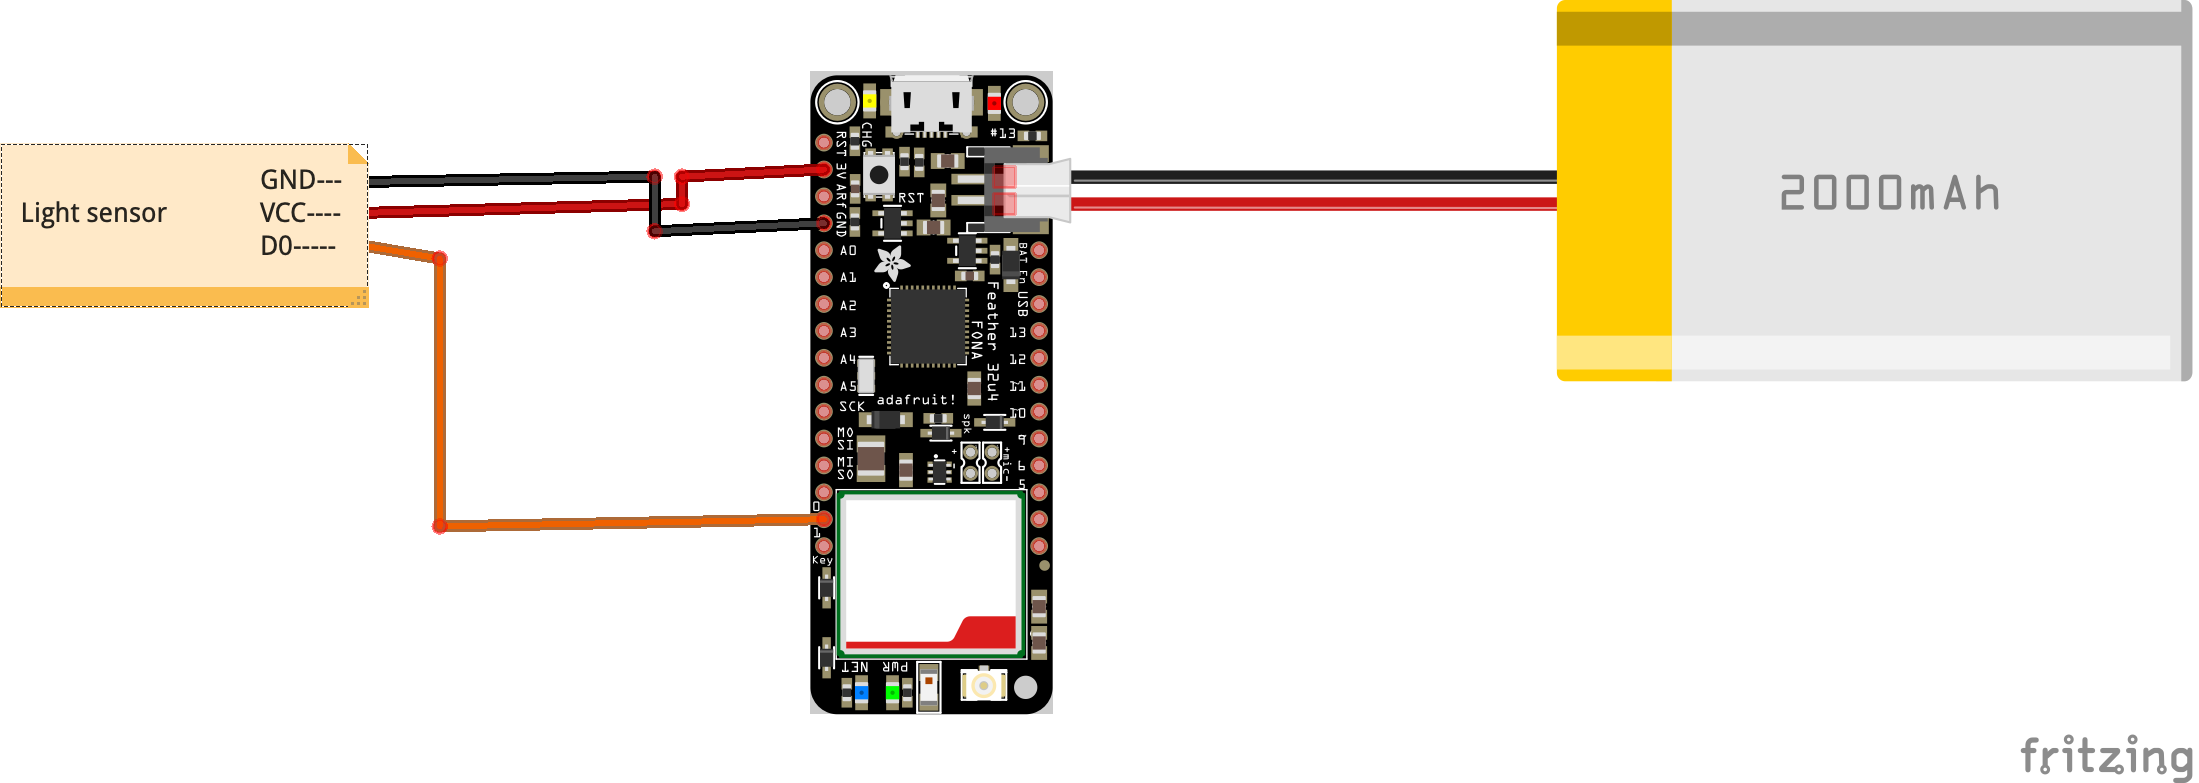
For this build, we’re going to use an Adafruit 32u4 Feather FONA, a photoresistor, and a Twilio Programmable Wireless SIM.
Note that this whole thing is going to work better on mailboxes that either aren’t metal or have a little hole where you can thread the antenna.
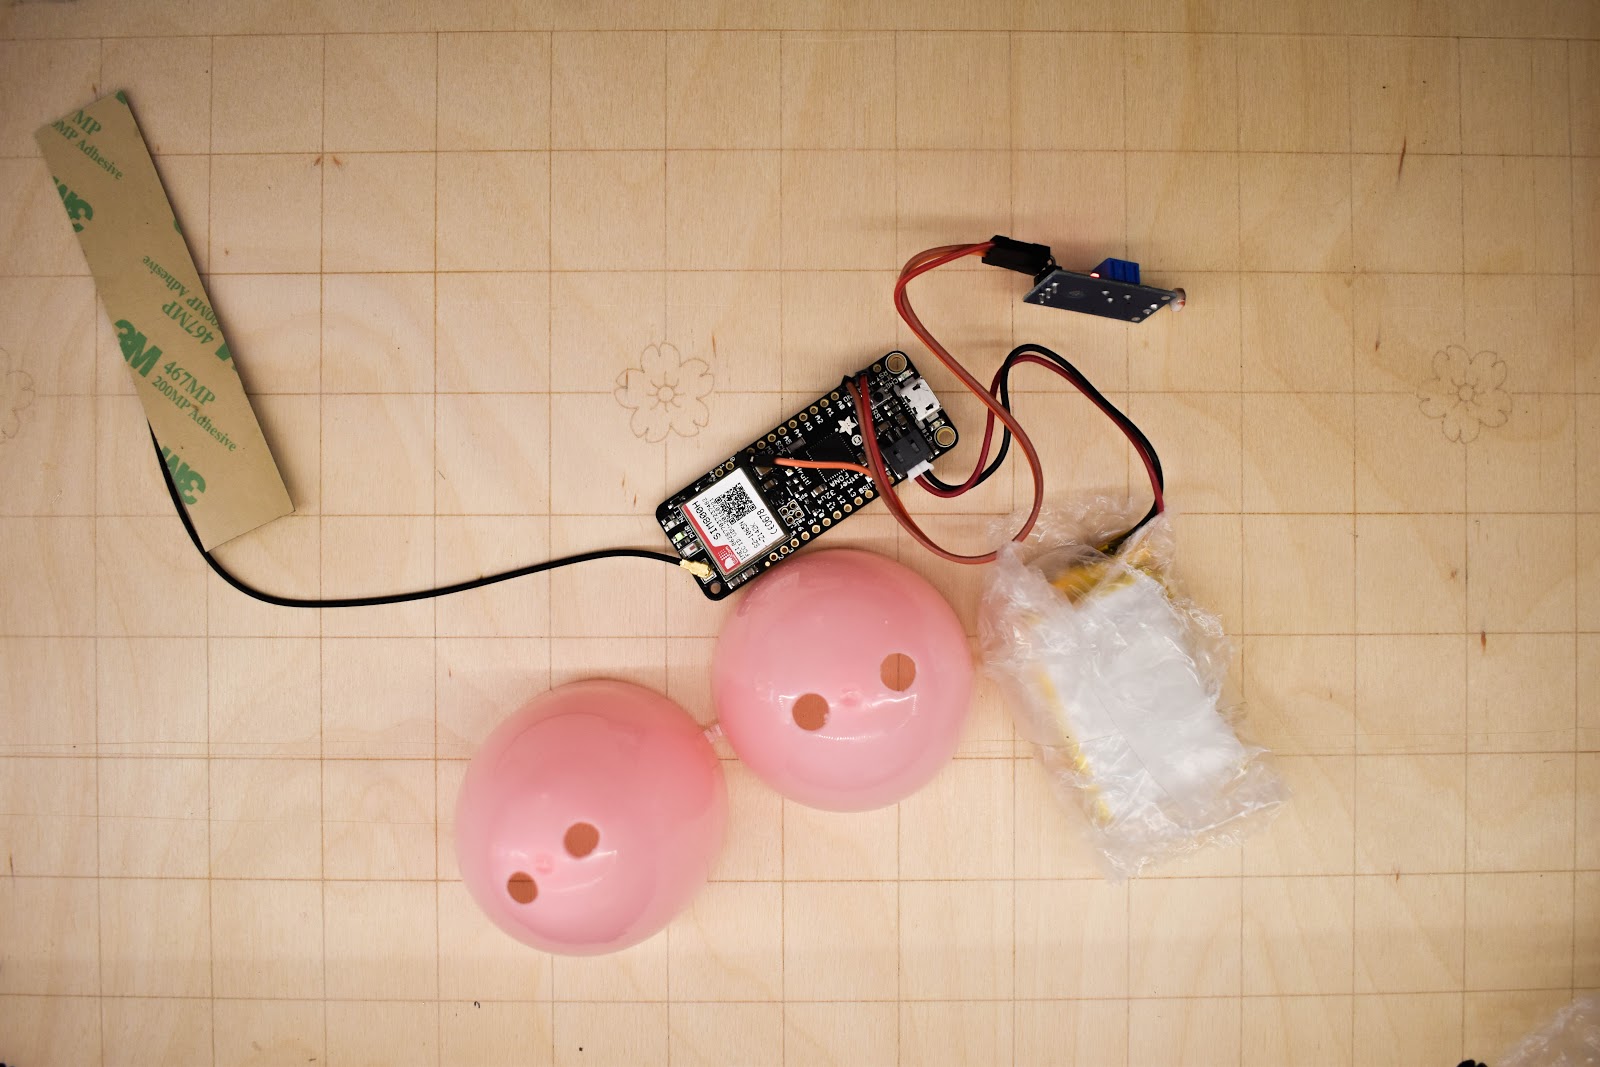
You will need
Hardware: Circuits n’ Stuff
- Your Twilio account. If you sign up for a new account through this link, you’ll get an extra $10 in credit when you upgrade.
- 1 x Twilio Programmable Wireless SIM. Log in and order one here. Create an order using the + button.
- 1 x Adafruit 32u4 Feather FONA with antenna
- 1 x LDR module with digital output. I used these. If you want the experience of building a circuit from scratch, you could also follow a tutorial for making a similar circuit with a comparator.
- 1 x 2000mAH 3.7V LiPo Battery
- 1 x USB-to-Micro-USB cable
- 3 x M-F wires
- Hardware workbench essentials: wire strippers, wire snips, needle nose pliers, Phillips-Head screwdriver, soldering iron, and solder.
Note: You can only buy SIMs in an upgraded account (one which has payment info added)
Firmware: What sits on your device
- The Arduino IDE
- The Rocketscream low-power library. Download this as a .zip and add it to your Arduino libraries by selecting
Sketch > Include Library > Add .ZIP Library… - The Adafruit FONA library and board info. You can search for this in your Arduino Library Manager. Follow Adafruit’s instructions to get set up.
- The Arduino sketch from this Github repo
- Your computer. Or someone else’s who can let you use it.
Software: Handling data in the digital world
- We will be following the tutorial here, which additionally requires a Twilio account and a Twilio phone number
Enclosure: Arts and crafts
- A plastic easter egg
- Scissors or a drill to poke holes in the egg
- Tape to secure the egg to your mailbox
- Bubble wrap and tape to keep the battery cushioned
- Googly eyes, glitter, glue, and whatever else you want to use!
Assembling your device
Set up your Twilio SIM. Follow the instructions here. Put the Twilio SIM into the Adafruit Feather FONA as described. You don’t have to add the firmware from these instructions though; you can use the one we’re going to upload later.
Check that your board works. Plug in the battery and the USB-to-Micro-USB cable. Make sure that the LEDs on the board light up. Then, unplug everything and get ready to solder!
Solder your M-F wires to the Adafruit Feather FONA. These wires will connect the Adafruit Feather FONA to the light sensor. You will want the M headers of the wires at GND, 3V3, and 0.
Plug the digital light sensor into the wires. Plug GND into ground, 3V3 into power, and 0 into the signal line.
If you plug in your battery now, you’ll see the LED on the digital light sensor light up. It will light up if the sensor is triggered (sees light).
Add code to your device
Open the Arduino IDE and follow Adafruit’s instructions to add the Adafruit 32u4 Feather FONA to your boards manager and add the FONA library to your libraries.
Download the the Rocketscream low-power library as a .zip. Add it to your Arduino libraries by selecting Sketch > Include Library > Add .ZIP Library… and selecting the file.
Download the code from this GitHub repo and open the sketch folder in your Arduino IDE.
Plug in your cable and battery to the Adafruit Feather FONA and connect it to your computer.
Compile and upload the code.
Get it to text us
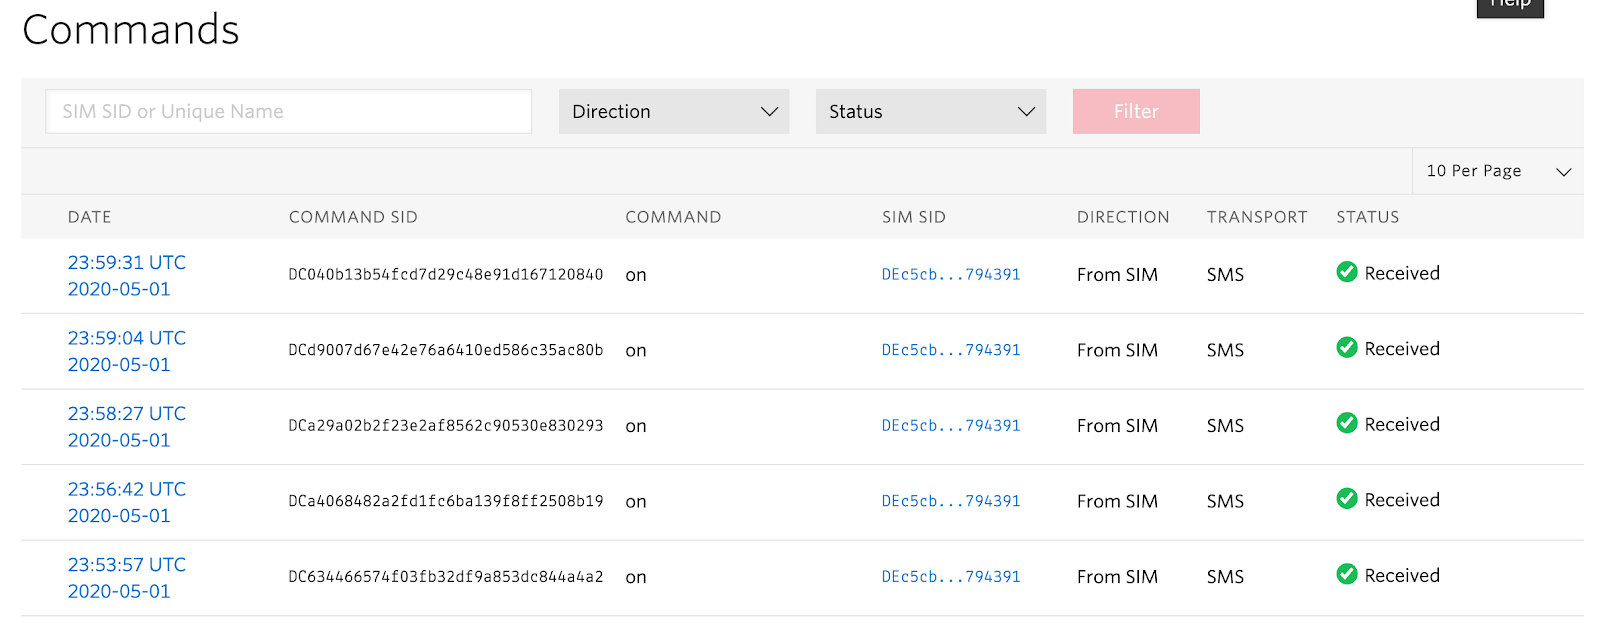
Follow this tutorial to get set up with Twilio M2M commands. The firmware on your device is already texting the short code with the M2M command on when the sensor sees light, so you can focus on the part that involves setting up a Twilio Function.
I set my Twilio Function to say You have mail! but you could have yours say whatever you like. (I recommend, oink oink the mail is here)
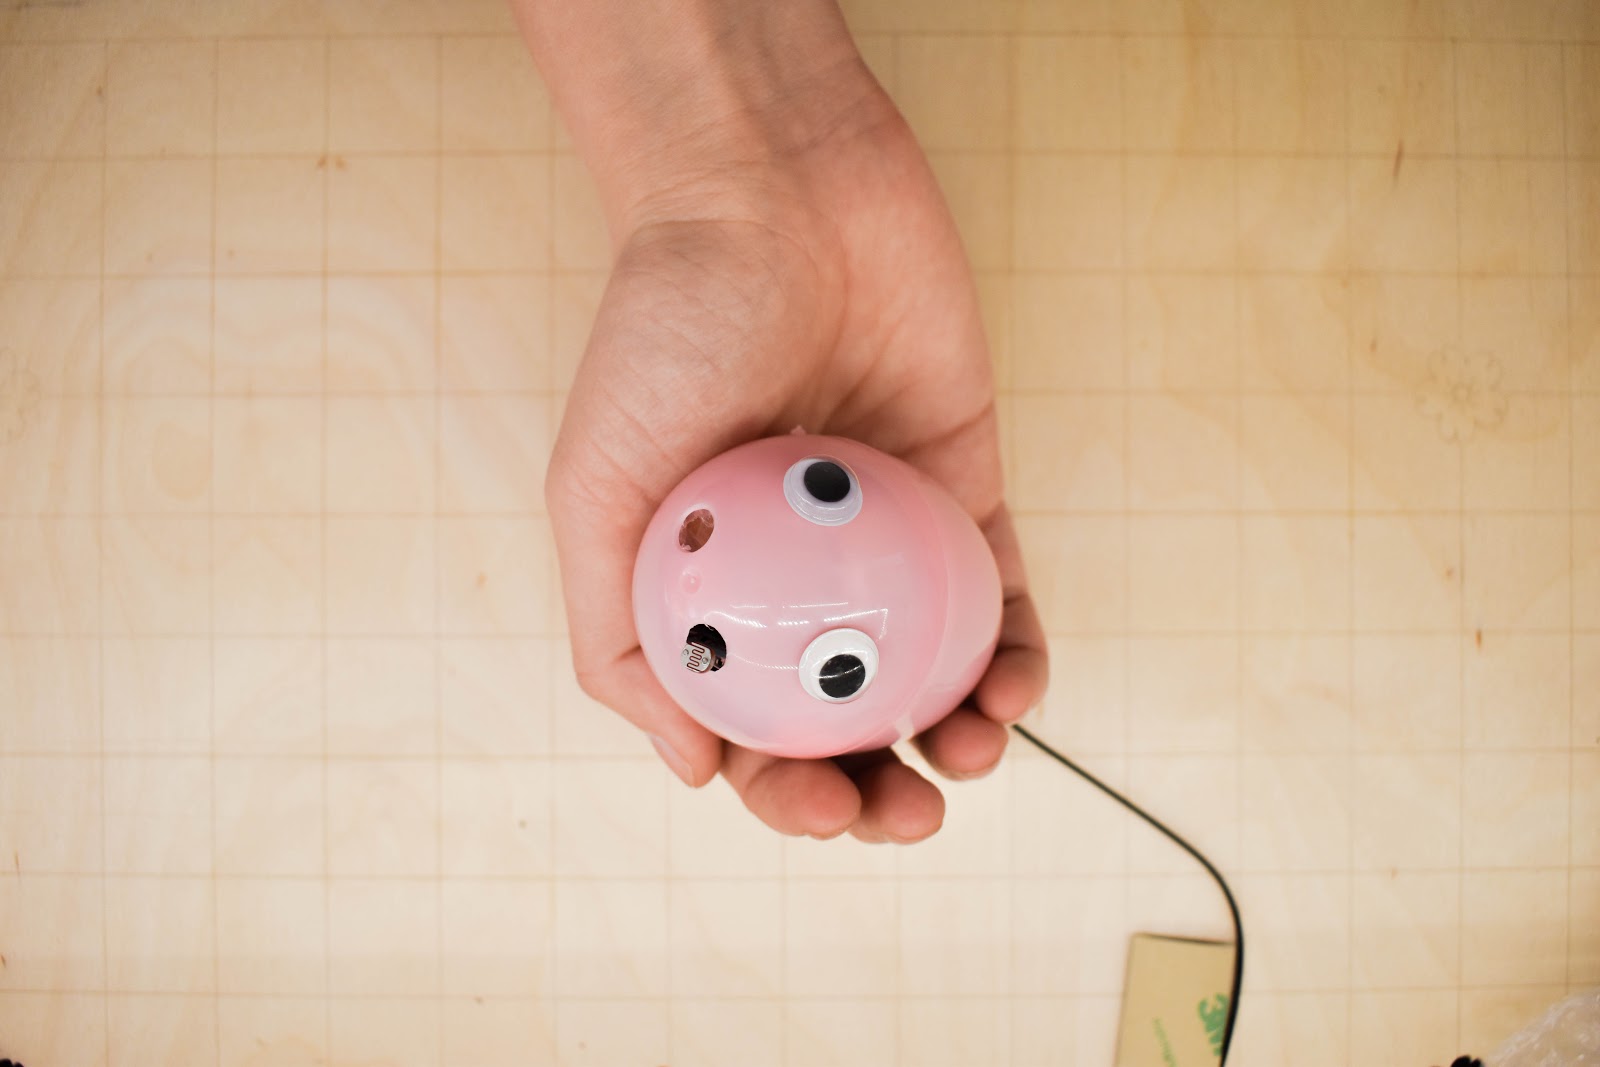
Dress it in something cute
Drill some holes in your egg. I like to drill two on the top and two on the bottom in case I need to reposition the antenna.
Wrap the battery in bubble wrap and tape it. LiPo batteries are dangerous when compressed or punctured. When you put them in enclosures, you have to make sure they aren’t at risk of being crushed or pinched.
Thread the antenna through one of the holes and attach it to the board. Position the light sensor so that the photoresistor itself protrudes out of the hole.
Decorate your egg! Optional but fun. I like to add googly eyes.
Put it in the mailbox
This is a trickier problem than it might seem at first! Some mailboxes are Faraday cages that block cellular signals. You have to find a hole in your mailbox (or make one!) for the antenna. Try to find an opening where you can thread the antenna that won’t cause rain to fall on your device!
In my mailbox, there’s a little open area at the hinge where an antenna fits perfectly.
Face the sensor towards the light of the mailbox and text it to see if the light sensor goes off. If it doesn’t, you’ll probably need to adjust the sensor using a screwdriver.
One you have it working, go celebrate!
Get notified
That’s all! Enjoy being texted when the mail comes. Check out the video below to see it in action.
Questions about the build? Feel free to leave comments and issues on the Github repo, find me on Twitter, or check out Twilio on Twitch, where I will inevitably stream a mailbox sensor build.
Questions about Twilio? Sign up for an account to build one yourself, or talk to Sales about IoT connectivity solutions.
Christine Sunu is the Internet of Things Developer Community Engagement Manager at Twilio. She's currently working on IoT, ambient computing, and robots that pretend to be alive. Find Christine on Twitter (@christinesunu) or Github (cmsunu28)
Related Resources
Twilio Docs
From APIs to SDKs to sample apps
API reference documentation, SDKs, helper libraries, quickstarts, and tutorials for your language and platform.
Resource Center
The latest ebooks, industry reports, and webinars
Learn from customer engagement experts to improve your own communication.
Ahoy
Twilio's developer community hub
Best practices, code samples, and inspiration to build communications and digital engagement experiences.