How to Build an IoT Medication Tracker
Time to read:
February 12, 2021
Written by
Reviewed by

Per CDC estimates, medications prescribed to patients are not taken as directed 50% of the time. This non-adherence causes 125,000 deaths per year in the US.
Common reasons for patients not following the healthcare provider prescription instructions are:
- Not understanding directions
- Forgetting
- Taking multiple medications each day with different schedules
- Inability to order medication refills timely
In this digital era, technology is transforming healthcare with continuous monitoring of patients. If we are able to make it easy and fun – think Fitbit, for example – to keep track of our steps per day, calories burnt, heart rate, oxygen saturation, and more, why should it be hard for patients and their healthcare providers to keep track of the medication schedule and automate prescription refills?
It shouldn’t. In this post, I’m going to show you how to build a demo IoT medicine tracker. While you'd have to build more for a production build, I'll show you what's possible with Electric Imp, Twilio Flex, and Airtable.

Technology to the rescue
To address the medicine adherence issue, we prototyped a medication tracker using Twilio’s customer engagement platform and Twilio Electric Imp.
Our prototype includes a website where a patient or caretaker can enter info about their prescription regimen. Info gets sent to the patient’s reminder device, which blinks a color-coded message to the user when it’s time to take certain meds. When the patient takes the meds, they can acknowledge the reminder. Info on how the patient has been doing with medication compliance gets stored in an Airtable (a cloud spreadsheet-like database) that can be shared with the provider.
Prerequisites
Before we can start, you’ll need to set up a few things with Electric Imp and Twilio. Here is the list of the things you need to build this prototype:
Electric Imp
- An Electric Imp account. You can sign up for a free account here.
- impExplorer Developer Kit
- An accessible Wi-Fi network. Since we’re using a vintage module, make sure you have a 2.4 GHz network available.
Twilio
- A Twilio Flex account. Here are the instructions to create a Flex account. If you sign up for a new account through this link, you’ll get an extra $10 in credit when you upgrade.
- Twilio phone number. Instructions are here.
- An Airtable account
Great, let’s get started.
Build an IoT medication schedule tracker
In the next steps, I’ll walk you through how to configure your devices and Twilio services to build the IoT tracker.
Set up your impExplorer
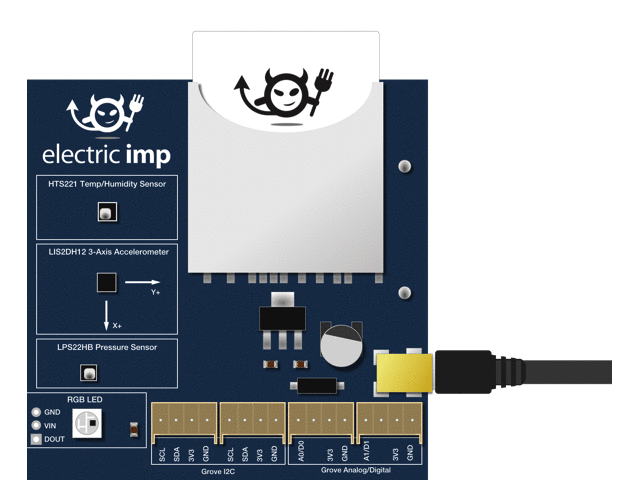
Set up your impExplorer following the instructions in this quickstart guide. Once you’ve done that, you’ll be ready to load application code onto your impExplorer!
Add source code to impExplorer
The IoT application code is divided into two components – agent and device code. The agent code is hosted in the Electric Imp cloud and the device code is deployed on the device (IoT Tracker) itself. You can use this sample code from the agent.nut and device.nut files. Paste the corresponding code into the agent and device editors of your impCentral console.
In this prototype, the agent will maintain the prescription schedule for the patients and send signals to the device (Rx Tracker) for medication reminders. The device will do 2 things:
- Receive signals from the agent and display the right LED color
- A “motion sensor” driven by the accelerometer will act like a button to send back the patient's acknowledgement to the agent.
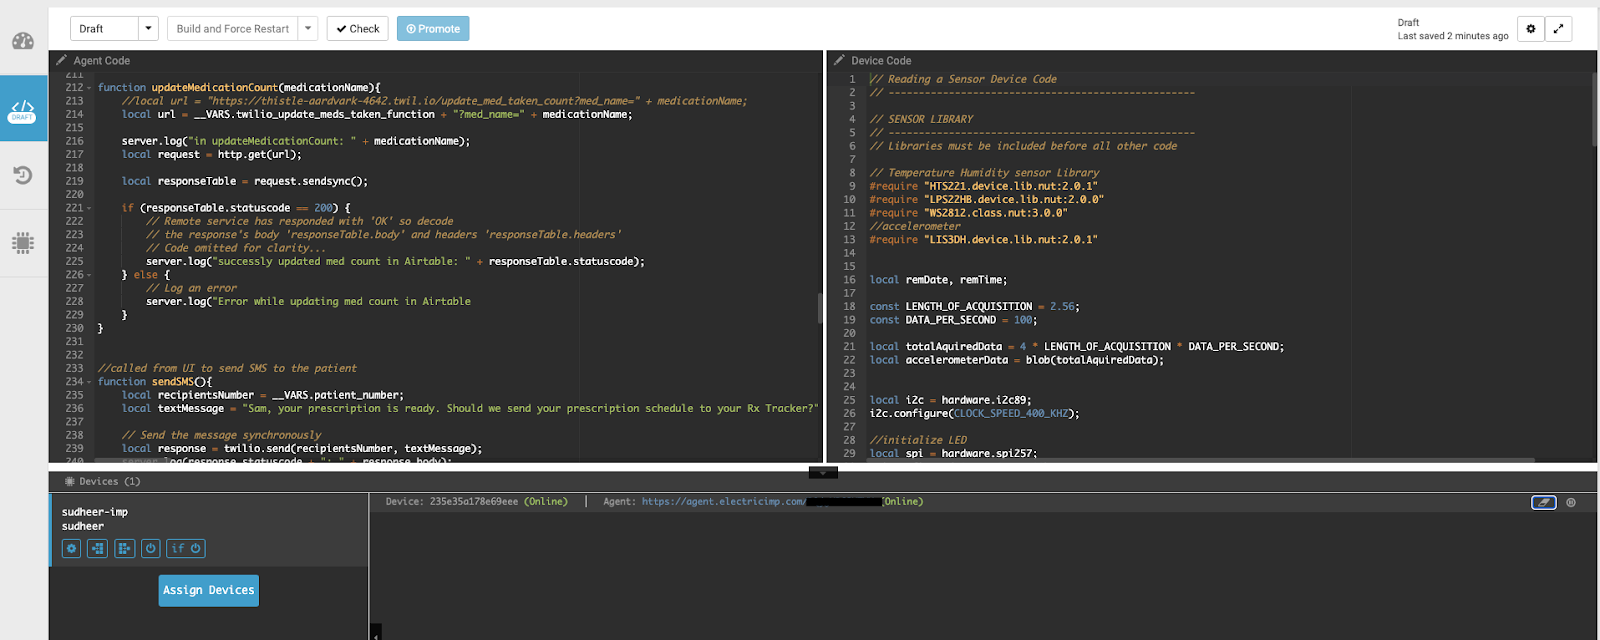
Note down the agent code url (bottom right panel of the portal) as we will use this when configuring Twilio account for SMS.
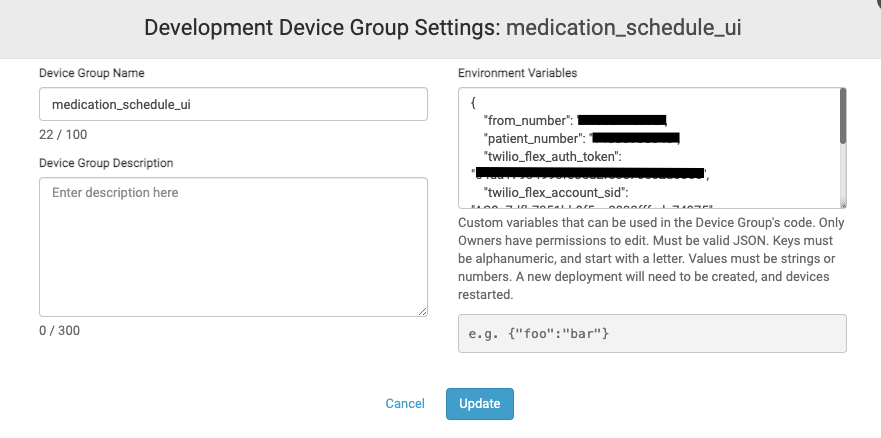
Configure environment variables section in your Development Device Group’s Settings using electricimp.sample.env. We are configuring a patient phone number, Twilio (from) phone number, Twilio account SID and auth token.
BlinkUp your Electric Imp
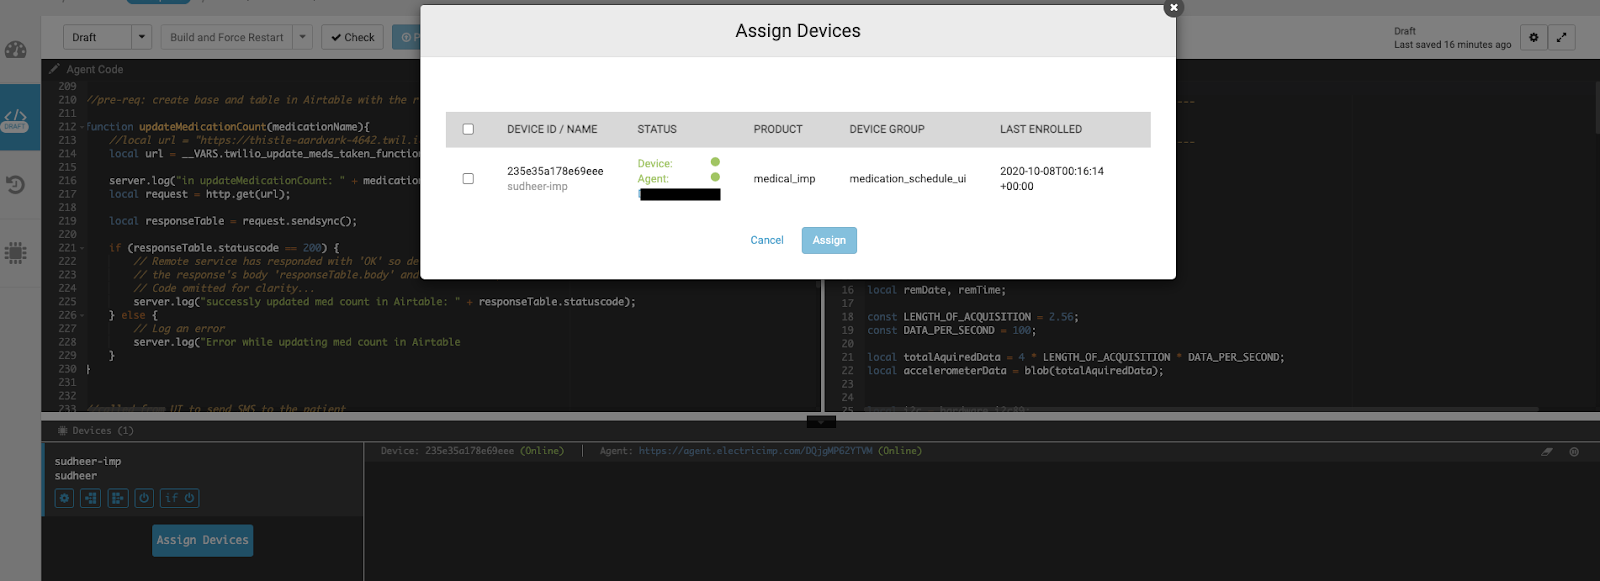
Follow the instructions here to set up your imp device. Once the device is connected to your WiFi, assign the Electric Imp device to your application in impCentral.
Configure a Flex Account
We will use the Twilio API to send SMS notifications to the patient about their prescription. Since it will be a 2-way conversation, our application needs to know when the patient replies.
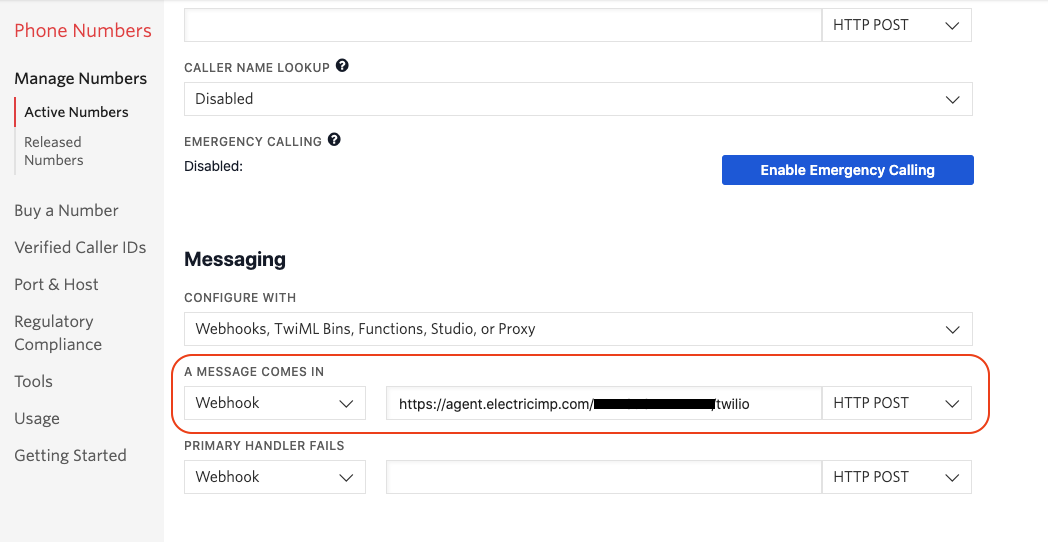
Let's use the agent URL that you noted down earlier to configure the Twilio number to send the patient responses to our application hosted on Electric Imp. In the Twilio portal, find your phone number and configure the Messaging webhook URL with the agent URL.
We will be using Twilio Flex to notify the physician’s office if the patient is falling back on their medication schedule. You can follow the instructions to create relevant functions and Studio flows in your Twilio Flex account.
Configure Airtable
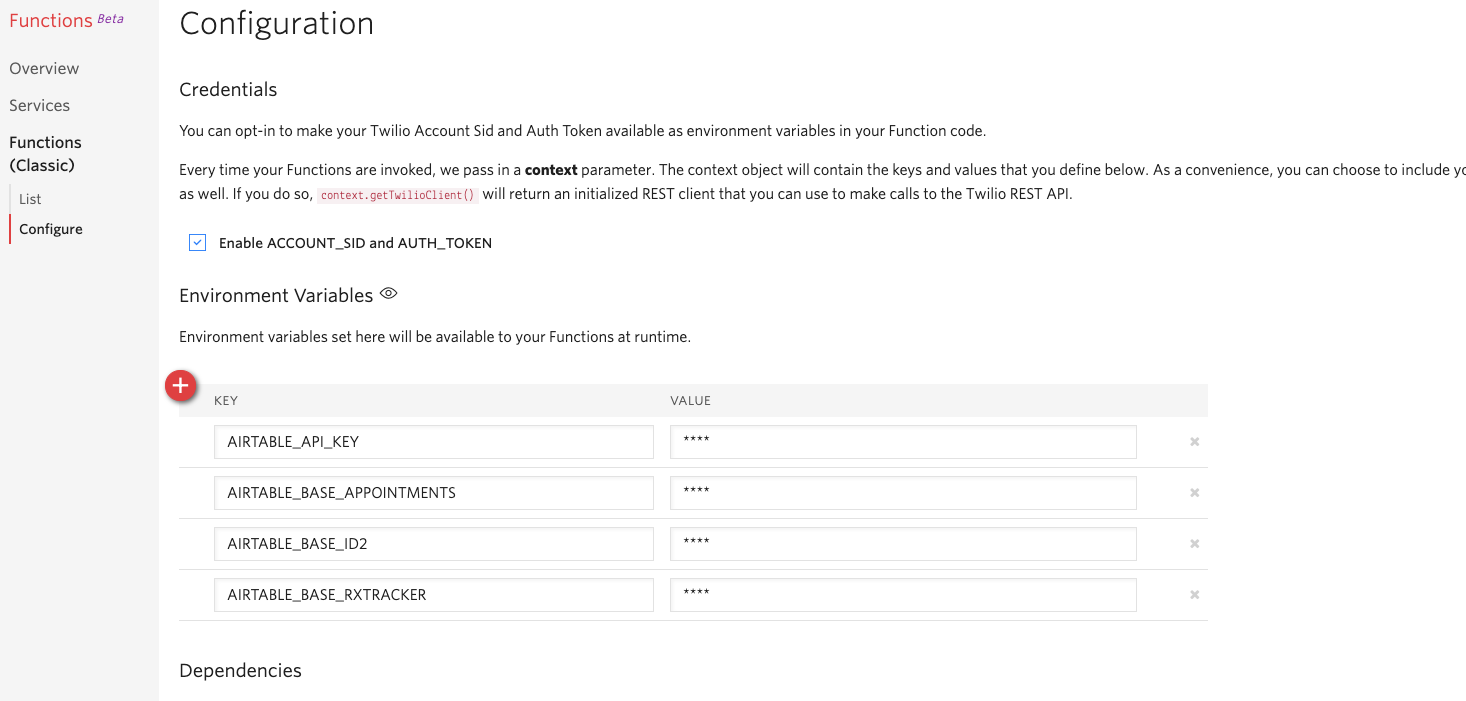
Create a new Airtable base and a table following this quickstart. Configure Electric Imp environment variables with your Airtable API Keys, base, and table names.
When you’re done, your Functions environment variables window will look something like this:
Create a Twilio function using this code that will track the patient’s medication usage in Airtable.
Test the IoT medication adherence device
Now that you completed the demo build and deployment, let's walk through how to test you the medication adherence demo.
Configure Rx Tracker with prescription schedule
First, we need to set up our prescription tracker with a medicine schedule.
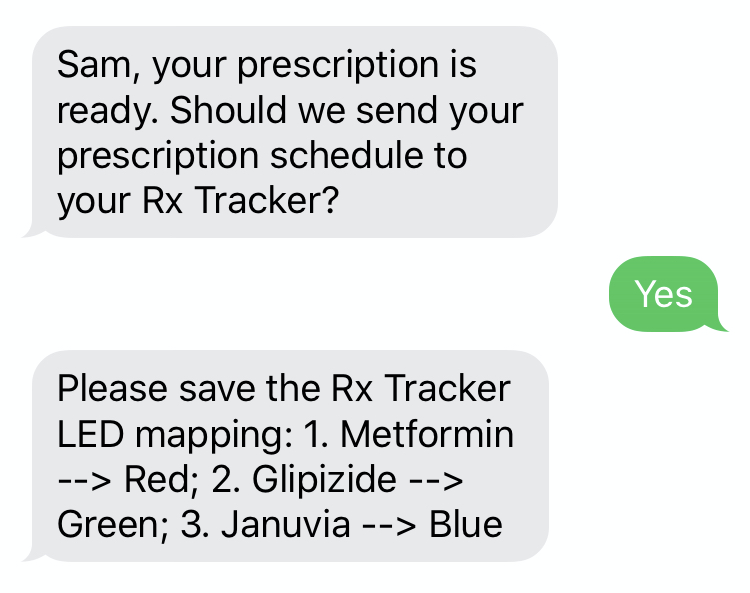
Navigate to the Agent URL and select a sample medication schedule (Metformin 3 times a day, Glipizide 2 times a day and Januvia once a day) from the dropdown, then click the “Send SMS button”.
You should receive an SMS to the configured patient_number from the earlier section. Reply “Yes” to the text messages so the medication schedule is configured in your IoT tracker automatically.
Prescription reminders and acknowledgement
Next, let’s test the patient reminders and acknowledgement functionality is working.
Click the “9:00am” button on the web page to simulate 9:00AM, and the IoT Tracker should start displaying a red blinking color on the LED reminding the patient to take Metformin.
Move the IoT Tracker once (there is no button currently – we are simulating pressing a button with the movement) to acknowledge that you took your medicine. The “motion sensor” will then send a signal back to the Agent code and update your Airtable with this information.
Immediately the green color starts blinking, reminding you to take Glipizide medication. Repeat the same process to acknowledge the green and blue color medication reminders.
Navigate to the Airtable dashboard to view the medication data collected in the table.
In your final build, it is straightforward to use different outputs for reminders, such as an LCD display or an audio speaker (or a combination instead of an LED). And for acknowledgements, you could use a button or a secure fingerprint sensor instead of the motion sensor.
Alerting health professionals
We talked about the happy path of the medication reminders and the patient acknowledging when they took their prescription medication on time. What happens when the patient misses their medication, or falls behind on the schedule?
Let’s test it. Place your hand on the Electric Imp card to simulate the patient missing their scheduled medication.
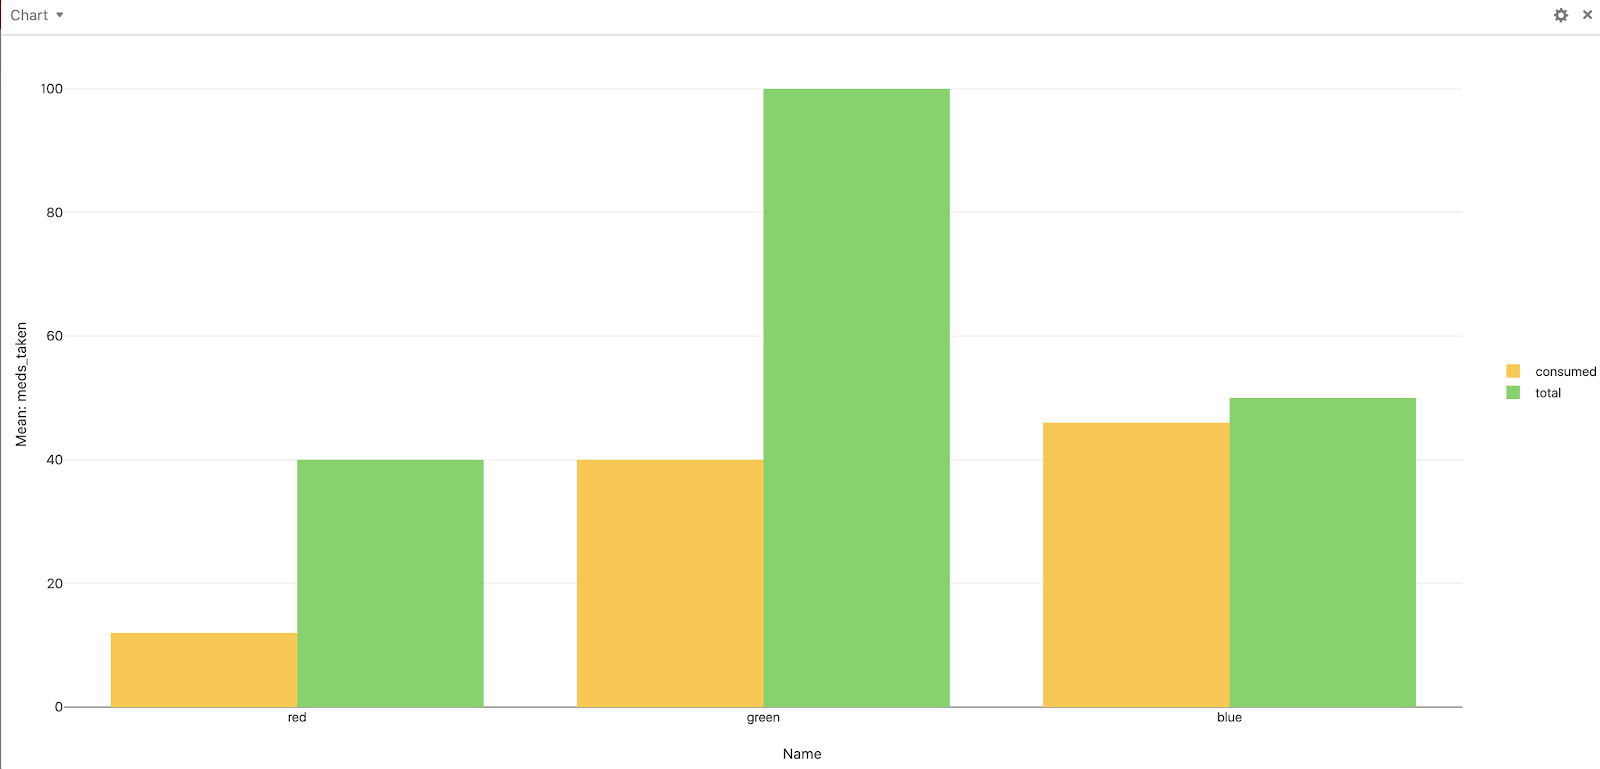
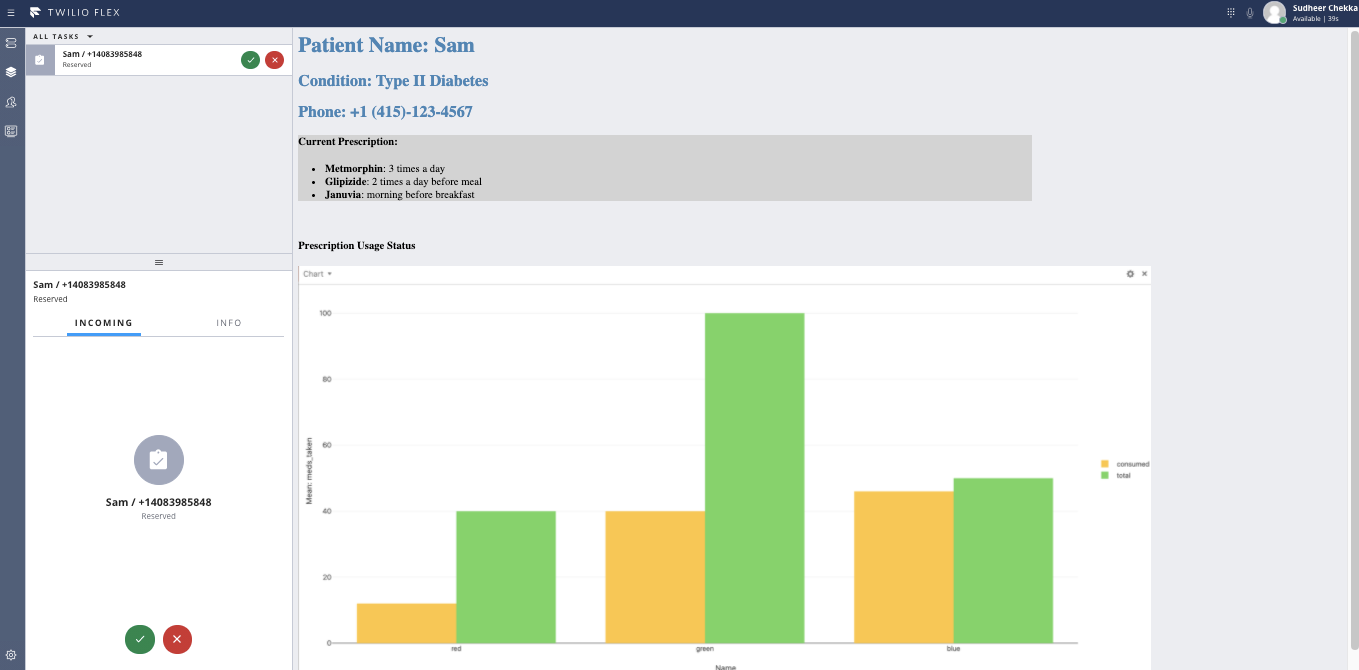
IoT Tracker will create a Twilio Flex task event to notify the doctor’s office when the patient is falling behind on the schedule. The doctor’s office – using the Flex Agent dashboard view – will be notified when new Flex task events are generated and sent to them.
When the task event is accepted, they will be able to view the patient’s prescription schedule and usage pattern dashboard as shown below in the screenshot:
Helping the patient adhere to their prescription schedule
Similar to tracking personal fitness (such as step count or heart rate), we can use Twilio’s communications and IoT platforms to help patients keep track of their complex prescription schedules and maintain real time status of the consumed medication. With all the medication usage data at hand, the application can also help identify if there is any medication held back – or, you might imagine, help automatically order refills.
With this kind of solution in place, healthcare providers can address the common challenges around medication schedule adherence. The IoT Tracker’s reminders can help simplify a complex prescription schedule into easy visual reminders, and consolidate and automate prescription refills and provide up-to-date usage data.
And before you go – here’s a quick look at the prototype of this solution:
Conclusion
Great job! You now have a working prototype of the IoT Tracker that can improve medication adherence and also provide real time prescription usage data to the patient and their physician.
With Twilio Flex, the IoT Tracker can automatically notify the physician’s office if it detects any anomaly in the patient’s prescription usage.
And now that you’ve built an IoT medication tracker, check out our IoT docs for tutorials and information on what else is possible.
Sudheer Chekka is a Solutions Architect at Twilio with a primary focus in the Healthcare industry improving patient digital engagement and experience. He has 20+ years of experience in Enterprise Application Architecture and Technology Sales helping customers build scalable distributed applications.
Related Posts
-
 Building a Greeting Card Generator with the Lovable Twilio ConnectorChiara Massironi
 -
 How to Approve Real Users and Block Fake Accounts at Sign Up with Lookup and VerifyKelley Robinson
 -
 How to Handle No-Answer/Pickup Scenarios with Voicemail and Callback using Twilio VoiceAmanda Lange Niels Swimberghe
Related Resources
Twilio Docs
From APIs to SDKs to sample apps
API reference documentation, SDKs, helper libraries, quickstarts, and tutorials for your language and platform.
Resource Center
The latest ebooks, industry reports, and webinars
Learn from customer engagement experts to improve your own communication.
Ahoy
Twilio's developer community hub
Best practices, code samples, and inspiration to build communications and digital engagement experiences.