Link IVR Time/Path with Inbound Calls Using Flex Insights
Time to read: 5 minutes
June 12, 2020
Written by

This post is part of a series on IVRs and Flex Insights. Learn how to track calls abandoned in your IVR here, and stayed tuned for an upcoming guide on keeping track of IVR workflow executions in Studio.
Contact centers push for the use of self-service options to reduce the time their agents spend on handling common requests. In many cases an IVR is used to serve basic customer needs. However, to provide a good customer experience and increase the percentage of self-service inbound calls, visibility on how customers interact with an IVR is critical.
In this guide, I’ll show you how to use Flex Insights to consume IVR interactions for inbound calls and provide you with some tips on building custom reports.
Ready to get started? In this example, we'll create an IVR Task, link the Task to an inbound call, and apply custom attributes and metrics.
TaskRouter Setup - ‘Nobody’ TaskQueue
We need to create dummy IVR tasks to carry information from your IVR to Flex Insights. To do this, we first need to create a ‘Nobody’ TaskQueue and Workflow. Tasks assigned to this queue are not offered to any agent. The tasks only carry information to enhance Flex Insights.
TaskQueue
Docs: TaskQueue Resources
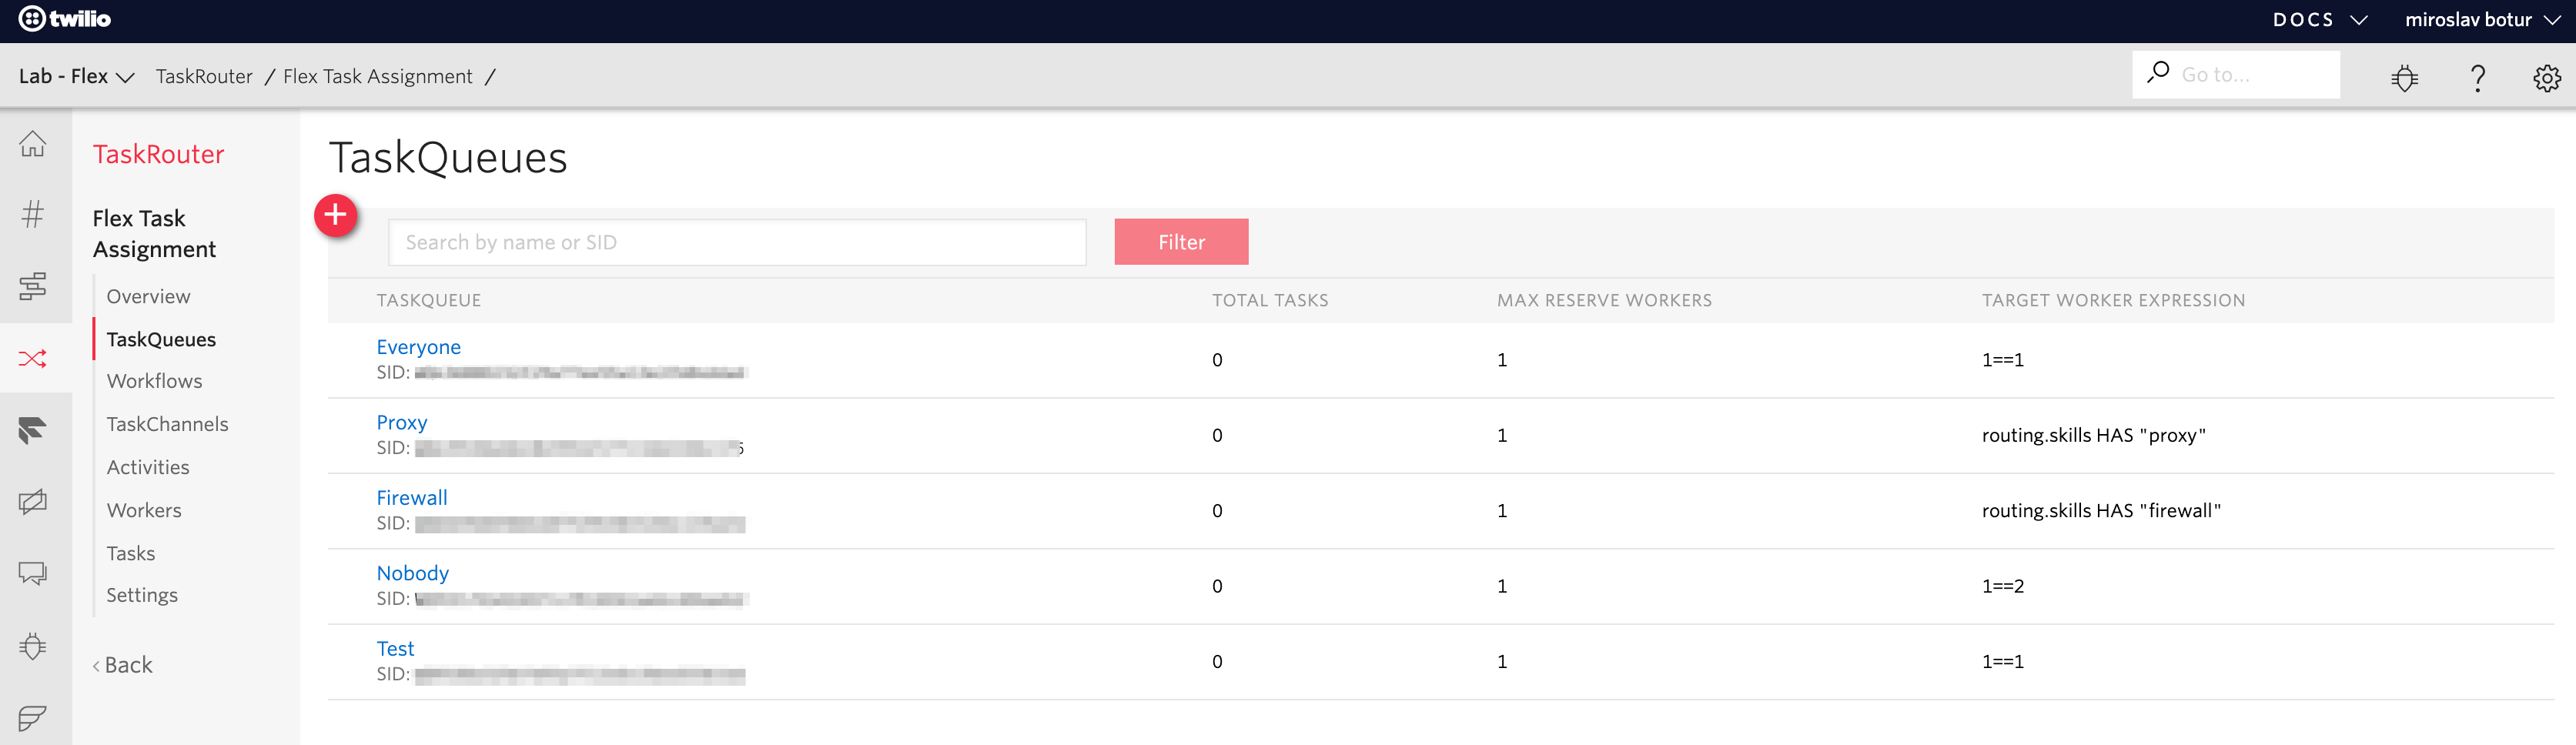
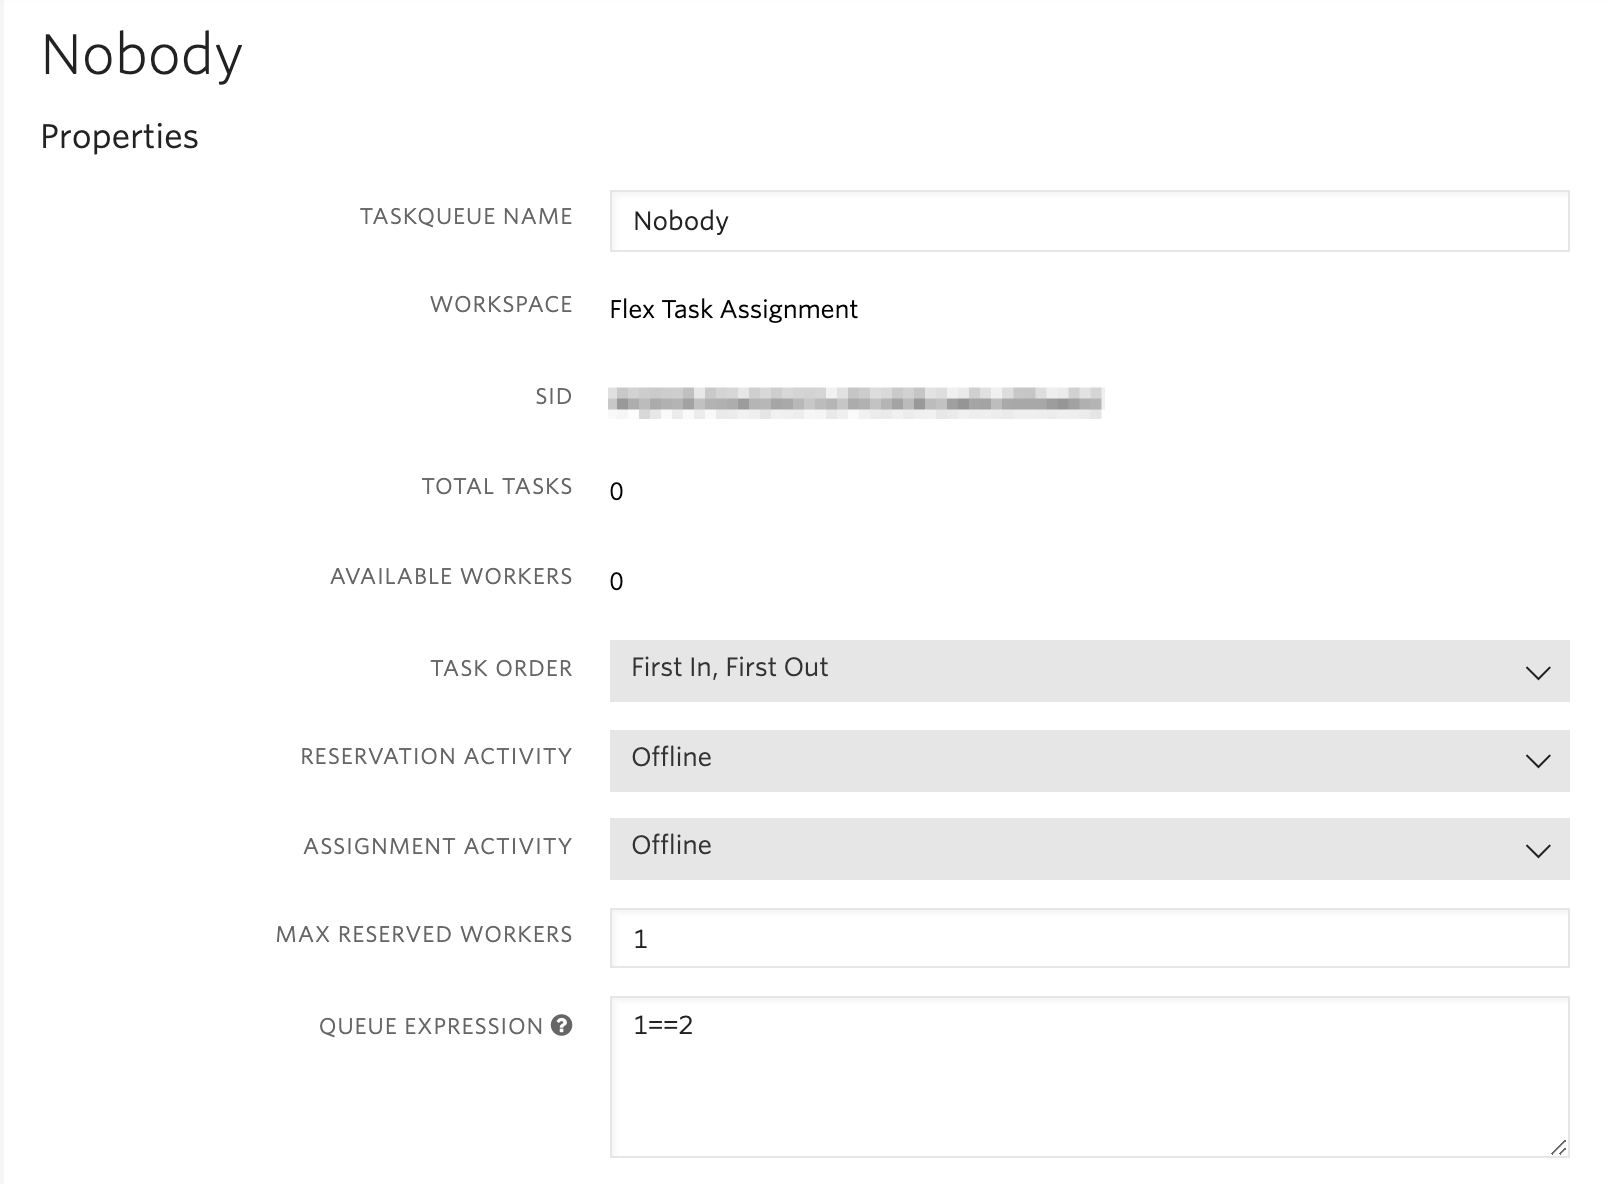
In the Twilio Console, navigate to TaskRouter, open the Flex Workspace and select TaskQueues. Create a new TaskQueue named 'Nobody' and set the expression to 1 == 2. This will create a queue with no agents. Your normal (non-IVR) tasks will not enter this queue. It will only be used to insert the IVR results into Flex Insights.
Workflow
Docs: Workflow Resources
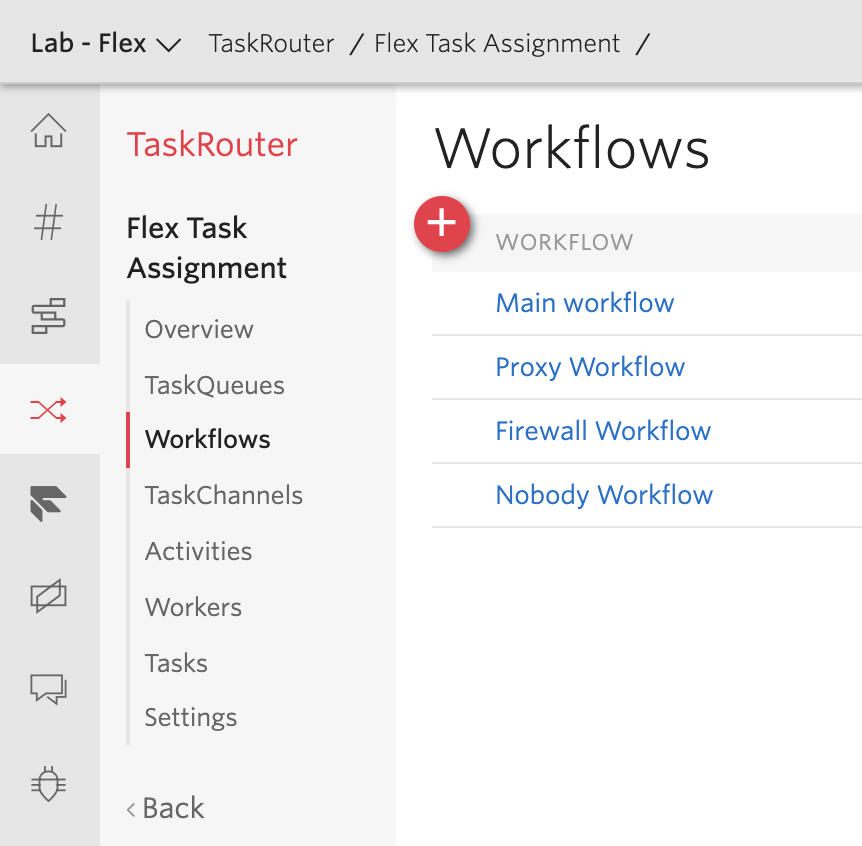
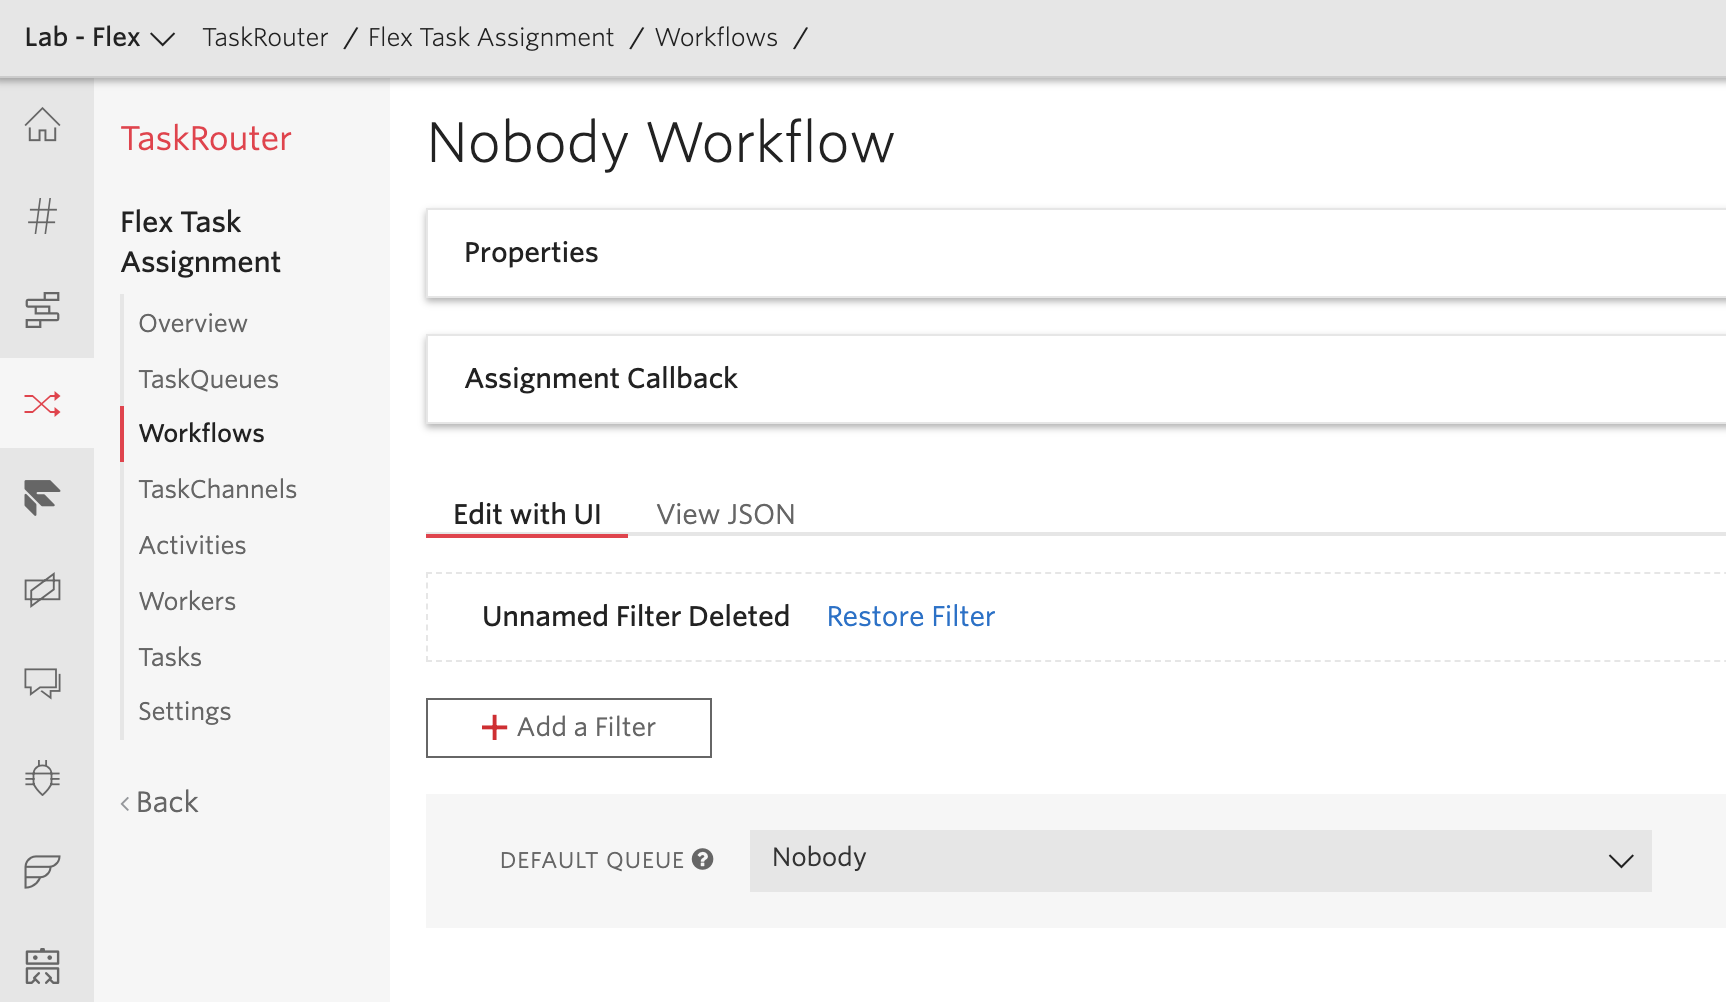
Once the TaskQueue has been created, select Workflows to create a new workflow. Name the new workflow 'Nobody', and create an expression that routes to the new 'Nobody' queue.
IVR Task
Docs: Enhance Flex Insights
Now we need to link the IVR interaction to another Flex Task (inbound call). To do this, we need a common conversation_id for both the IVR and the inbound call. We'll set the initial Call SID as the unique identifier.
To set this unique identifier, we'll use the Flex Insights conversations.conversation_id attribute for all the Tasks involved. By default, Flex Insights will generate a unique conversation_id for every task. To link the Tasks into a single conversation, we'll override this behavior by using the Call SID as the conversation_id explicitly. This tells Flex Insights to link the IVR and the Flex inbound call together.
In this example, Twilio Studio and Twilio Functions are used to set the conversation_id on the IVR task.
Studio
Docs: Studio
We need to create two widgets that call two functions: ‘IVR_Create_Task’ and ‘IVR_Update_Task’. We’ll place them around the IVR gadget as shown in the image below.
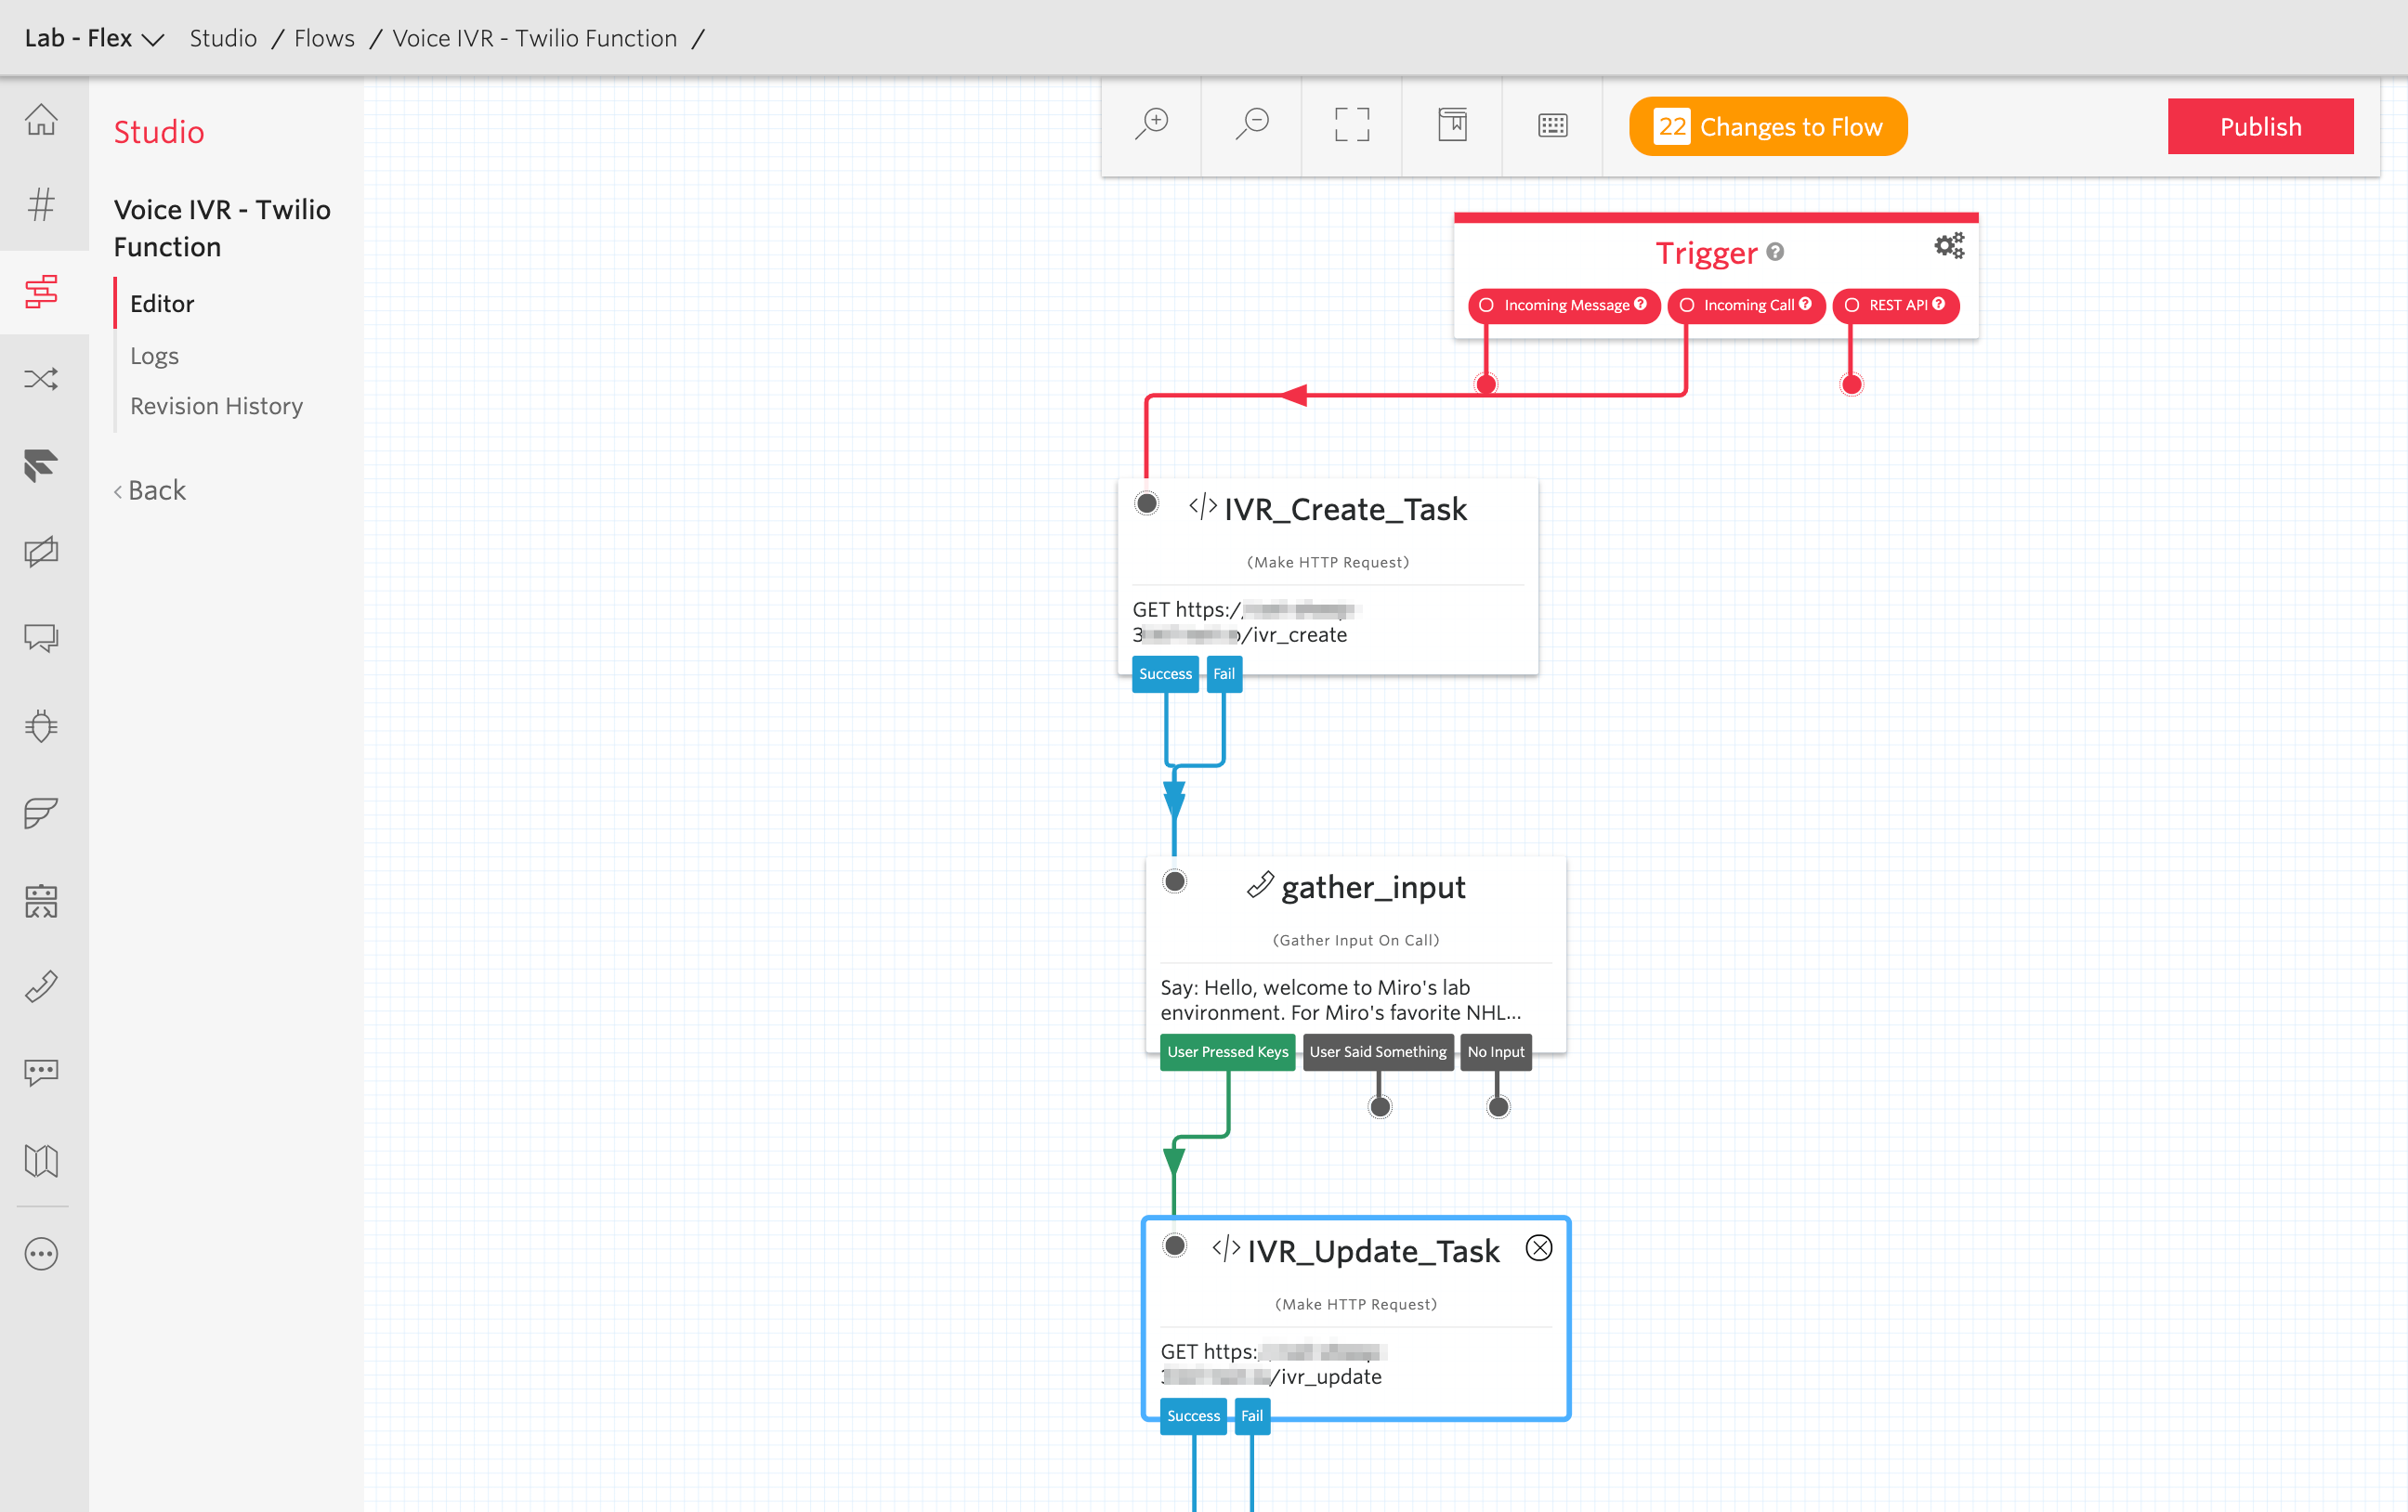
IVR_Create_Task
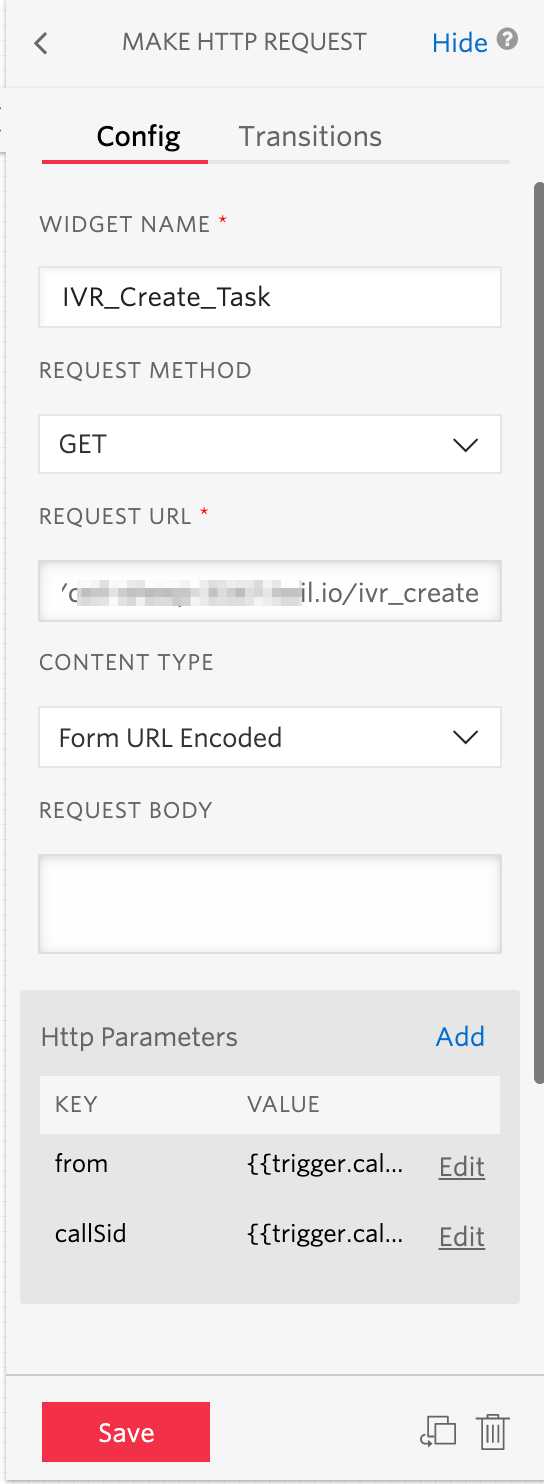
We can use either the ‘Run Function’ or the ‘Make HTTP request’ widget. In this example, I use the ‘Make HTTP request’ widget with the following settings:
Request_URL
- The URL to your function ‘IVR_Create_Task’ which is described below.
HTTP parameters
- from = {{trigger.call.Caller}}
It is useful to see the caller number in Flex Insights. - callSid = {{trigger.call.CallSid}}
The Call SID is used as the Conversation ID.
IVR_Update_task
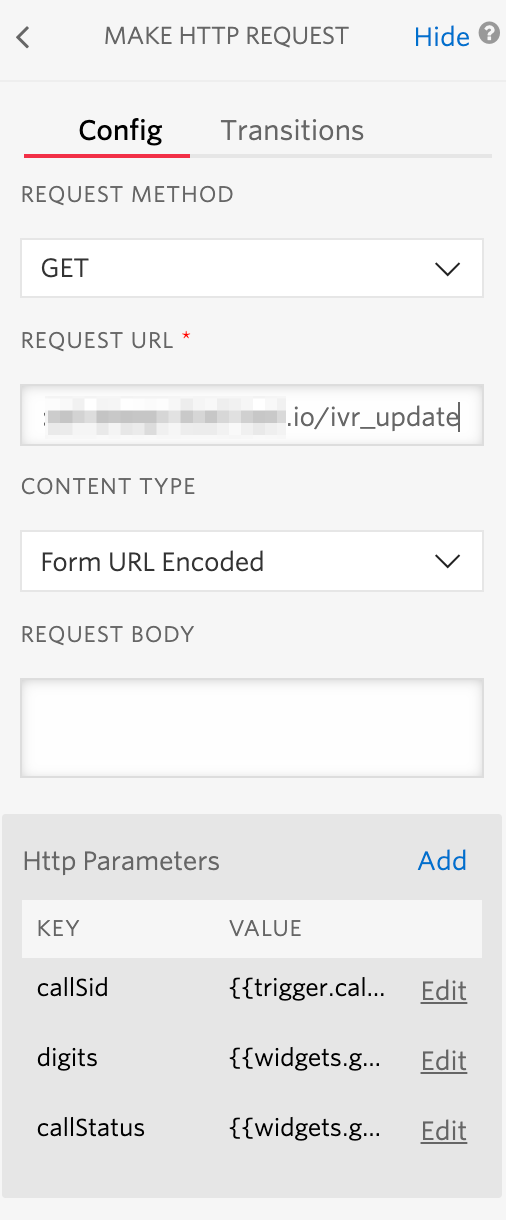
We can also use either the ‘Run Function’ or the ‘Make HTTP request’ widget here. In this example, I use the ‘Make HTTP request’ widget with the following settings:
Request_URL
- The URL to your function 'IVR_Update_Task' which is described below.
HTTP parameters
- callSid = {{trigger.call.CallSid}}
We use the Call SID to search for the task that we created before the IVR. - digits = {{widgets.gather_input.Digits}}
Information about digit(s) which is pressed in the IVR (called ‘gather_input’ in this example). - callStatus = {{widgets.gather_input.CallStatus}}
Call status lets us determine if the call was abandoned during the IVR or not. We will use this information in our update IVR function below.
Function
Docs: Functions
Create IVR Task
This function is called from the Studio ‘IVR_Create_Task’ widget and will:
- Add the Call SID to the ‘conversation_id’ attribute
This is required in order to link the IVR and Flex in Flex Insights. - Set the attribute ‘virtual’ to ‘Yes’
The attribute indicates whether the segment should be included in general reports. If ‘virtual’ is ‘Yes’ then these Segments have a special purpose and should not appear in reporting on top of conversations. - Set the attribute ‘abandoned’ to ‘Yes’ and ‘abandoned_phase’ to ‘IVR’
If the call gets abandoned during the IVR stage, you can create a report on this information to see the % of calls that do not get through the IVR. If the call gets through the IVR, then we will modify these two attributes in the function ‘IVR - Update Task’. - Set the attribute ‘communication_channel’ to ‘IVR’
This channel can be used for separate reporting in Flex Insights. By default, there are voice and chat channels. It’s up to you if you want to keep it as ‘voice’ or ‘IVR’.
If you do not want to change the 'voice' channel, you can modify one of the custom attributes (conversation_attribute_X) and use the attribute to filter IVR calls. - Set the help attribute ‘IVR_time_start’ to the current timestamp
We will use this attribute to measure the number of seconds spent in the IVR.
Function:
- Name: IVR - Create Task
- Path: /ivr_create
- Access Control: enable Check for valid Twilio signature
- Code:
Update IVR Task
This function is called from the Studio ‘IVR_Update_Task’ widget and will:
- Find the task created by the ‘IVR_Create_Task’ function
It searches for a task with conversation_id = call_SID. - Set the attribute ‘IVR_time’
It uses the help attribute ‘IVR_time_start’ created by the ‘IVR_Create_Task’ function and the timestamp of the variable ‘IVR_end’. It’s rounded to seconds. - Set the metric ‘queue_time’ to 0
There is no queue, therefore we do not want it to have any value in Flex Insights. - Set the attribute ‘IVR_path’
The digit is brought in the HTTP parameter from Studio. - Set the ‘abandoned’ and ‘abandoned_phase’ attributes
We bring the call status in the HTTP parameter from Studio. If the call is completed, it means that it was abandoned in the IVR. If the call is not completed, it means it moved on in Studio to the next widget. - Set the task ‘assignmentStatus’ to ‘canceled’
This is important because we want to see the real time of the IVR segment in Flex Insights. If you let the task cancel by time out (5 minutes by default), the IVR segment time in Flex Insights will be the time of cancelation.
Function:
- Name: IVR - Update Task
- Path: /ivr_update
- Access Control: enable Check for valid Twilio signature
- Code:
Flex Task
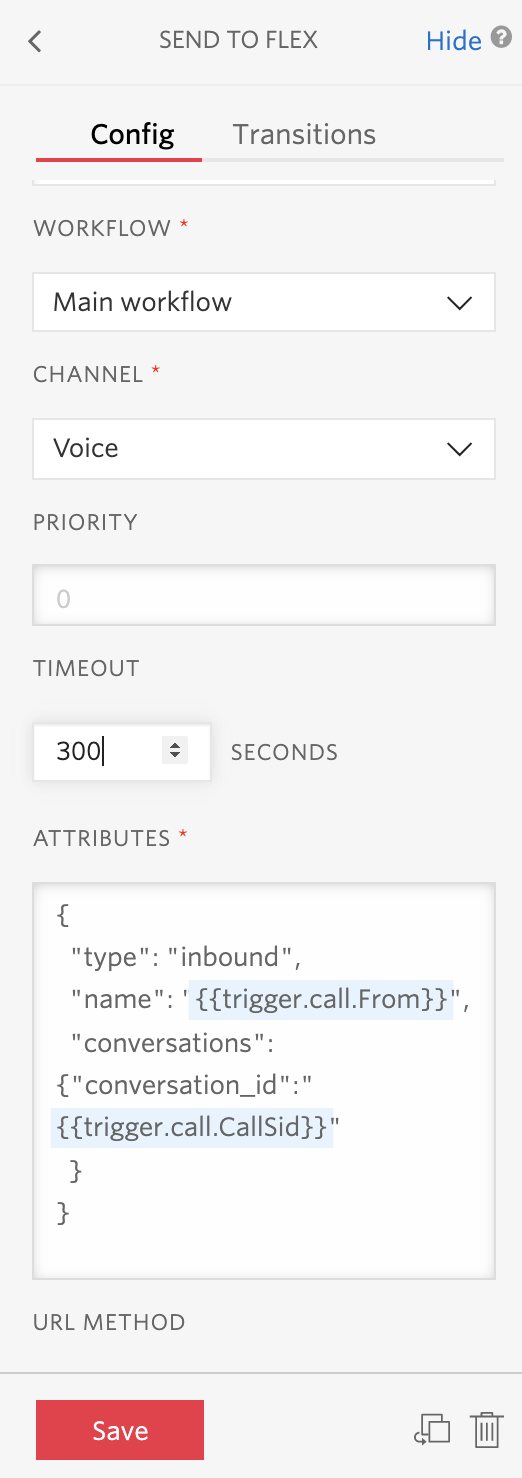
The Flex Task is created automatically by the widget ‘Send To Flex’. All you need to do is set the ‘conversation_id’ attribute to the same call SID as for the IVR task. Both tasks will then be linked into one conversation in Flex Insights.
JSON attributes - "conversation_id":"{{trigger.call.CallSid}}"
Flex Insights
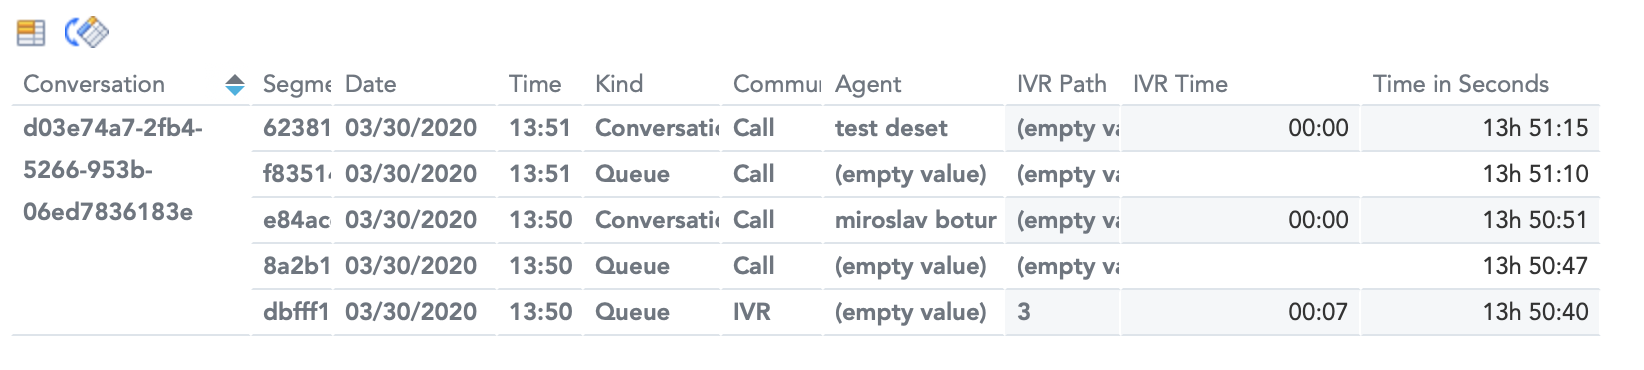
If everything worked as expected, you should see the IVR information in Flex Insights. When you look at a single conversation, you’ll be able to see IVR as one of the interactions, together with waiting in the queue and talking to agents.
You can now create custom metrics and reports that take IVR segments into consideration. A few inspirational examples for building your reports:
- Number of conversations that are finished in the IVR and never reach agents.
- Distribution of inbound conversations based on IVR choices.
- Time your customers spend in the IVR.
Miro Botur is a Flex Insights product specialist at Twilio. You can reach him at mbotur@twilio.com.
.png)

Related Resources
Twilio Docs
From APIs to SDKs to sample apps
API reference documentation, SDKs, helper libraries, quickstarts, and tutorials for your language and platform.
Resource Center
The latest ebooks, industry reports, and webinars
Learn from customer engagement experts to improve your own communication.
Ahoy
Twilio's developer community hub
Best practices, code samples, and inspiration to build communications and digital engagement experiences.