Last Minute Valentine’s Day Gifts Delivered via Twilio Studio
Time to read: 6 minutes
February 14, 2018
Written by

Weeks ago, you had the best intentions of getting a Valentine’s day present. But, something came up. Now, yet again, you’re scrambling at the last minute. This happens to the best of us. In the immortal words of The Hitchhiker’s’ Guide to the Galaxy, “Don’t panic.” We’ve got you covered.
I’m going to show you how to build a Valentines Day app that will help you deliver a last minute gift (that isn’t a CVS box of chocolates) to that special someone.
Try it out! Call or text (339) 215-8084.
I built that in about 20 minutes using something called Twilio Studio. Studio is a drag and drop user interface for building communication “flows” like the one you just experienced.
Even cooler is that I did it without writing a single line of code. I promise I’m not a software engineer – I spent college writing essays about the opinions of dead guys.
On a 0-10 scale with 0 being “Technology is scary and I hate it” and 10 being “I am an actual real live software developer,” I’d put this at a 4-5.
Let’s Get Building
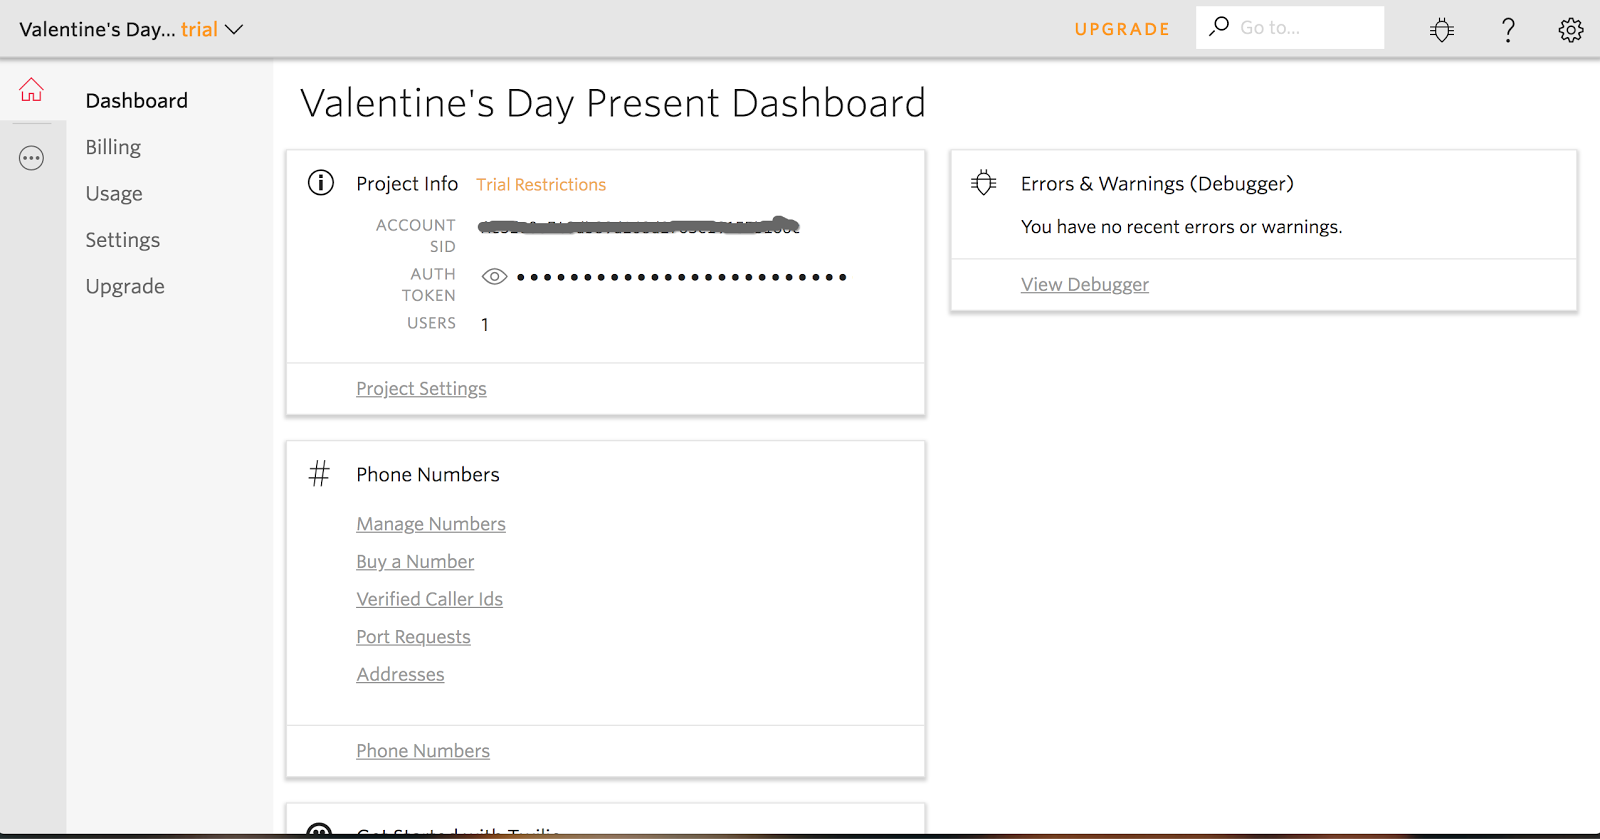
First sign up for a Twilio account if you don’t already have one. It will take you to a screen that looks like this.
Go to the studio homepage, set up your first flow by clicking the big red button that says “Create New Flow” , name it whatever you want, and make sure to choose the option that says “start from scratch”.
You should end up on a page that looks like this. This is the canvas and it’s the place you design your flow.
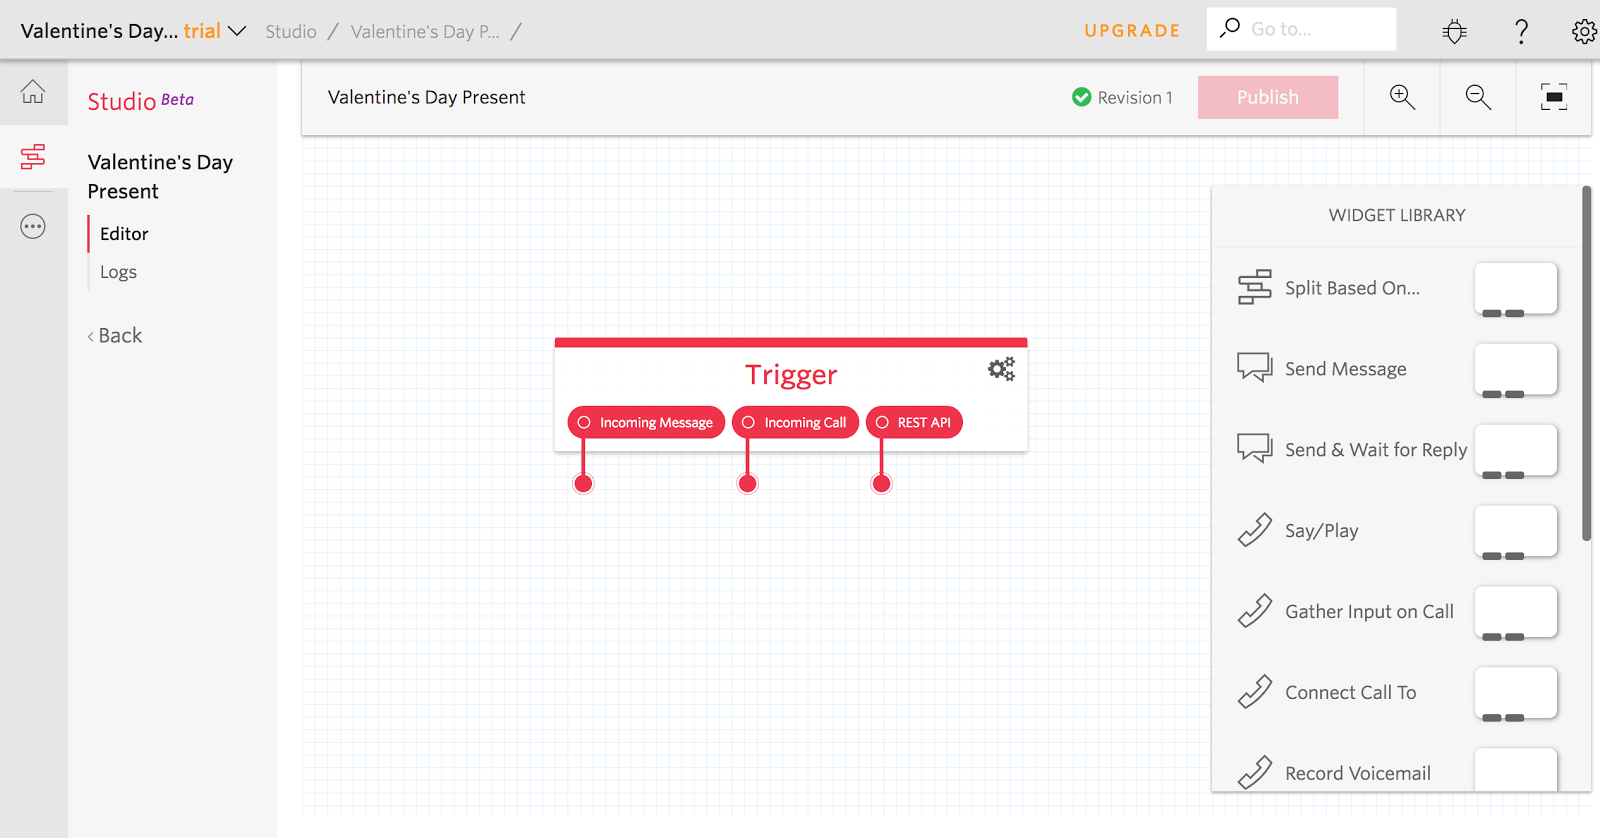
Studio starts with the assumption that some kind of trigger occurs. In this case the possible triggers are calls or texts. When that trigger happens studio allows you to define a custom response using pre-built logic called “widgets”. Simply drag and drop the widget you want on the canvas, connect it to the trigger, and you’re ready to do.
We’ll start with a simple call flow that’s triggered when you (or your special someone) calls a set number (that we’ll configure later). Drag the “Gather Input on Call” widget and connect it to the “Incoming Call” Trigger like so.
What a gather widget does is read/play a predefined message and then collect the digits the user inputs on their keypad. You control the settings of the widget using the sidebar to the right. If you click on the widget itself you should see sidebar options that look like this.
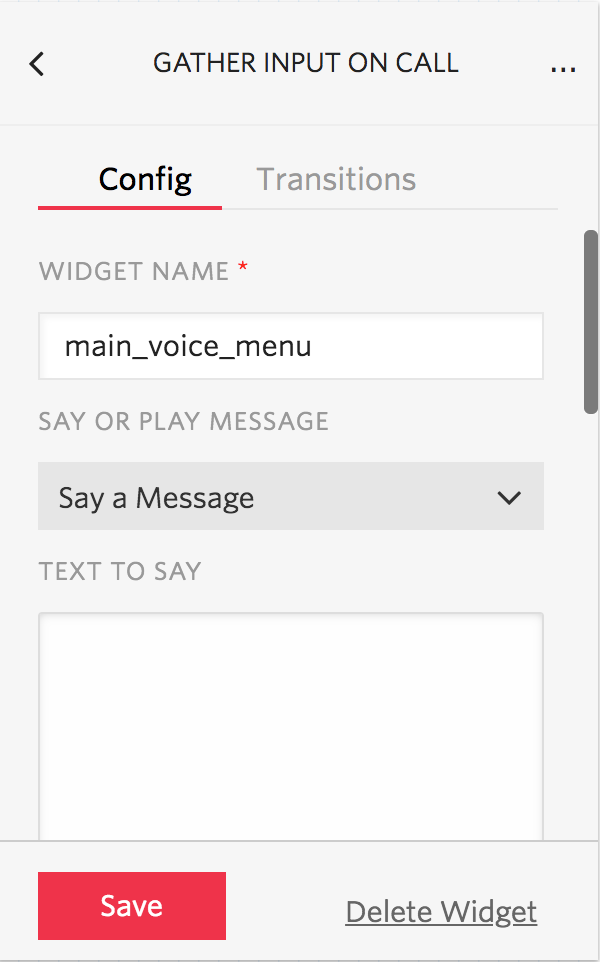
Go ahead and name you widget whatever you like. As you can see I went the highly original route and named mine “main_voice_menu”. For the option of of “Say or Play a Message” choose “Say a Message”. This will read whatever message you put in the “TEXT TO SAY” box.
You’ll want to scroll down and change the “STOP GATHERING AFTER” from 2 seconds to 5 seconds. This is super important. When it’s set to 2 seconds there’s a good chance it will timeout before your significant other has time to input anything on the keypad.
In the “TEXT TO SAY” box put whatever message you want read to your significant other and the options you want available to them. For example:
“Hello love and welcome to your Valentine’s day present. I’ve created this phone number as an expression of my love that will live on forever. And that you will always be able to access. Press 1 to hear my favorite memory with you, press 2 to hear my favorite thing about you, etc.”
You can put as many options as you want but I’d recommend limiting the first menu to two or three so the first they hear message isn’t too long. Now you have to insert the widget that can take those inputs you “gathered” and do something with them. The widget that does that is called “Split Based On”.
Drag the “Split Based On” widget onto the canvas and connect into the the “User Pressed Keys” option on the “main_menu_voice” widget.
Change the name to something you’ll remember, as you can see I went the creative route again and named mine “main_menu_split”.
Next you have to select the “variable to test”. This is the input that the “Split Based On” widget uses to make it’s decision.
You want to use the number the user input on the keypad. Scroll down under the “variable to test section” and choose the option that says “main_menu_voice.Digits” (this will have a different name if you’ve named your widgets differently than I have).

Next, let’s define your transitions. Transitions control how the the flow moves from one widget to the next based on whatever conditions you select.
You do that by clicking the word “transitions” in the top right corner. Click “new transition” and set up a transition for every option you’ve decided to include. I have two options in my original menu so I’m going to create two transitions.
Now that I’ve created the transitions I’ve got to define my responses. Input 1 is “My favorite memory of you” so I’m going to use a “Say/Play” widget to say, “My favorite memory of you is that night we split a bottle of wine, made a summer salad, and watched shacohlah together”. (That phonetic spelling is my best attempt at getting a TTS engine to don a french accent)
Drag the widget onto the canvas, connect it to the correct transition, and name it whatever you like.
Input 2 is “My favorite thing about you” and again I’ll use the “Say/Play” widget but this time I’m going to say, “My favorite thing about you is staring into your eyes. Its like eating a bag of hot cheetos, once I start its impossible for me to stop.”
Now for the last part you’ll want some sort of sign off message that signifies that the call is about to come to a close. No one likes feeling like they’ve been hung up on.
I’m a sentimental guy so I’m going to go with, “My heart is like an iPhone X and you are like the case. Without you it would surely be broken. Happy Valentines day my love, I wait with baited breath until we see another again.”
Once you have your sign off message connect it to all the other messages you’ve created to ensure that no matter what option someone picks, they get a sign off message.
And voila! You’ve created a custom experience for your significant other. Now all we have have to do is connect it to a phone number.
To do that we’re going to the buy a phone number section of the console and buy a phone number. You can search for a number within a specific area code, or with a specific combination of digits. Once you find the number you want click “buy number” and then “set up number”
You should end up on a screen that looks like this.
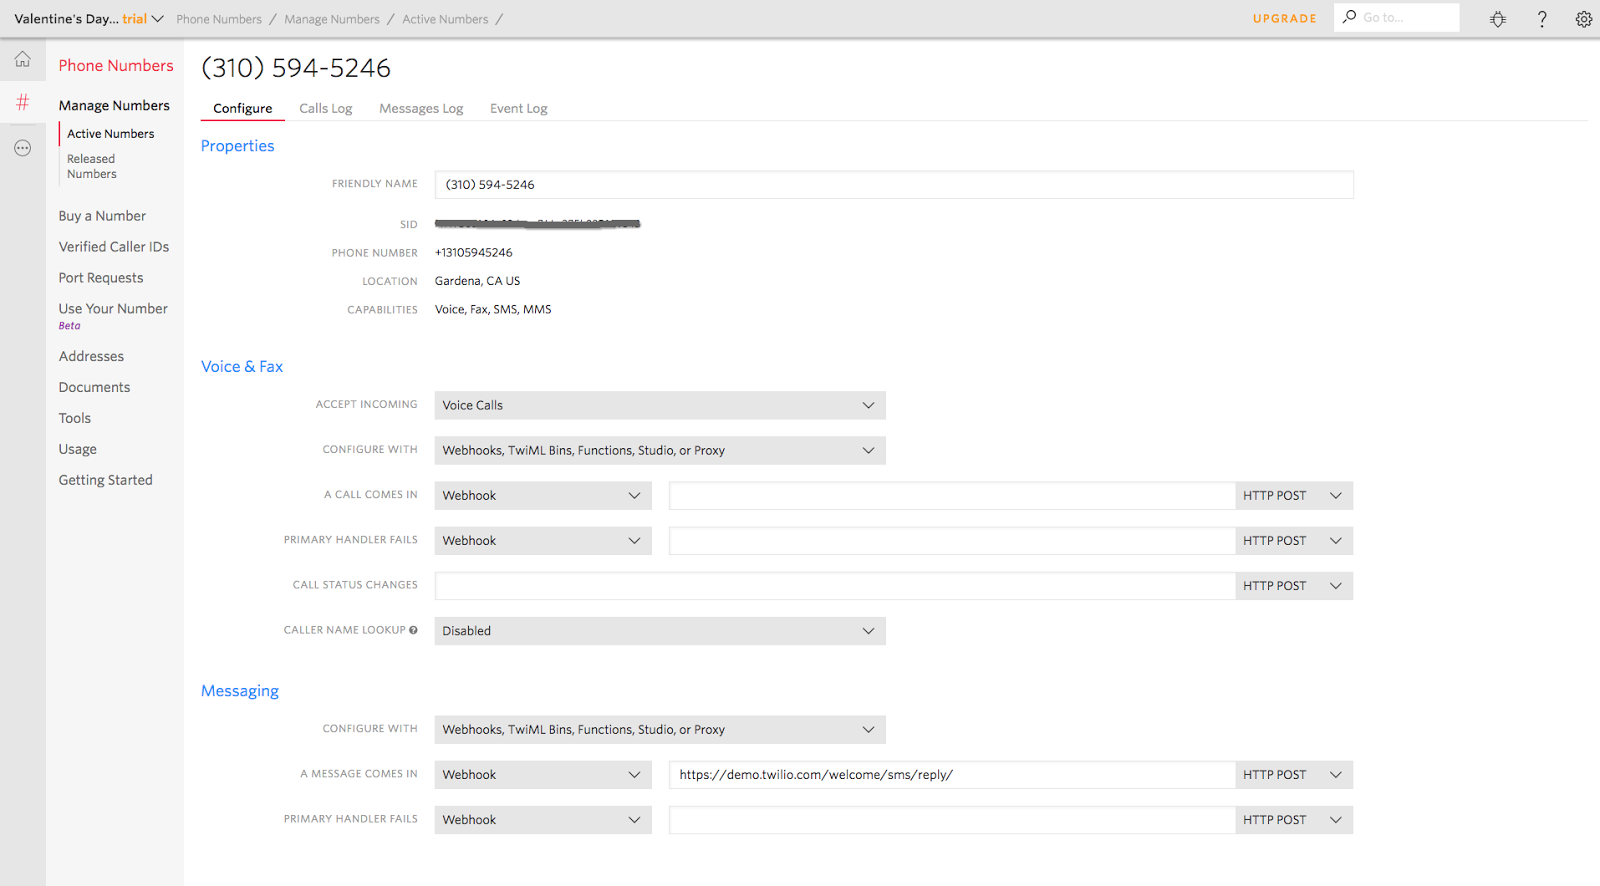
Now all you have to do is connect this phone number to your studio flow by scrolling down to the “Voice and Fax” section, and changing the “A Call Comes In Section” to “Studio Flow” then choosing your flows’ name.
Now, for the moment of truth. Give you number a ring.
If you haven’t upgraded your account you will hear a voice that sounds like someone who would be selling you steak knives on a late night infomercial say “You have a trial account, you can remove this message at any time by upgrading to a full account. Press any key to execute your code”.
At this point you should be hearing the first menu you set up. If the call ends abruptly or you hear the message “I’m sorry an application error has occurred” go back and make sure you followed all the previous steps correctly. Otherwise you should be hearing the options you set up.
If you’re happy with the outcome you can upgrade your Twilio account. If not, I’m sure CVS has a few good cards left 😛
There you have it. You’ve created a custom phone number, saving Valentine’s day, and possibly your relationship thanks to Twilio Studio.
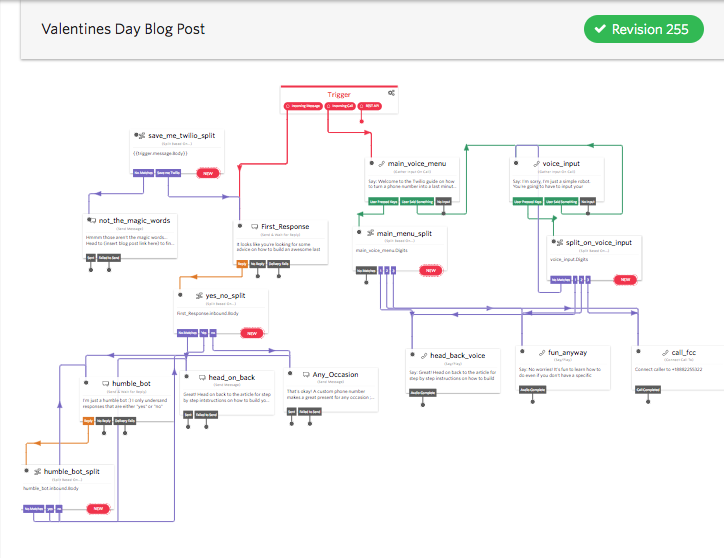
The flow we built is a really simple one. The flow I built for that first demo phone number looks like this.
If you want to make the experience more complex or customized here are a few things you can do:
- Upload your own audio files using runtime assets and use them instead of the robo-voice prompts with the “Play a Message” option on the “Say/Play” Widget.
- Create an SMS journey that mirrors your phone call journey using the “Send & Wait for Reply” widget.
- Create a “choose your own adventure” type experience with the “Split Based On” widget.
- Build a full fledged chatbot.
To see all the different possibilities head on over to the Studio Docs page. I hope you had as much fun playing with studio and reading this blog post as I did writing it. Happy Valentine’s Day!
Related Resources
Twilio Docs
From APIs to SDKs to sample apps
API reference documentation, SDKs, helper libraries, quickstarts, and tutorials for your language and platform.
Resource Center
The latest ebooks, industry reports, and webinars
Learn from customer engagement experts to improve your own communication.
Ahoy
Twilio's developer community hub
Best practices, code samples, and inspiration to build communications and digital engagement experiences.