Log Incoming SMS Messages to Airtable using Laravel and Twilio
Time to read:
July 22, 2020
Written by
Reviewed by
This post is part of Twilio’s archive and may contain outdated information. We’re always building something new, so be sure to check out our latest posts for the most up-to-date insights.

In this tutorial, we’ll be looking at how to keep track of Incoming SMS messages sent to your Twilio Phone Number on Airtable. Everytime your Twilio phone number receives an SMS message, we’ll forward the content of the message and some other important information about the message to a table in Airtable.
Technical Requirements
You will need the following to complete this tutorial:
- PHP version 7.2.5 or Higher
- Laravel 7
- Composer globally installed
- Twilio Account
- Airtable Account
- Ngrok
Setting up Laravel
There are different ways to set up a new Laravel project. You can do so via the Laravel installer or by using Composer. For the sake of this tutorial, we’ll be using Composer.
Run the following command in your terminal:
This will set up a new Laravel project for us in the twilio-airtable directory.
Next, we’ll be installing a Laravel package that will make it easier for interacting with Airtable’s APIs. From the terminal, run the following command:
Setting up Airtable
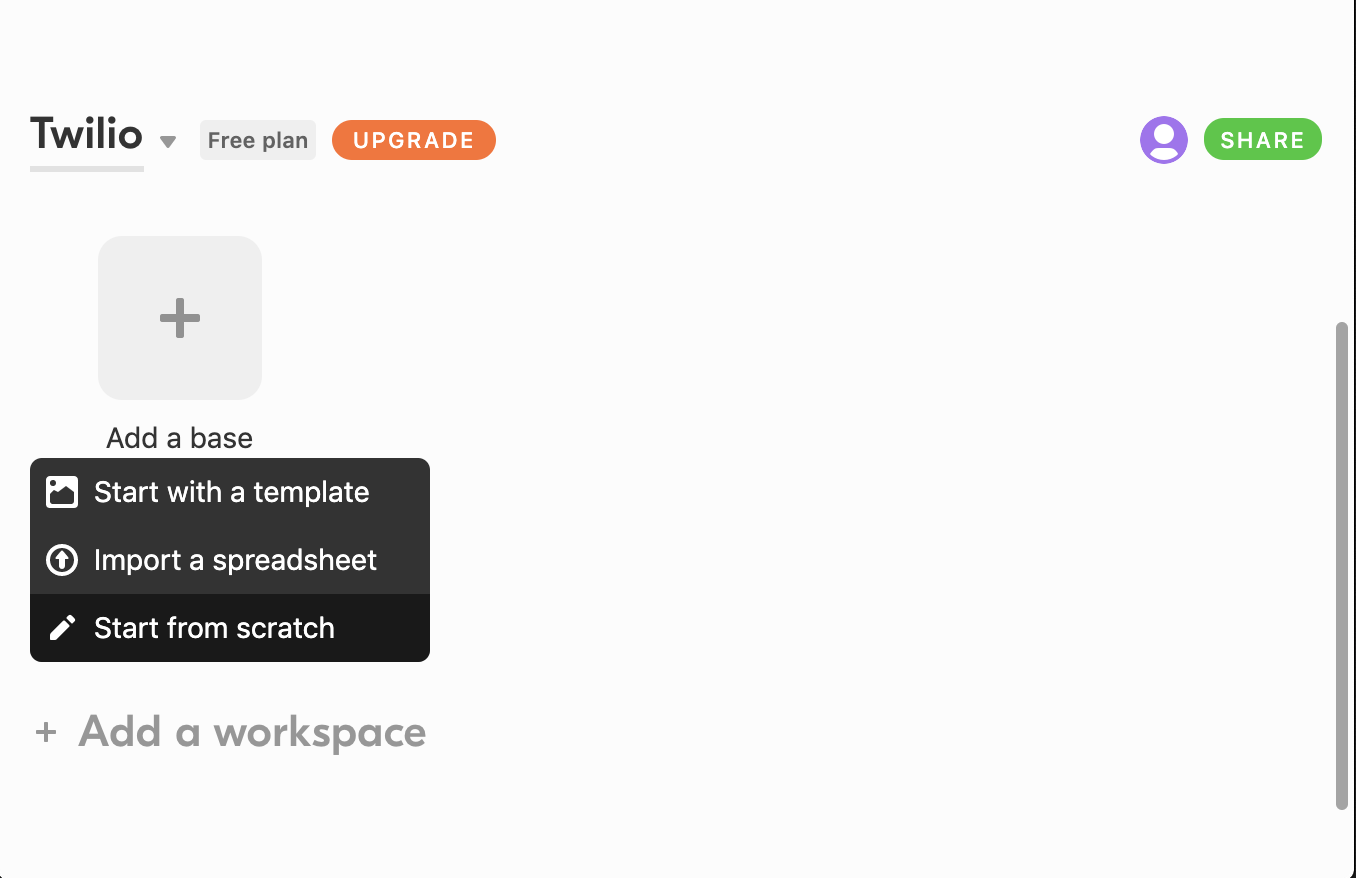
Head over to your Airtable Account and Login. You’ll need to create an account if you don’t already have one. Next, you’ll need to create a base. A base in Airtable is simply short for database, and is used to store information for your project. A base is made up of one or more tables.
Under your chosen workspace, click “Add a base” and then select “Start from scratch”
Next, provide the base with a name of “twilio_sms_logs”
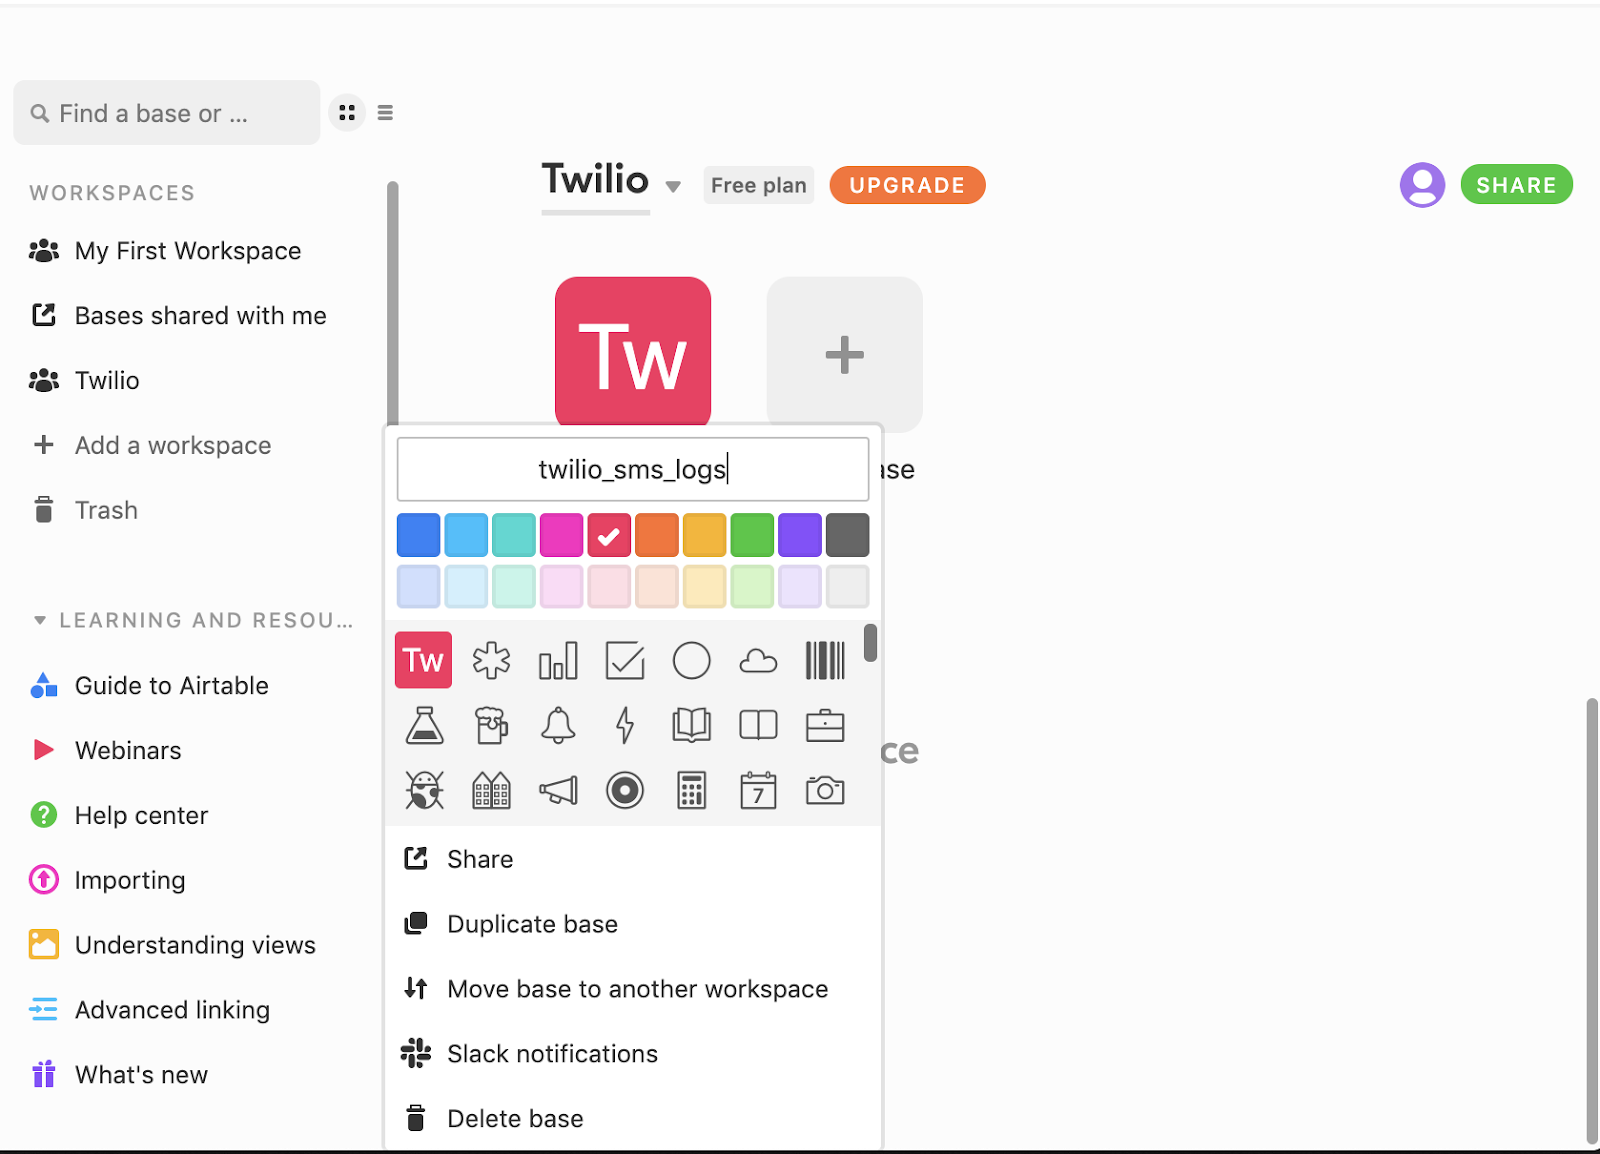
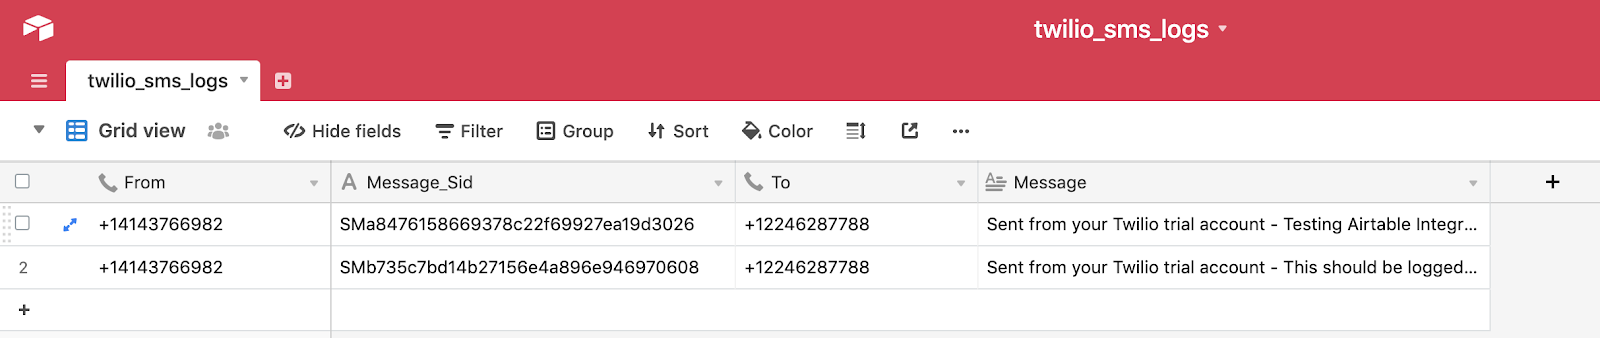
Select the base you just created and add the following fields to your table along with their corresponding type. These are the fields we’ll be storing whenever we receive an SMS message on our Twilio Phone number.
- From - The phone number that sent the message. It has a type of “Phone Number”.
- Message_Sid - A 34 character, unique ID assigned by Twilio for the messageo. It has a type of “Single line text”.
- To - The phone number of the recipient, which in this case will be our Twilio Phone Number. It also has a type of “Phone Number”.
- Message - The content of the SMS message that was received. It has a type of “Long Text”
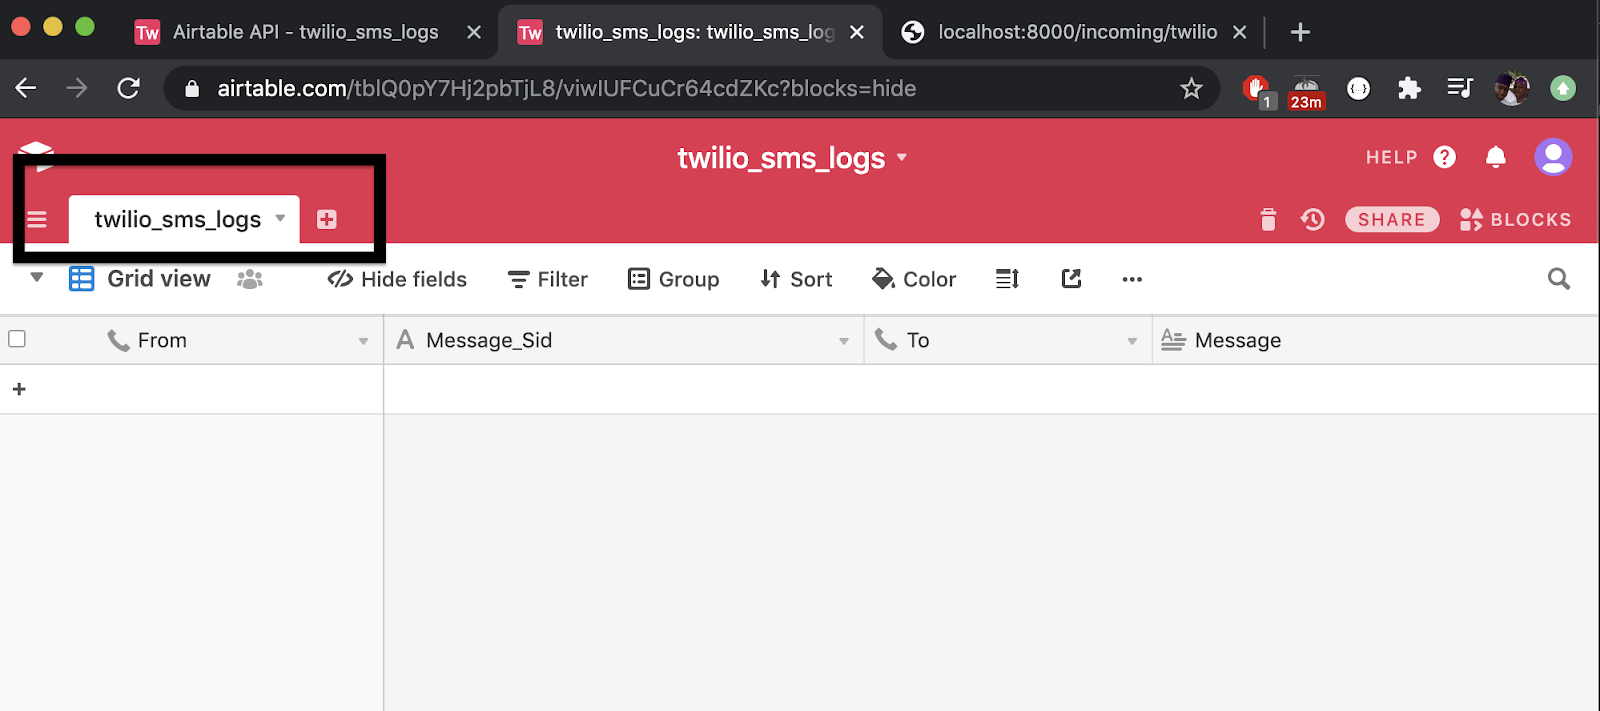
Rename the table name from “Table 1” to “twilio_sms_logs” as highlighted by the black section in the image below.
Logging Incoming SMS messages
Before we get started interacting with Airtable’s APIs using the package we installed earlier, we need to add certain information about our Airtable account as environment variables.
Head over to the root of your project’s directory and run the following command:
This will publish an airtable.php file in the config directory. Open the file and under the tables array, rename the default key to twilio_sms_logs
We’ll be defining the following environment variables:
- AIRTABLE_KEY - This is your Airtable API Key and can be obtained here.
- AIRTABLE_BASE - This is the ID of the base we created earlier. It can be found here. Select the “twilio_sms_logs” base and then copy the base ID from the url. For example, with the URL https://airtable.com/random-base-id/api/docs#curl/introduction, the base ID here is “random-base-id”.
- AIRTABLE_TABLE - This is the name of the table we created under the base, which in our case was called “twilio_sms_logs”.
Next, add these details to your .env file:
From the terminal, run the following command to create a Controller class:
Edit the file with the following code:
The logSms() function will be triggered whenever our Twilio number receives an SMS message. The table() method on the Airtable Facade receives our table name “twilio_sms_logs” as an argument. The create() method is then called which handles inserting a new row into our table. The method accepts an array of key/value pairs, where the key is the name of the table field and the corresponding value is obtained from the request payload that Twilio sends out.
Create Webhook Endpoint
Twilio makes use of Webhooks to notify us whenever our Twilio phone number receives a message. We’ll be adding a Webhook URL to our Twilio account shortly. Before we do that, let’s add the webhook endpoint to our routes. Edit the routes/web.php file and add the following code:
Disable CSRF Verification
Because Twilio has no way to obtain a CSRF Token from our application, it’s important we disable CSRF verification for the endpoint we created earlier. The VerifyCsrfToken middleware is used for validating all tokens. Luckily, the middleware accepts an except array which accepts a list of endpoints to disable CSRF verification for.
Edit the app\Http\Middleware\VerifyCsrfToken.php file and add the route we created earlier to the except array.
This will start a development server at a specific port on your local machine. Take note of the port as it will be printed to the terminal once the server starts running. Next, open up another terminal and run the following command:
NOTE: Replace 8000 with the port your application is running on
This will display a UI in your terminal with your new Public URL and other information.
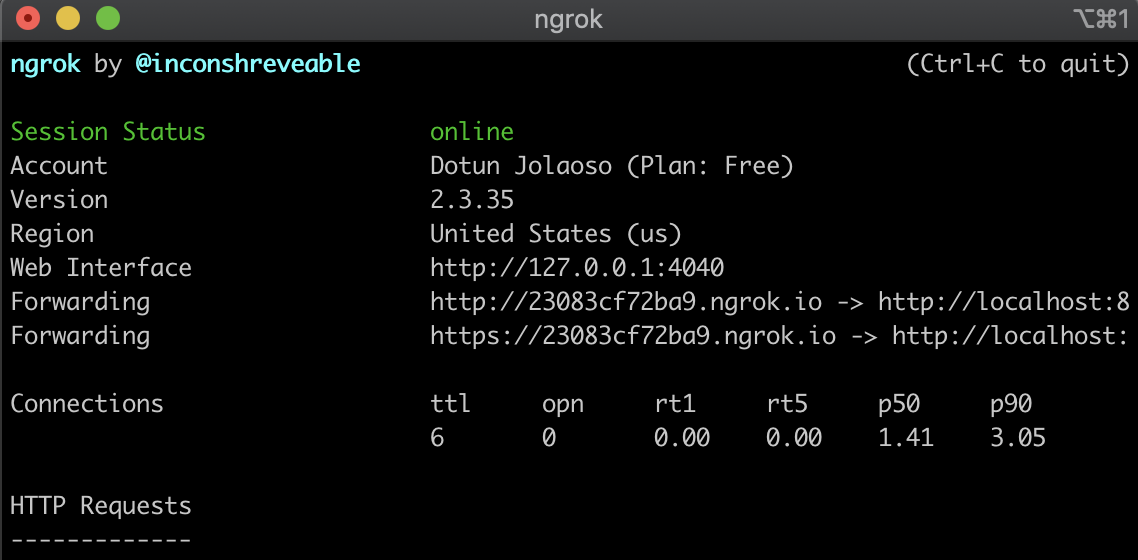
Take note of the first Forwarding URL, as this is what will be used to configure our Twilio Webhook.
Configuring Twilio
Head over to your Twilio Console and click on Phone Numbers. If you already have one or more phone numbers assigned to your account, select the number you would like to use for this project. If this is a brand new account, buy a new phone number to use on this project.
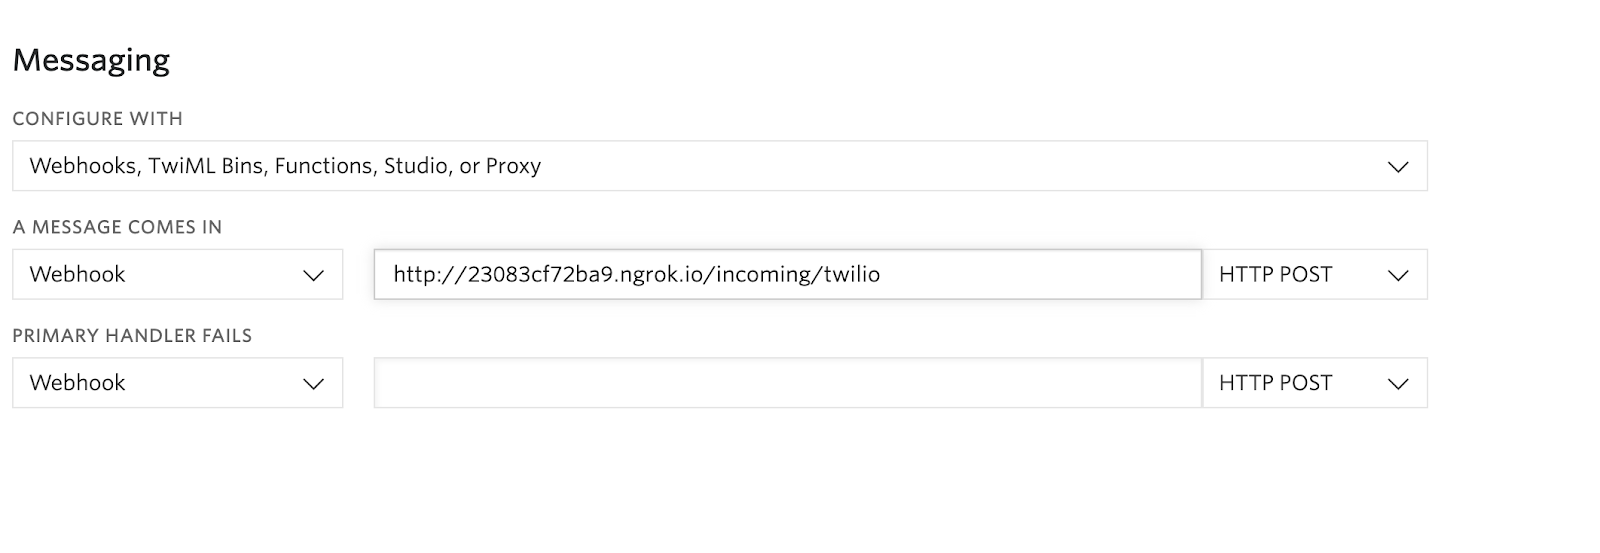
In the phone number configuration, scroll down to the “Messaging” section and under the “A message comes in” field, use the forwarding URL from ngrok with /incoming/twilio appended. Ensure the request method is set to HTTP POST and then click the “Save” button at the bottom of the page to save the settings.
Testing
To test the service, send an SMS message to your Twilio phone number from your phone. Head over to the table you configured on Airtable, and you should see a new row has been created containing information about the message you just sent.
Conclusion
In this tutorial we’ve seen how we can log incoming SMS messages to our Twilio Phone number to Airtable using Laravel. This solution would be great if you’re looking for a way to monitor your incoming SMS activities. You can keep track of the sender's phone number, content of the message and any other information you find useful that Twilio provides. The GitHub repository with the complete code for this project can be found here.
Dotun Jolaoso
Website: https://dotunj.dev/
Github: https://github.com/Dotunj
Twitter: https://twitter.com/Dotunj_

Related Resources
Twilio Docs
From APIs to SDKs to sample apps
API reference documentation, SDKs, helper libraries, quickstarts, and tutorials for your language and platform.
Resource Center
The latest ebooks, industry reports, and webinars
Learn from customer engagement experts to improve your own communication.
Ahoy
Twilio's developer community hub
Best practices, code samples, and inspiration to build communications and digital engagement experiences.