Build a Workout Accountability SMS Buddy with the Strava API, Twilio Functions, and the Twilio CLI
Time to read:
April 28, 2020
Written by
Reviewed by

With gyms closed during quarantine, many people are trying to run or bike more outdoors (at a safe social distance from others, of course!) Strava is a popular social fitness app that helps users track and share outdoor workouts. Read on to learn how to build a quarantine workout accountability SMS system with the Strava API, Twilio Functions, and the Twilio Serverless Toolkit.
Prerequisites
- A Strava account - sign up here if you don't have one already
- A Twilio account - sign up for a free one here and receive an extra $10 if you upgrade through this link
- A Twilio phone number with SMS capabilities - configure one here
- Postman (you could alternatively make cURL requests from the command line)
Setup the Strava API

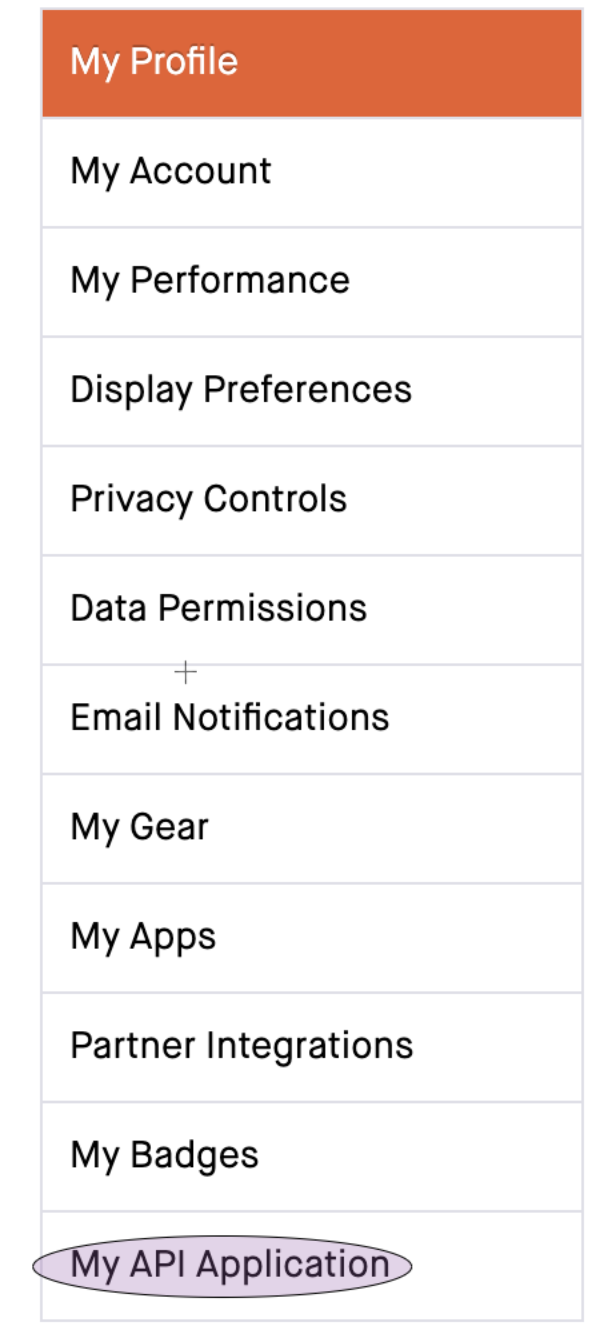
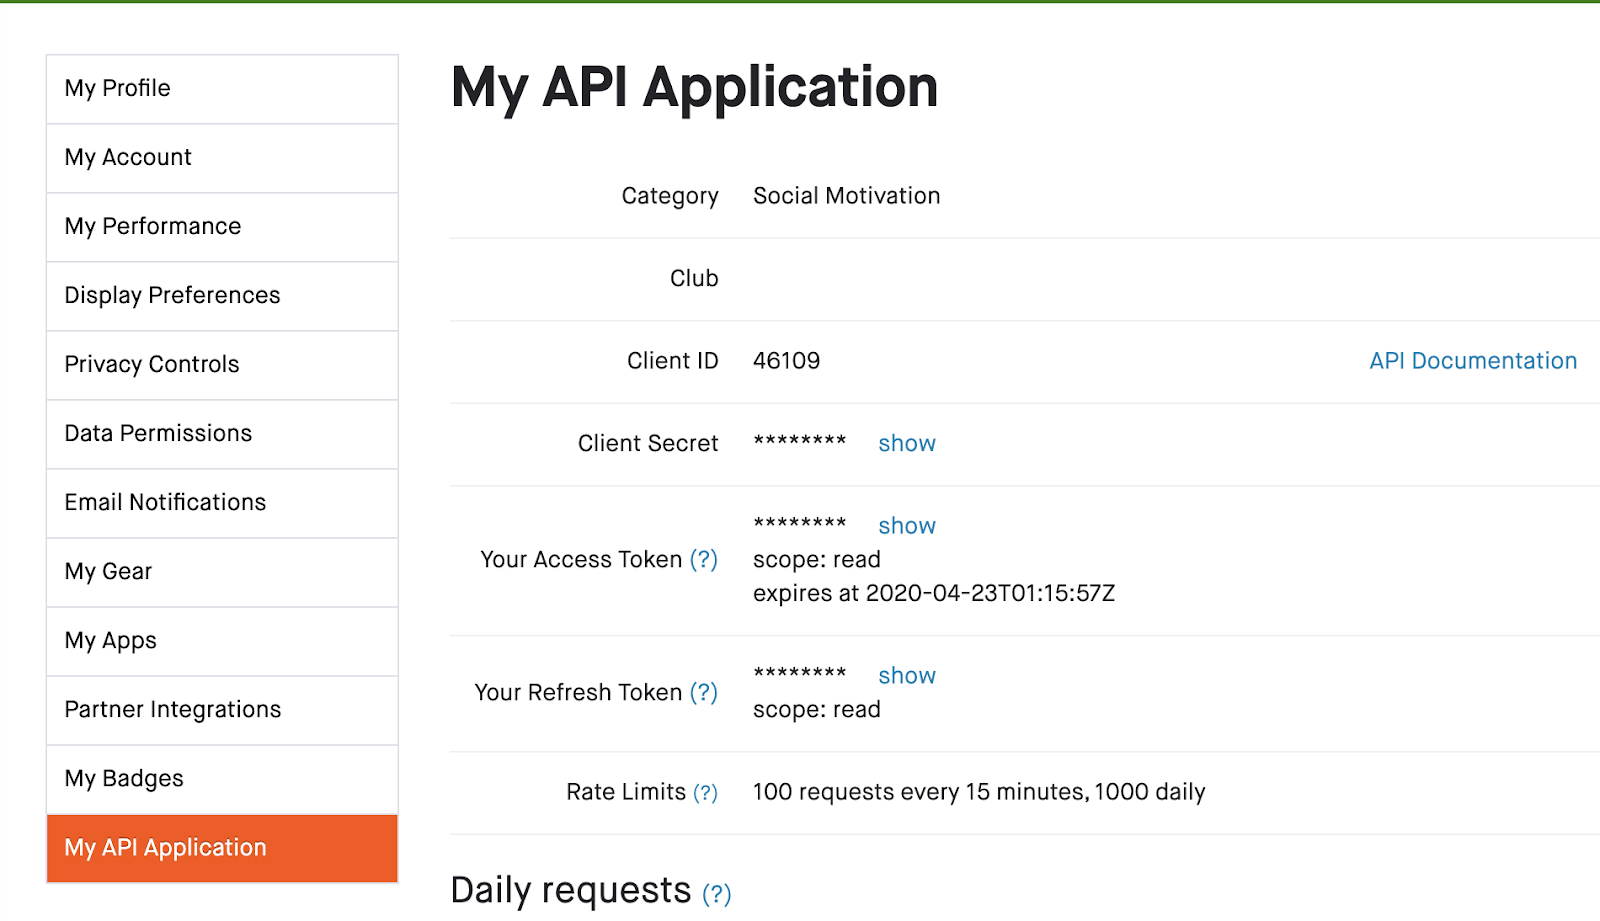
In order to use the Strava API, you need to create an app. If you’re reading this, you likely already have a Strava account but if not go ahead and create one now from the Prerequisites link above. Sign in to your Strava account and navigate to your API settings page. You can alternatively find that by selecting My API Application in the dropdown menu on the left of your regular account settings.
You should now see the “My API Application” page. Fill it out accordingly:
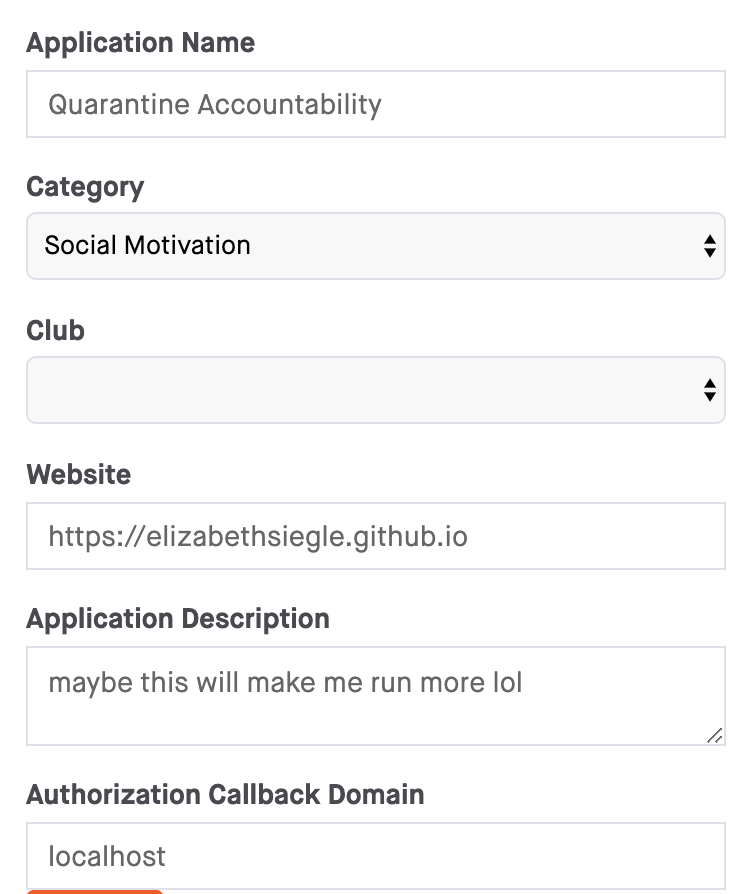
- Application name (I called mine Quarantine Accountability)
- Category (social motivation, perhaps?)
- Club (I left this blank as I'm not in a Strava club and it's not required)
- Website (I used my personal website, this can be anything)
- Application description ("maybe this will make me run more?")
- Authorization Callback Domain (localhost)
Agree to Strava's API agreement and click Create. Yay! You have your first Strava application.

Make your first Strava API Request
The Strava API docs go over the endpoints you can use and the arguments they take. This post will start off hitting the endpoint to receive your personal statistics which requires two pieces of information for query string parameters:
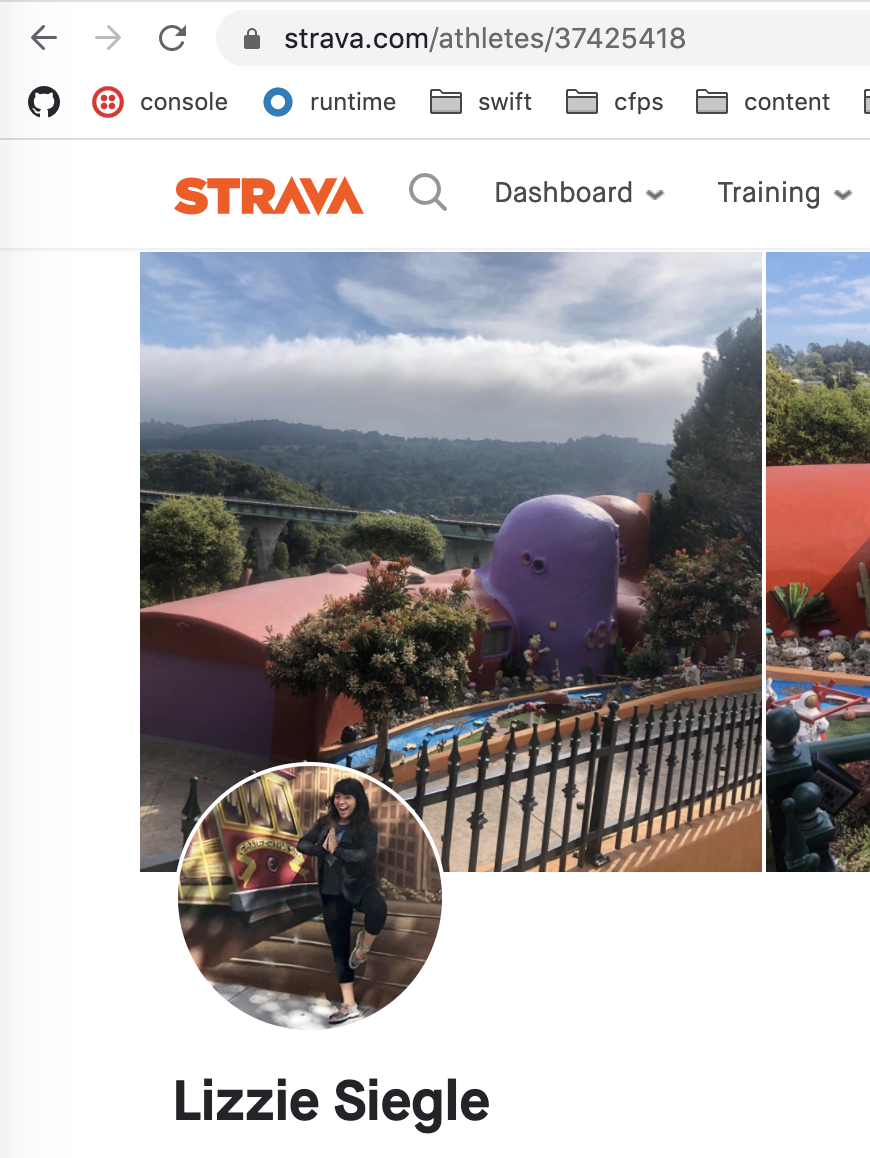
- Your numeric athlete ID is found by navigating to your Strava profile (click My Profile) in the top right corner and look at the URL after /athletes.
- Your Access Token, found in your API application settings.
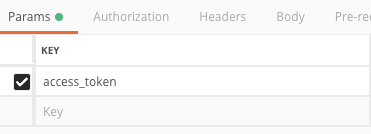
Open Postman and paste https://www.strava.com/api/v3/athletes/{your-athlete-ID}/stats into the URL bar, replacing {your-athlete-ID} with your ID from above (from your personal Strava page, not your API settings page.)

Underneath the URL bar, select Params. Add a Key called access_token and its corresponding Value of your access Token from the last step.
Click the blue Send button to make a GET request and you should see something like this in Postman:
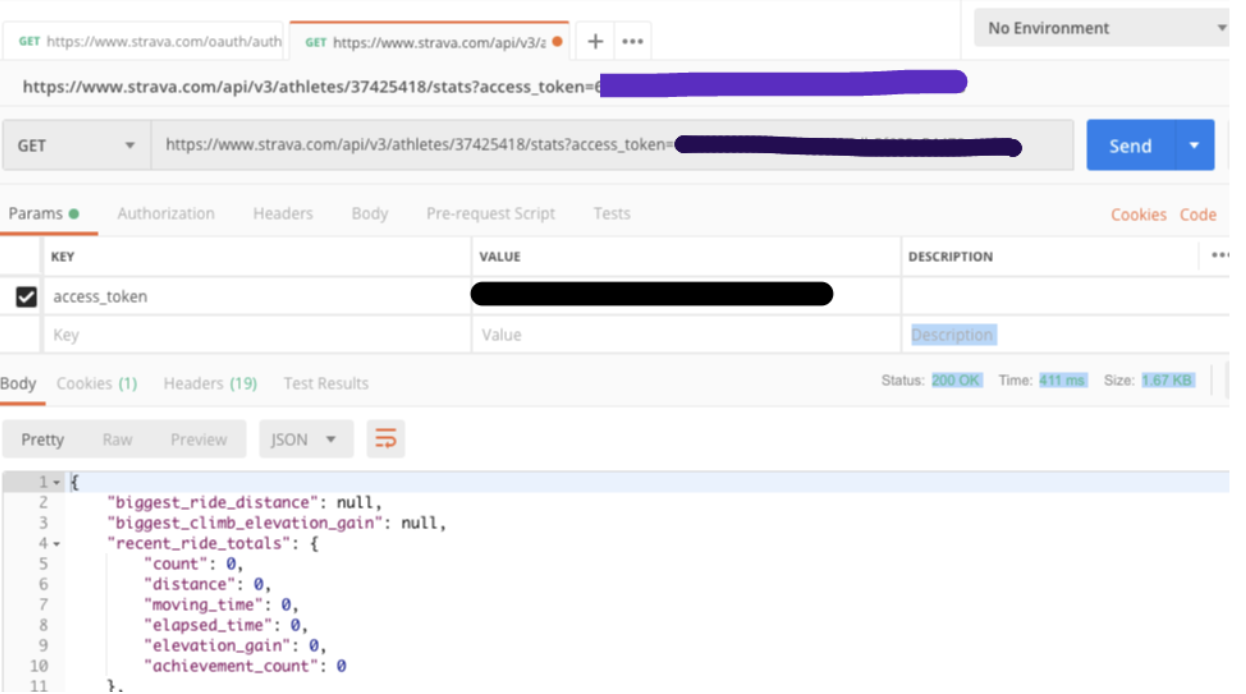
Nice! You just accessed your statistics in a nice JSON format. Feel free to play around with different Strava endpoints and see what other information you can access.

Strava Activity Webhook Authentication
Strava changed its API authorization process in 2018. The Access Token from above has scope:read which is insufficient to make a request to each endpoint. For example, to access any Activity webhook the scope must instead be activity:read. Let's make an Access Token that can hit an Activity webhook.
- Grab your client ID from your Strava app settings. In a web browser tab, type into the URL bar
https://www.strava.com/oauth/authorize?client_id=YOUR_CLIENT_ID&redirect_uri=http://localhost&response_type=code&scope=activity:readand clickenter. You should see a screen like this:
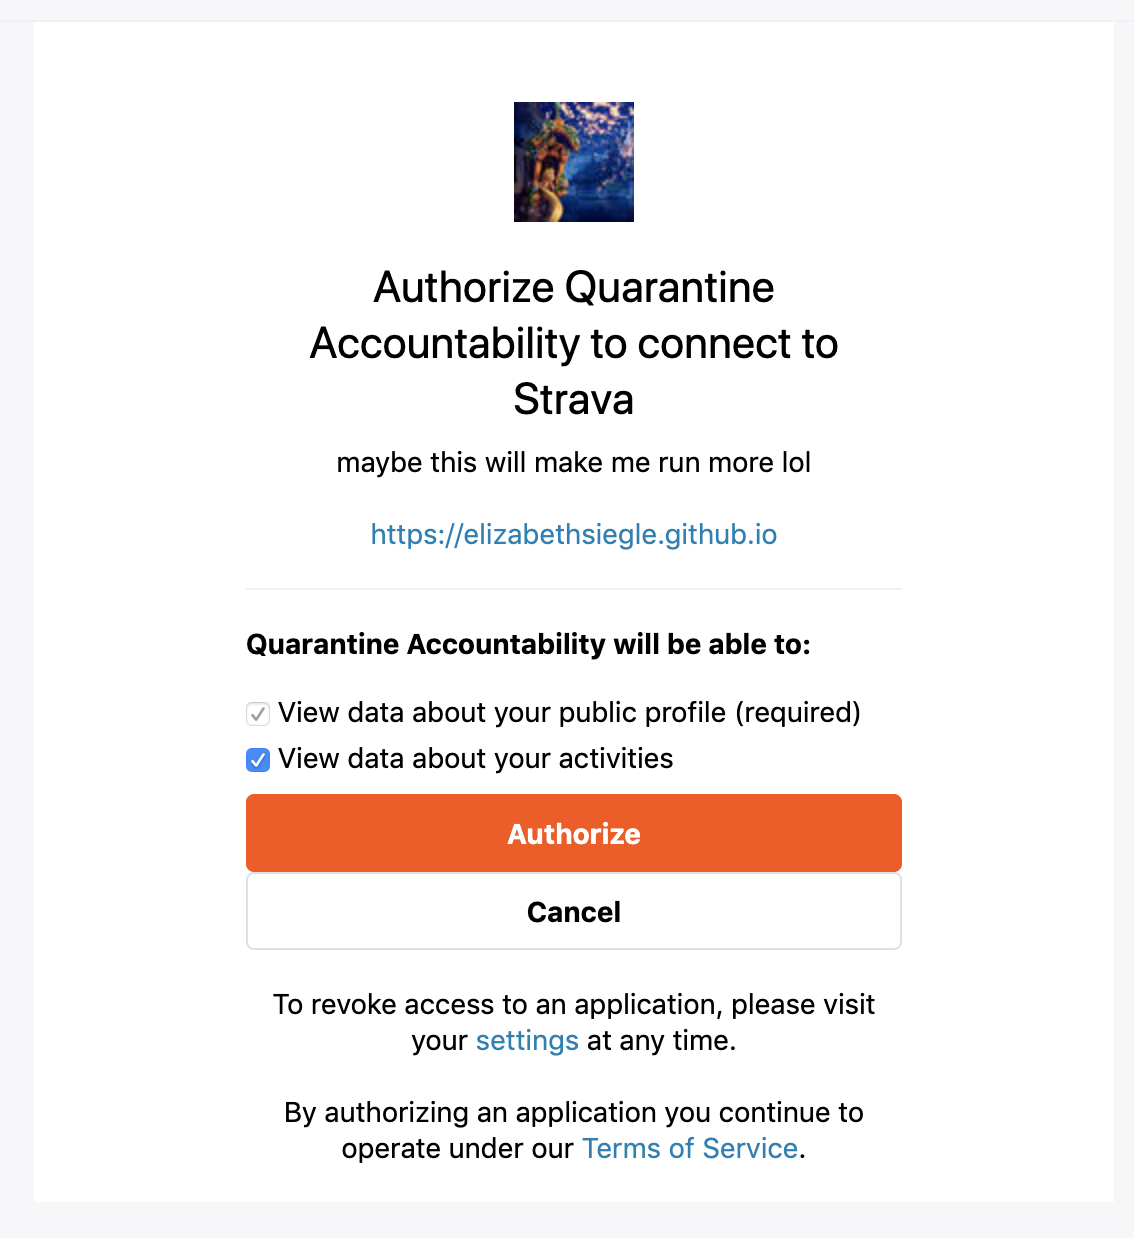
- Click Authorize. In the URL bar, copy the code as shown below.

- Now back in Postman, add
https://www.strava.com/oauth/tokenin the Postman URL bar and add the following parameter keys and their corresponding values:client_idandclient_secretwhose values you can find in your Strava app settings,codewith the code from step two, andgrant_typewhose value is authorization_code.
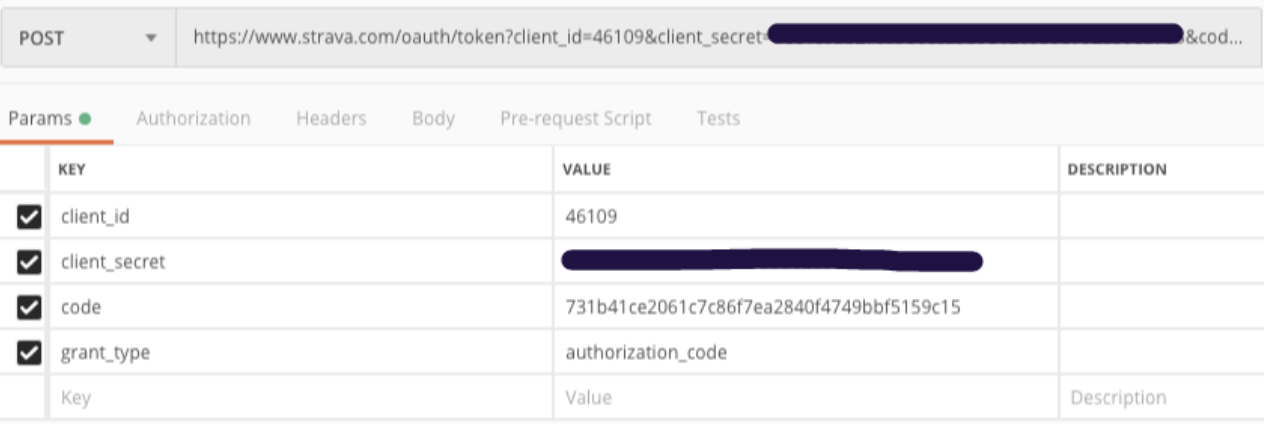
Make the POST request and you should receive some JSON like this:
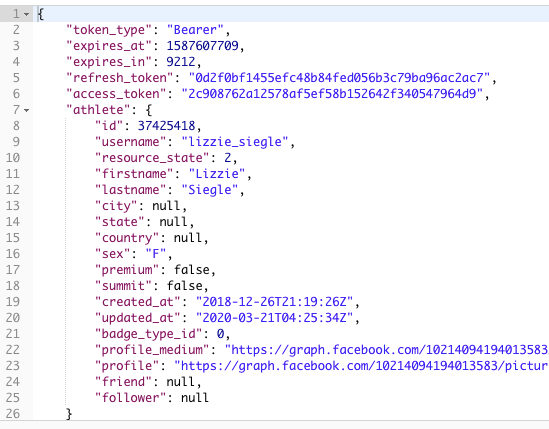
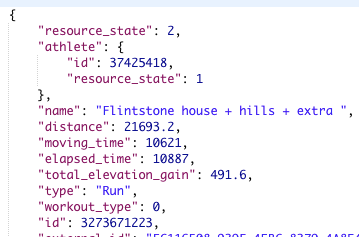
With this new Access Token we can access the Strava Activities endpoint. To test the information we receive from this endpoint, make another Get request in Postman that looks something like this:
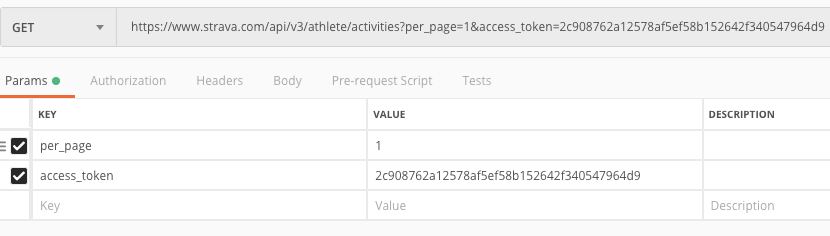
This returns details about the most recent Strava activity completed.
Now we can move on to making our Twilio app with the CLI and Functions to hold ourselves accountable for exercising.
Make and Test the Function Locally
Let’s write a function that uses the Strava API to compute the time and distance of our last activity, and wraps that information in TwiML. To debug our Function more easily, we'll use the Serverless Toolkit developed by my teammate Dominik. For more details on installation and project structure, check out the docs on how to develop and debug Twilio Functions locally.
The best way to work with the Serverless Toolkit is through the Twilio CLI. If you don't have the Twilio CLI installed yet, run the following commands to install it and the Serverless Toolkit:
cd into strava-demo/functions and make a new file called strava.js containing the following code:
Add your Access Token from the authentication portion as an environment variable in your Function's .env called STRAVA_ACCESS_TOKEN so others can't see it and use it, and check that the got module is listed as a dependency (not a devDependency) in your projects package.json, both files of which are in your root directory. Still in your root directory, run followed by npm start. You should see some local URLs you can test.
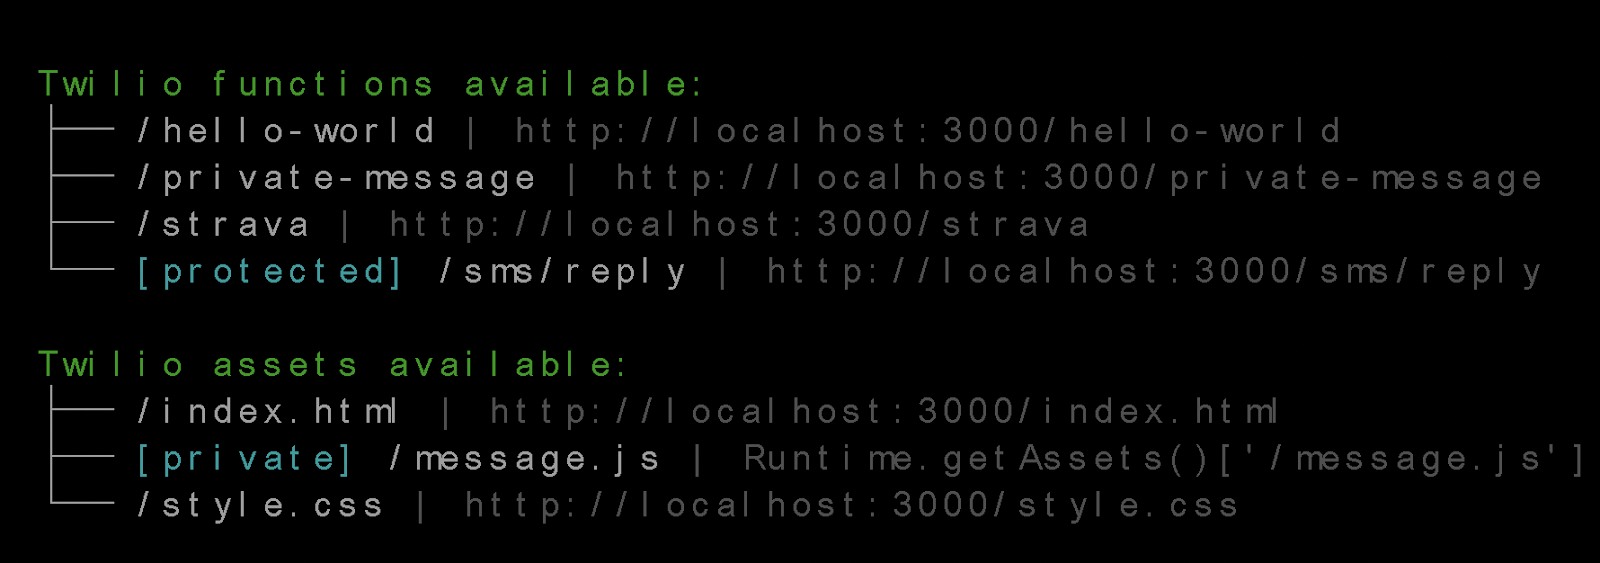
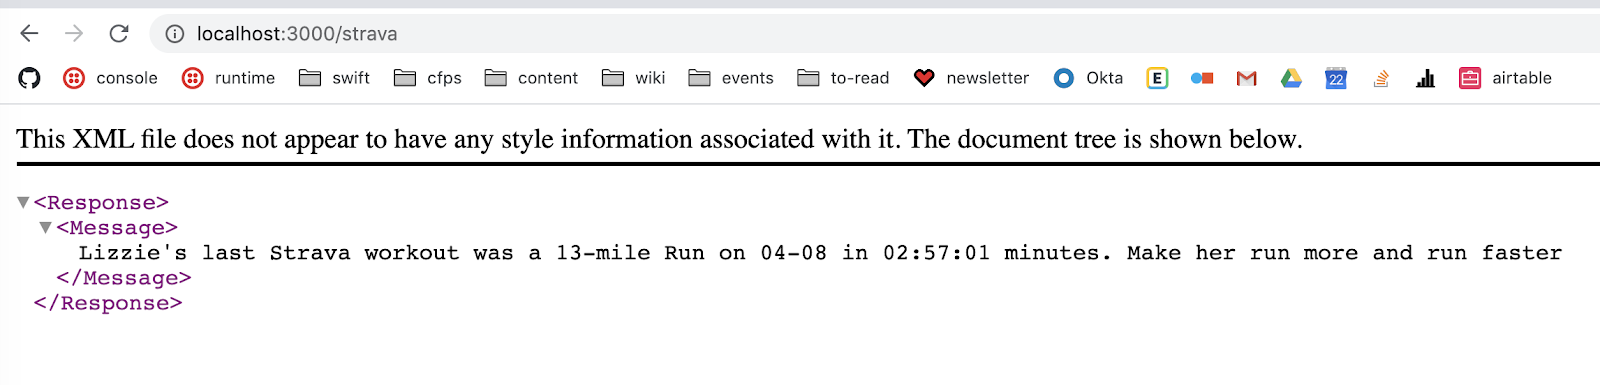
Going to localhost://3000/strava in the browser should display a page like this:
Configure our Function with a Twilio Phone Number
To open up our app to the web with a public-facing URL, run twilio serverless:deploy. You should see this at the bottom of your terminal:
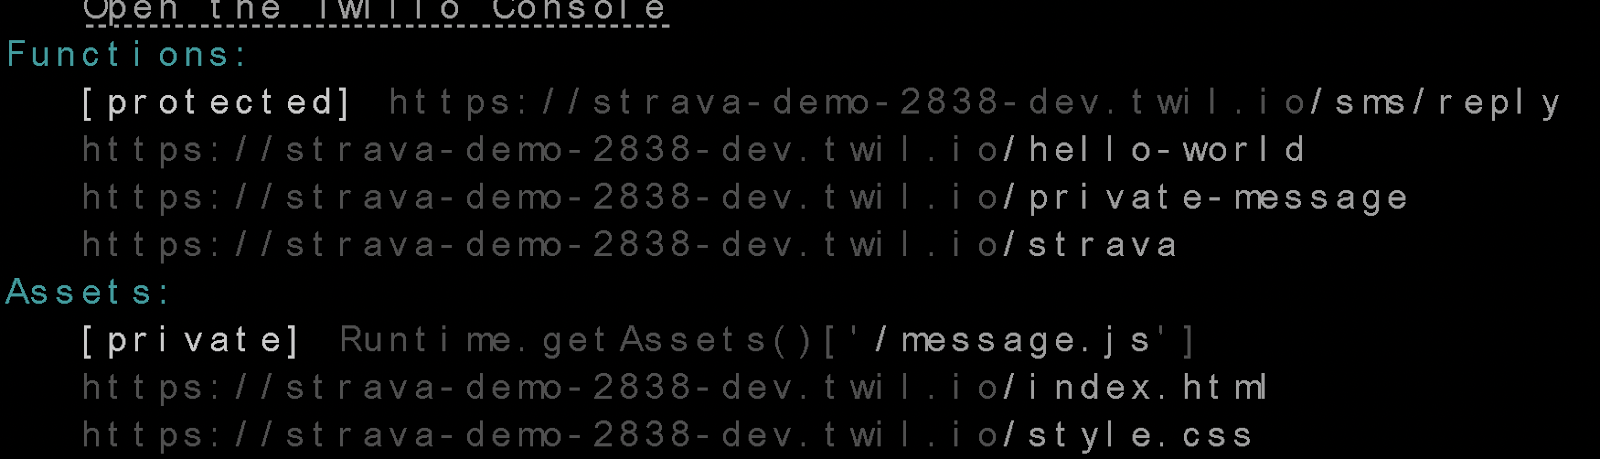
Grab the Function URL corresponding to your app (here it has /strava) and configure a Twilio phone number with it as shown below.
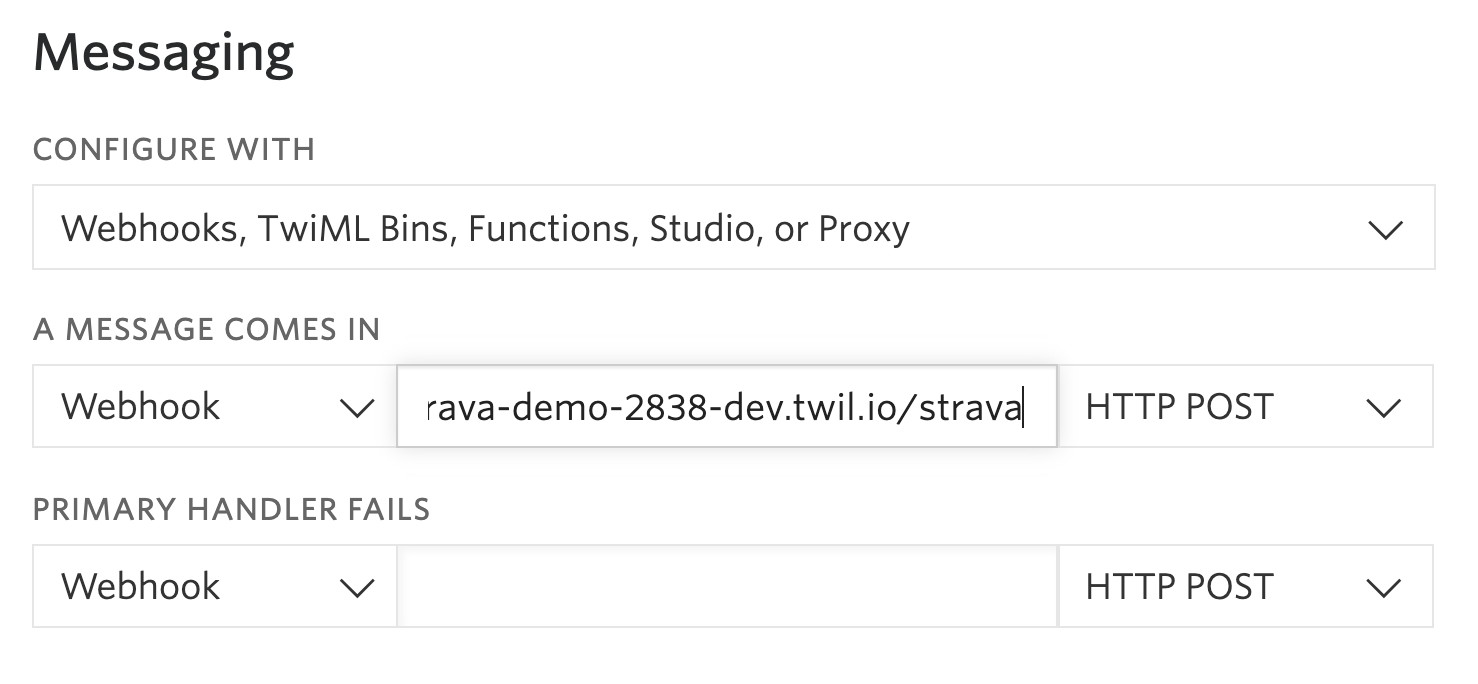
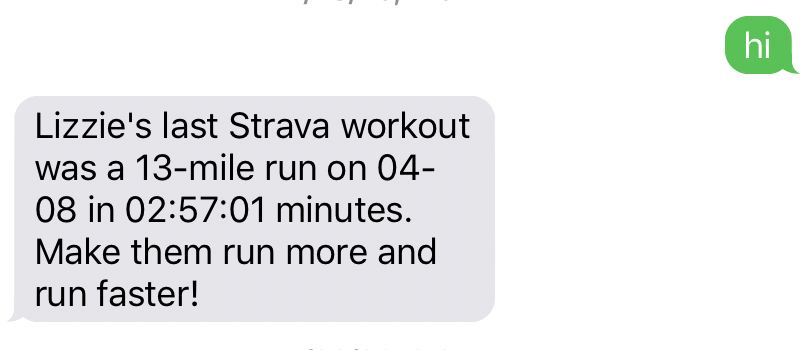
Click Save and now text anything to your Twilio phone number for a response like this one:
Warning: Strava Access Tokens expire after six hours. For more information on refreshing expired Access Tokens, check out this section of the Strava docs.
What's Next

You can access and play around with different JSON information with different Strava API endpoints. I don't know about you, but I feel like it's time to go for a run so people don't ask me why I haven't done so in a while. Let me know online or in the comments section what you're working on.
- Twitter: @lizziepika
- GitHub: elizabethsiegle
- Email: lsiegle@twilio.com


Related Resources
Twilio Docs
From APIs to SDKs to sample apps
API reference documentation, SDKs, helper libraries, quickstarts, and tutorials for your language and platform.
Resource Center
The latest ebooks, industry reports, and webinars
Learn from customer engagement experts to improve your own communication.
Ahoy
Twilio's developer community hub
Best practices, code samples, and inspiration to build communications and digital engagement experiences.