React Tutorial: Getting started with React, Express and Socket.io
Time to read: 7 minutes
November 18, 2015
Written by

I’ve been having a lot of fun messing around with React lately. For example, you might have seen a post I wrote on how to get set up with React, Webpack and Babel for ES6 code. Creating that post was a blast, but I didn’t want the fun to stop there so I kept on building. In this post, I’ll show you how to use React to build reusable, composable components for displaying and maintaining the state of your data in a real application.
Tracking the status of a phone call is a great example to show how React deals with handling state. To do this, let’s build a dashboard that will monitor phone calls using call progress events for Twilio Voice. You can find the code for the backend portion of this dashboard here if you want to focus on just building the client side React app for now.
The back end uses Express to receive requests from Twilio when a call’s status changes as well as to serve our React app. Socket.IO is used to communicate between the client and server in real time.
If you want to learn how the back end was built step by step you can check out these resources:
- The small app built for tracking call progress events came from my previous blog post.
- Socket.IO is used to sync the data between client and server. You can read this blog post to find out how to add Socket.IO to our server side app.
- You can follow through my set up post to make sure you have Webpack and Babel working.
Getting ready to pick up the phone
In order to run the code powering our call monitoring app, you are going to need Node.js and npm installed. At the time of writing this, I have Node v4.0 and npm v2.10.1 installed.
You will also need to create a Twilio account and purchase a phone number with Voice capabilities. You can get through this post using a trial account, but you will have to verify each phone number that you make calls to with the API. Upgrading your account will allow you to make calls without verifying the phone number first.
Set up the dashboard’s backend locally by entering the following commands into your terminal. You may have to type your GitHub credentials:
You can check to make sure everything is working by running node index.js in your terminal and visiting http://localhost:3000. You will see by looking at the console in your terminal that you’ve made a socket connection.
Now that all of the dependencies installed to work with the existing version of this app are taken care of, we need to install react for building components and react-dom for rendering them to the DOM:
Building our React components
Described by its own homepage as the V in MVC, React allows you to build reusable UI components and makes maintaining changes in your data’s state effortless by abstracting the browser DOM.
For our call state monitoring dashboard, there will be two React components to keep track of the phone calls. One will be a parent component containing a list of all phone calls, and the other will be for displaying the data of each individual phone call.
The parent component will hold an array of all phone calls, and whenever the status of a call changes, this will be updated in our array and passed down to the individual component as a property. When working with React components, it’s best to have the parent-most component hold the actual data and pass it down as properties to its children.
Let’s start by creating a component for a single phone call. In the project’s static directory, open a file called PhoneCall.jsx and add the following code:
This allows us to lay out how we want the data of one phone call to look when it is rendered. Notice that this is an ES6 class definition, which inherits its prototype directly from React.Component so that it is no longer necessary to call React.createClass.
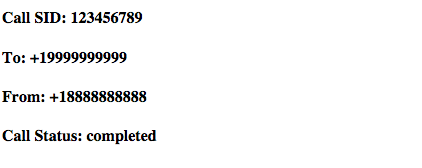
We aren’t finished yet, but let’s make sure everything is working by rendering our component with some dummy data. Add two more lines to the end of static/PhoneCall.jsx:
The ReactDOM library can mount React components to specific DOM elements. In this example a PhoneCall component with dummy data is mounted to a div on the page to make sure everything’s working.
Now before everything can be rendered, Webpack needs an entry point to our JavaScript in order to bundle everything for the browser. This should sound familiar if you’ve followed through my previous post on setting up React. Open a file called bundleEntry.js and add the following line:
Don’t forget to make sure the bundle.js file generated by Webpack is included in your HTML, like we did before.
Now compile everything with Webpack, and run the server so we can see our dummy data rendered to a web page. You can do this by running the start script:
When you visit http://localhost:3000 you should see the following on the web page:
You can feel free to remove those last two lines of static/PhoneCall.jsx as we will add code for rendering our components in a different place later.
Creating a parent component to hold the data
Now let’s move on to handling the state of all phone calls. Every time the status of a call changes, the item in the list representing that call will be updated, and then the state of the parent component will be updated to contain the new list. This way whenever a call is created it will be added to our dashboard.
Create the container component to hold all of the phone calls that are taking place. Open a file in your static directory called PhoneCallBox.jsx and add the following code:
You’ll notice that the class contains a constructor defining the initial state of our data and a render function defining how the data looks when rendered. There is also a call to ReactDOM.render in order to mount this component to our phone-calls element.
PhoneCallBox’s render function maps each phone call object in our array to a PhoneCall React component wrapped in an
- . The entire list of phone calls is then rendered.
The only problem right now is that there is no way to handle changes to a call’s status. This is where we can add onto the previous code from my Socket.IO post by creating a listener for status updates sent from the server.
Modifying the parent component to handle state changes
To handle the state changes we need to create a function that will execute whenever a call’s status is updated. This function should receive an object from the server defining the new state of a phone call, and iterate through the phoneCalls array to update that call’s status.
Open
PhoneCallBox.jsxin yourstaticdirectory once again and add this function to the PhoneCallBox React class:
Now that we have a function to use as a callback for handling state changes, we need to connect the client’s rendering to some actual data coming from the server.
Hop back into PhoneCallBox.jsx and add a Socket.IO event listener to our React component’s constructor function so the handleStateChange function is bound to “call progress event” events before the component mounts:
Now update the entry point for Webpack to bundle all of the client side code. Open up bundleEntry.js again and import the parent PhoneCallBox React component instead:
Now to bundle everything with webpack and run the Express server one more time, use the start script defined in package.json:
Here is where you’ll need your Twilio account and a phone number with voice capabilities. You’ll need to set these environment variables so you can make phone calls using your Twilio account to test the dashboard.
In order for Twilio to see your web app, you’ll need to have ngrok running on port 3000. To do that you can check out the first part of this awesome post.
Edit makeCall.js to have all of the right values and visit http://localhost:3000 one more time.
Now fire up some phone calls with makeCall.js to see changes on the page. Feel free to run this script several times while still on the page:
Don’t hang up the phone just yet
With this code, the dashboard app that was started in the call progress events post is complete from front to back. We have an Express server that receives call progress events when a phone call’s state changes, a websockets layer using Socket.IO to communicate changes between client and server, and a ReactJS-based front end for displaying and handling the data’s state in the view.
Using this as a basic example of what you can do with React, you are ready to start building more.
Try continuing this project by adding a persistent datastore to keep track of calls over time or perhaps by implementing an interface on the client side to control the flow of calls(I.E. hanging up a phone call by clicking a button).
I’d love to see what cool things you build. Feel free to reach out if you have any questions.
- Email: Sagnew@twilio.com
- Twitter: @Sagnewshreds
- Github: Sagnew
- Twitch (streaming live code): Sagnewshreds

Related Resources
Twilio Docs
From APIs to SDKs to sample apps
API reference documentation, SDKs, helper libraries, quickstarts, and tutorials for your language and platform.
Resource Center
The latest ebooks, industry reports, and webinars
Learn from customer engagement experts to improve your own communication.
Ahoy
Twilio's developer community hub
Best practices, code samples, and inspiration to build communications and digital engagement experiences.