How to Send Party Invitations Using SendGrid and Java
Time to read:
May 18, 2023
Written by
Reviewed by

Summer is around the corner and party mode is in full swing! Why not spice up your party planning skills by using SendGrid to send custom invitations to each guest. With just a few lines of Java code, you can create a memorable experience for your guests and make your friend's birthday celebration extra special.
Prerequisites
For this tutorial, you will need to set up Java on your system and a Twilio SendGrid account to send emails. Refer to the list below to set up everything required for this tutorial:
- A free Twilio SendGrid account.
- Java Development Kit (JDK) version 17.
- A Twilio account. If you are new to Twilio click here to create a free account now.
- A phone capable of receiving SMS to test the project.
Configuration
Start off by creating a directory to store the files of the project. Using your favorite terminal, enter:
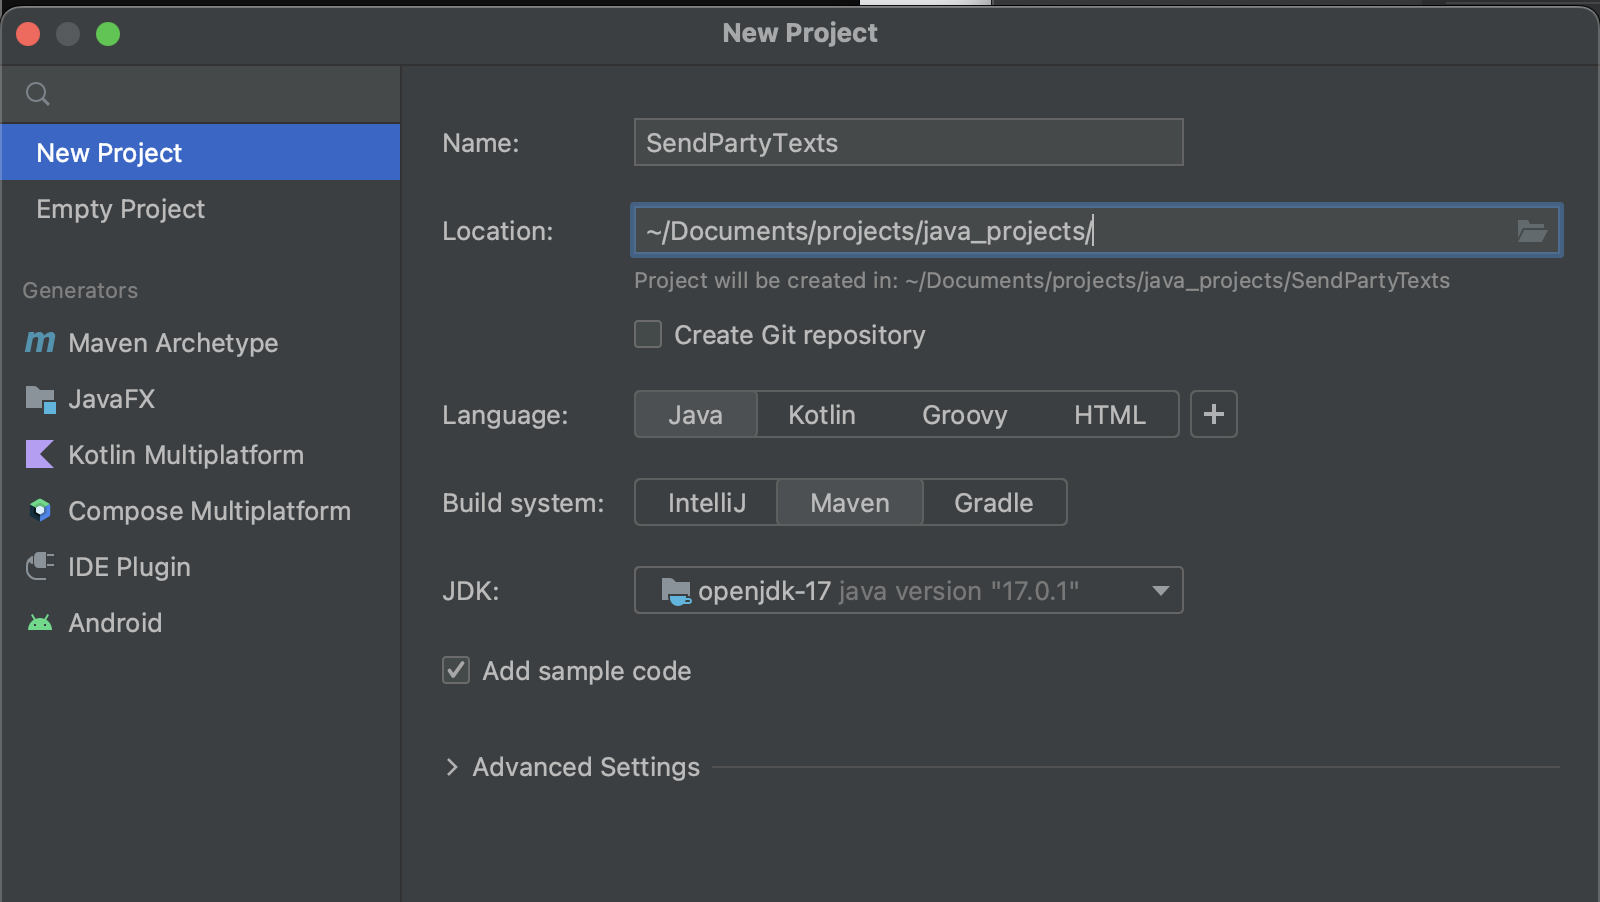
Open your favorite IDE such as IntelliJ IDEA CE and create a new project. Give the project a name such as "SendPartyTexts". Select "Java" as the Language, and "Maven" for the Build System.
Set up a Twilio SendGrid account
To use Twilio SendGrid APIs to send emails, you must first create an API key using the SendGrid console. Next, the sender's email ID must be registered and verified before it can be used to send emails.
Create an API key
To create an API key, head over to the Settings in the Twilio SendGrid console and select API keys. Enter the API key name such as "partykey"and permissions on the form that appears. For this tutorial, grant Full access to the API key.

This image is reused and the project directory name does not reflect the one used in this project.
You will not be able to see this API key again later, so be sure to keep it in a safe place to use later in this article.
Register an email sender
Next, register the email ID that will be used to send emails. SendGrid allows you programmatically send emails using only verified email addresses. You can choose to either verify a single email ID or authenticate a domain. For this tutorial, let us register a single email ID.
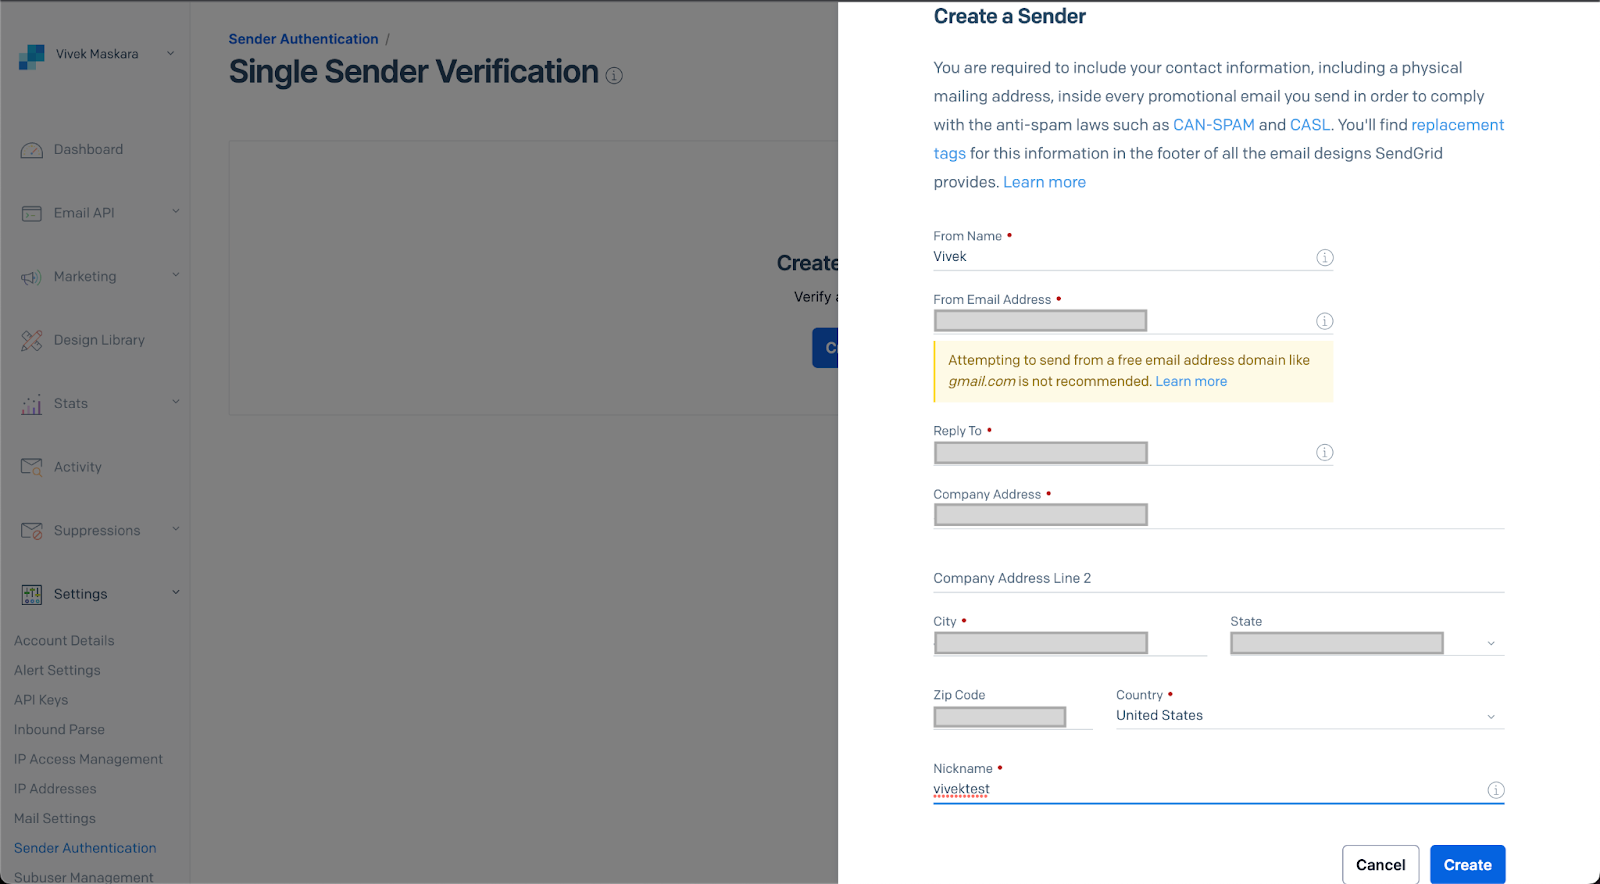
To register a sender, head to Settings in the Twilio SendGrid Console and select Sender Authentication. Click Verify a Single Sender on the Sender authentication page to create a new sender.
On the form that appears, enter the sender details and click Create.
You will receive an email to verify the sender. Once verified, the email ID can be used for programmatically sending emails using Twilio SendGrid APIs.
Add the SendGrid dependencies
To send emails from Java code, you'll also need to add the SendGrid Java library to your project. You can do this by adding the following Maven dependency to your pom.xml file:
Save the file.
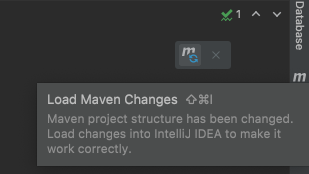
Look at the top-right corner of the IntelliJ IDEA and find the little icon with an "M" shape. Click it to load Maven changes.
Customize your email invitations
Dynamic templates allow you to create email templates with placeholders that can be replaced with personalized content for each recipient. You can create and manage your dynamic templates on the SendGrid website.

Click on the Create a Dynamic Template button. Open the template dropdown and click on Add version in the small box.
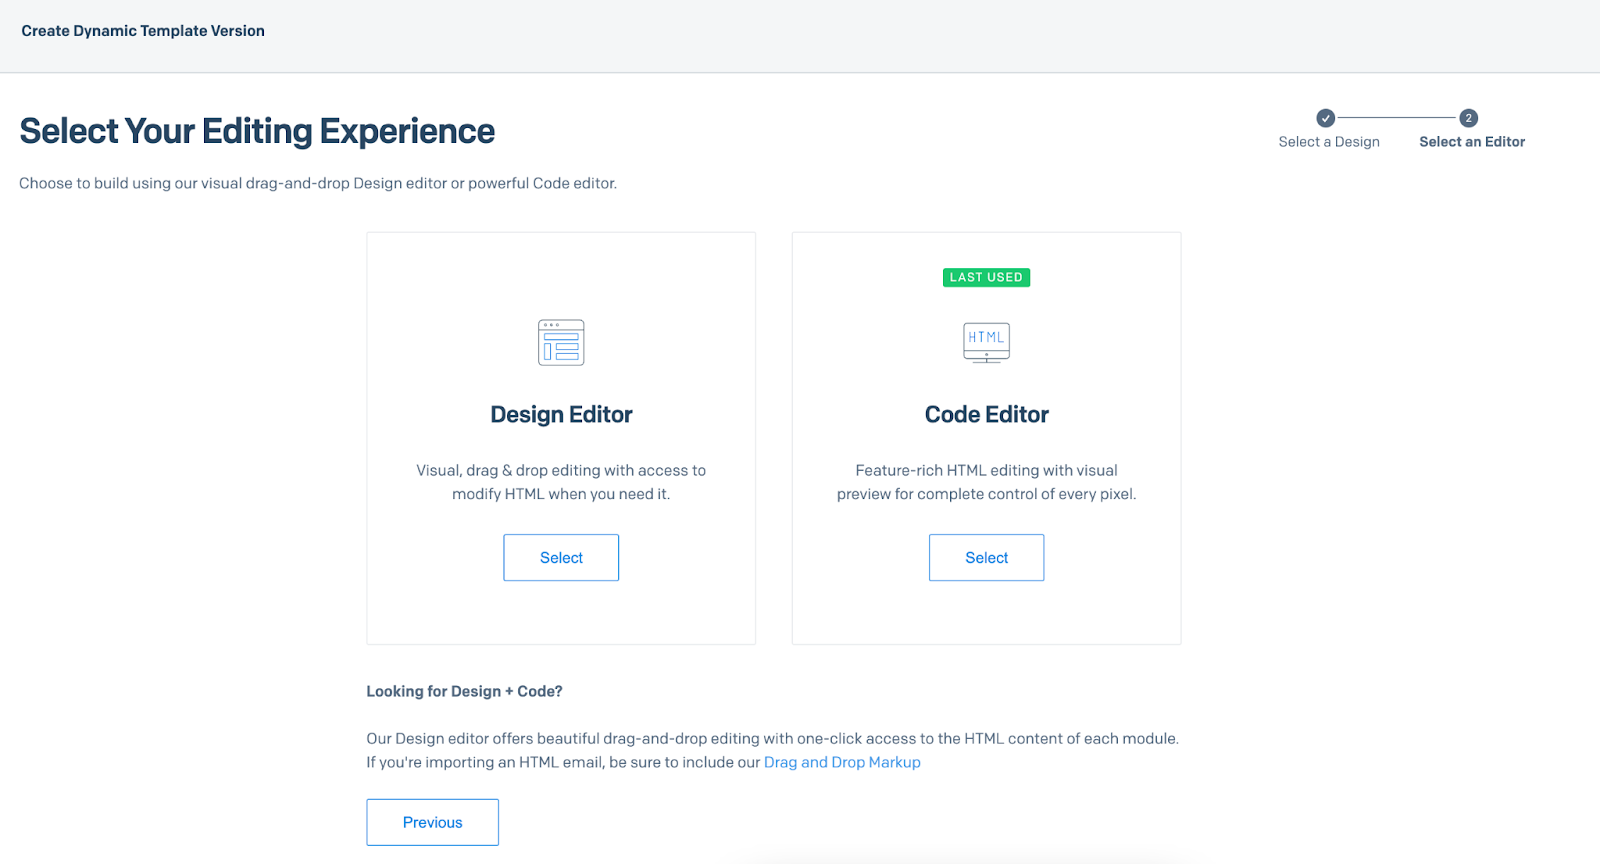
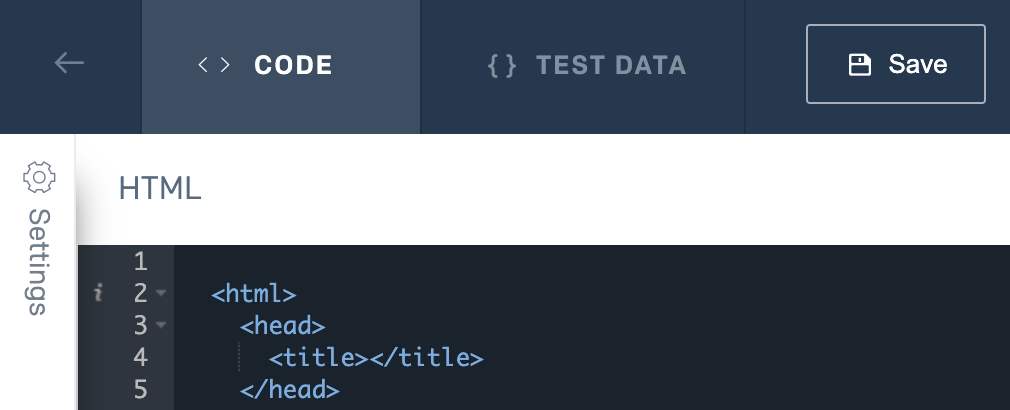
Click on Blank Template and select the Code Editor option as seen below:
Since you want to include the guest's name and address in the invitation, you must add the placeholders for the dynamic content.
To change the subject line of the email, click on the small Settings tab on the left hand side of the screen as seen below and type in {{ subject }} in the Subject field:
Save the Template ID starting with "d-XXXXXXXXXXXX" to insert into your code in the next section.
Configure the environment variables
Locate the Run tab at the top of the IntelliJ IDEA console and select Edit Configurations… in the dropdown as seen below:
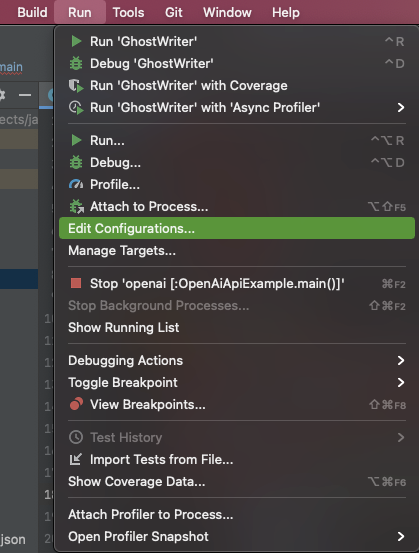
This image is reused and the project directory name does not reflect the one used in this project.
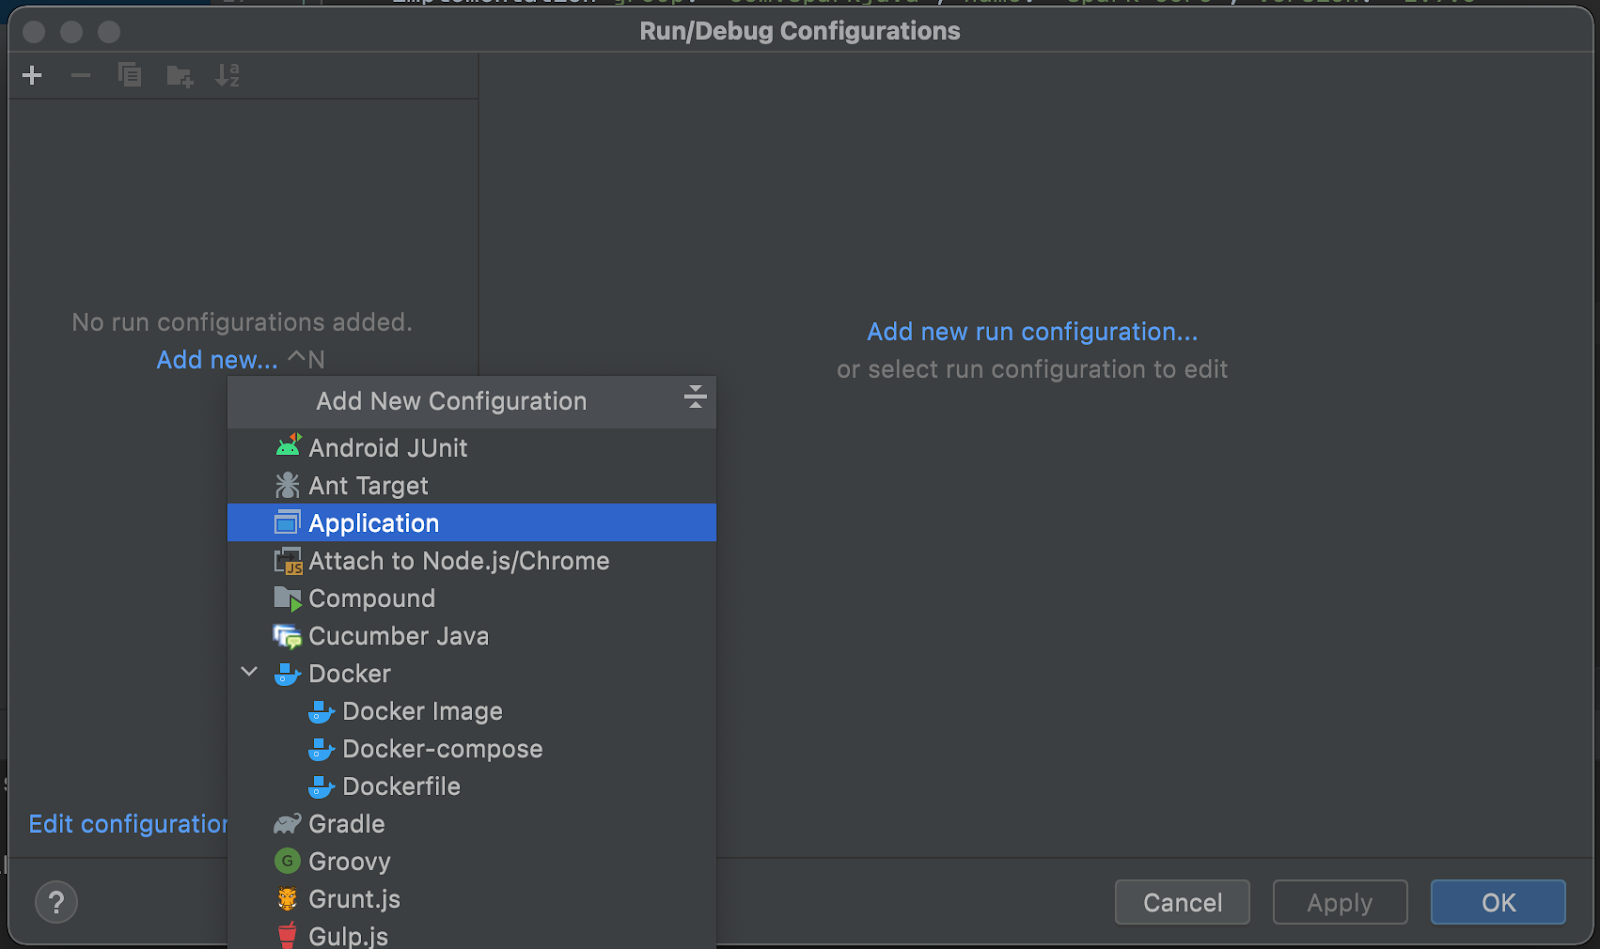
Another window displaying the "Run/Debug Configurations" will pop up with the details regarding the project. If there are no existing configurations for you to edit, click on Add New… on the left-hand side and create a new application named "SendPartyTexts".
It is best practice to protect your Twilio account credentials by setting environment variables.
Refer to this article to set up and hide variables in the IntelliJ IDEA environment.
Click on the Apply button, and then OK once finished.
Integrate SendGrid's API with Java code
Create a file named SendPartyTexts.java within the src/main/java subfolder in your project directory. With your SendGrid account set up and your Java project configured with the SendGrid library, you're ready to start sending email invitations. Copy and paste the code below to send a personalized invitation to each guest:
Here's a breakdown of what this code is doing:
- The
Emailclass is used to create an email object that represents the sender's email address and the guest's email address. - The
Personalizationclass is used to personalize the email for each guest by adding their name and contact information. - The
SendGridclass is used to authenticate your Java code with the SendGrid API using your API key. - The
Mailclass is used to create an email object that represents the content of the email, including the subject and message.
Remember to replace the <YOUR_SENDGRID_API_KEY> with the API key you created earlier.
You should also replace the <YOUR_TEMPLATE_ID_HERE> to use a dynamic template in your project.
Send Party Invitations with Java Code
Save your file and compile the SendPartyTexts class by clicking on the hammer button to build, then the play button to run on IntelliJ. Otherwise, you can execute the following commands in your terminal:
You should see a printed 202 HTTP status code on your terminal.
Check your email to see the SendGrid email invitation that you created. You can also view the status of the emails you have sent out on the SendGrid Activity Feed dashboard.
Implement Best Practices
When sending email invitations with SendGrid, it's important to follow best practices to ensure that your emails are delivered to your guests' inboxes and not marked as spam. Here are some tips to keep in mind:
- Use a recognizable sender name and email address to establish trust with your guests.
- Personalize the email content to increase engagement and avoid being marked as spam.
- Include an unsubscribe link to comply with anti-spam laws and allow guests to opt-out of future emails.
- Avoid using spam trigger words and phrases, such as "free," "money," and "buy now."
- Test your emails with different email clients and devices to ensure that they look good and are properly formatted.
What's next for building with SendGrid's Java SDK?
You’ve made it! In this article, we've shown you how to use SendGrid to send personalized email invitations with Java code. By using dynamic templates and personalization, you can create an engaging and memorable experience for your guests. Remember to follow best practices for sending emails to ensure that your invitations are delivered to your guests' inboxes. With these skills, you can send custom emails for all kinds of events, from birthday parties to weddings to business conferences. Happy coding!
Now you know how to use SendGrid’s Java SDK to send personalized emails to your users for special events. Check out these other articles on how to build further with SendGrid's Java SDK:


Related Resources
Twilio Docs
From APIs to SDKs to sample apps
API reference documentation, SDKs, helper libraries, quickstarts, and tutorials for your language and platform.
Resource Center
The latest ebooks, industry reports, and webinars
Learn from customer engagement experts to improve your own communication.
Ahoy
Twilio's developer community hub
Best practices, code samples, and inspiration to build communications and digital engagement experiences.