How to Use Svelte and Go to Build a Video Chat App
Time to read: 6 minutes
November 21, 2022
Written by
Reviewed by

The internet has made the world a much smaller place. Not only can you chat with your loved ones in real-time, but you can also see them and experience an extra level of interaction that words fail to capture.
In this tutorial, I will show you how simple it is to build a video chat app using Twilio Video, using Svelte for the frontend and Golang for the backend.
Prerequisites
To follow this tutorial, you will need the following:
Getting started
Brief Overview
The process flow of the application is as follows:
- The frontend displays a form that allows the user to specify a room name.
- The room name provided by the user is then passed to the backend.
- Using this room name, the backend will then generate and return an Access Token containing a video grant.
- This token is then used by the frontend application to connect to the created room and subscribe for room updates, such as when a new participant joins the room.
To get started, create a new folder named video_app, which will have two sub-folders named frontend and backend, by running the commands below.
Build the application's backend
Then, change into the backend folder to begin creating the backend of the application. Now, start by creating a new module named svelte_video_app using the following command.
After that, you need to add the project's dependencies:
- Go CORS Handler: CORS is a net/http handler implementing Cross Origin Resource Sharing W3 specification in Golang. Since the frontend and backend will be running on separate ports, CORS will need to be enabled.
- GoDotEnv: This will help with managing environment variables.
- Twilio Go Helper Library: This simplifies interacting with the Twilio API.
To do this, run the following command.
Next, create a new file named .env to store the environment variables which the application requires. Then, in the new file paste the following code.
After that, create a local version of the .env file using the following command.
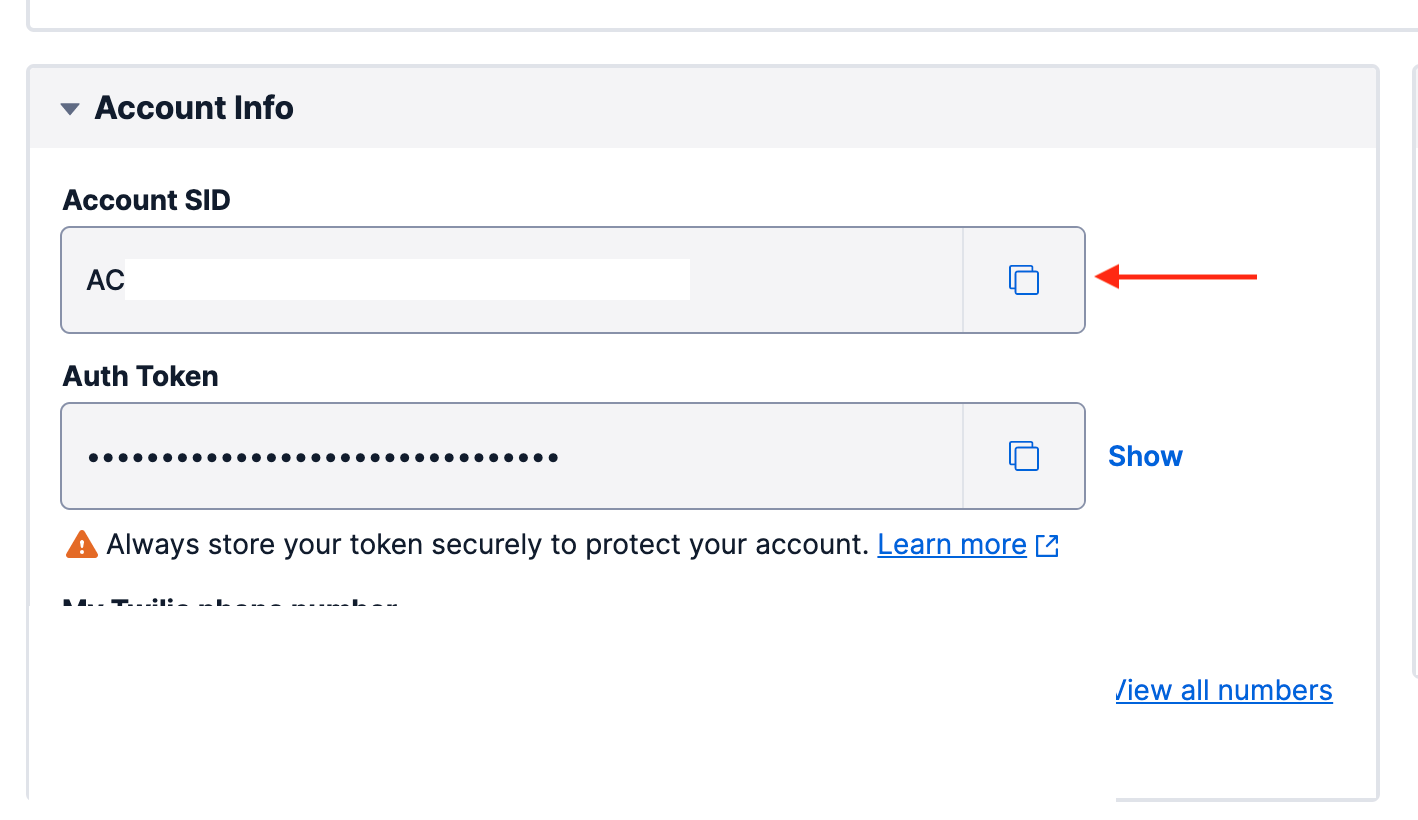
Launch your Twilio console to access your Twilio credentials. Copy the ACCOUNT SID from your dashboard. Henceforth, this will be referred to as your TWILIO_ACCOUNT_SID.
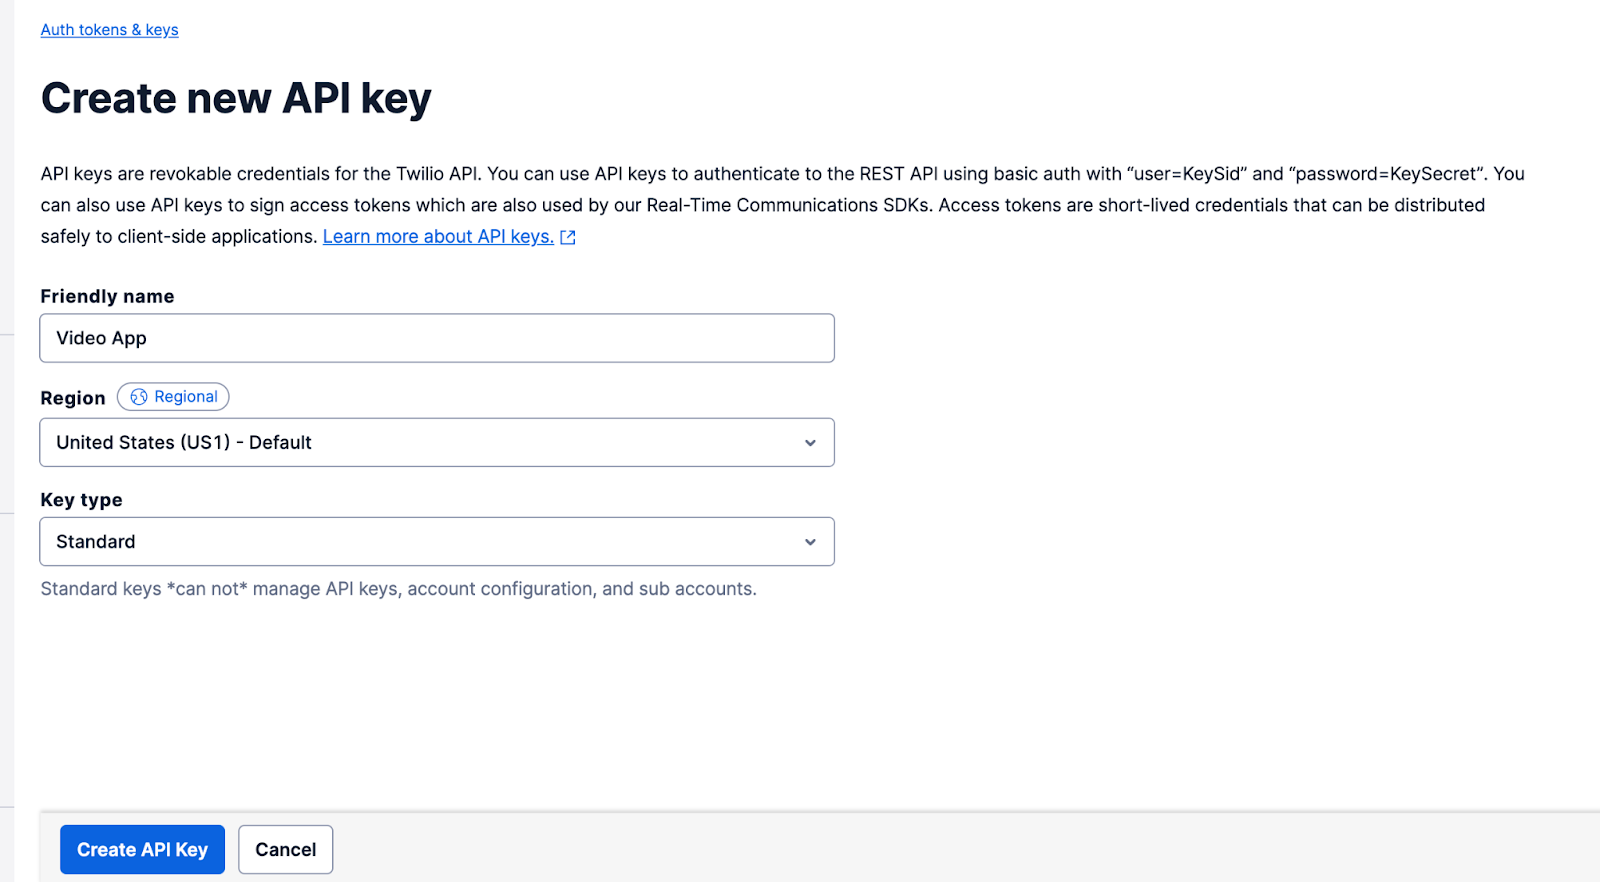
Next, create a new API Key which will be used for authentication to the Twilio Video API.
Give your API key a friendly name such as "Video App" and click on the Create API Key button, at the bottom of the page, to complete the process.
Once completed, the API Key SID and API Key Secret will be displayed. Make a note of both as the secret key; it is only displayed once. Going forward, these keys will be referenced as TWILIO_API_KEY_SID and TWILIO_API_SECRET_KEY respectively.
Replace the placeholder values in .env.local with the respective keys you copied from your Twilio console.
Add the ability to generate an Access Token
Create a new folder named helper in the backend folder. In the new helper folder, create a new file named token.go and add the following code to it.
The identity() function is used to generate a unique identifier for each user. This unique identifier is passed to the AccessTokenParams struct which is used to create the Access Token JWT. Additionally, a video grant for the provided room name is added to the token. In the absence of any errors, the token is returned for use elsewhere in the application.
Model the room
Next, create a struct to model the room. This struct will simplify parsing of the JSON request. Additionally, it will hold the logic for validating the provided room name before a request to the Twilio API can be made.
To do this, create a new folder named model in the backend folder, and in that new folder create a file named room.go. Then, paste the following code into the new file.
This struct has a single field named Name which corresponds to the room name received from the frontend application.
The Validate() function takes a Room struct and ensures that the room name is not shorter than six characters. The validation rules can be modified as required to suit your requirements.
Create the main function
All that is left is a main() function to serve as the entry point for the application and handle incoming requests. In the backend folder, create a new file named main.go and paste the following code into it.
In the main() function, four key things take place:
- The environment variables are loaded.
- A new CORS handler with default options is created.
- The
roomHandler()function is attached to the CORS handler. - The application is served on port 8000.
You can serve the backend by running the following command.
Build the application's frontend
Now, change into the frontend folder to begin creating the frontend of the application with Svelte.
There, create a new Svelte project by running the following command.
When prompted with the following question, press Enter.
Next, install the JavaScript dependencies for the project, by running the following command.
The dependencies are as follows:
- Axios: Axios will be used to make API requests and get the appropriate response
- Izitoast: This plugin will be used for displaying notifications
- Twilio-video.js: twilio-video.js allows you to add real-time voice and video to your web apps
Build helper function
First, create a helper function to handle the process of connecting to a room. In the frontend/src folder, create a new file named Helper.js and add the following code to it.
The connectToRoom function takes two parameters, the name of the room and the DOM element which will hold the Video Participant tracks. Using the name of the room, a new Access Token is created (via an API call to the backend application).
The Access Token is passed along with the room name to the connect() function provided by twilio-video. The connect() function returns a room object which allows you to subscribe to the participantConnected event and add the participant’s video track to the video container.
Next, a video track for the user is created and attached to the video container. The first time this occurs, a prompt will be displayed asking the user for permission to access the device camera and microphone.
Update the App component
Now, update frontend/src/App.svelte to match the following code.
Configure Rollup for Twilio-video.js
While the code for the frontend is now complete, there’s still some work to do before the frontend application can be bundled successfully. Try running the application using the following command.
You will encounter the following error:
To fix this problem, import the rollup/plugin-json package using the following command.
Next, open the frontend/rollup.config.js file. In the plugins array of the default export, add the following plugin
Don’t forget to add the appropriate import statement to the top of the file.
Svelte has LiveReload enabled hence the bundle process will re-run once you have made the changes. This time you will notice a warning as shown below:
If you try navigating to the served application at http://localhost:8080/ you will encounter a blank screen and the following error in your console.
To fix this, head back to your rollup config. There, in the plugins array, add the following to the options object passed to the resolve() function.
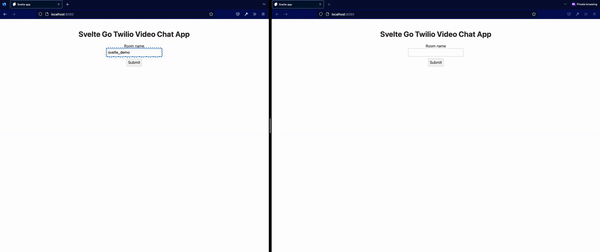
This time, your frontend application bundles without any errors and you can test your application. To do that, navigate to http://localhost:8080/ in two browser tabs to see your application in action.
Conclusion
There you have it, without writing any code for permissions, RTC (Real Time Communication) or data streaming, you have an application capable of handling all those and even more.
In addition to video streaming, the Twilio Video SDK provides functionality for muting audio, recording video chats and displaying camera previews before joining a room. You can view the documentation here,
I’m excited to see you build the next big thing in video communication.
You can review the final codebase for this article on Github. Until next time ✌🏾
Joseph Udonsak is a software engineer with a passion for solving challenges – be it building applications, or conquering new frontiers on Candy Crush. When he’s not staring at his screens, he enjoys a cold beer and laughs with his family and friends.
Main image credits
- Camera image by John Donges is licensed under CC BY-ND 2.0
- "Go Programming Language Sticker" Just Stickers, https://juststickers.in/product/go-programming-language-sticker/
- "Svelte logo" rednet.io, https://rednet.io/2021-05-27-svelte-getting-started.html
Related Resources
Twilio Docs
From APIs to SDKs to sample apps
API reference documentation, SDKs, helper libraries, quickstarts, and tutorials for your language and platform.
Resource Center
The latest ebooks, industry reports, and webinars
Learn from customer engagement experts to improve your own communication.
Ahoy
Twilio's developer community hub
Best practices, code samples, and inspiration to build communications and digital engagement experiences.