Verifying Phone Numbers in Ruby on Rails with Twilio's Verify API
Time to read:
September 07, 2018
Written by

In the public-facing world of apps, verifying that users are real people can be tough. This is where phone verification really becomes an asset, helping to mitigate fraud.
In this post, we will walk through integrating Twilio’s Verify API into a Ruby on Rails application to discover whether a user’s phone number exists, its type of line, and its carrier. We will then authenticate the user with Verify’s token verification.
Getting Started
We will build a simple login action, with phone verification. This walk-through will provide basic functionality that can be ported to new or existing Ruby/Rails applications.
At a high level, successful interactions will look something like:
- The user submits a phone number to the application.
- The phone number is verified as real, or not; and whether the phone is a mobile or a landline.
- If the number is a valid cell, the user is sent an authentication code.
- The user enters the code to complete the authentication process.
Of course, a lot can go wrong in this process, so we’ll have to plan to handle exceptions to this process as we build this service.
Note: completed code for this walkthrough is available here.
Environment Setup
We’ll be using Ruby 2.5.0, best installed and managed using either rvm or rbenv, and we will use PostgreSQL for storage. If you’re on a Mac, I’d recommend using homebrew for installing these; otherwise, see install instructions for your environment in the documentation for each service. You'll need the Rails gem installed as well, which you can do with:
Which also gives us Bundler, which we’ll use for package management.
Then, start a new Rails application with:
For this project, we will need to install the Authy gem. This library allows us to interact with the Twilio Verify API.
So, in your Gemfile, add:
Let’s also add Pry to our Gemfile, for great Ruby debugging:
In the group :development block (we don’t accidentally want debugger in prod!), add
Then, on the command line, run:
Lastly, let’s create our development and test databases:
Building the Login Service
To have a functioning login page, we need to implement the ability to CRUD. a resource, which in our case, is a user.
We could build this ability by hand, but, for the purposes of this article, why not take advantage of Rails’ out-of-the-box ability to do this for us? Rails Generators can build out an entire CRUD-able resource for us, adhering to RESTful routing and MVC design (lots of buzzwords here—feel free to to follow the links to read more :) ).
From the command line:
If you’re not familiar with Rails, just know that this does a lot for us. First, it creates a migration to make a users table with name and phone_number columns. It then creates a corresponding user model. It makes all RESTful routes for the user resource, controller actions for each route, and, finally, very simple stock Rails views for the user resource. To verify, try:
And you should see:
Note: If you are using Rails 5.2, you may see more routes related to Active Storage, but we don’t need to worry about those right now for our purposes.
Then, let’s run our migration to create our users table, and fire up our dev server:
According to the routes we see above, if we open a browser and navigate to localhost:3000/users/new, we should see:
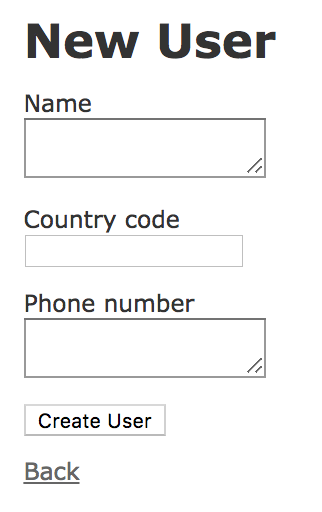
Rails Magic!! 👏👏
Go ahead and create a user and submit. After doing so, you should see:
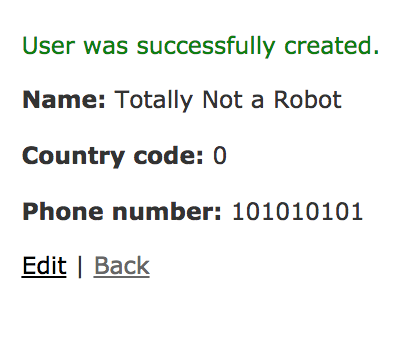
Great! Now we know that we can create and save users and phone numbers.
Registering an App in the Twilio Console
We will need some credentials to interact with the Authy API. To access the Twilio Developer Console, head to https://www.twilio.com/console/verify/applications. If you don’t have an account, feel free to sign up on the free tier, which will be sufficient for what we’re building here.
Once logged in, select ‘Create New Application’ to get started. After giving the app a name, you should see:

The details of this page help for configuring exactly how users interact with the application. For now, what we really need is the API key to get some requests working. Let grab that API key:
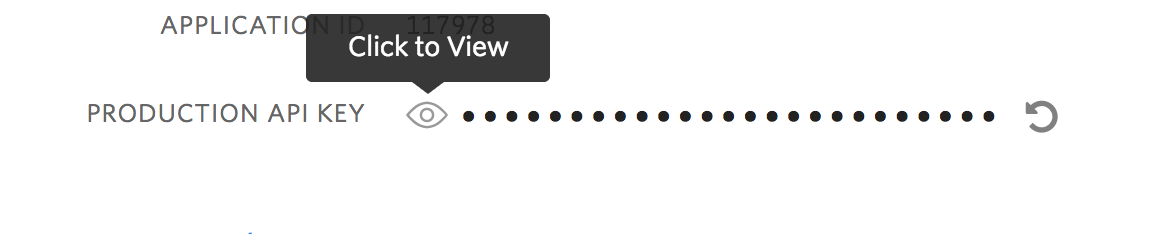
Copy the key to your clipboard, and let’s head back to the console.
Try:
Be sure to replace <YOUR_KEY> with your API copied from the console. Regarding the <VALID_CELL_NUMBER>, I’d recommend using your own cell number for this so that strangers don’t receive invitations to authenticate on your app.
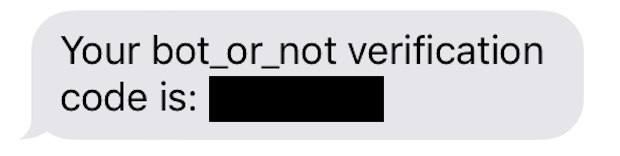
And, boom! You should have received an object in response, including various information about the cell phone and any actions taken. Also, using your cell, you should receive a text message.
Using Authy-Ruby
We can now make successful requests for information about and validity of our cell phone numbers. The next step is to do this programmatically in our app.
Our Authy gem gives us access to a Ruby library that abstracts Twilio’s Authy API. There’s quite a bit of functionality built in, but we are particularly interested in the PhoneVerification class, with its start and check methods.
According to the docs, start begins the process by verifying a user’s cell phone information and that it has SMS capability, and upon receipt of those two things, the API sends a text message with an expiring code to the user. Let’s try this in the Rails console:
Here, we can go ahead and try out the Authy library:
Oops! The library doesn’t know the API key to use. In your config/initializers directory, add authy.rb file, and in it:
Note: to keep your api keys private, you should add this file to your .gitignore file if you plan on pushing this to project to a public repository.
Now restart the Rails console, and let’s try again. Using a valid phone number, you should see a response like:
Also, the phone number given should have received something like:
The code given is valid for 10 minutes, so if you’re still within that window, we can try the check method with the same code (don’t worry if it’s expired, you should just be able to send the start method again):
Great, we’ve spiked out the verify feature using the library. Now let’s get this functionality into our app.
To keep responsibilities separated, let’s add a new /services/ directory in the ./app/ directory, and in it, a verify.rb file. Because the nature of this service will be functional and won’t need to handle state, let’s make this a Ruby module.
In it, let’s start with a method for determining whether the phone number is valid, like we did in our console:
This way the method will act as guard, returning a boolean that we can easily use for controlling the flow to our user_controller. To have the method available to us in our controller, be sure to include it in our UserController class.
At the bottom of the file, the scaffolding gave us a private method called user_params.
When invoked, this method creates a hash of only those attributes passed in to the permit method. This will be helpful when we need to use the inputted country_code and phone_number for verification.
You’ll notice that a lot came out of the box here when we scaffolded the user resource, some of which we don’t need. Thinking back to our high-level interactions, this is where we can tackle the first two:
- User submits a phone number to the application.
- The phone number is verified as real, or not; phone line type is determined.
Let’s do some work to our create method. Get rid of the scaffolded code that came in the create method and replace it with:
Notice we used an alert for the else condition. To make sure this render properly, go to /app/view/users/new.html.erb and change:
to:
The above additions and changes will do a few things for us: the initial if statement will evaluate our valid_phone_number? method as true or false. If successful, we will persist the user’s name and phone number to our user table; otherwise, with an unverified number, the else condition is run and the user is redirected back to the initial form.
Let’s try it!
Spin up our local Rails server with rails s and navigate back to localhost:3000/users/new.
You should see the same form, but now, it should behave differently. Entering a nonsense number will cause the guard method we added above to return false, returning us to this same form. Entering a valid number should create the user and send an SMS like we saw above.
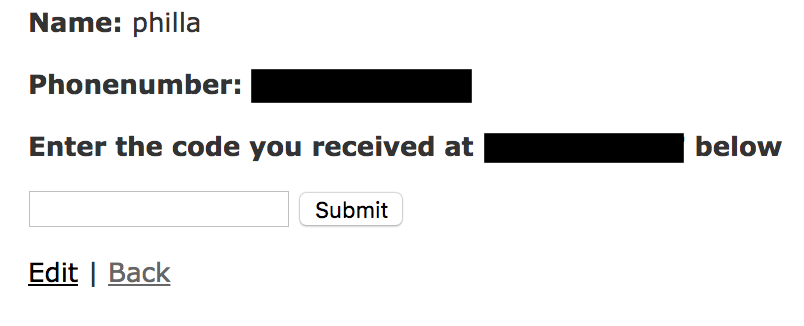
We still need to implement our check method. This should happen _only after_ saving a user with a valid phone number since a valid code is only texted to a user with a valid number.
We can deal with this by adding an input to the user#show path. This approach fits nicely into our applications flow, since a user is only delivered to this resource if it is created, and it is only created if the user provides a valid cell number.
In our views, then, add a simple Rails form_tag to the user/show.html.erb
Which, in the context of what was already there from the scaffolding, should look something like:
You’ll notice in our form_tag that we specified the verb and resource, so this action will take us to the update action in the user controller.
At this point, we need to add a `check` method to our module. The interface to this method will need to identify the user's phone number and check the code received by the user against it. Again, this is a good opportunity for a guard method that returns a boolean. So, in the Verify module, add the following:
Now we can check the code against our local persisted user information and check both against the Authy API to complete verification. Also, we might want to indicate in our backend that the user has been verified. It’s easy enough to add this to the user table:
And in the generated migration file:
Then, back on the command line
With this in place, let’s add an indicator on the users show page, along with a guard only showing the form if the user is not verified.
So, porting this functionality now to our controller, take a minute to rearrange the update action. First, since we are fundamentally changing the update action, we don’t want to allow for edit ability that our scaffolding gave us. So, let’s get rid of anything that would lead us back to the update action, except for the phone verification flow:
In `/app/views/users/show.html.erb` and in `/app/views/users/index.html.erb` delete
Then, in our update action:
Here, we’ve handled the update action in a similar fashion to the create action in terms of flow control. The key difference is that on successful return of the valid confirmation code, we update the verification column on the user.
To ensure that our success notice or error alert are displayed on the page we need to add one more thing to the view. Open `app/views/users/show.html.erb` and add the alert message below the notice.
And with that, we’ve handled all of the logic for our authentication process! 👏👏
Next Steps
This is a simple implementation of using Verify for phone numbers. To dig a little deeper, I would suggest looking into other verification methods offered by the Authy gem, and experimenting with Twilio’s other tools for preventing fraud, specifically, the Lookup API.
Thanks for following along, I'm Daniel Phillips and you can find me on the following sites: @d_philla and github.com/dphilla.
Related Resources
Twilio Docs
From APIs to SDKs to sample apps
API reference documentation, SDKs, helper libraries, quickstarts, and tutorials for your language and platform.
Resource Center
The latest ebooks, industry reports, and webinars
Learn from customer engagement experts to improve your own communication.
Ahoy
Twilio's developer community hub
Best practices, code samples, and inspiration to build communications and digital engagement experiences.