Creating a virtual photo booth using Twilio, WhatsApp & Cloudinary
Time to read: 4 minutes
July 16, 2019
Written by

If you've ever been to Berlin, chances are high that you've seen multiple photo booths in bars and on the street. Berlin and photo booths just belong together. This year for JSConf EU we wanted to build our own virtual photo booth, powered by Twilio for WhatsApp. In this post, we'll look at how we built the digital part of the photo booth using Twilio and Cloudinary.
Let's build a purely digital version of this photo booth where when a person sends in an image, we'll perform some manipulations on that picture and send it back.
Prerequisites
Before we get started, make sure you have the following:
- A Twilio account (sign up for free)
- The WhatsApp Sandbox Channel installed (learn how to activate your WhatsApp sandbox)
- A free Cloudinary account
If you prefer to view the next steps as a video to follow along, make sure to check out this video on YouTube:
Setting up Your WhatsApp Number
When a person sends a picture to our WhatsApp number (or Sandbox for that matter), Twilio will trigger a webhook request that we'll have to receive. We could use any HTTP server for this, but in our case we'll use a Twilio Function. This allows us to host a serverless HTTP endpoint using Node.js.
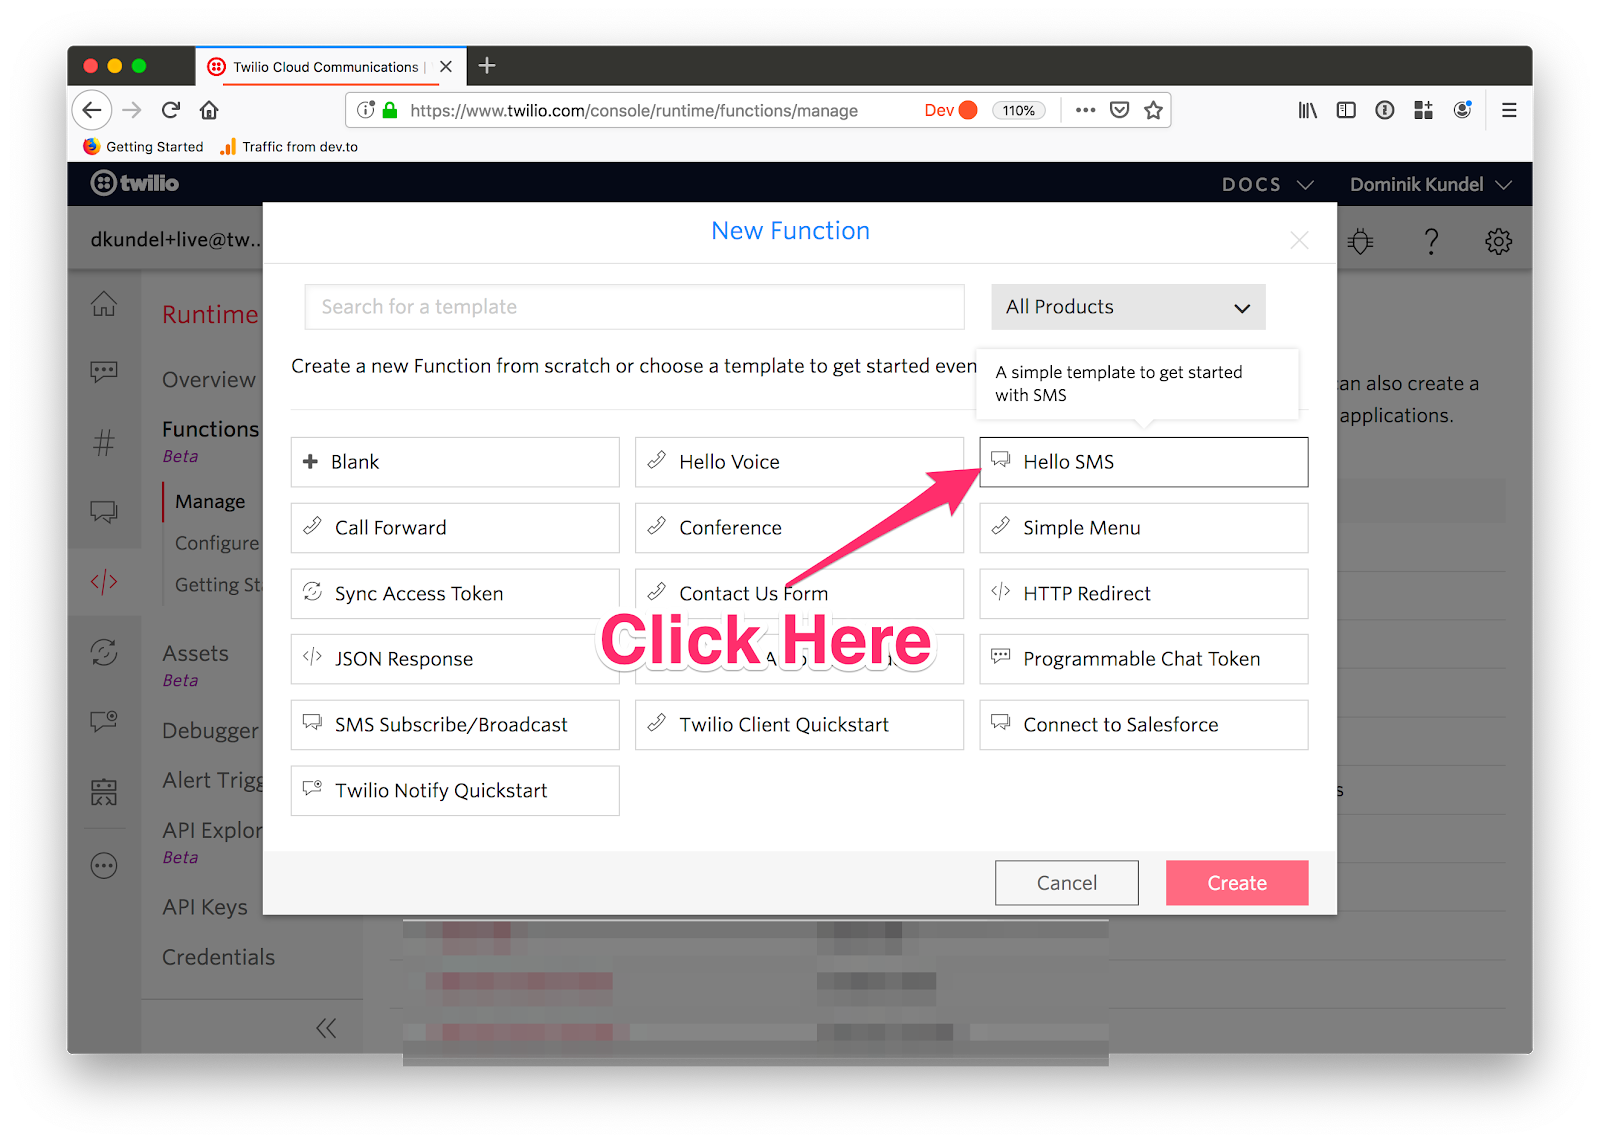
Inside the Twilio Console, head to the Functions section and create a new Twilio Function with the "Hello SMS" template.
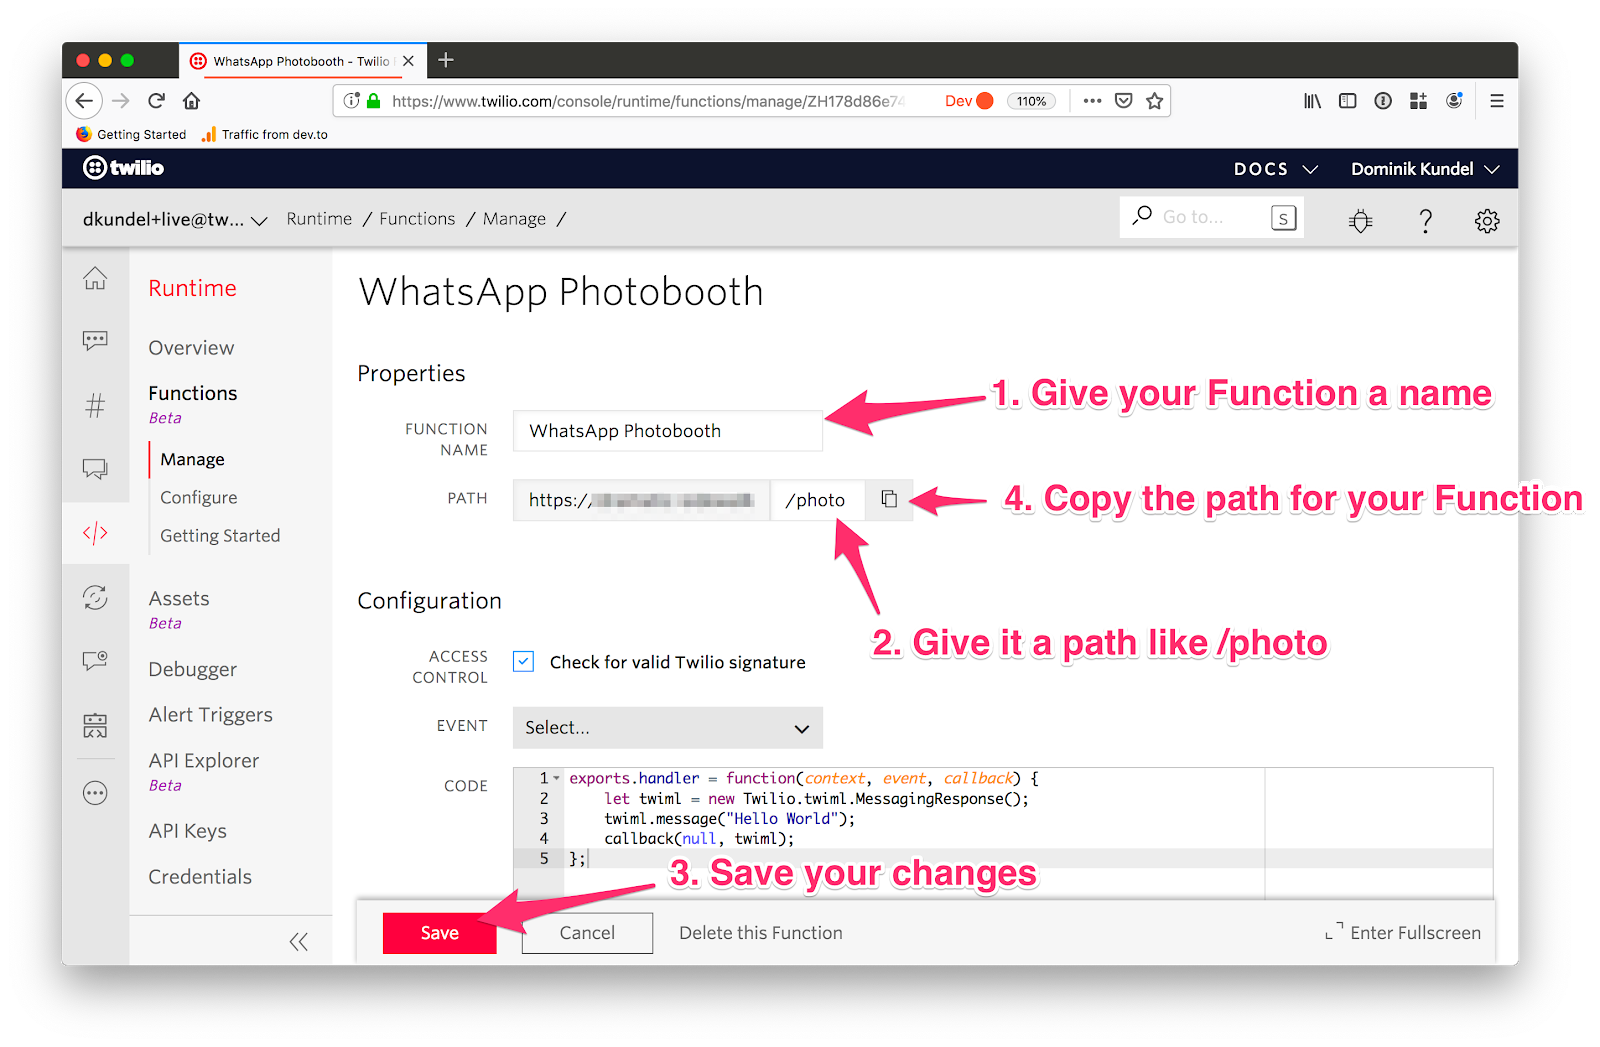
Once you created your new Function, give it a name like "WhatsApp Photobooth" and a path such as /photo. Make sure to save the changes and copy the path to your Twilio Function.
In a new tab, head over to the WhatsApp sandbox configuration screen and set the URL for "When a message comes in" to the path of your Twilio Function. Scroll all the way to the bottom to save the changes.
You can test if everything is properly set up by texting any message to your WhatsApp sandbox. The response should always be "Hello World".
Receiving the Picture
Now that we have our Twilio Function wired up, let's see how we can retrieve an image when we sent one.
When Twilio makes the HTTP request to your webhook, it will send a set of info around your message as part of that request. In Twilio Functions we can access these via the event object that is passed to our Function.
Specifically in our case the event.MediaUrl0 is of interest because it will contain the URL of our image if one has been sent with the message. We might also have event.MediaUrl1 to event.MediaUrl9 available if more images have been sent but in our case we'll focus on the first one.
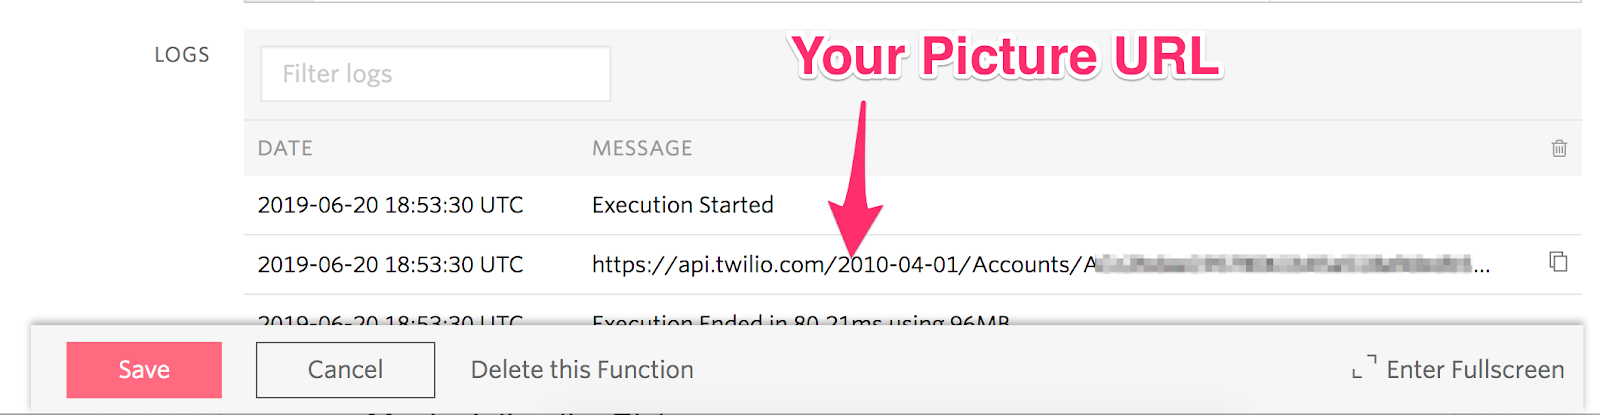
For now, we'll just log the URL, modify your Twilio Function accordingly and hit save:
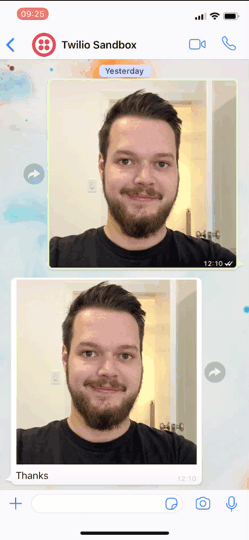
Afterwards, send in a picture to the sandbox and check the logs at the bottom of your Function. You should see a URL logged. Press the "copy" button to copy the URL and open it in another tab and you can see the image you've sent.
Now that we can access the sent image. Let's see how we can modify it using Cloudinary.
Manipulating the Picture
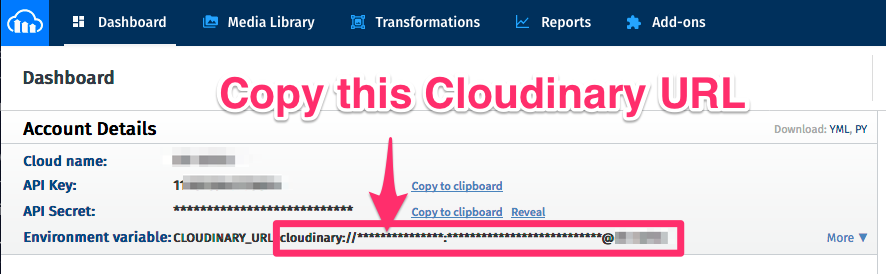
Cloudinary is a platform for image management and manipulation. It's great for our use case because we'll want to do some image manipulation on our picture. We'll also need a URL that we can give Twilio to send the resulting image. Cloudinary combines both of these in one platform.
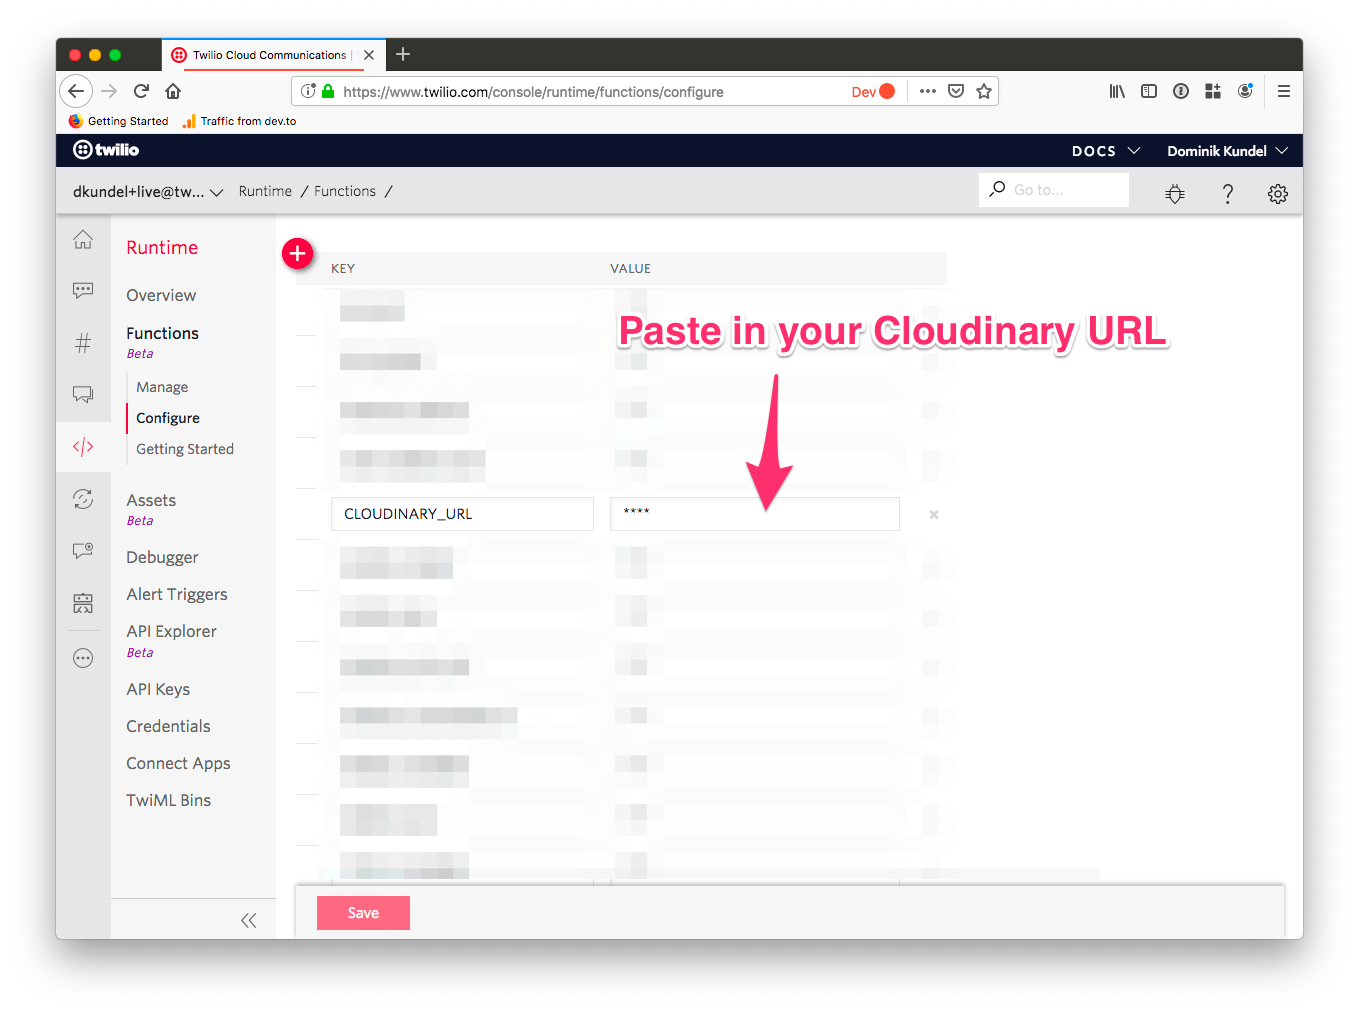
Start by installing the cloudinary SDK as a dependency and setting your Cloudinary credentials. Go to the Configure page of your Twilio Functions and in the Environment Variables section, add your CLOUDINARY_URL from the Cloudinary Dashboard.
Afterwards, scroll to the Dependencies section and add cloudinary with the version * to install the latest version.
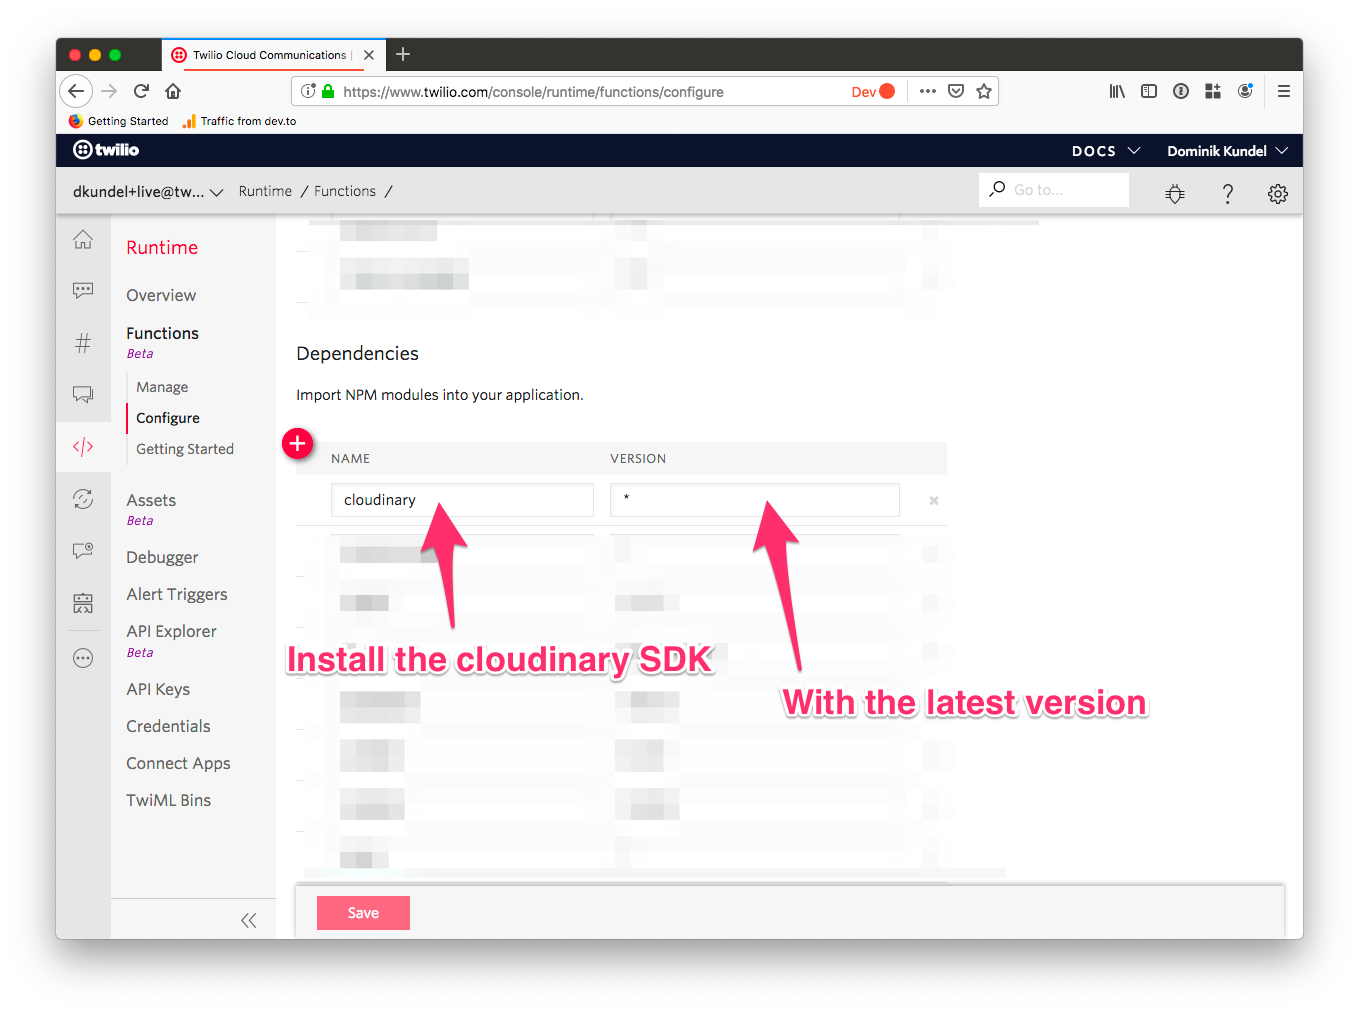
When you are done with both, hit save to apply the changes.
Now that we have the Cloudinary SDK all set-up, it's time to work on the image manipulation. In our case we'll want to do the following to the picture:
- Change the aspect ratio to a 3x4 picture.
- Adjust the height to 1600px
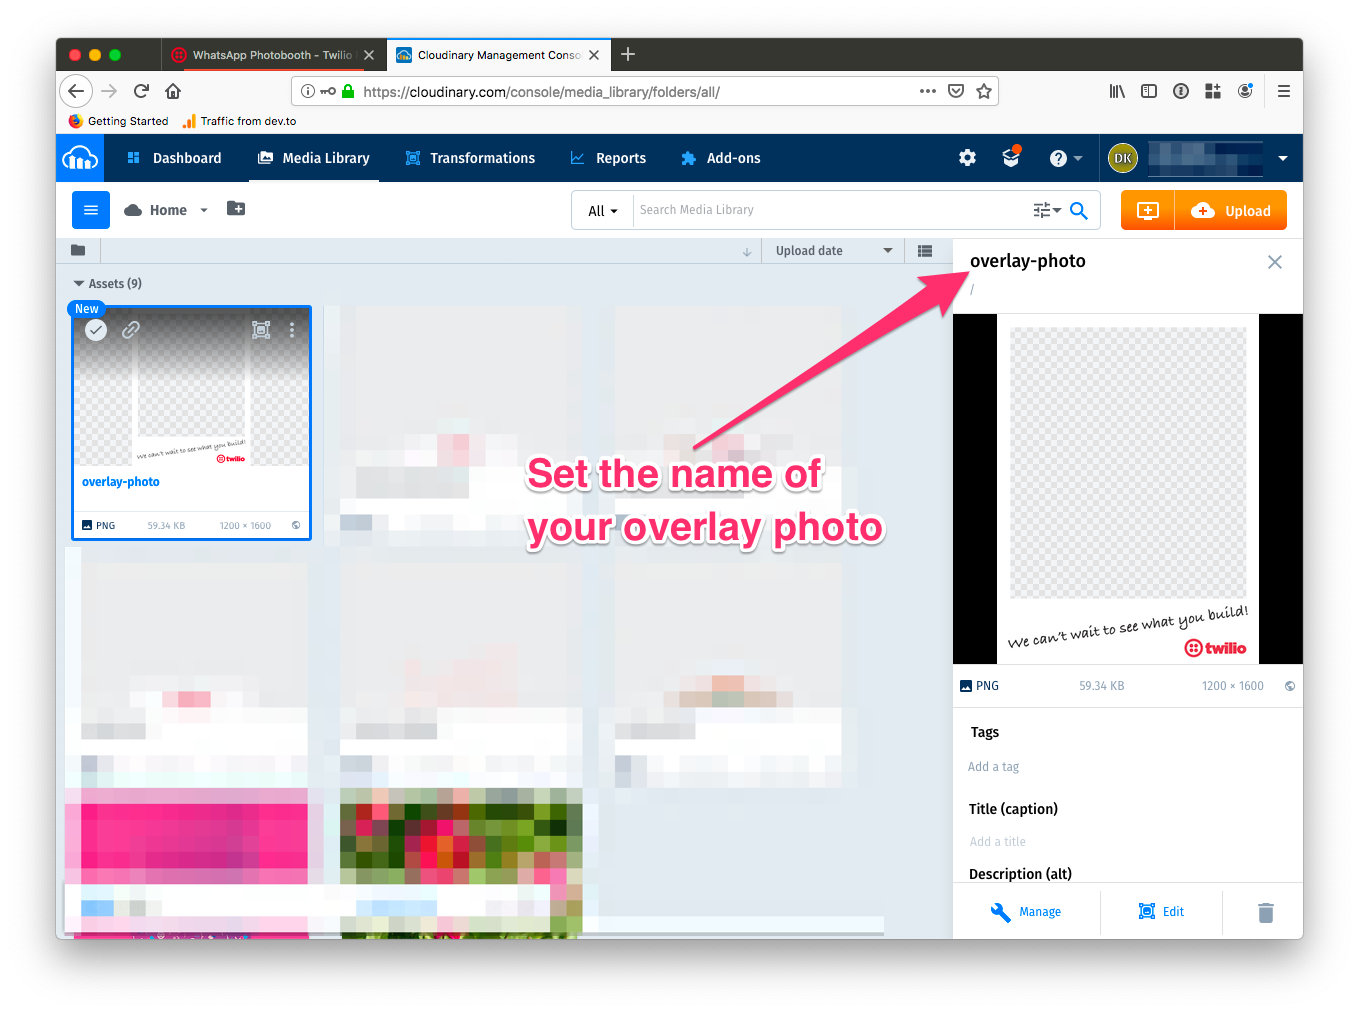
- Apply an overlay on top. In our case, it's going to be this overlay

Before we can start with the image manipulation, you'll have to upload the overlay to your Cloudinary media library. You can either use your own in the size 1200px width by 1600px height or download one here.
Upload it to the Cloudinary Media library and give it a name of overlay-photo.
Cloudinary uses the concept of transformations to manipulate an image and comes with a wide variety of options. It also supports eager transforms. That means we can pass a set of transformations to it during image upload to tell it which transformations it should have readily cached. You can learn about the various available transforms in the Cloudinary docs.
In our situation the transformations convert to the following in JavaScript:
Since the Cloudinary API is callback based, we'll use the built-inbuilt in promisify method to enable the use of async/await with this API.
During the upload, we'll also have to assign the photo a public ID which acts as a name. We'll use the ID of your sent message (MessageSid) for this one as it's a good unique identifier.
As a result of the upload, we'll be able to retrieve the URL of the eager transform. We can then use that to set the media on our response Messaging TwiML.
Update your Twilio Function to contain the following:
Press Save to deploy your changes.
Now that you have the changes deployed, text a picture into your WhatsApp sandbox number and you should get as a response with the transformed picture.
What's Next?
Congratulations, you've built your own digital photo booth powered by Twilio, WhatsApp, and Cloudinary. But your journey with Twilio doesn't have to be over. Why don't you check out:
- Learn how you can use Twilio Autopilot to build WhatsApp bots
- How to build an npm search bot with Twilio and WhatsApp
- Jump into your own TwilioQuest adventure and learn in an interactive game how to use Twilio's APIs
And if you have any questions or want to show me what you built, feel free to contact me:
- Twitter: @dkundel
- Email: dkundel@twilio.com
- GitHub: dkundel
- dkundel.com


Related Resources
Twilio Docs
From APIs to SDKs to sample apps
API reference documentation, SDKs, helper libraries, quickstarts, and tutorials for your language and platform.
Resource Center
The latest ebooks, industry reports, and webinars
Learn from customer engagement experts to improve your own communication.
Ahoy
Twilio's developer community hub
Best practices, code samples, and inspiration to build communications and digital engagement experiences.