Create a Serverless Conversation Demo with Telegram
Time to read:
July 27, 2023
Written by
Reviewed by
Twilio Conversations is an omni-channel messaging platform that allows you to build engaging conversational messaging experiences across multiple channels such as chat, SMS, WhatsApp, and Facebook Messenger. But what if you want to add another channel, like Telegram?
Conversation Scoped Webhooks provide a way to attach a unique monitor, bot, or other integration to each conversation. This can be used to add a Telegram bot to Conversations.
This Conversations quickstart creates a demo application that provides a basic Javascript-based chat UI using CodeSandbox.io. In this demo, we will add a Telegram bot to the conversation and use Twilio Functions for backend logic implementation.
Overview
This blog post offers a detailed guide for creating a serverless conversation demo with Telegram and ChatUI, utilizing Twilio Functions for implementing backend logic. The guide walks you through integrating a Telegram bot into the conversation, adding another participant via ChatUI, and setting up a scoped webhook to handle Telegram messages. Included in the document is a high-level diagram and flow, along with code snippets for each step of the process. Additionally, the post provides prerequisites and settings required to run the functions.
Prerequisites
- A Twilio account (If you don’t have one up, you can sign up for free here)
- A Telegram account
- Learn and get started with Twilio Functions
- Get familiar with Conversations quickstart and have the Conversations demo application using CodeSandbox.io ready
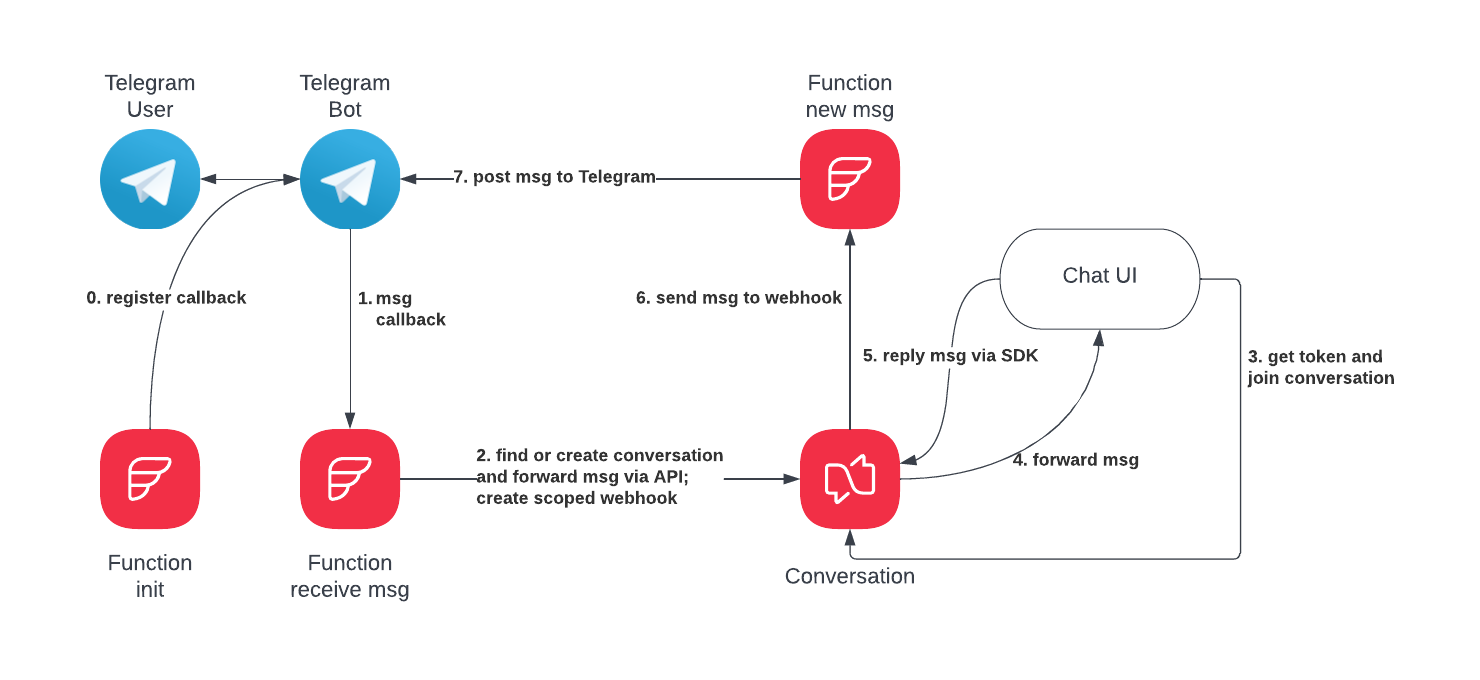
High-level diagram and step-by-step setup
The high-level diagram and flow are shown in the figure below. It illustrates how messages are sent back and forth between Twilio Conversations, Telegram, and the Conversation demo (Chat UI). Let's get started!
Step 0: Register for Telegram callback
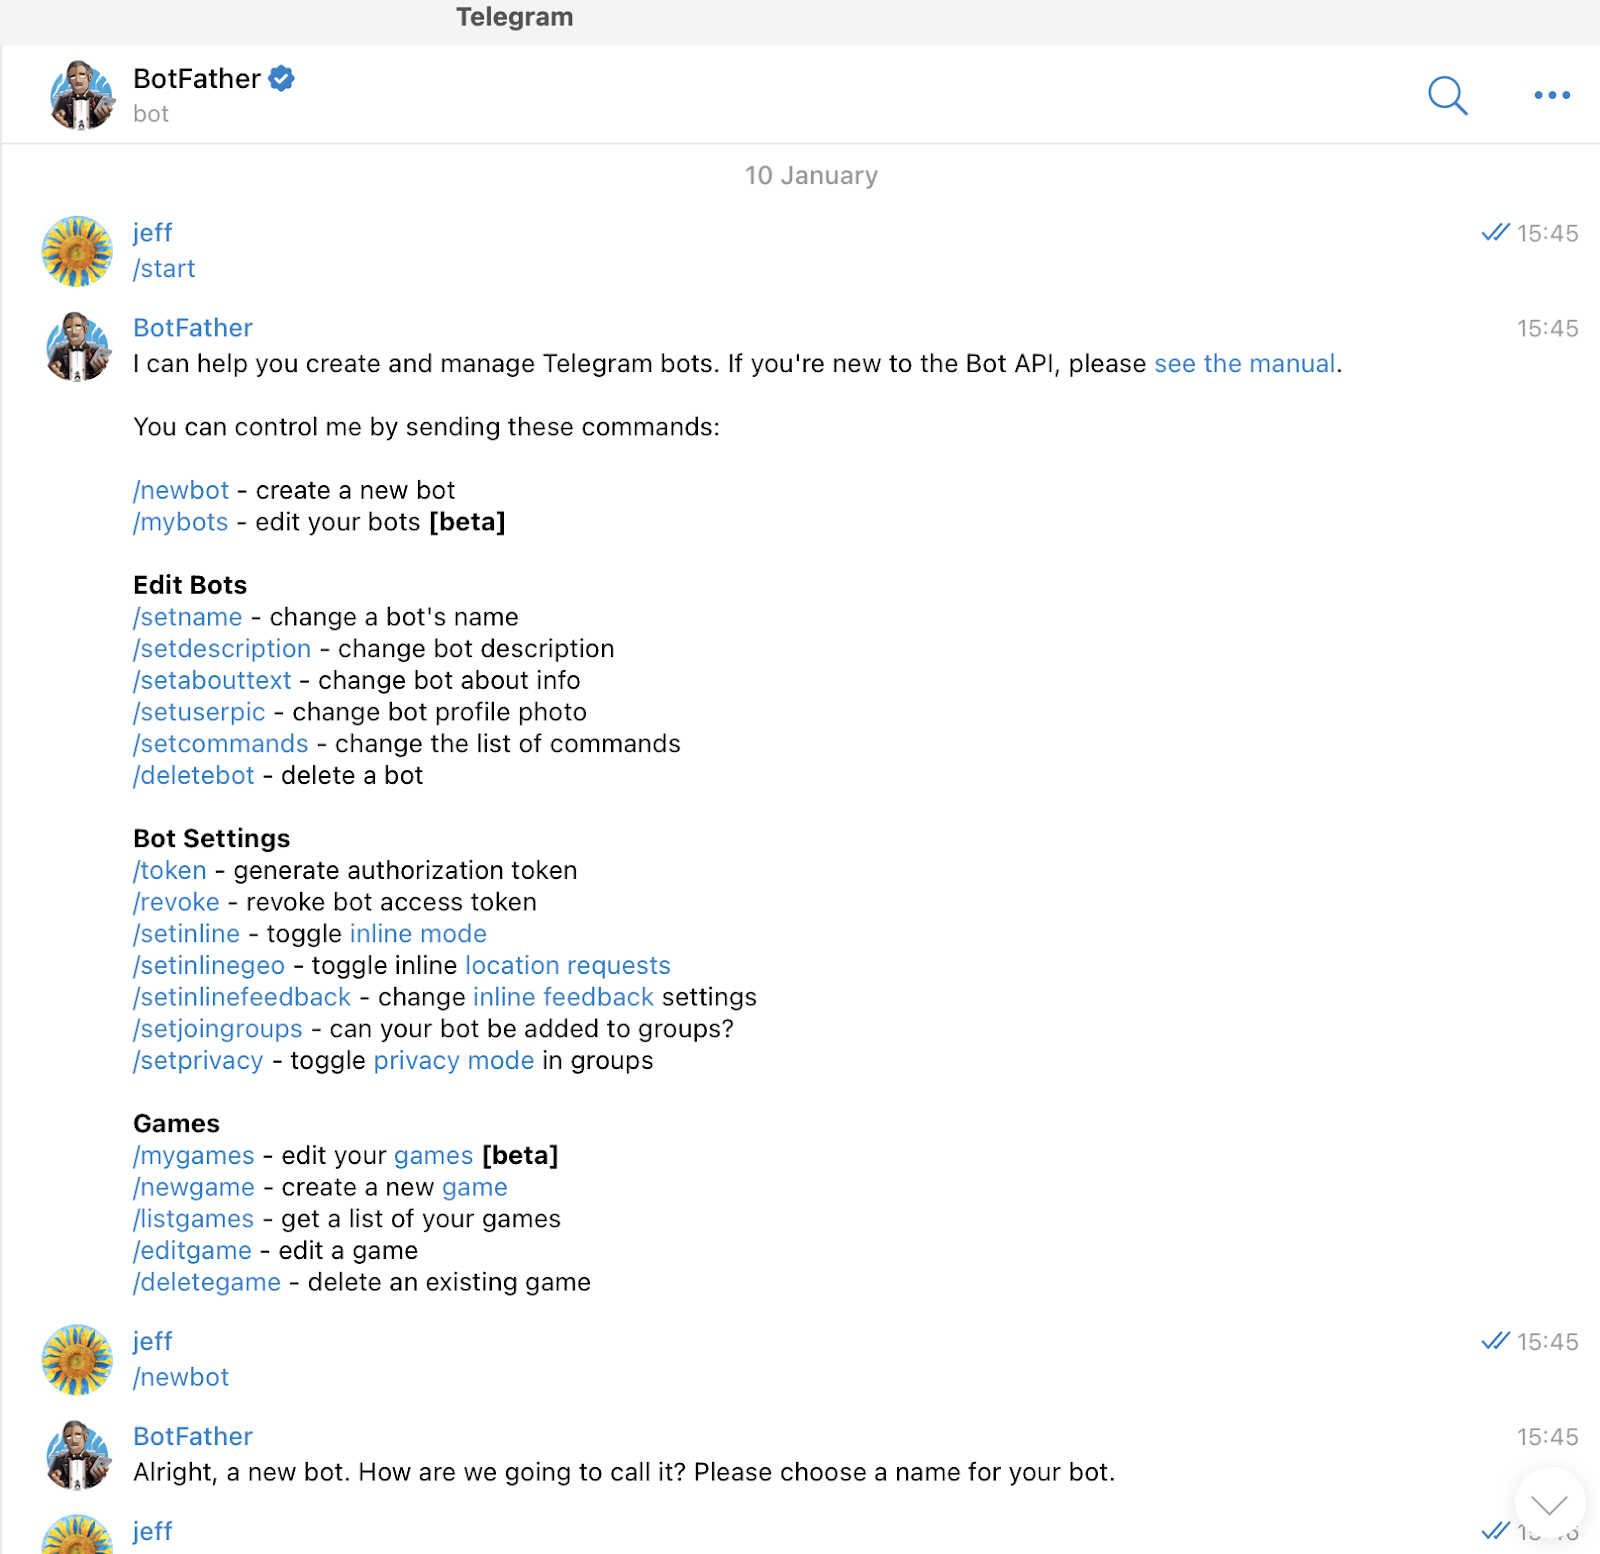
To begin, create a Telegram bot. Install the Telegram Messenger app on your device, and then locate BotFather.
BotFather is a bot that assists you in creating new bot accounts and managing your existing bots. Use it to create a new bot and select a username for it by sending commands to the BotFather. You should see the conversation and commands with the BotFather as shown below, but you can start the prompt with /start and BotFather will guide you.
Once you have created the Telegram bot and obtained its token, an HTTP Post request is required to set the callback for new Telegram messages. This is accomplished in the /init function, which should be run once to set the callback. Alternatively, you could use curl to perform the same task.
Navigate to the Twilio Functions section on the Console and create a new service. Once a service is created, create a Function called /init , and replace the existing code in the Functions editor with the following:
Step 1: Telegram sends a message callback
Telegram will send HTTP Post to the webhook registered in Step 0 on every message sent to the bot.
Step 2: Handle the incoming Telegram message
This function is a webhook that handles incoming Telegram messages. Several tasks are performed here:
- It finds the existing conversation and participant using the Telegram chat ID.
- If they do not exist, a new conversation and participant identity are created.
- The message is forwarded to the conversation.
- The scoped webhook for the conversation is set to handle outgoing messages to Telegram. The chat ID is used as a parameter to compile the webhook address, ensuring consistency in Telegram.
Below is the function code. To use it, create a new function in your Functions service called /receive-messages and replace the existing code with the following.
/receive-message
Step 3: Setup and add Chat UI to the conversation
It's time to add a second chat participant to talk with your Telegram participant. We’ll reuse the sample Conversations application from the Conversations quickstart, please follow the guide to set it up.
After the Conversation demo is running, find the conversation SID in step 2 and add the Chat participant using the command below. You can see more details at Add a Conversation Participant. Your TWILIO_ACCOUNT_SID and TWILIO_AUTH_TOKEN can be found in the Twilio console.
Steps 4 & 5: Conversation sends messages to ChatUI and vice versa
In a conversation, messages are sent automatically to all participants. This means that everyone in the conversation receives the message at the same time. Additionally, when a participant replies to a message, that reply is also sent to the entire conversation. This ensures that everyone is kept informed of all messages and replies, allowing for a smooth and efficient communication process. Furthermore, this feature helps to avoid any confusion or misunderstandings that may arise if messages were only sent to specific participants, as everyone is able to see the full conversation and all replies.
Step 6: Conversation sends messages to the scoped webhook
In Step 2, the scoped webhook is registered for onMessageAdded. Therefore, every new message in the conversation triggers a HTTP POST to the webhook.
Step 7: Scoped webhook posts message to Telegram
The /new_message function plays an important role in integrating a Telegram bot into Twilio Conversations. It checks the HTTP POST from the conversation to determine the source of the message. If the source is SDK, it sends the message to Telegram via an HTTP POST. This function is essential in ensuring seamless communication between the participants in the conversation and the Telegram bot.
The code for this function is straightforward to understand. It utilizes the Axios library to make an HTTP POST request to the Telegram API. The request includes the chat ID and the message text. If the source of the message is not 'SDK', the function does not execute any code.
Below is the code for the function new_message.
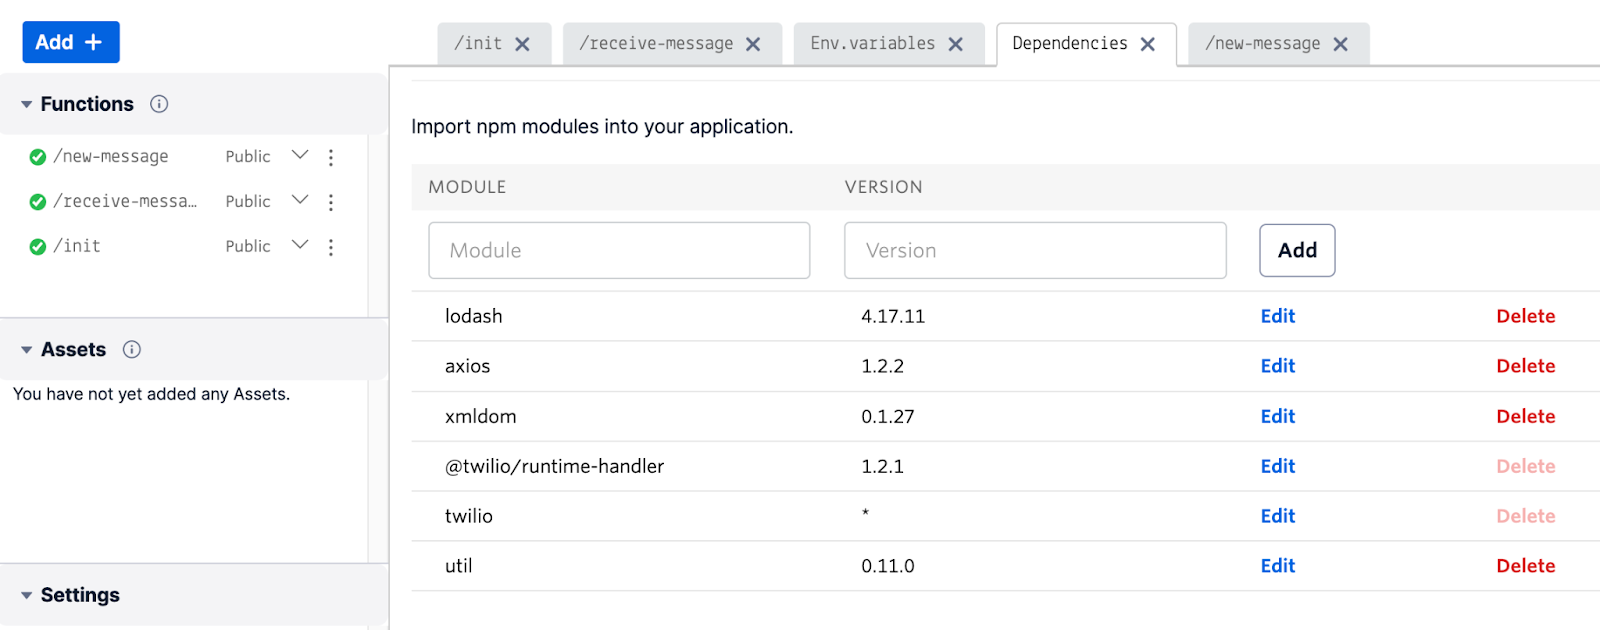
Functions settings in Twilio Console
After completing all the steps mentioned above, you will be able to see 3 functions in your Twilio console. These functions are crucial to the overall functionality of your Twilio application and must be set up correctly in order for your application to work as intended. In order to run these functions properly, it is important to ensure that all variables and dependencies are properly configured. Taking the time to double-check these settings can save you a lot of time and frustration in the long run, and can ensure that your Twilio application runs smoothly and efficiently.
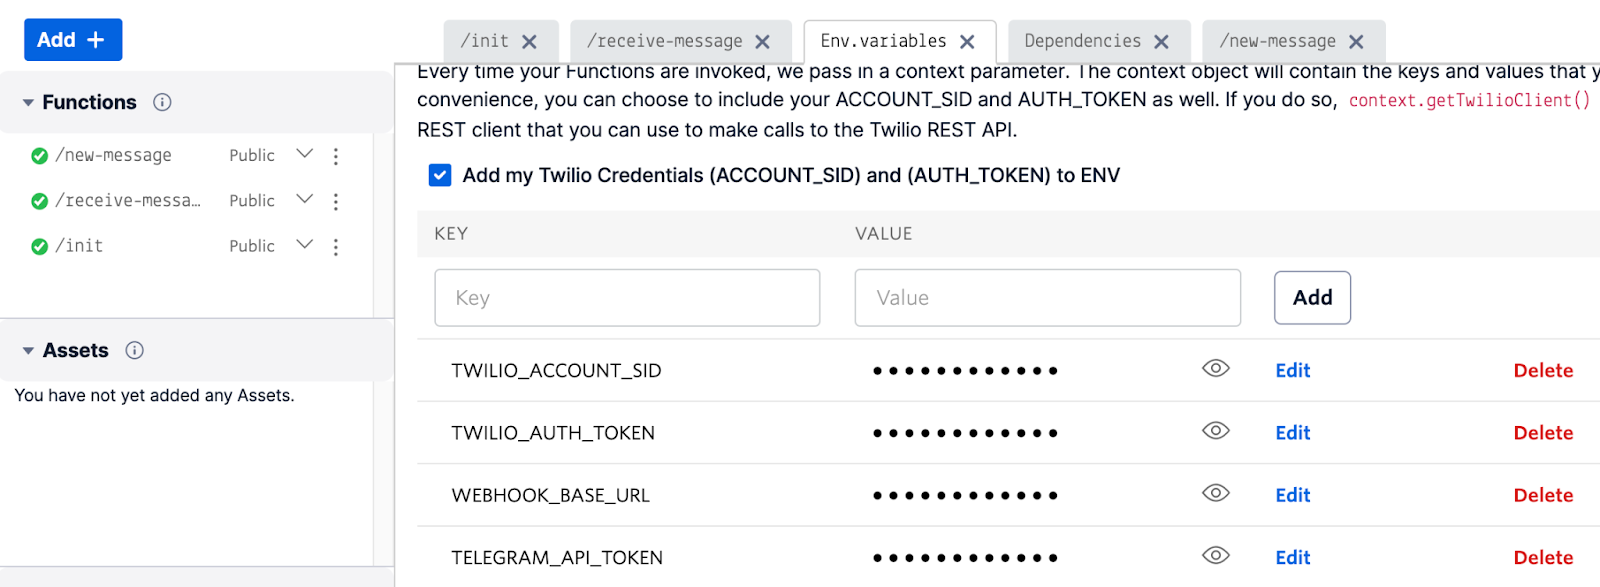
- TWILIO_ACCOUNT_SID: Twilio Account SID is a 34-character alphanumeric identifier that begins with the letters “AC" and can be found on the dashboard when logging into the Twilio Console. See this help page for more details.
- TWILIO_AUTH_TOKEN: Auth Token acts as a password for Twilio API access – you can use this guide to find it.
- WEBHOOK_BASE_URL: This is your Twilio function endpoint, used as a webhook to receive messages from the conversation. For this guide it is
telegram2conversations-4852.twil.io, you can find your URL in the Twilio Functions console. - TELEGRAM_API_TOKEN: The Telegram token you received from BotFather in Step 0.
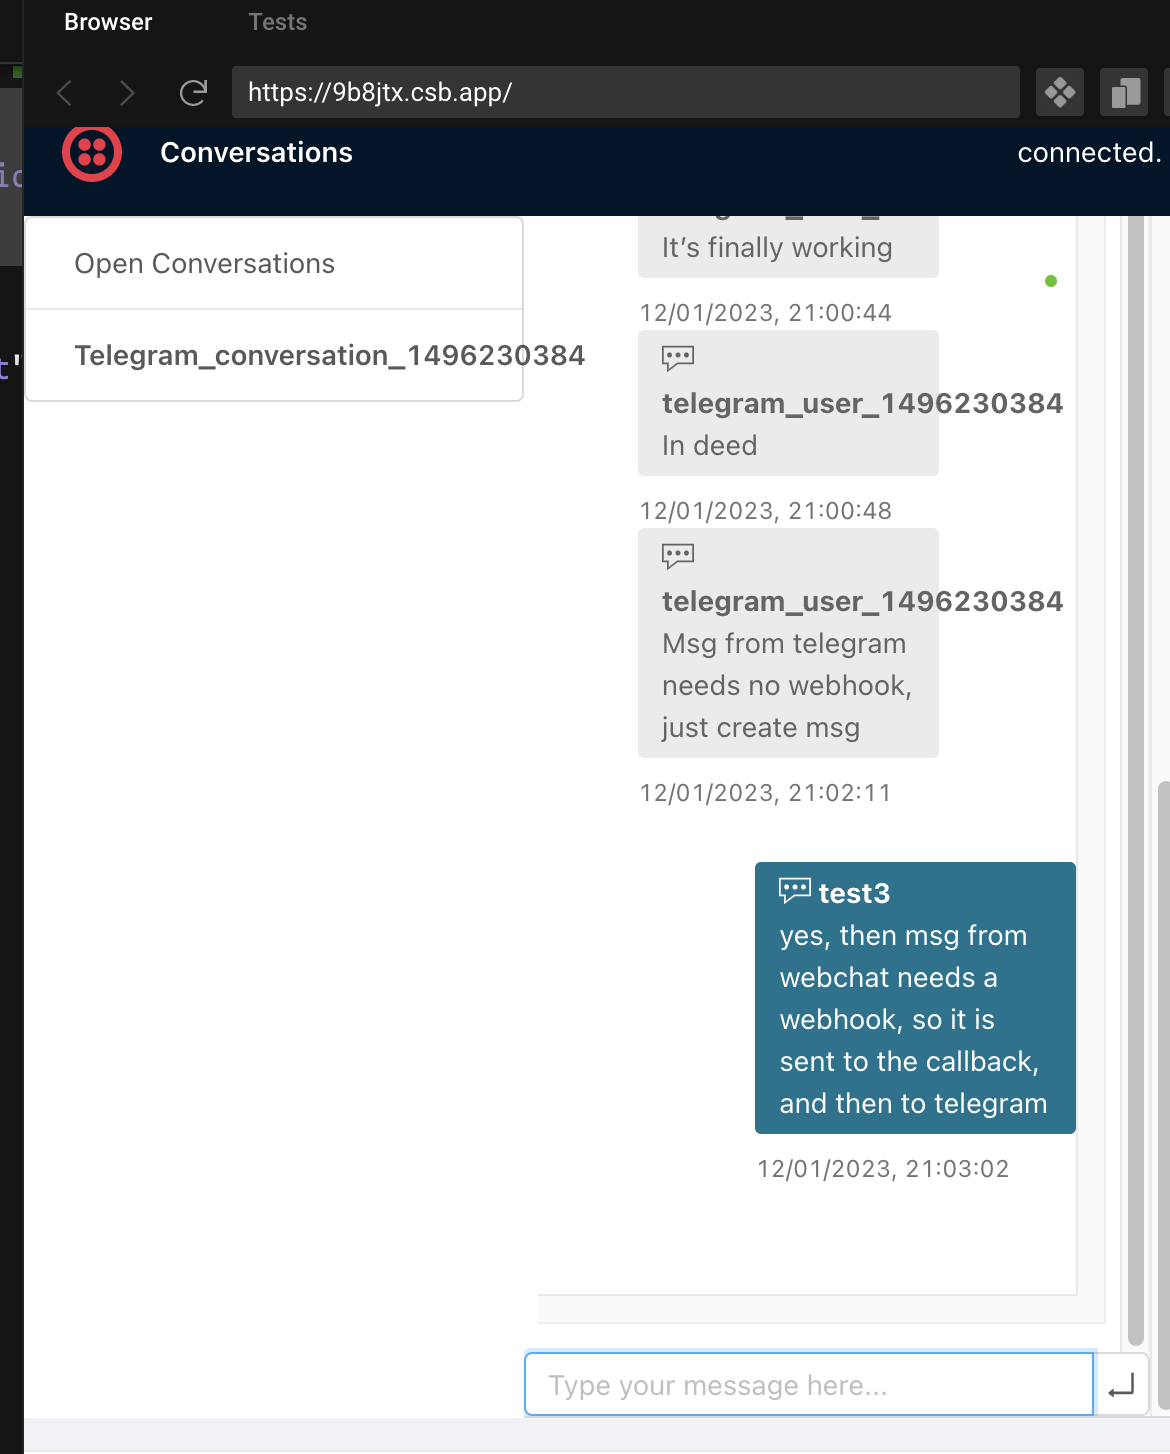
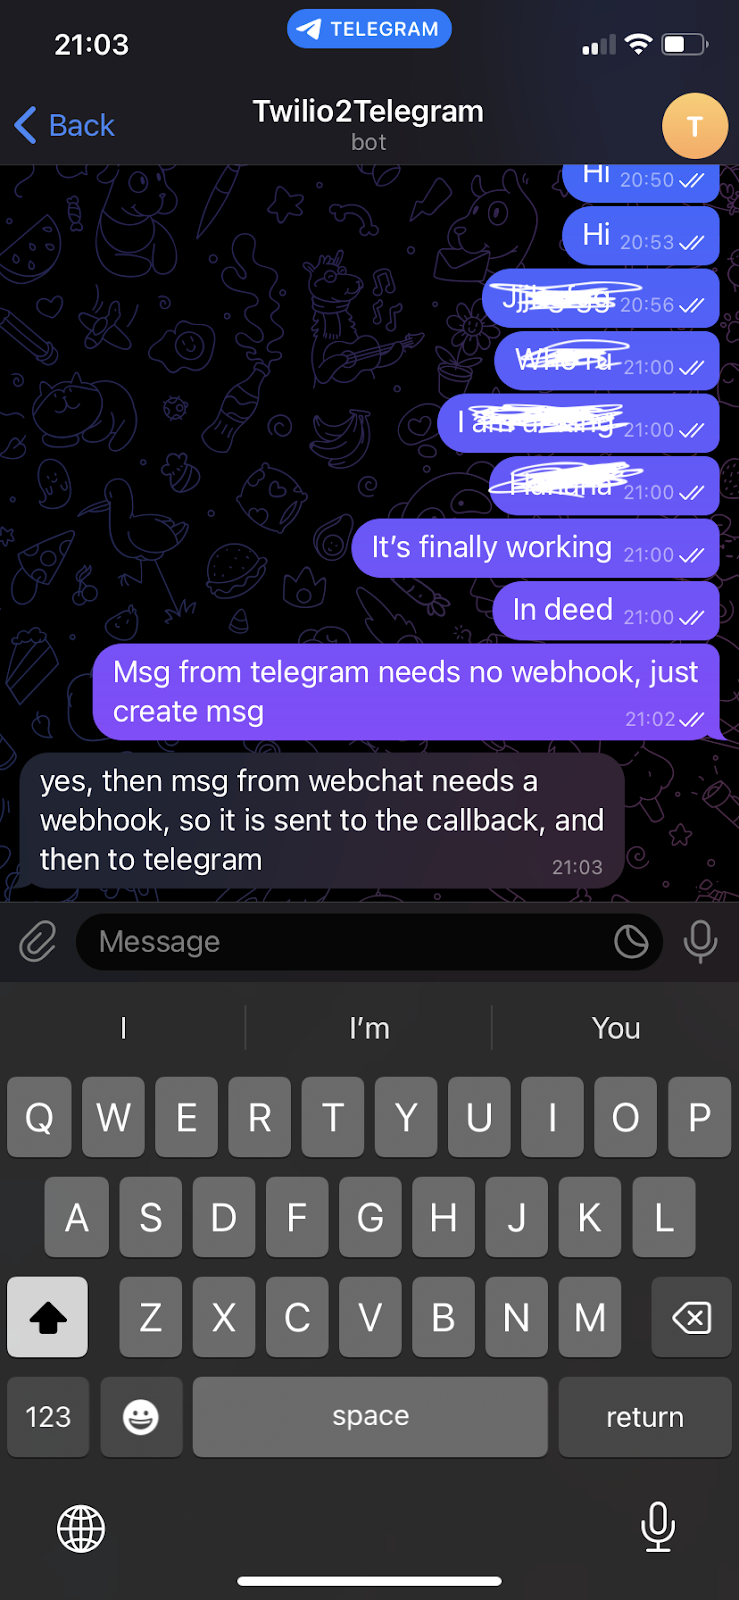
Test the Telegram bot
Finally, after setting up the Telegram Bot, you can start sending messages to it. The Bot will receive your messages and forward them to the Conversation demo you set up earlier. Similarly, any messages sent from the Conversation demo will be directed to the Bot. This seamless integration between the Bot and the Conversation demo allows for straightforward communication between users and the Bot. To get a better idea of how this works, refer to the screenshots below, which illustrate how the messages are presented.
Conclusion
This guide provides a step-by-step process for creating a serverless conversation demo with Telegram and ChatUI using Twilio Functions. By following the instructions outlined in this document, you can seamlessly integrate a Telegram bot into your Twilio Conversations and facilitate smooth and efficient communication between participants. With the right tools and resources, you can create engaging conversational messaging experiences that span multiple channels and meet the needs of your target audience.
Hao Wang is a principal solution engineer at Twilio to help customers make the best use of Twilio products. He can either be reached at hwang0 [at] twilio.com or LinkedIn.

Related Resources
Twilio Docs
From APIs to SDKs to sample apps
API reference documentation, SDKs, helper libraries, quickstarts, and tutorials for your language and platform.
Resource Center
The latest ebooks, industry reports, and webinars
Learn from customer engagement experts to improve your own communication.
Ahoy
Twilio's developer community hub
Best practices, code samples, and inspiration to build communications and digital engagement experiences.