Getting started with Socket.io in Swift on iOS
Time to read:
September 30, 2016
Written by
This post is part of Twilio’s archive and may contain outdated information. We’re always building something new, so be sure to check out our latest posts for the most up-to-date insights.

WebSockets are a powerful protocol for real-time event based communication. Socket.io makes working with WebSockets easier on iOS with Swift compared to implementing all the underlying bits yourself.
Let’s demonstrate how to work with the Swift Socket.io client library by building an application to monitor the status of Twilio phone calls. This application will be similar to the application built in another tutorial for getting started with Socket.io on the web with JavaScript.
The tools we’ll need
- Node.js and npm version 4.0 or greater installed on your machine for our web server
- Xcode 8.0 or greater and Swift 3.0 or greater
To find out which version of swift you’re running, enter the following command in your terminal:
- A Twilio Account to run the final version of our code – Sign up for free
Setting up our server
Start off by cloning or downloading a zip file of this starter repository which contains two projects:
- a prebuilt Node.js web app and server and
- an iOS app with a pre-configured storyboard set up with a
UITableViewthat we will use to display the data we receive.
To clone the repository open your terminal, navigate to where you want this project to live and enter the following commands:
Once you have the repository cloned or the ZIP extracted, install the dependencies for the Node.js app:
Once the dependencies install open up index.js and add this new route at the bottom:
This route uses Socket.io to emit an event named “test”. In just a bit we will configure our iOS app to receive that event later in the post. For now, run the server by entering the following terminal command and keep it running for us to test later:
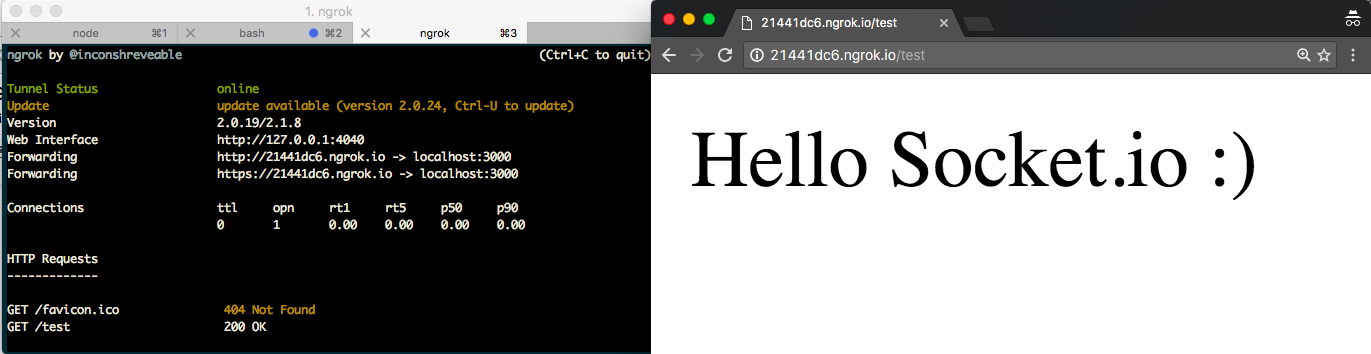
Now let’s make our web server accessible over the internet so we can run our app. We need to do this because iOS requires apps that want to make requests to external services do it via HTTPS. We also need a publicly accessible URL later on to test phone calls made with the Twilio REST API. For this, we will use a tool called ngrok.
Download ngrok and have it run on port 3000 in a new terminal window with the following command:
Take note of the randomly generated URL that ngrok provides you as we’ll be using it in a bit. Visit this URL and add “/test” to the end of it to see the new route that we added to index.js.
Setting up our client side iOS app
Navigate to the directory containing the starter iOS app. From the root directory of this repository run:
We’ll use CocoaPods to install the dependencies used by our app. First, install CocoaPods if you don’t have it:
Now install the dependencies:
CocoaPods links the dependencies of our project together by creating a new Xcode Workspace. To make sure XCode loads those dependencies open the workspace using the CallStatusDashboard.xcworkspace file instead of the Xcode project file:
Lets verify the Socket.io pod was added to our project by importing it in ViewController.swift:
Build the project and a prompt that says “Build Successful” should display.
Getting started with Socket.io in Swift
Now we’re ready to start receiving Socket.io events from our server.
Create a new Swift file called SocketIOManager.swift and add the following:
This code creates a Singleton class so we can reuse the Socket.io functionality across our entire application. The init function tests our socket connection by subscribing to the “test” event emitted by our server.
Don’t forget to replace the socket URL with the URL that ngrok generated for you.
Head over to AppDelegate.swift and use SocketIOManager to connect to the server when the app becomes active and disconnect from it when the app enters the background or exits. To do this, add the following two lines where appropriate in AppDelegate.swift:
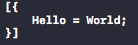
Run the app and open http://localhost:3000/test in your browser. Visiting this URL should cause the Node app to emit an event to our iOS app which will print the data array we receive in the Xcode console:
Monitoring the status of a phone call
We’re ready to recreate the web app from my other Socket.io tutorial in our iOS app.
This previous post explained how to monitor phone calls sent with the Twilio API in real time using call progress events. With these, you can set up a webhook to receive a request whenever the status of your phone calls change. This is already taken care of in index.js.
The real time updates of call progress events provide us with a great opportunity to play around with WebSockets.
When the status of a phone call changes, our server will emit an event that the iOS app we are building will receive. From there, we’ll update the UITableView in our app to display the new status of that phone call.
We’ll need a data structure to represent phone calls. Let’s use a struct for this. Create a new file called PhoneCall.swift and add the following code:
With this struct we can create an array allowing us to store all of the PhoneCallss we want to show in our UITableView. Replace the global array of Strings inside the ViewController class of ViewController.swift with the following:
And replace the code inside tableView(_:cellForRowAt:) with the following:
In SocketIOManager.swift, add the following code to the end of the init function. This will listen for status update events sent from the Node app similarly to the test event we created before. On receiving this event, we will pass a message to the rest of the code using NSNotificationCenter:
We need to modify ViewController.swift to receive that status update and update the UITableView. If it is a new call, we’ll add it to the phoneCalls array. If it is an existing call with an updated status, we will update the corresponding array element.
Create a new function in ViewController called handleCallStatusUpdateNotification with the following code:
Next subscribe to the notification and set our previous function as it’s handler by adding this code to the end of viewDidLoad:
Finally, In order to test everything, you’ll need a Twilio phone number. You can buy one here or just use a trial number that comes with your Twilio account. When using a trial number, you can only make calls to numbers that you verified. This shouldn’t be a problem for now though.
Open makeCall.js in the root directory of our project and replace all of the relevant values with your Twilio phone number, your personal phone number and your ngrok URL:
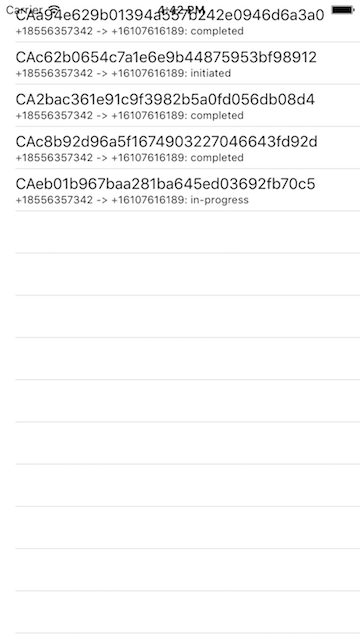
Now run the app, and enter the following in your terminal to see a phone call appear in the table in your iOS app:
This will use the Twilio REST API to make your phone receive a call from your Twilio number. You should see the status of the call displayed in your iOS app changing when you answer and hang up.
Try it a few times to see it working!
Real time communication is rad
Now you can add real time events to communicate between client and server to any of the apps you build. If you want to see how to build a similar application, but in a web browser, check out this ReactJS tutorial that also uses Socket.io to monitor the status of phone calls.
I can’t wait to see what kind of awesome projects you build. Check out Twilio’s iOS Client and documentation for some ideas.
Feel free to reach out for any questions:
- Email: Sagnew@twilio.com
- Twitter: @Sagnewshreds
- Github: Sagnew
- Twitch (streaming live code): Sagnewshreds

Related Resources
Twilio Docs
From APIs to SDKs to sample apps
API reference documentation, SDKs, helper libraries, quickstarts, and tutorials for your language and platform.
Resource Center
The latest ebooks, industry reports, and webinars
Learn from customer engagement experts to improve your own communication.
Ahoy
Twilio's developer community hub
Best practices, code samples, and inspiration to build communications and digital engagement experiences.