Getting Started with Swift Package Manager
Time to read:
October 27, 2016
Written by
This post is part of Twilio’s archive and may contain outdated information. We’re always building something new, so be sure to check out our latest posts for the most up-to-date insights.

When building iOS applications with Swift, you often need to use third party libraries as dependencies to avoid rewriting code that other developers have already created and shared. Swift Package Manager (SwiftPM) is a command-line tool for building, testing and managing Swift project dependencies.
We will create a very basic Swift command line program that will parse some JSON using the popular SwiftyJSON framework to learn how to work with SwiftPM.
Making sure you have the right tools
You will need Xcode 8.0 or greater and Swift 3.0 or greater to use Swift Package Manager on OS X. Swift 3 is also available on Linux.
To find out which version of Swift you’re running, enter the following command in your terminal:
Creating a Swift package
Open your terminal and create a new directory where you want this project to live. Now create a Swift package in this directory with the following command. This command will name your Swift package after your current directory. For future reference, I named mine SPMTest:
The most important part of creating your Swift package is the Package.swift file. There are two important elements in the Package.swift file that you may wish to edit:
- The name element. It indicates the name of the project and the name of the executable file which will be generated when the project is built.
- The dependencies list. This indicates all of the subprojects that your application is dependent upon. Each item in this array consists of a “.Package” with a repository URL and a version.
Open Package.swift and add SwiftyJSON as a dependency:
Now download the dependencies with the following command:
All dependencies are downloaded into a Packages directory which the SPM will automatically create.
Using our installed dependencies
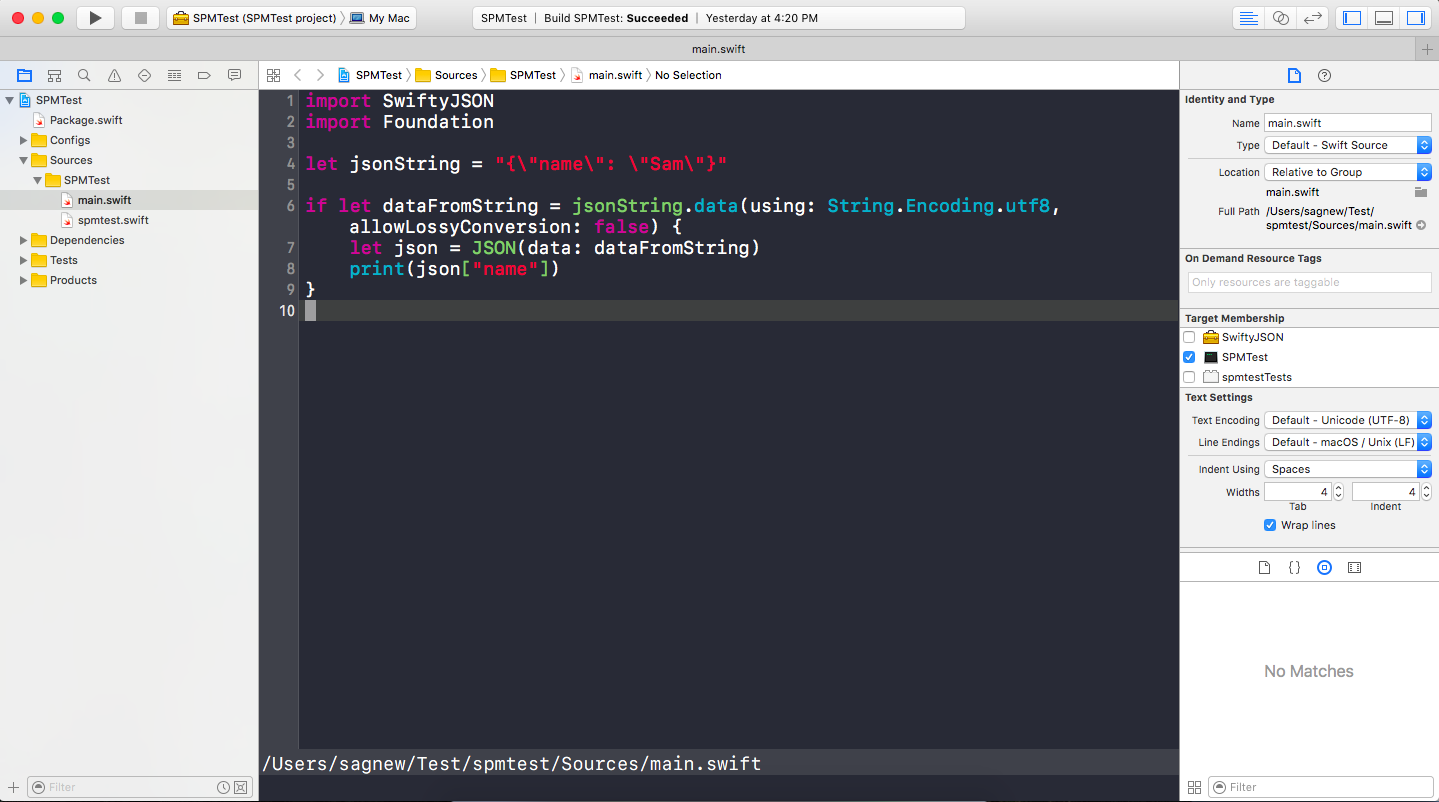
Now that SwiftyJSON is installed, we can use it as a framework. Create a file called main.swift in the Sources directory. SwiftPM looks at this file to decide what to do when we run our program.
Add some basic JSON parsing code to Sources/main.swift:
Now build the project by running the following command from the root directory of your project:
SPM will generate an executable for this project. From the root directory of your project, run this executable and hope the JSON is parsed correctly:
You can also use SwiftPM to generate an Xcode project for you by running:
After this, open your newly generated Xcode project:
This allows you to reap all of the benefits that editing Swift in Xcode gives you, such as awesome autocompletion.
Moving on with your Swift projects
Although it is new, it is exciting that Swift now has an official package manager.
If you are worried about whether it is ready for production applications or not, you may still want to use CocoaPods or Carthage until SwiftPM has been more widely adopted. If you want to see what kind of awesome packages you can use with SwiftPM, check out the Swift Modules website.
I can’t wait to see what you build. Feel free to reach out and share your experiences or ask any questions.
- Email: sagnew@twilio.com
- Twitter: @Sagnewshreds
- Github: Sagnew
- Twitch (streaming live code): Sagnewshreds

Related Resources
Twilio Docs
From APIs to SDKs to sample apps
API reference documentation, SDKs, helper libraries, quickstarts, and tutorials for your language and platform.
Resource Center
The latest ebooks, industry reports, and webinars
Learn from customer engagement experts to improve your own communication.
Ahoy
Twilio's developer community hub
Best practices, code samples, and inspiration to build communications and digital engagement experiences.