Build a smart doorbell with Twilio and Android Things
Time to read:
June 06, 2017
Written by
This post is part of Twilio’s archive and may contain outdated information. We’re always building something new, so be sure to check out our latest posts for the most up-to-date insights.

Working from home and being an avid Marilyn Manson fan means I usually miss out when someone’s knocking on my door. We have a doorbell but it’s not nearly as effective as the noise cancelling capabilities on my headphones.
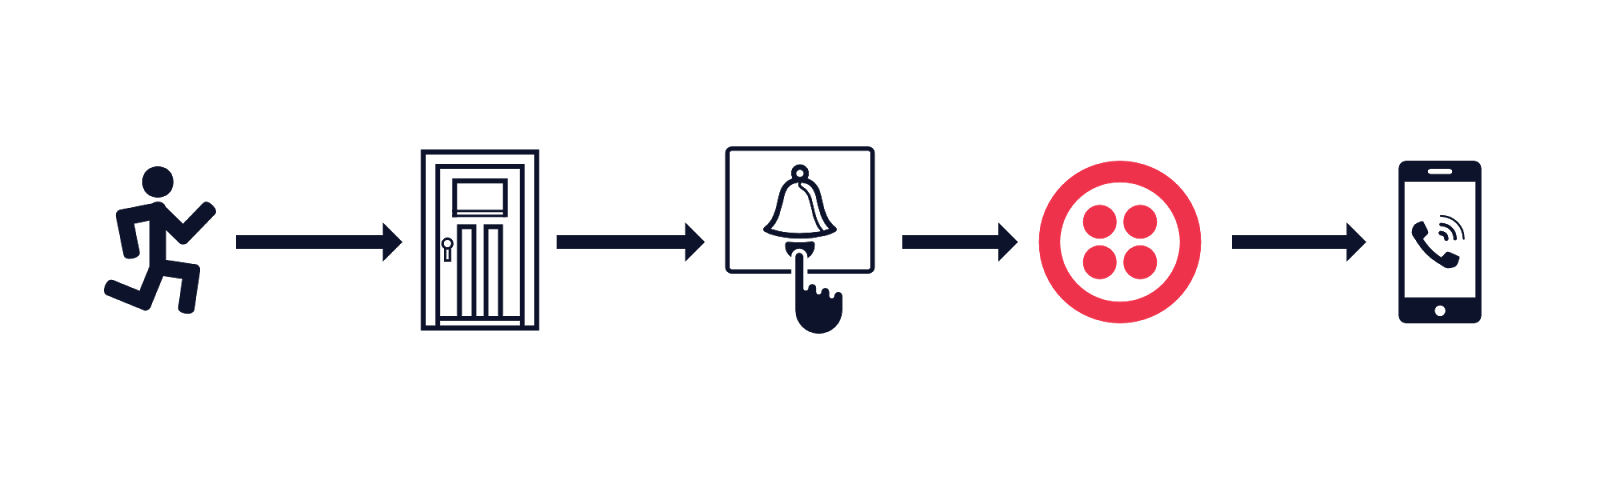
My headphone is paired to my phone which still means I will miss someone at the door, but never any calls. How about we build a smart doorbell that rings my phone when someone’s at the door?

We will use Node.js to create a backend so we can interact with Twilio and build an Android application that will run on a Raspberry Pi and will serve as our smart doorbell.
What we’ll need
- A Twilio telephone number. Sign up for free here
- Android Things up and running on a Raspberry Pi 3. You can see how to get that going on this blog post
- Android Studio
- Node.js installed and your favourite editor. I will be using Visual Studio Code
- Male to Female and Male to Male jumper wires – Get them here
- A 400 point breadboard – Get one here
- A 1K Ω resistor (Brown, Black, Red, Gold) – Get yourself a bunch of them in different values as they will always come in handy
- A tactile button to serve as a trigger. Get them in many colours for added fun.
Backend
We will start by building our app’s backend. It uses the Twilio API to call our number when someone presses the doorbell.
If you don’t want to go through the build of the backend, you can clone this repository or click the button below to deploy your own backend to Heroku.
Start off by opening a new terminal window and create a new folder called Doorbell. I usually create mine in ~/Projects/JavaScript.
Inside that folder create a new node project and install the Twilio Node Helper Library and Express.
You should now have a file called package.json and a folder called node_modules which will have the twilio and express libraries amongst others.
Still on the Doorbell folder create a new file called index.js and open it with your favourite editor. In that file create a basic express app to make sure your setup is all ready to go.
Start the application up by running node . on your terminal and you should now be able to hit http://localhost:3000 on your browser to see a fabulous “Hello World” page.

We’re ready to use the Twilio API. Our backend should not only call us but also give us a voice message saying that there’s someone at the door. That way, even if we’re not looking at our phone we will know who’s calling when someone is at the door.
Under the existing “/” route we will create two more routes. One of them will generate TwiML with a voice message, and the other will start the call from our Twilio number to our real phone number.
Notice how we set the greetingUrl to be an internal request inside our application. When the call starts Twilio makes a request to /call and our application will tell Twilio where to get TwiML from.
I’m using environment variables to set my account credentials and phone numbers. My colleague Dominik wrote an article showing how to set environment variables on Windows, macOS and Linux. If that’s not something you want to do you can replace the values of process.env.TWILIO_ACCOUNT_SID, process.env.TWILIO_AUTH_TOKEN, process.env.MY_NUMBER and process.env.TWILIO_NUMBER with your tokens and telephone numbers that you can get on the Twilio dashboard.
Our backend is ready, but trying to run it right now would result on a failure since we’re telling Twilio to access an application that is only running on our local machine. We can make that work by running it with ngrok. My other colleague Kevin wrote an article showing how you can test your webhooks locally with ngrok.
Stop and start the node application and on a new terminal window run:
That will give you a forwarding URL which you can copy and paste on your browser.
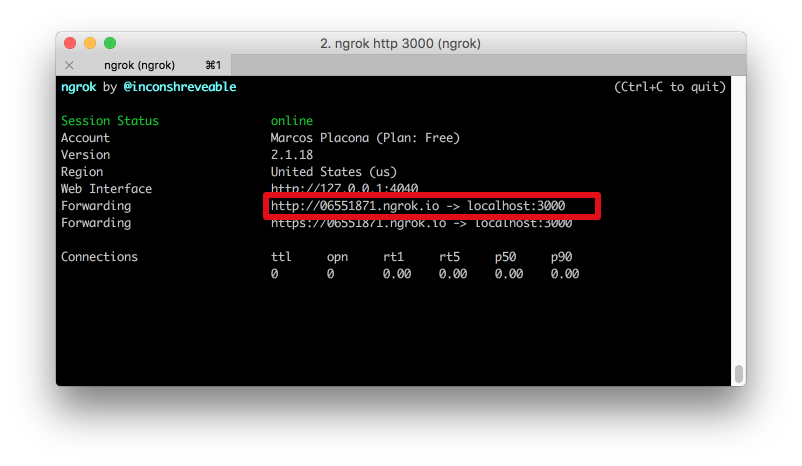
Hitting the URL on your browser will give you the “Hello World” page, but if you go to the /call route, your phone should ring and you will get a message saying there's someone at the door.

Let’s look at how to use this API with our Android Things application.
Hooking up the hardware
Now that we have our backend API up and running, let’s hook the hardware up together so when someone presses the button our Android Things application makes a request to our API to make our phones ring.
We will use 3 pins on the Raspberry Pi 3 for this. BCM6 (31) which is a general I/O pin, 5v (2) for power and GND (39) as our ground.
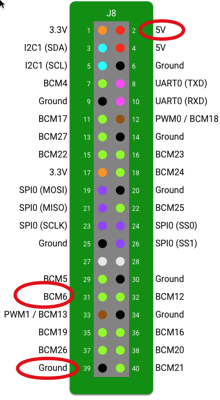
We will also hook up our button and resistor to the breadboard as follows:
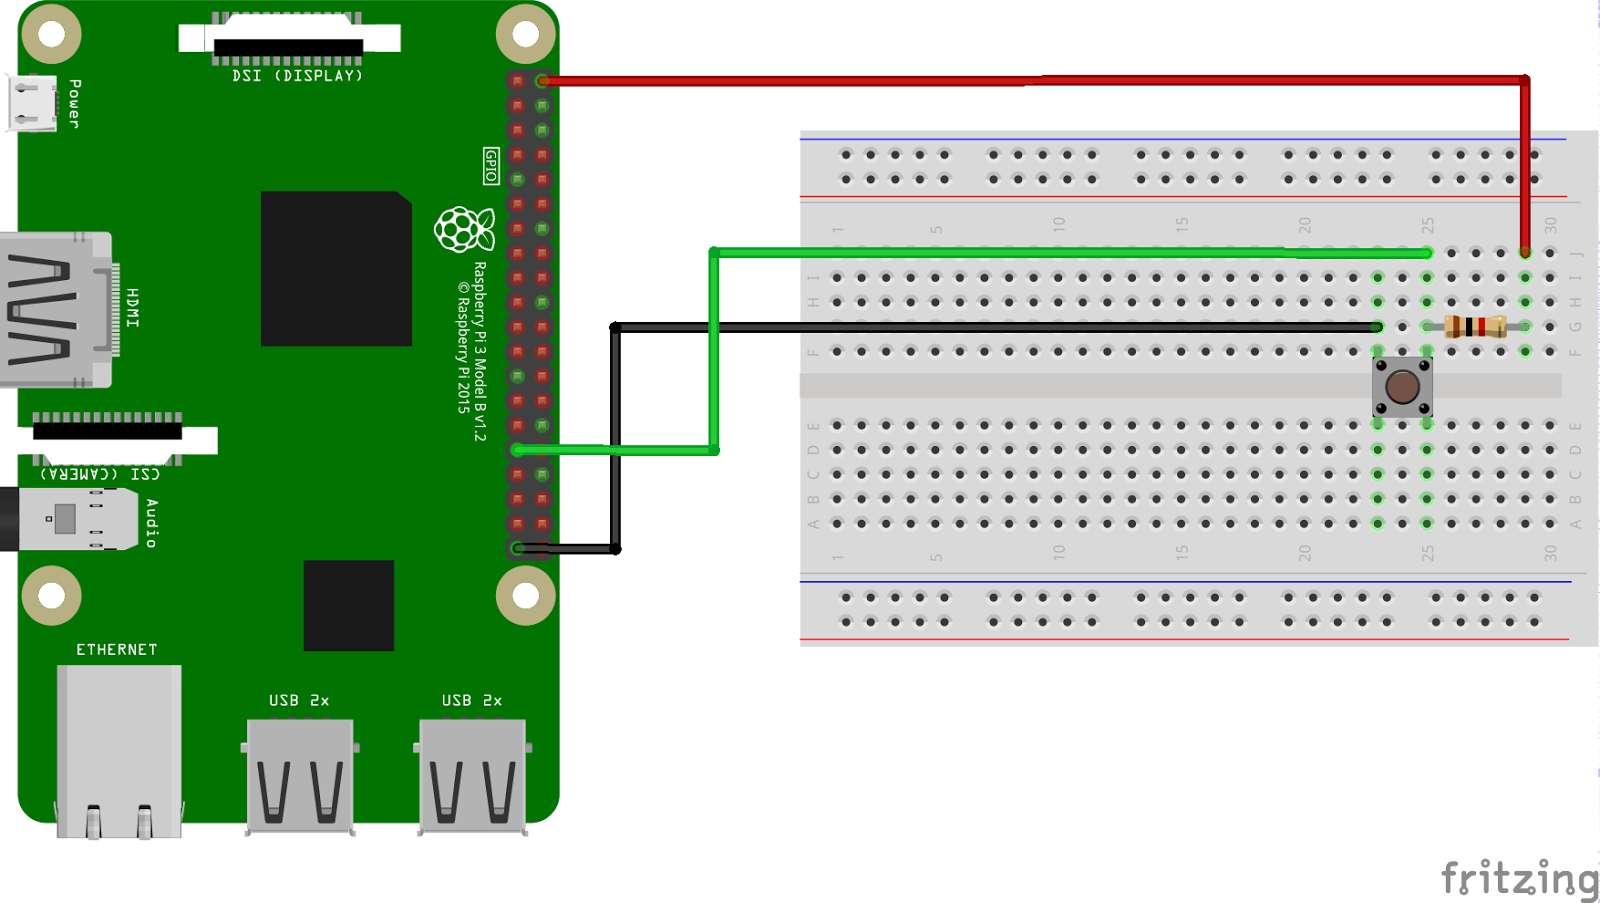
Let’s look at what it takes to observe the button press and react with an API call.
Building the App
Open up Android Studio and create a new project called Doorbell. I store all my Android Things projects under ~/Projects/Android/Things. You can see all the code for this in this repository too.
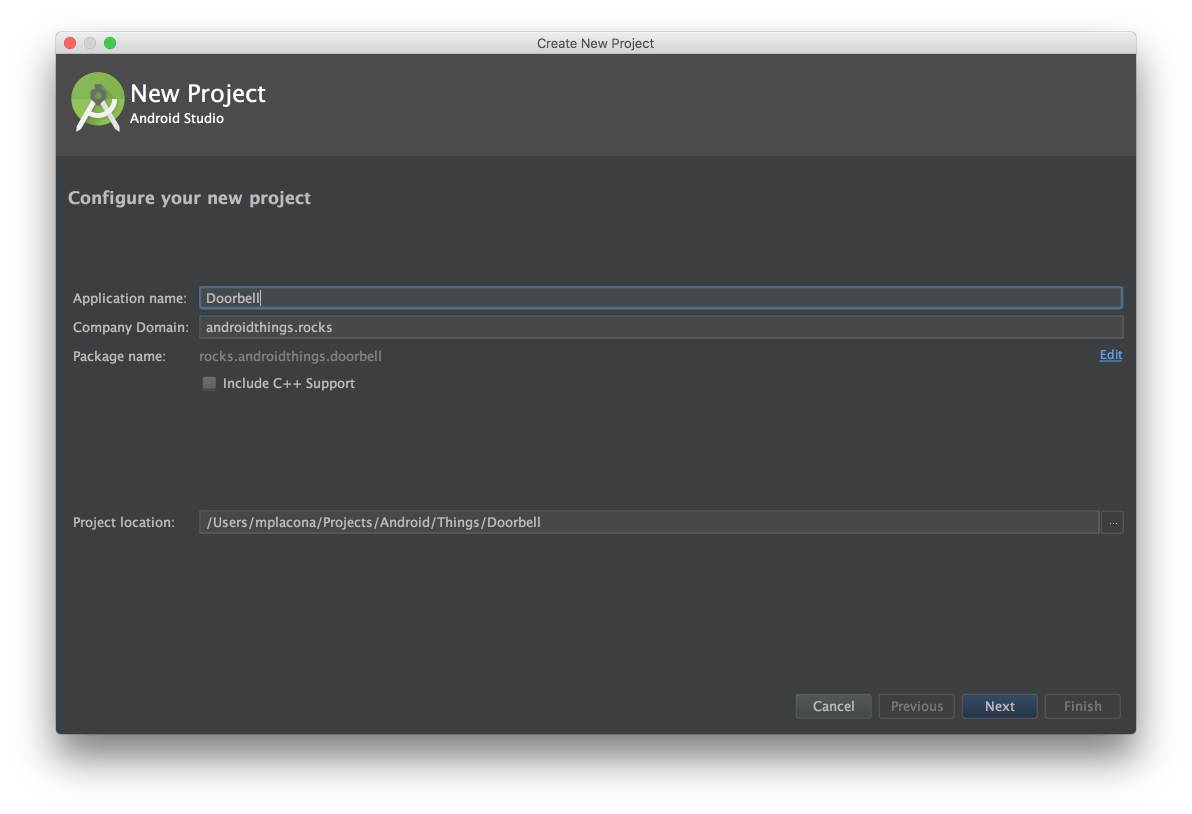
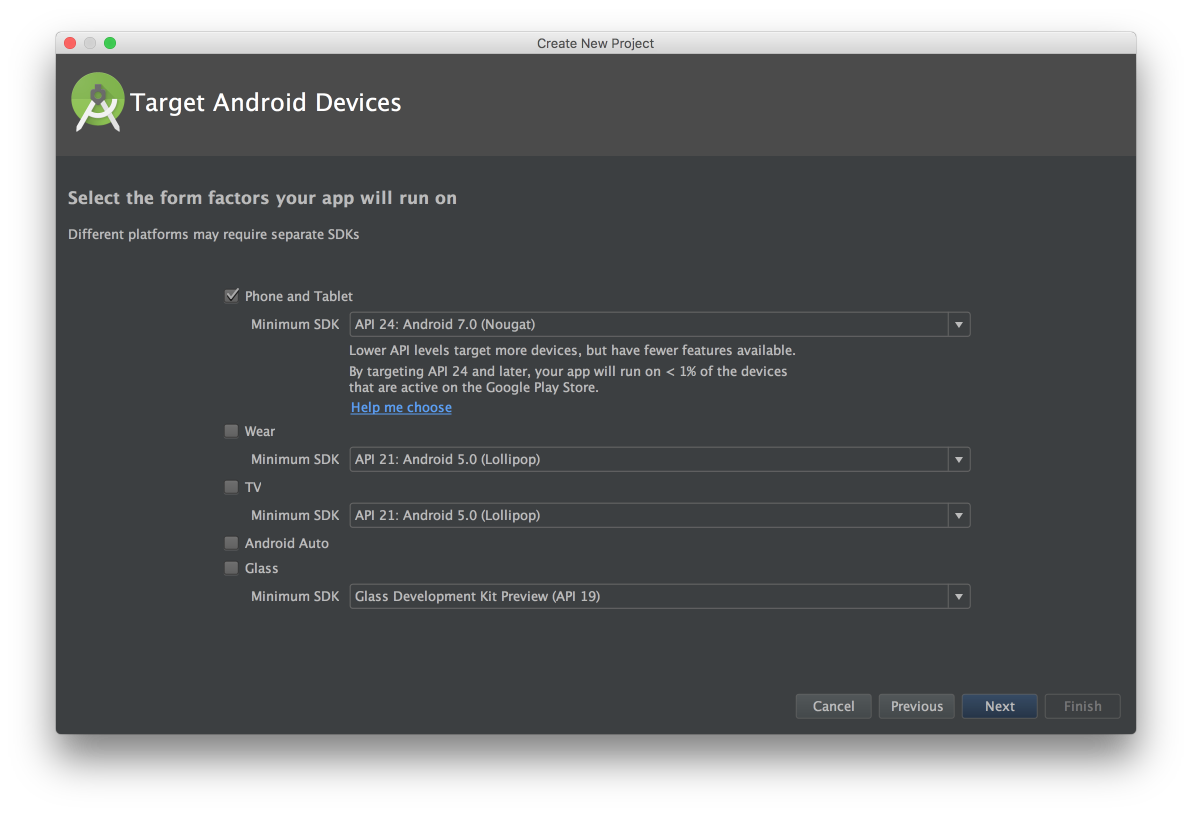
Make sure this project’s Minimum SDK is 24 or above as Android Things is only compatible after Nougat.
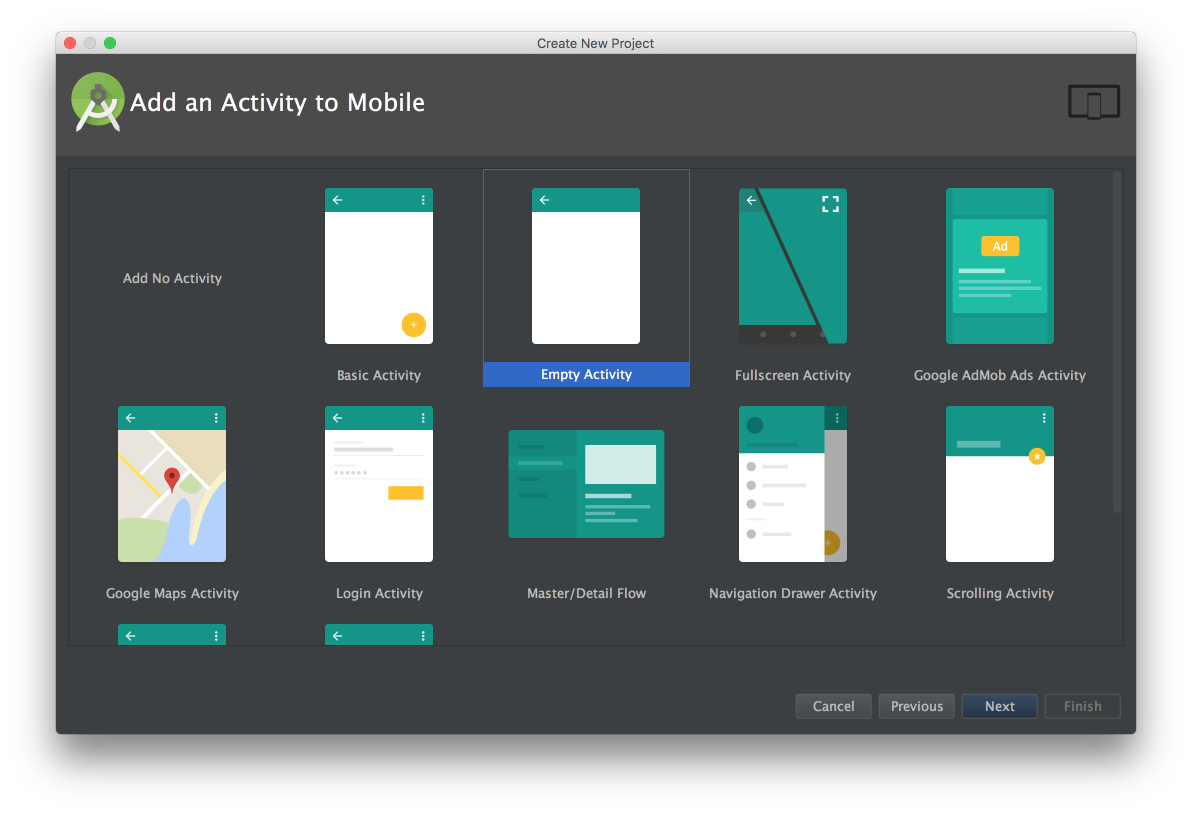
Next up choose
Empty Activity and press finish on the next screen to have an empty activity created.
We will start by adding some dependencies to our new Android project and by changing the Manifest so the application has the right permissions, and most importantly, that it launches itself when the Raspberry Pi powers up. This is important since we will have no interface to launch the app on the Raspberry Pi.
Open the application level build.gradle and add the following dependencies:
First we’re adding Android Things and the button driver that allows us to interact with a hardware button. We then add Retrofit which will make it much easier for us to consume our doorbell’s API. Let gradle do it’s thing now and sync.
Open AndroidManifest.xml and request permissions for INTERNET. We need this to be able to make external HTTP requests from the app.
Still in the manifest add a new intent filter under the existing .MainActivity so the app launches automatically on boot.
Retrofit uses interfaces to generate code that will communicate with APIs. Create a new Java class called Doorbell of the kind Interface alongside your MainActivity in the doorbell package.
Inside the Doorbell interface add a GET request to the doorbell API.
We pass call as an attribute to @GET since it maps directly to our Node application route which in this case is “/call”.
Now open MainActivity and add the following variables to the top of the class:
You can resolve the dependencies by pressing Alt+Enter but attention when resolving Button as you will get at least a couple of options and you should choose com.google.android.things.contrib.driver.button.Button.
Make sure you change BASE_URL to match the URL you got from your server, or ngrok in case you’re running the application locally.
Underneath the onCreate method create a new method called initialiseDoorbellButton. This method will register our physical button and add an event listener for when the button is pressed.
Let’s create the event listener for when the button is pressed.
On the onCreate method, add a call to initialiseDoorbellButton(); so we register the button and the event listener when the app is launched.
Testing it all out
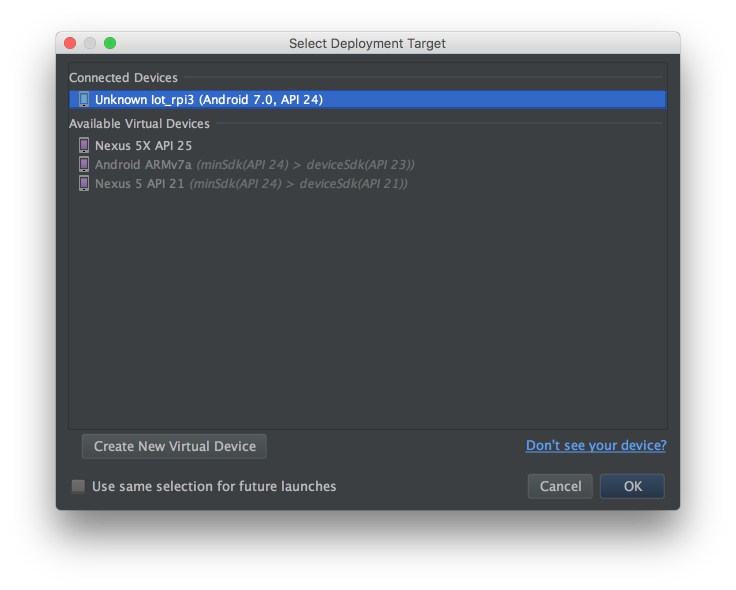
Run the app by pressing Run or CTRL+R. If your Raspberry Pi is not listed in the list of connected devices switch back to your terminal and run adb connect Android.local. Your Raspberry Pi should now show on the list.
Once the application finishes building and installing, press the button on your breadboard and you should see that a message is logged in Android Monitor for every time you press the button.
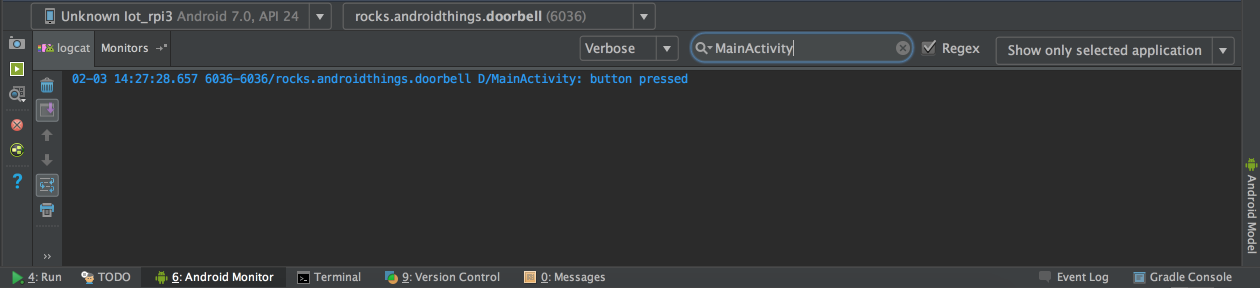
Awesome! We’ve now integrated external hardware with our Android application. But we’re still not getting any calls.
Hooking up with Twilio
Still in MainActivity add a call to Retrofit inside the onCreate method to make requests to our doorbell API.
Now we want to call the startCall method in mDoorbellApi every time someone presses the button. Scroll back to Button.OnButtonEventListener and under the “button press” log, add a call to our API.
We are logging the call Sid or an error message depending on the outcome of our API request.
Run the application again, and your phone should ring when you press the button.

Headbang away!
We’ve now got a smart doorbell that will call us every time there’s someone at the door. I know I’m never missing that parcel delivery again.
But how about using the camera module so you also get an MMS message with the picture of the person ringing your doorbell?
Hit me up on Twitter at @marcos_placona or by email on marcos@twilio.com to tell me what you’re building.

Related Resources
Twilio Docs
From APIs to SDKs to sample apps
API reference documentation, SDKs, helper libraries, quickstarts, and tutorials for your language and platform.
Resource Center
The latest ebooks, industry reports, and webinars
Learn from customer engagement experts to improve your own communication.
Ahoy
Twilio's developer community hub
Best practices, code samples, and inspiration to build communications and digital engagement experiences.