How to Receive SMS in WordPress with a PHP Plugin
Time to read:
September 01, 2017
Written by
This post is part of Twilio’s archive and may contain outdated information. We’re always building something new, so be sure to check out our latest posts for the most up-to-date insights.

In this tutorial, we’ll walk through on how to set up receiving SMS in WordPress with a PHP plugin. When the plugin is installed you will be able to respond to SMS and handle two-way messaging in your WordPress sites.
Prerequisites
- A ready WordPress installation. If you do not have one set up, here are the installation instruction.
- A Twilio phone number. You can use an existing phone number or purchase a new one from the Twilio Console.
Our two-way messaging project
When you send out SMS to your users, there is a chance that some users might reply to your SMS. When a user replies, the message is received by your Twilio number, Twilio will make an HTTP request to the message URL configured for that number. In your response to that request, you tell Twilio what to do in response to the SMS using Twilio’s subset of XML, TwiML or just acknowledge receipt.
In the course of this article, we’ll just acknowledge receipt by responding back to the user with a default text.
Overview of WordPress REST API
The WordPress Built-in REST API feature provides API endpoints for WordPress data types that allow developers to interact with sites remotely by sending and receiving JSON (JavaScript Object Notation) objects. It also allows developers to add a new endpoint to achieve their need.
The WordPress RESTful API will enable us to set up a route/endpoint which we’ll add to our Twilio Console and will serve as a webhook for incoming messages. First we need to create our endpoint which we will add to our Twilio Console later.
Starting up the plugin
-
Goto
wordpress_intallation/wp-content/pluginsand create a new folder:receivedx(you can name this folder whatever you prefer). - Create a new file in the folder you just created:
receivedx.php(you can name this file whatever you prefer)
Now, add this code to the created wp-content/plugins/receivedx/receivedx.php file and save the changes.
Here, we are defining information of our new plugin such as the Plugin Name, Description, Author and Author URI. Without this information WordPress will ignore our plugin.
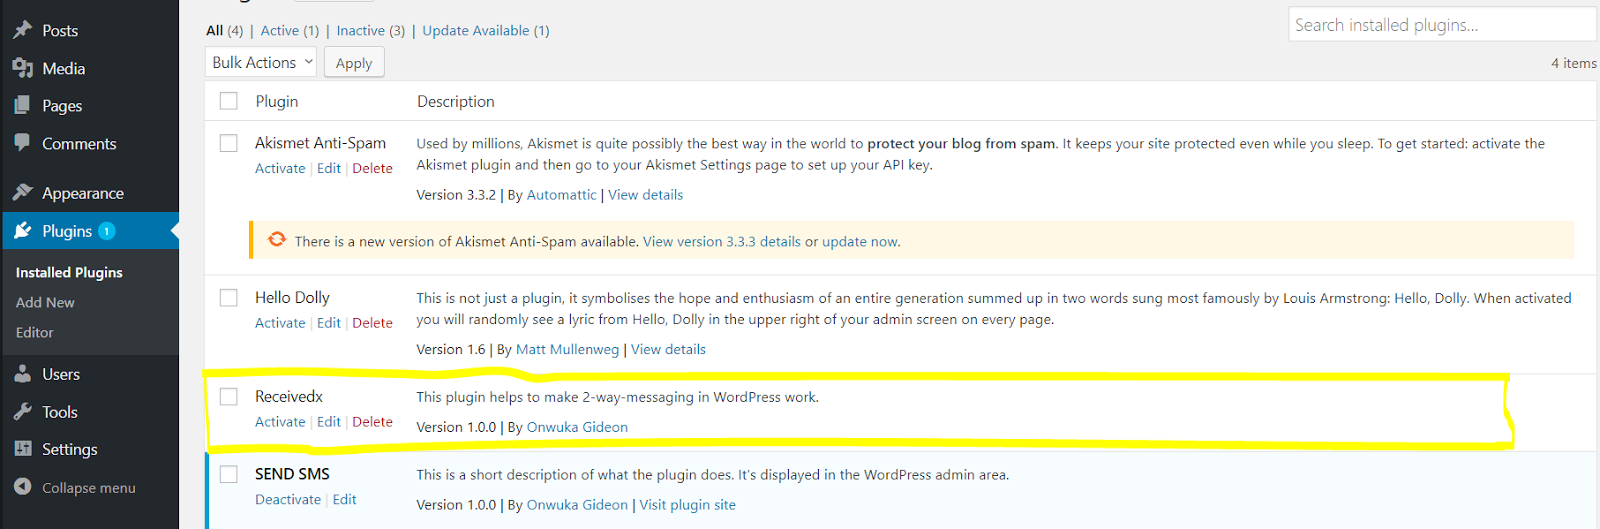
Next, activate our new plugin. Go to your WordPress admin Dashboard at wordpress_installation/wp-admin and click the Plugins link on the left column. Click on the “Activate” link of our plugin called Receivedx.
Set up an endpoint for receiving SMS
Next, we’ll create our own route that will serve as a webhook for our Twilio number. Add the below code to receivedx.php.
The register_receive_message_route() calls a built-in WordPress function register_rest_route() to register our custom endpoint.
We passed in three arguments to register_rest_route():
-
the namespace:
receivedx/v1is a namespace which uniquely identifies our base route so it does not clash with other routes owned by other plugins. This is like a base endpoint for all routes that we create within our plugin.
-
the route we want:
/receive_smsis our route that we want to use to point to our endpoint for receiving SMS.
-
an array of options:
- This tells WordPress what method can be used to access our endpoint. Here we are using POST (
'methods' => 'POST'). Also, we have another key in the array of option:callback– It accepts our endpoint functiontrigger_receive_sms. We’ll create this function later.
The resulting endpoint we created is receivedx/v1/receive_sms. It’s the result of the concatenation of the first parameter ( receivedx/v1 ) and and the second parameter (receive_sms) passed to the register_rest_route() function.
Write the code for receiving SMS
Now, we will write a function which the route we generated above will point to. This is the function whose function name we passed as the callback parameter above.
This function gets executed whenever a message is sent to our Twilio number and Twilio makes a POST request to our route which we’ll add to Twilio later.
So, what is this function doing? If someone sends a message to our Twilio Number, the user will receive a response: “Ahoy from WordPress”.
When Twilio makes a HTTP request to our route, it expects an HTTP response in return. This HTTP request that Twilio makes to our route includes a parameter(From, To, Body). This response takes the form of TwiML, a subset of XML used to relay instructions back to Twilio. Thus, we start our response by setting the Content-Type header to text/xml.
Valid TwiML has instructions nested inside opening and closing <Response> tags (even if you don’t want Twilio to do anything, you should still send back an empty <Response>). In this case, we use the tag to reply with an SMS. There are many creative things you can do here. You can read more about Twilio TwiMl API in the Twilio Docs.
Add the action hook
Next let’s register the functions we just created above. Add this line to your wp-content/plugins/receivedx/receivedx.php file:
The add_action function is a WordPress core function we use to let WordPress know of the function we just created.
At this point, we now have a route available for us:
http://wordpress_installation/wp-json/receivedx/v1/receive_sms
Your URL is composed the following way:
- http://wordpress_installation = WordPress installation URL
- wp-json = WordPress API base URL
- receivedx/v1 = our plugin API base URL
- receive_sms = points to the endpoint for receiving SMS
Our endpoint we just created can be accessed via a POST method, if you use a GET method, you will get a 404 error.
Add our endpoint URL to Twilio
Your route needs to have a publicly accessible URL for Twilio to reach it. For this you can either deploy your WordPress application to a server or use a tool like ngrok to open a tunnel to localhost.
If you use Ngrok your webhook URL will look something like http://8f65b745.ngrok.io/demo_wp_app/wp-json/receivedx/v1/receive_sms. Note that this URL changes every time you restart ngrok.
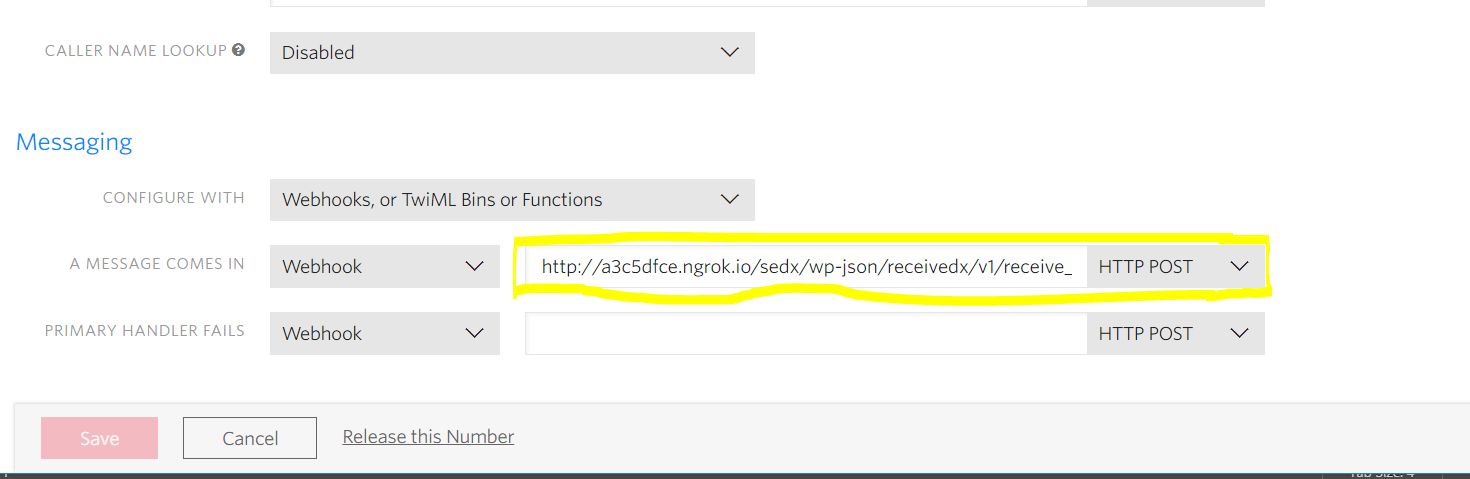
Now, log into your Twilio Console, go into the Phone Number section and then click on Manage Numbers to configure a number or buy a new one. If you have a number already, you should now see a list of numbers, click on the Number you want to configure. Scroll down to the messaging section.
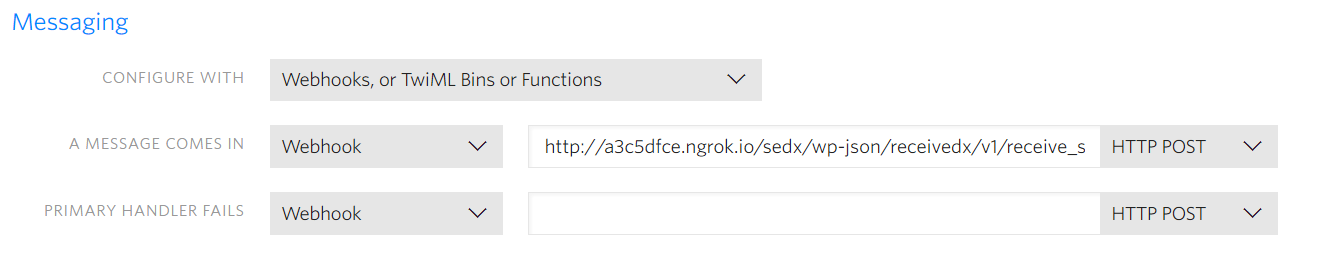
Add your webhook URL to the A MESSAGE COMES IN field. Make sure the dropdowns to the left and to the right of the webhook you just inserted is Webhook and HTTP POST respectively then save.

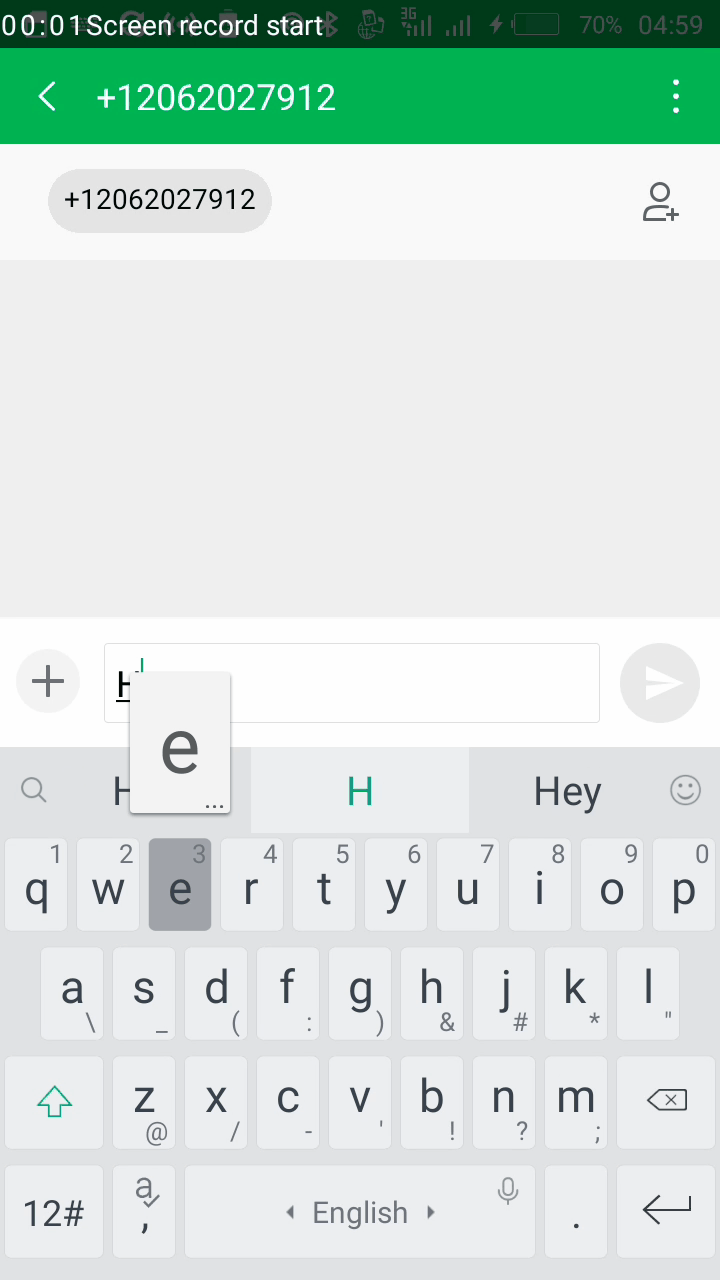
Test if it works
Now that we have everything set up let’s check if the code that we wrote works. Grab your phone or ask a friend to send an SMS with any text to the phone number that you configured. If everything worked you should get back the following text: “Ahoy from WordPress”.
Conclusion
That’s it! We have just learned how to utilise the WordPress REST API feature to set up routes and endpoints. We also learned how to receive SMS on our WordPress website.
Now you can receive SMS on your WordPress website. If you want to be able to send SMS make sure to check out my blog post about sending SMS with WordPress. From here on you are just limited by your creativity; for example, when a user sends a message to your Twilio number, you could send the message to your number and continue the communication from there.
Thanks for reading. Please let me know your thoughts.
Onwuka Gideon
Twitter @gideon_onwuka
Facebook devgideon
Related Resources
Twilio Docs
From APIs to SDKs to sample apps
API reference documentation, SDKs, helper libraries, quickstarts, and tutorials for your language and platform.
Resource Center
The latest ebooks, industry reports, and webinars
Learn from customer engagement experts to improve your own communication.
Ahoy
Twilio's developer community hub
Best practices, code samples, and inspiration to build communications and digital engagement experiences.