Add Transactional Email to your Wix Site using Twilio SendGrid and Velo IDE
Time to read:
October 28, 2020
Written by
Reviewed by

This post is a part of a two-part series on integrating Twilio and SendGrid services into your Wix site using Velo.
I hope you had a chance to read the great post by my colleague Meredith, diving into how you can use Velo to integrate Twilio into your Wix site. In the following post, I’m going to run through the process of integrating SendGrid to create email notifications, also known as transactional emails.
If you aren’t familiar, Velo helps developers build web applications as quickly as possible. It provides a complete solution that combines the Wix visual builder with a built-in, online IDE.
The Velo team has also put significant effort into streamlining the process of integrating 3rd-party services such as SendGrid. While SMS is a critical tool for communicating with users, it isn’t the only one. Email remains one of the most important tools available to reach users, and SendGrid is incredibly helpful in managing that process.
First let’s sign up for SendGrid and activate its email API.
On the left side pane, click Settings followed by API Keys to open the API Keys dashboard.
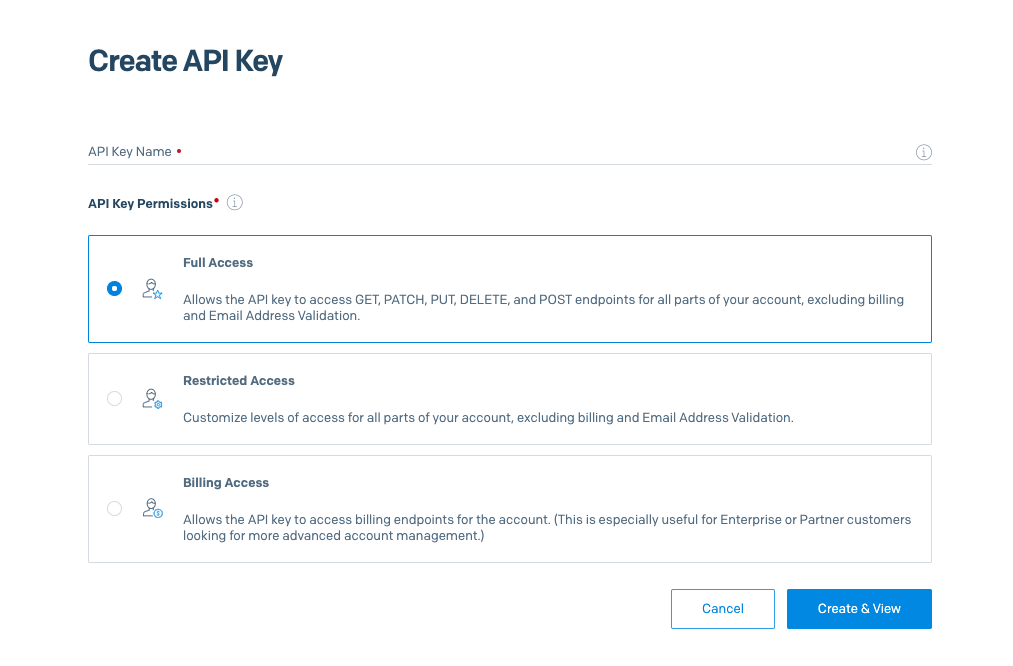
Click the Create API Key button on the following screen, give your key a name, and select Full Access so that you can use all available HTTP methods. Once you’ve selected Full access and clicked Create & View, your API key will be available for you to view and copy.
NOTE: Keep in mind that your API key can only be viewed one time in the dashboard.
Now that you have your API key ready to go, let’s navigate to the Wix editor so that we can integrate SendGrid with Velo!

To get things going, make sure you enable Dev Mode at the top of the Wix editor. This will enable Velo and all of it’s features. Next let's get to the integration by installing SendGrid’s npm module.
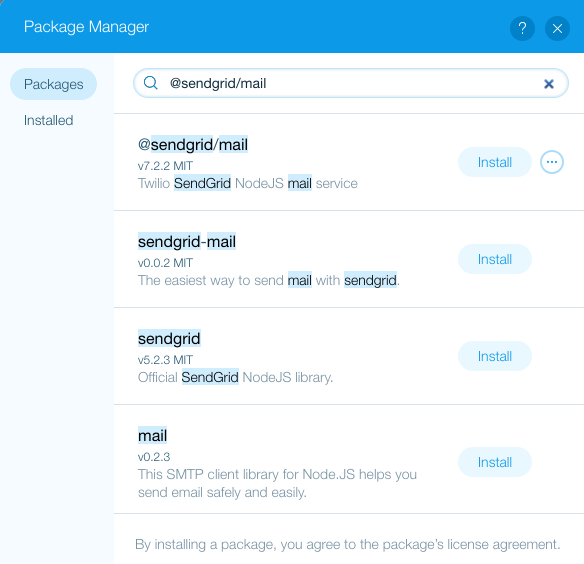
In your left side Site Structure panel, go to the node_modules section and using the gear icon or the Install a New Package link, open the npm package explorer. Search for “@sendgrid/mail” and click install.
Now that the SendGrid package is installed, we can start to use it’s functionality.
Create a new Web Module from the Code files section and import the SendGrid package. To do so, click backend followed by new web module. For this example we’ll name our new web module “sendgrid”.
Type the following code into the editor to import the package:
Next we need to create a constant that will allow us to store our API Key. Go ahead and paste your API key that you created in the SendGrid dashboard. To add an extra layer of security for your API key, use the Secrets manager.
Now that we have our API key set and ready to go, let's add a function that will accept all the parameters needed to send the email. Our email will contain the recipient, subject, sender, and the body of the message.
Our backend code is now all ready to go. Lets navigate to the front end to create an experience for the site visitors. In the page Code’s IDE, make sure to import the sendEmail function from the backend.
Drag and drop a button that will be used to send the email. Use the properties panel to change the ID of the button.
Add an onClick function for the button. Since the sendEmail function was imported, you can call it in the button's onClick function. Inside the same function, construct an object to pass the values needed for the email.
Make sure to replace the given strings with your own information. Your sender email should match your SendGrid verified email address. For example:
Testing
Now you can test! PREVIEW your application and click your button, You should receive a message in your email! Feel free to add text input boxes and use the .value property to capture what is being typed!
It is that simple to integrate SendGrid with Velo!
Do you prefer a video tutorial? Check out one of our past webinars.
Joshua Alphonse is a Developer Advocate for Velo at Wix.com where he builds communities and connects with developers. He can be reached via:
- Twitter: https://twitter.com/Joshalphonse
- Github: https://www.linkedin.com/in/joshua-alphonse/


Related Resources
Twilio Docs
From APIs to SDKs to sample apps
API reference documentation, SDKs, helper libraries, quickstarts, and tutorials for your language and platform.
Resource Center
The latest ebooks, industry reports, and webinars
Learn from customer engagement experts to improve your own communication.
Ahoy
Twilio's developer community hub
Best practices, code samples, and inspiration to build communications and digital engagement experiences.