Authenticate Yii2 Users Using Twilio Verify

May 12, 2021
Written by
Oluyemi Olususi
Contributor
Opinions expressed by Twilio contributors are their own
Reviewed by

Authenticate Yii2 Users Using Twilio Verify

Registering users in your application is relatively easy enough. Ensuring that they provide valid phone numbers, however, can be a very difficult task.

Twilio's Verify API guarantees that your application’s database only contains users with verified phone numbers. So In this tutorial, I will show you how you can seamlessly capture and confirm user phone numbers during registration in a Yii2 application, by leveraging Twilio Verify.

Prerequisite

To get the most out of this tutorial, you will need the following:

  • A basic understanding of PHP and version 2 of the Yii framework
  • Composer globally installed on your computer
  • A local MySQL database instance
  • A Twilio account

Application Flow

During this tutorial, we will build a basic application using the Yii2 framework. It will support the ability to register users, and for users to login and view a simplistic user dashboard. During registration, a unique code will be sent to the user's phone, which they will need to use  for verification purposes.

To avoid cluttering the main user table  with details of users who are not willing to be verified or who enter an incorrect verification code, user details will be stored in a temporary user table. Once verified, user details will be moved to the main user table in the database.

This way, a clean-up can be performed on the database, deleting redundant user details from the temporary user table when necessary.

Creating the application

To begin, create a new Yii2 application, using Composer, by running the following command from the terminal.

composer create-project --prefer-dist yiisoft/yii2-app-basic yii-verify

This will create a Yii2 application using Yii's basic project template, sufficient enough for the tutorial, in the root of the folder where you ran the command from.

Note: other installation options are available which include creating an application with an Advance project template and building an application from scratch.

To verify that the application was created successfully, navigate into the yii-verify folder and run the application, using the following commands.

// navigate into the folder
cd yii-verify

// server the application
php yii serve

Note: if you have Docker installed, you can launch the application by running docker-compose up -d. If you do, it will be available on port 8000.

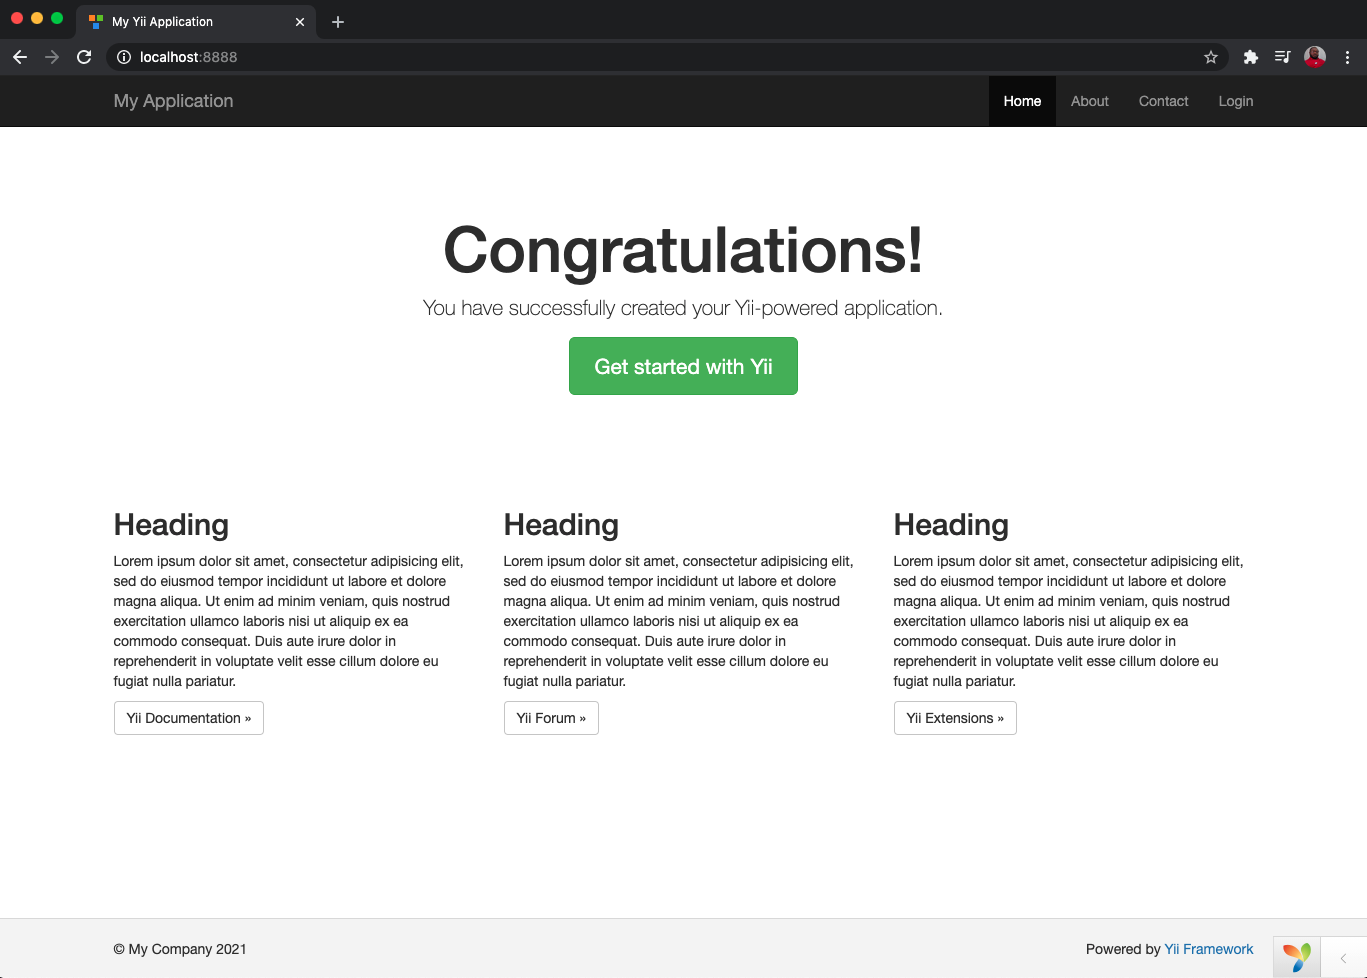
By default, the application will be served on localhost on port 8080. Open the site in your browser (http://localhost:8080) where you should see the welcome page, as in the screenshot below.

The Yii2 welcome page

Configure  the database connection

Next, you need to set up a connection to your local database instance using your preferred database management tool. Create a new database and name it as you wish. I named mine yii_verify. Then, open config/db.php and update its content as shown below.

return [
    'class' => 'yii\db\Connection',
    // change `dbname` to match yours
    'dsn' => 'mysql:host=localhost;dbname=library_api', 
    'username' => YOUR_DB_USERNAME,
    'password' => YOUR_DB_PASSWORD,
    'charset' => 'utf8',
];

Create the database migration files

Next, create migrations for the two database tables that the application will use, user and temporary_user. Use the yii migrate/create command to do so,by running the commands below, answering "yes" when prompted.

php yii migrate/create create_user_table
php yii migrate/create create_temporary_user_table

The commands above will create migration files within a new migrations directory. Migrations files are usually prefixed with the letter m and the UTC date and time of when they were created, e.g., m210408_150000_create_user_table.php.  

Edit the migration files

Next, modify the default content in the migration files generated above, starting with migrations/m<YYMMDD_HHMMSS>_create_user_table.php. Use the code below to replace the existing safeUp function.

public function safeUp()
{
    $this->createTable('{{%user}}', [
        'id' => $this->primaryKey(),
        'username' => $this->string()->unique(),
        'password' => $this->string(),
        'auth_key' => $this->string(),
        'access_token' => $this->text(),
        'verified' => $this->boolean()->defaultValue(false),
    ]);
}

Then, update the safeUp() function for migrations/m<YYMMDD_HHMMSS>_create_temporary_user_table.php to match the code below.

public function safeUp()
{
    $this->createTable('{{%temporary_user}}', [
        'id' => $this->primaryKey(),
        'username' => $this->string(),
        'password' => $this->string(),
        'country_code' => $this->string(),
        'number' => $this->string(),
    ]);
}

With the two migration files updated, run them to create the database tables, using the command below. Type yes and press Enter to run the migrations.

php yii migrate

Create model classes

For proper manipulation of data and structured interaction with the tables in the database, we will create an Active Record class which can also be considered as a model for the temporary_user table.

By default, a Model has been created for the ser table during the installation of the application. Use the following command to create an Active Record class for the temporary_user table. When prompted, type "yes" and press "Enter" to continue.

php yii gii/model --tableName=temporary_user --modelClass=TemporaryUser

The generated model class will be saved in the models directory, named TemporaryUser.php. Open it and replace the existing code with the code below.

<?php
declare(strict_types=1);

namespace app\models;

use Yii;

/**
 * This is the model class for table "temporary_user".
 *
 * @property int $id
 * @property string|null $username
 * @property string|null $password
 * @property string|null $country_code
 * @property string|null $number
 */
class TemporaryUser extends \yii\db\ActiveRecord
{

    public static function tableName()
    {
        return 'temporary_user';
    }

    public function rules()
    {
        return [
            [['username', 'password', 'country_code', 'number'], 'string', 'max' => 255],
        ];
    }


    public function attributeLabels()
    {
        return [
            'id' => 'ID',
            'username' => 'Username',
            'password' => 'Password',
            'country_code' => 'Country Code',
            'number' => 'Number',
        ];
    }

    // add this method
    public static function findByUsername($username)
    {
        return self::findOne(['username' => $username]);
    }
}

Interestingly, the gii/model command was able to discover the fields created in the temporary_user  table and generated both the rules() and attributeLabels methods for the TemporaryUser model. The change that we made was the findByUsername method. This method retrieves the details of a particular user using the $username parameter.

In the same vein, open models/User.php and replace the default content with the code below

 <?php
declare(strict_types=1);

namespace app\models;

use yii\db\ActiveRecord;

/**
 * Class User
 * @package app\models
 *
 * @property int $id
 * @property string $username
 * @property string $password
 * @property string $auth_key
 * @property string $access_token
 * @property string $verified
 */
class User extends ActiveRecord implements \yii\web\IdentityInterface
{
    public static function tableName()
    {
        return 'user';
    }

    public function rules()
    {
        return [
            [['username', 'password', 'auth_key', 'access_token'], 'required'],
            [['username'], 'string', 'max' => 55],
            [['password', 'auth_key', 'access_token'], 'string', 'max' => 255]
        ];
    }

    public function attributeLabels()
    {
        return [
            'id' => 'ID',
            'username' => 'Username',
            'password' => 'Password',
            'auth_key' => 'Auth Key',
            'access_token' => 'Access Token',
        ];
    }


    public static function findIdentity($id)
    {
        return self::findOne($id);
    }


    public static function findIdentityByAccessToken($token, $type = null)
    {
       return self::find()->where(['access_token' => $token])->one();
    }

    /**
     * Finds user by username
     *
     * @param string $username
     * @return static|null
     */
    public static function findByUsername($username)
    {
        return self::findOne(['username' => $username]);
    }


    public function getId()
    {
        return $this->id;
    }


    public function getAuthKey()
    {
        return $this->auth_key;
    }


    public function validateAuthKey($authKey)
    {
        return $this->auth_key === $authKey;
    }

    /**
     * Validates password
     *
     * @param string $password password to validate
     * @return bool if password provided is valid for current user
     */
    public function validatePassword($password)
    {
        return \Yii::$app->security->validatePassword($password, $this->password);
    }
}

Here, we made modifications by creating rules to specify the maximum string length for username, password, auth_key and access_token fields respectively. Also, we extended from the Active Record class, and created methods to retrieve the details of a particular user from the database.

Create the SignupForm Class

Similar to the models created in the preceding section, we will next create an Active Record based form also known as ActiveForm. This will be used to extract, represent, and validate the data entered by users.

At this stage of the tutorial, we only need a new form to represent the data requested from the user during the sign up stage. Create a new file, named SignupForm.php, within the models directory, and paste the code below into it.

<?php
declare(strict_types=1);

namespace app\models;

use yii\base\Model;
use yii\helpers\VarDumper;

class SignupForm extends Model
{
    public $username;
    public $password;
    public $country_code;
    public $number;

    public function rules()
    {
        return [
            [['username', 'password','country_code', 'number'], 'required'],
            ['username', 'string', 'min' => 4, 'max' => 16],
        ];
    }

    public function signup()
    {
        $user = new TemporaryUser();
        $user->username = $this->username;
        $user->password = \Yii::$app->security->generatePasswordHash($this->password);
        $user->country_code = $this->country_code;
        $user->number = $this->number;
        $formattedNumber = '+'.$this->country_code.$this->number;

        if ($user->save()) {
            return true;
        }

        \Yii::error("User was not saved. ". VarDumper::dumpAsString($user->errors));
        return false;
    }
}

Modify the SiteController to render the sign up Form

To render the signup form on the client side, we will pass an instance of the SignupForm model using the ActiveForm widget to the view layer. Open controllers/SiteController.php and create an action to handle signups, by inserting the following code

public function actionSignup()
{
    $model = new SignupForm();

    if ($model->load(Yii::$app->request->post()) && $model->signup()) {
        return $this->redirect('login');
    }

    return $this->render('signup', [
        'model' => $model
    ]);
}

Note: Don’t forget to import the SignupForm

use app\models\SignupForm;

Next, uncomment and modify the urlManager component in your application configuration, which is located in config/web.php. If it's not there, add the code below to the components element of the $config array.

'urlManager' => [
    'enablePrettyUrl' => true,
    'showScriptName' => false,
    'rules' => [],
],

This will enable a pretty URL format for all the routes within the application.

Create the view templates

Next, to render the signup form, create a new file, named signup.php, in the views/site folder. Then, open the newly created file and paste the following code into it.

<?php

/* @var $this yii\web\View */
/* @var $form yii\bootstrap\ActiveForm */
/* @var $model app\models\SignupForm */

use yii\helpers\Html;
use yii\bootstrap\ActiveForm;

$this->title = 'Sign Up';
$this->params['breadcrumbs'][] = $this->title;
?>
<div class="site-login">
    <h1><?= Html::encode($this->title) ?></h1>

    <p>Please fill out the following fields to signup:</p>

    <?php $form = ActiveForm::begin([
        'id' => 'signup-form',
        'layout' => 'horizontal',
        'fieldConfig' => [
            'template' => "{label}\n<div class=\"col-lg-3\">{input}</div>\n<div class=\"col-lg-8\">{error}</div>",
            'labelOptions' => ['class' => 'col-lg-1 control-label'],
        ],
    ]); ?>

    <?= $form->field($model, 'username')->textInput(['autofocus' => true]) ?>
    <?= $form->field($model, 'password')->passwordInput() ?>
    <?= $form->field($model, 'country_code')->textInput() ?>
    <?= $form->field($model, 'number')->textInput() ?>

    <div class="form-group">
        <div class="col-lg-offset-1 col-lg-11">
            <?= Html::submitButton('Sign Up ', ['class' => 'btn btn-primary', 'name' => 'signup-button']) ?>
        </div>
    </div>

    <?php ActiveForm::end(); ?>
</div>

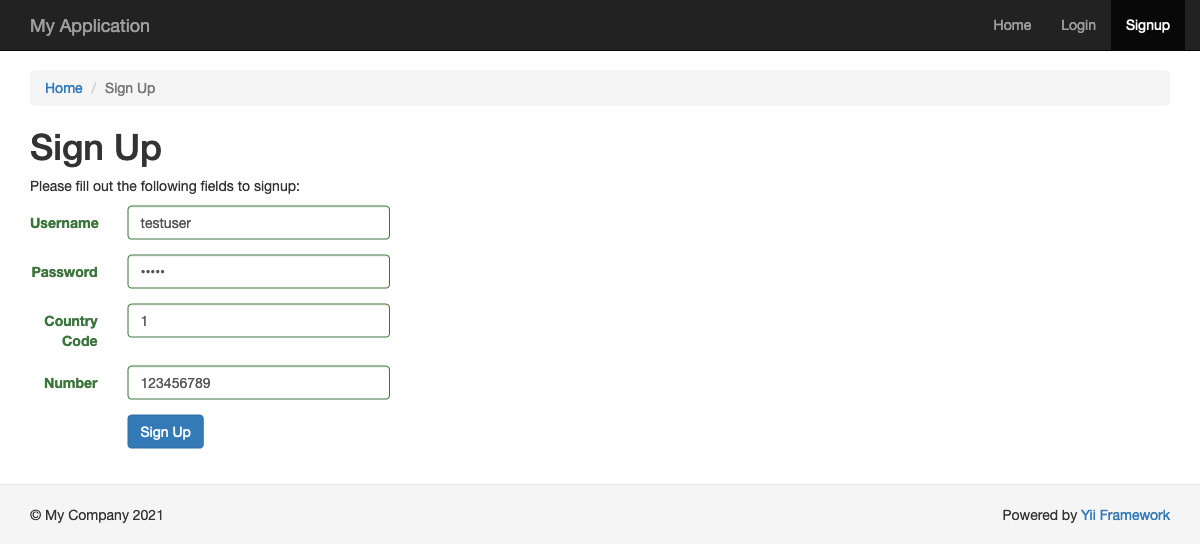
If you run the app at this point, users will be able to sign up, by filling in and submitting the submit form (/signup). After doing so, their details will be saved in the temporary user table. However, they won't, yet, be able to login.

In the next section, we will complete the signup process, by integrating SMS verification by using the Twilio Verify API. After doing so, during signup the user will receive a token to verify their authenticity which they will need to use.

Create a Twilio Service

To integrate the Twilio Verify API into the application, you need to have a Twilio Service.

Navigate to the Twilio Services dashboard and create a service, if you don't already have one. Give your service a friendly name, as you wish. I have named mine "yii-verify-service". Once you have created the service, copy the SERVICE SID, which can be found on the Service's "General Settings" page. You can see an example below.

Create a new Twilio service


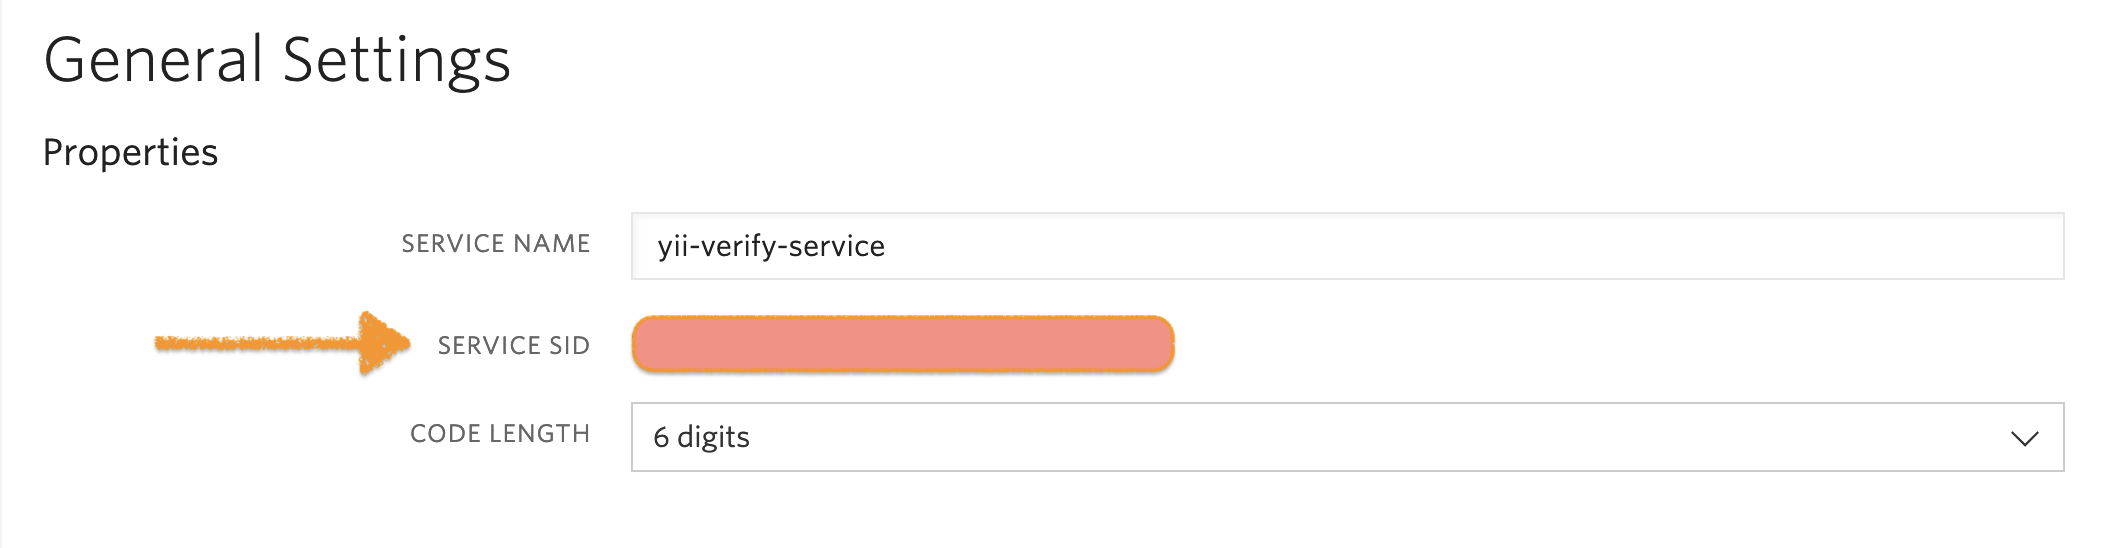
Ensure that you save the value of SERVICE SID for the newly created service as it will be required later in the tutorial.

Note: While you're there, obtain your ACCOUNT SID and AUTH TOKEN from the Twilio Console.

For the application and Twilio to communicate, you need to install Twilio PHP SDK. Run the command below to install it using Composer.

composer require twilio/sdk

Once the installation is completed, create environment variables to hold the Twilio credentials. By default, Yii2 does not support the usage of a .env file for storing environment variables.

So for this tutorial, we will improvise and define the required variables as constants. To do that, create a new file, named env.php, in the root directory of the application, and insert the following content into it.

<?php

defined('TWILIO_ACCOUNT_SID') or define('TWILIO_ACCOUNT_SID', 'YOUR_TWILIO_ACCOUNT_SID');
defined('TWILIO_AUTH_TOKEN') or define('TWILIO_AUTH_TOKEN', 'YOUR_TWILIO_AUTH_TOKEN');
defined('TWILIO_SERVICE_SID') or define('TWILIO_SERVICE_SID', 'YOUR_TWILIO_SERVICE_SID');

Note: Please be sure to replace YOUR_TWILIO_ACCOUNT_SID and  YOUR_TWILIO_AUTH_TOKEN with the appropriate credentials from the Twilio Console, and YOUR_TWILIO_SERVICE_SID with the service id from the service which you created earlier.

Next, navigate to web/index.php and add the highlighted lines below to it to load env.php, which we have just created.

<?php

// comment out the following two lines when deployed to production
defined('YII_DEBUG') or define('YII_DEBUG', true);
defined('YII_ENV') or define('YII_ENV', 'dev');

if (file_exists(__DIR__ . '/../env.php')) {
    require __DIR__ . '/../env.php';
}

require __DIR__ . '/../vendor/autoload.php';
require __DIR__ . '/../vendor/yiisoft/yii2/Yii.php';

$config = require __DIR__ . '/../config/web.php';

(new yii\web\Application($config))->run();

This is one of the simpler approaches to define, load, and make use of environment variables in Yii2 applications. You could also use a package such as phpdotenv.

Note: Don’t forget to exclude  env.php  from your version control system, for example, by adding it to .gitignore when using Git.

Now, we’ll create a service that allows us to handle SMS verification. At the root of the application, create a directory named service, then, inside that directory, create a file named TwilioSMSVerificationService.php. Open the file and paste the code below into it.

<?php
declare(strict_types=1);

namespace app\service;

use Twilio\Exceptions\TwilioException;
use Twilio\Rest\Client;

class TwilioSMSVerificationService
{
    private $phoneNumber;
    private $serviceSid;
    private $twilio;

    public function __construct($phoneNumber)
    {
      $this->phoneNumber = $phoneNumber;
      $sid = TWILIO_ACCOUNT_SID;
      $token = TWILIO_AUTH_TOKEN;
      $this->serviceSid = TWILIO_SERVICE_SID;
      $this->twilio = new Client($sid, $token);
    }

    public function sendVerificationToken()
    {
        try {
            $this
                ->twilio
                ->verify
                ->v2
                ->services($this->serviceSid)
                ->verifications
                ->create($this->phoneNumber, 'sms');
        } catch (TwilioException $e) {
            return $e->getMessage();
        }
    }

    public function isValidToken($token)
    {
        try {
            $verificationResult =
                $this
                    ->twilio
                    ->verify
                    ->v2
                    ->services($this->serviceSid)
                    ->verificationChecks
                    ->create($token,
                        ['to' => $this->phoneNumber]
                    );
            return $verificationResult->status === 'approved';
        } catch (TwilioException $e) {
            return $e->getMessage();
        }
    }
}

In the code above, we created the service with three private variables: the user’s phone number, the Twilio service ID, and a Client object from the Twilio SDK, which are  initialized within the class constructor. The third variable, Client, will be used for making API requests to the Verify API.

Next we created two new functions:

  • sendVerificationToken: This will be used to send a verification token to a phone number.
  • isValidToken: This will be used to verify the token provided by the user, by making a verification check to the Twilio Verify API and returning a boolean corresponding to whether the token is valid or not.

Verify the SMS token using TwilioSMSVerificationService

Here, we will start by creating a form, named verifyUserFormBegin, to enable a user to enter and verify the token sent to their phone number. Before creating the form, we will modify models/SignupForm.php to utilize TwilioSMSVerificationService, and to store the current user’s details in the active session.

Open models/SignupForm.php and replace its content with the code below

<?php
declare(strict_types=1);

namespace app\models;

use app\service\TwilioSMSVerificationService;
use yii\base\Model;
use yii\helpers\VarDumper;

class SignupForm extends Model
{
    public $username;
    public $password;
    public $country_code;
    public $number;

    public function rules()
    {
        return [
            [['username', 'password','country_code', 'number'], 'required'],
            ['username', 'string', 'min' => 4, 'max' => 16],
        ];
    }

    public function signup()
    {
        $user = new TemporaryUser();
        $user->username = $this->username;
        $user->password = \Yii::$app->security->generatePasswordHash($this->password);
        $user->country_code = $this->country_code;
        $user->number = $this->number;
        $formattedNumber = '+'.$this->country_code.$this->number;

        if ($user->save()) {
            $verificationService = new TwilioSMSVerificationService($formattedNumber);
            $verificationService->sendVerificationToken();
            $this->storeDataInSession($formattedNumber, $user);
            return true;
        }

        \Yii::error("User was not saved. ". VarDumper::dumpAsString($user->errors));
        return false;
    }

    public function storeDataInSession($phoneNumber, $user)
    {
        $session = \Yii::$app->session;
        $session->set('phoneNumber', $phoneNumber);
        $session->set('user', $user);
    }
}

The difference in this version of the class is that we instantiated the TwilioSMSVerificationService with the formatted phone number of the user, which included the country code as the parameter.

Next, we created a new method, named storeDataInSession(), to store the user data in the session. This makes it easier to track and monitor for verification purposes.

With those changes made, in the models folder, create a new file named VerifyUserForm.php. Open this file and paste the code below into it.

<?php
declare(strict_types=1);

namespace app\models;

use app\service\TwilioSMSVerificationService;
use yii\base\Model;

class VerifyUserForm extends Model
{
    public $token;

    public function rules()
    {
        return [
            [['token'], 'required'],
        ];
    }

    public function verifyUser()
    {
        $session = \Yii::$app->session;
        $phoneNumber = $session->get('phoneNumber');
        $verificationService = new TwilioSMSVerificationService($phoneNumber);

        if ($verificationService->isValidToken($this->token)) {
            $userSessionDetails = $session->get('user');
            $user = new User();
            $user->username = $userSessionDetails['username'];
            $user->password = $userSessionDetails['password'];
            $user->auth_key = \Yii::$app->security->generateRandomString();
            $user->access_token = \Yii::$app->security->generateRandomString();
            $user->verified = true;

            $session->setFlash('verified', 'Your phone number has been verified. Please log in');
            if($user->save()) {
                return true;
            }
        }

        \Yii::error("Token not valid. ");
        return false;
    }
}

In the verifyUser() method, we get the token provided by the user and call TwilioSMSVerificationService to validate it. If the token is valid, we will retrieve the user’s details from the session and persist them in the user table.

Now, create an action in controllers/SiteController.php, named actionVerifyUser, to utilize the newly created form. Open controllers/SiteController.php and paste the code below into it.

public function actionVerifyUser()
{
    $model = new VerifyUserForm();
    if ($model->load(Yii::$app->request->post()) && $model->verifyUser()) {
        return $this->redirect('login');
    }

    return $this->render('verifyuser', [
        'model' => $model
    ]);
}

Note: Don’t forget to import the VerifyUserForm

use app\models\VerifyUserForm;

To render the form, navigate to the views/site folder and create a file named verifyUser.php and paste the following code in it:

<?php

/* @var $this yii\web\View */
/* @var $form yii\bootstrap\ActiveForm */
/* @var $model app\models\VerifyUserForm */

use yii\helpers\Html;
use yii\bootstrap\ActiveForm;

$this->title = 'Verify Phone Number';
$this->params['breadcrumbs'][] = $this->title;
?>
<div class="site-login">
    <h1><?= Html::encode($this->title) ?></h1>

    <p>Please provide the token sent by SMS</p>

    <?php $form = ActiveForm::begin([
        'id' => 'verify-user-form',
        'layout' => 'horizontal',
        'fieldConfig' => [
            'template' => "{label}\n<div class=\"col-lg-3\">{input}</div>\n<div class=\"col-lg-8\">{error}</div>",
            'labelOptions' => ['class' => 'col-lg-1 control-label'],
        ],
    ]); ?>

    <?= $form->field($model, 'token')->textInput(['autofocus' => true]) ?>

    <div class="form-group">
        <div class="col-lg-offset-1 col-lg-11">
            <?= Html::submitButton('Verify Me', ['class' => 'btn btn-primary', 'name' => 'verify-user-button']) ?>
        </div>
    </div>

    <?php ActiveForm::end(); ?>
</div>

Redirect the user to the verify form

As created earlier, the actionSignup() method in the SiteController redirects the user to the login page.  Modify the method to redirect to the verified user’s page instead, as shown in the snippet below, so that they can verify the SMS token that they will receive after submitting their details.

public function actionSignup()
{
    $model = new SignupForm();

    if ($model->load(Yii::$app->request->post()) && $model->signup()) {
        return $this->redirect('verify-user'); // modify this
    }

    return $this->render('signup', [
        'model' => $model
    ]);
}

Create a protected dashboard view

This application will allow a verified and authenticated user to view the dashboard which, in real-life applications, would contain resources retrieved from the database for such users.

In controllers/SiteController.php add the code below, to render the dashboard view.

public function actionDashboard()
{
    if (Yii::$app->user->isGuest) {
        return $this->goBack();
    } elseif (!Yii::$app->user->identity->verified) {
        return $this->goBack();
    }

    return $this->render('dashboard');
}

Now, create the view file, named dashboard.php, in the views/site folder and paste the following content in it:

<?php

/* @var $this yii\web\View */

use yii\helpers\Html;

$this->title = 'Dashboard';
$this->params['breadcrumbs'][] = $this->title;
?>
<div class="site-about">
    <h1><?= Html::encode($this->title) ?></h1>
    <p>
        This is the dashboard page. You must register and be verified to see this page
    </p>
</div>

Modify the main application layout view

The views/layouts/main.php file houses the structure on which the whole application was built and also contains the links in the navigation bar. Open this file and modify its content as shown below

<?php

/* @var $this \yii\web\View */
/* @var $content string */

use app\widgets\Alert;
use yii\helpers\Html;
use yii\bootstrap\Nav;
use yii\bootstrap\NavBar;
use yii\widgets\Breadcrumbs;
use app\assets\AppAsset;

AppAsset::register($this);
?>
<?php $this->beginPage() ?>
<!DOCTYPE html>
<html lang="<?= Yii::$app->language ?>">
<head>
    <meta charset="<?= Yii::$app->charset ?>">
    <meta http-equiv="X-UA-Compatible" content="IE=edge">
    <meta name="viewport" content="width=device-width, initial-scale=1">
    <?php $this->registerCsrfMetaTags() ?>
    <title><?= Html::encode($this->title) ?></title>
    <?php $this->head() ?>
</head>
<body>
<?php $this->beginBody() ?>

<div class="wrap">
    <?php
    NavBar::begin([
        'brandLabel' => Yii::$app->name,
        'brandUrl' => Yii::$app->homeUrl,
        'options' => [
            'class' => 'navbar-inverse navbar-fixed-top',
        ],
    ]);
    echo Nav::widget([
        'options' => ['class' => 'navbar-nav navbar-right'],
        'items' => [
            ['label' => 'Home', 'url' => ['/site/index']],
            Yii::$app->user->isGuest ? (
                ['label' => 'Login', 'url' => ['/site/login']]
            ) : (
                '<li>'
                . Html::beginForm(['/site/logout'], 'post')
                . Html::submitButton(
                    'Logout (' . Yii::$app->user->identity->username . ')',
                    ['class' => 'btn btn-link logout']
                )
                . Html::endForm()
                . '</li>'
            ),
            Yii::$app->user->isGuest ? (
            ['label' => 'Signup', 'url' => ['/site/signup']]
            ) : (
            ['label' => 'Dashboard', 'url' => ['/site/dashboard']]
            ),
        ],
    ]);
    NavBar::end();
    ?>

    <div class="container">
        <?= Breadcrumbs::widget([
            'links' => isset($this->params['breadcrumbs']) ? $this->params['breadcrumbs'] : [],
        ]) ?>
        <?= Alert::widget() ?>
        <?= $content ?>
    </div>
</div>

<footer class="footer">
    <div class="container">
        <p class="pull-left">&copy; My Company <?= date('Y') ?></p>

        <p class="pull-right"><?= Yii::powered() ?></p>
    </div>
</footer>

<?php $this->endBody() ?>
</body>
</html>
<?php $this->endPage() ?>

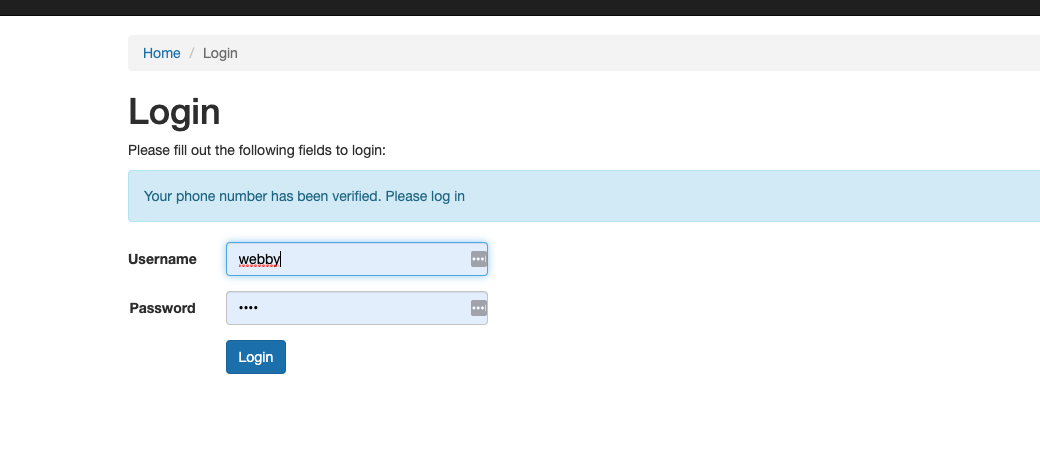
Lastly, modify the login view to display the flash message added to the session whenever a user is verified. Open views/site/login.php and replace its content with the code below.

<?php

/* @var $this yii\web\View */
/* @var $form yii\bootstrap\ActiveForm */
/* @var $model app\models\LoginForm */

use yii\helpers\Html;
use yii\bootstrap\ActiveForm;

$this->title = 'Login';
$this->params['breadcrumbs'][] = $this->title;
?>
<div class="site-login">
    <h1><?= Html::encode($this->title) ?></h1>

    <p>Please fill out the following fields to login:</p>

    <?php
    $session = Yii::$app->session;
    if($session->hasFlash('verified')) {
        $message = $session->getFlash('verified');
        echo "<div class='alert alert-info' role='alert'>
             {$message}
        </div>";
    }
    ?>

    <?php $form = ActiveForm::begin([
        'id' => 'login-form',
        'layout' => 'horizontal',
        'fieldConfig' => [
            'template' => "{label}\n<div class=\"col-lg-3\">{input}</div>\n<div class=\"col-lg-8\">{error}</div>",
            'labelOptions' => ['class' => 'col-lg-1 control-label'],
        ],
    ]); ?>

        <?= $form->field($model, 'username')->textInput(['autofocus' => true]) ?>
        <?= $form->field($model, 'password')->passwordInput() ?>
        <div class="form-group">
            <div class="col-lg-offset-1 col-lg-11">
                <?= Html::submitButton('Login', ['class' => 'btn btn-primary', 'name' => 'login-button']) ?>
            </div>
        </div>

    <?php ActiveForm::end(); ?>

</div>

See it working

You've now created the application, so it's time to test it. Start by running the command below to launch the application.

Note: if you tested the signup process in the first version of the application, make sure to truncate the temporary_user table.

php yii serve

Then, navigate to the default URL at http://localhost:8080/ to view it. Click on Signup and provide the appropriate details.

Sign up form


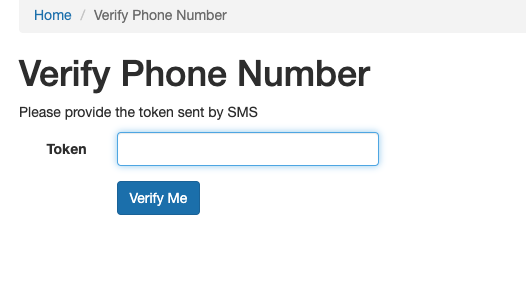
Then, provide the token sent to your phone number via SMS for verification in the next form.

Verify Phone number form

Once verified, you will be redirected to the login page with a flash message indicating that the phone number has been successfully verified.

Login Page

Conclusion

In this tutorial, you learned how to verify the phone number of, potential, new users of our Yii2-based application, by utilizing Twilio Verify API as an added layer of security. We built this application to ensure that only verified users with valid phone numbers can have their details moved to the main user table in our application database.

You can improve the application that we have built here, by adding more features as you deem fit. Find the complete source code on GitHub.

Oluyemi is a tech enthusiast with a background in Telecommunication Engineering. With a keen interest to solve day-to-day problems encountered by users, he ventured into programming and has since directed his problem-solving skills at building software for both web and mobile.

A full-stack software engineer with a passion for sharing knowledge, Oluyemi has published a good number of technical articles and content on several blogs on the internet. Being tech-savvy, his hobbies include trying out new programming languages and frameworks.