Build a Custom WordPress Plugin to Send SMS with Twilio Programmable Messaging
Time to read:
November 09, 2020
Written by
Reviewed by

The tension of blogging really begins after publishing. Who read it? How do they feel? There are numerous questions that flood the mind of any author, but more importantly, most authors just want their content read.
Sending bulk SMS is a great tool to have in your toolbelt to encourage traffic to your WordPress blog. Imagine being able to send an SMS to every subscriber to your blog.
Let’s build a WordPress plugin in PHP using Twilio Programmable SMS and send text messages to readers about topics they care about.
Prepare WordPress for the Plugin
Plugins let you extend and add functionality to your WordPress site. Since we are adding an entirely new function to WordPress, we have to use a plugin to achieve this.
If you haven’t already installed WordPress, you can download and install a copy by following the installation instructions here. I have my WordPress installation path as http://localhost/sendex/. I’ll be using it as my reference throughout this tutorial, but feel free to substitute with your own path.
Once you are done with the installation, log into your WordPress admin dashboard. This is where we will be working from now on. The admin dashboard should be located at http://localhost/sendex/wp-admin, assuming that you used the same installation.
Assuming your installation path is http://example.com/, you can get to the admin dashboard by opening http://example.com/wp-admin in your browser.
Log in with your username and password. If the login was successful, you’re ready to go!
Sign Up for a Twilio SMS Account
Head to Twilio to create an account, if you don’t have one already. You will need access to the Twilio Programmable SMS API in order to send messages.
After that, navigate to the Twilio Console and note your Account SID and Auth Token credentials. They should look like:
Setting Up Our WordPress Plugin
Now we’re ready to write some code. In simplest terms, a WordPress plugin is a PHP file with a WordPress plugin header comment. Its header is read on page load, and any functionality within is injected into the WordPress application.
To keep things neatly organized, we’ll organize all of our files into a single folder.
Navigate to the WordPress installation’s wp-content directory and open the plugins directory. Next create a new directory named sendex as sendex is also the name of our new plugin.
NOTE: The plugin directory should be the same name as the name of your plugin.
Next, open the newly created directory and create a new file named sendex.php. This file will serve as our plugin main file.
We also need to add a plugin header comment to our plugin. Open the sendex.php file and add the following header comment. Note that it describes the plugin we are creating, outlining meta data such as name, author, and description:
Our new plugin is now discoverable by WordPress! Goto the WordPress plugin page in the admin dashboard. You will see our plugin listed there too:
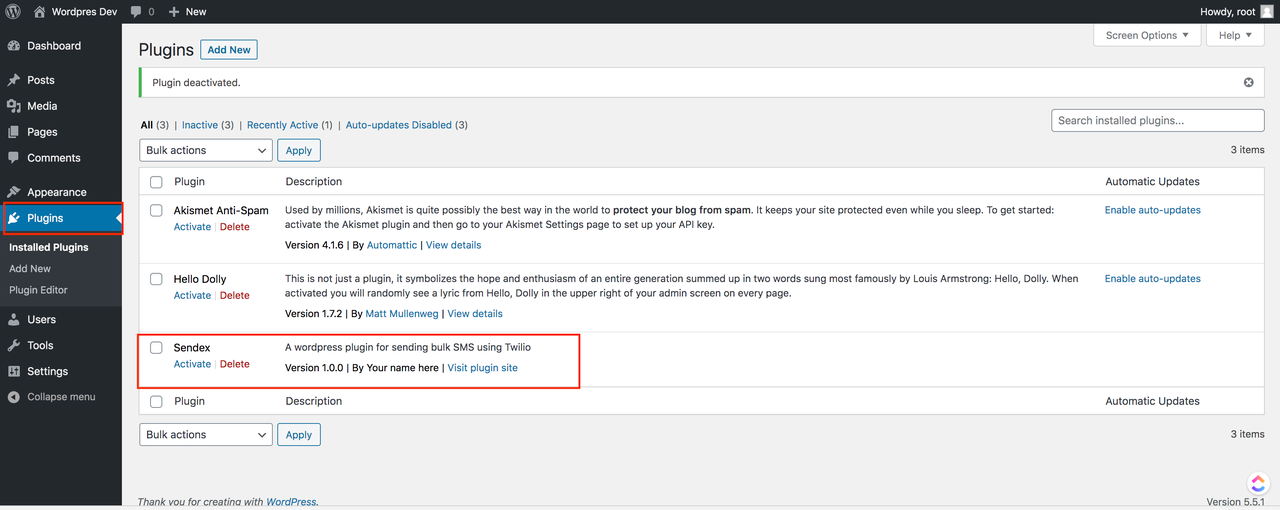
Activate the plugin by clicking on the Activate link. Feel free to update the comment as you wish.
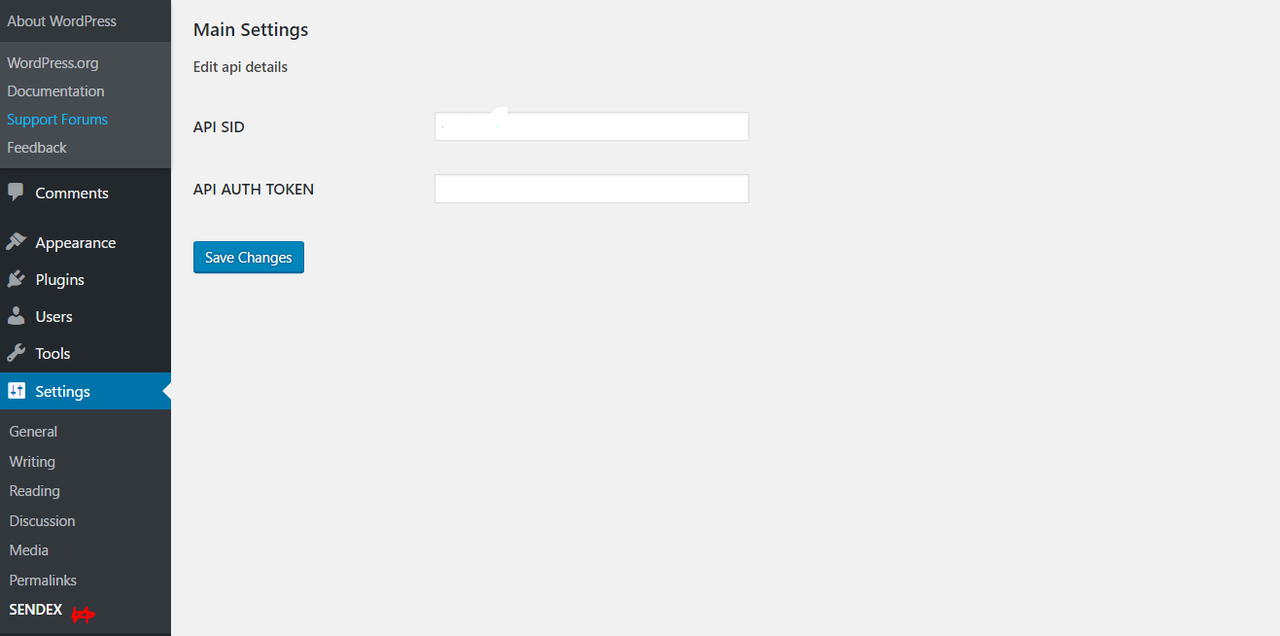
Create a Settings Page
We need to add a form to the Settings page in our admin panel so that we can manage our Twilio API credentials easily. We will create a page similar to the image below:
All work from this point on will be done in the sendex folder. Open the sendex.php file. Create a new class for our plugin called Sendex:
Before we move ahead, let’s take a look at the WordPress add_options_page() function which is used to add options to WordPress.
The add_options_page() function is a WordPress core function used to add new option pages. We are utilizing this to create our own settings page. It accepts five (5) parameters:
0
$page_title: text to be displayed in the title tags of the page when the menu is selected).$menu_title: text that will be displayed on the menu that will be linked to our settings page.- the
$capabilityoption: user capability required for this menu to be displayed to the user. $menu_slug: a unique string that will be used to refer to the page that we just created. The slug name to refer to this menu by (should be unique for this menu)- (optional): accepts a callable array with $this as the first value, and the name of the class method to pass this data to as the second value.
Next, create a file named sendex-admin-settings-page.php in the sendex folder. This file will render our settings page HTML. Inside the new file you just created, add the following code:
Next, we need to include the page we just created so that our plugin can display it when called. Add a function to the Sendex class that will render the HTML for the settings page:
We will need an option page to call the displaySendexSettingsPage function. Add the following function to the Sendex class to trigger the option page:
Next, let's create a function named sendexAdminSettingsSave() that will register the options and fields that we need to save the credentials to the database. Add the following code to the Sendex class in the sendex.php file:
NOTE: The comments throughout the code explain what each function handles.
The sendexAdminSettingsSave method has 4 functions:
register_settings()registers a setting and its sanitization callback. This is part of the Settings API, which allows us to automatically generate /wp-admin settings pages by registering our settings and using a few callbacks to control the output.add_settings_section()helps us group common input fields.add_settings_field()prints the HTML<input>field to the page.
Now we need to hook into these functions so that WordPress knows about them. Open up the sendex.php file and then add the following code to it immediately, after the Sendex class declaration:
Add a Page for Sending Messages
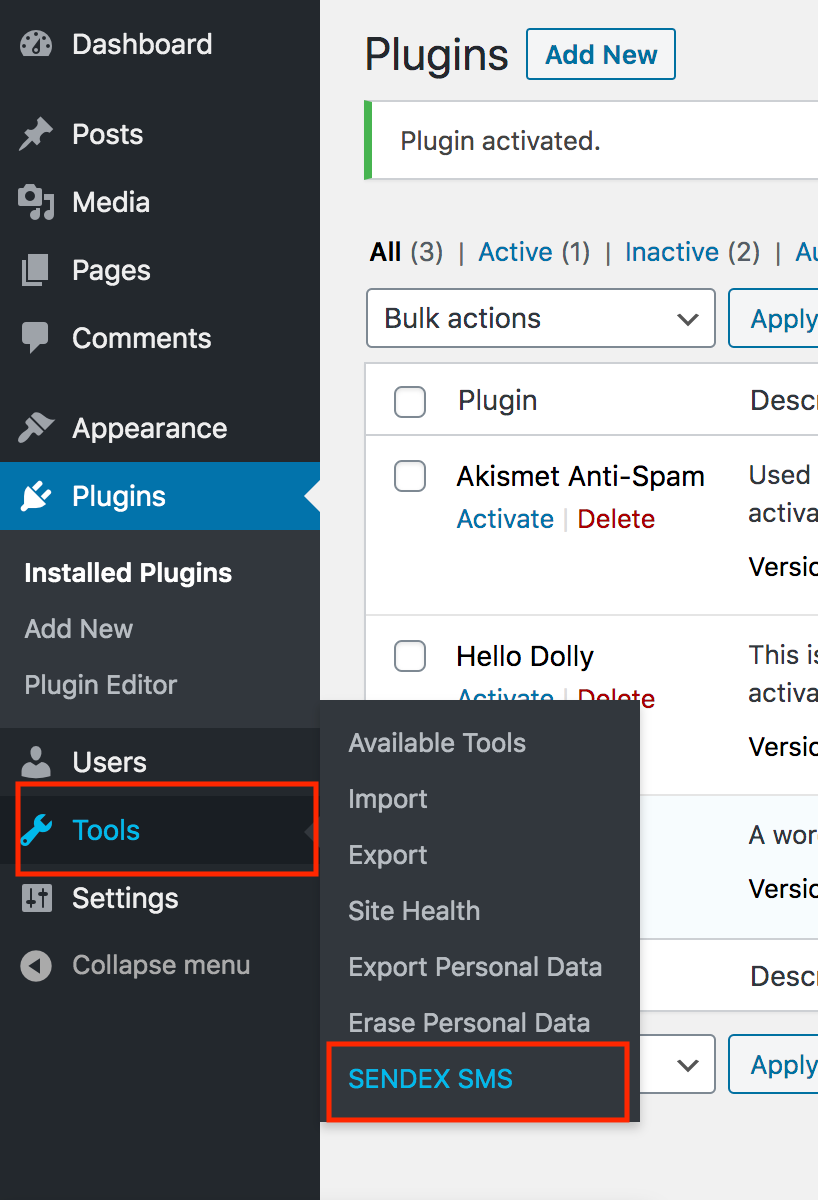
We need to add a page where we can send our SMS from. First, we will add a submenu to the tools tab in the admin area.
We’ll now create a page that renders the HTML markup for sending messages. Create a new file in the sendex directory named sendex-admin-sms-page.php. Add the below HTML markup to it:
Now, add the following methods to the Sendex class in the sendex.php file:
The add_submenu_page function adds a new page under the tools tab to display the form to send SMS. For further reference, take a look at this reference page.
The displaySendexSmsPage function includes our HTML forms for sending sms.
One more thing. In order for the displaySendexSmsPage function to work, it will need to be hooked into the WordPress admin_menu action.
At the very end of the code, outside of the Sendex class in the sendex.php file, add the following code to hook up the function that we just created into WordPress:
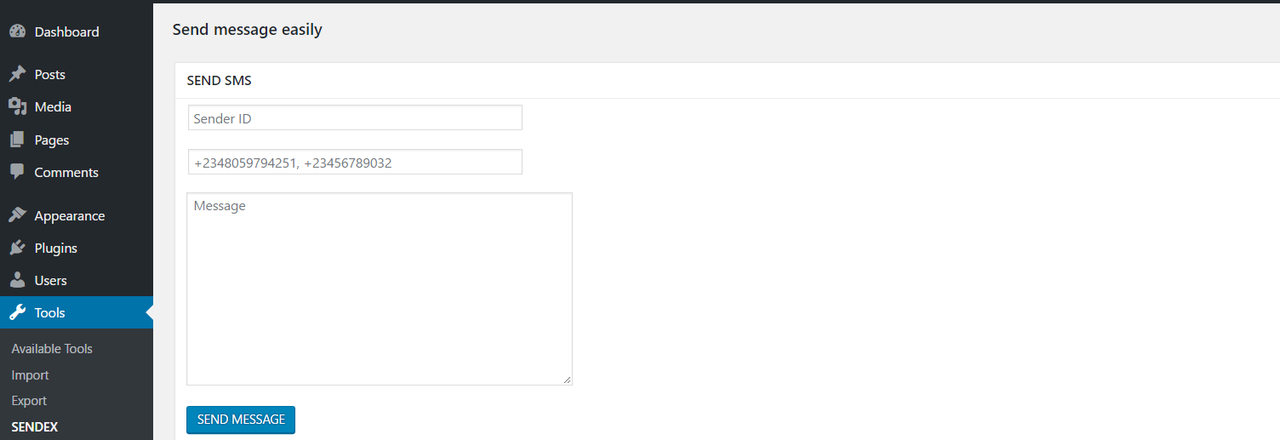
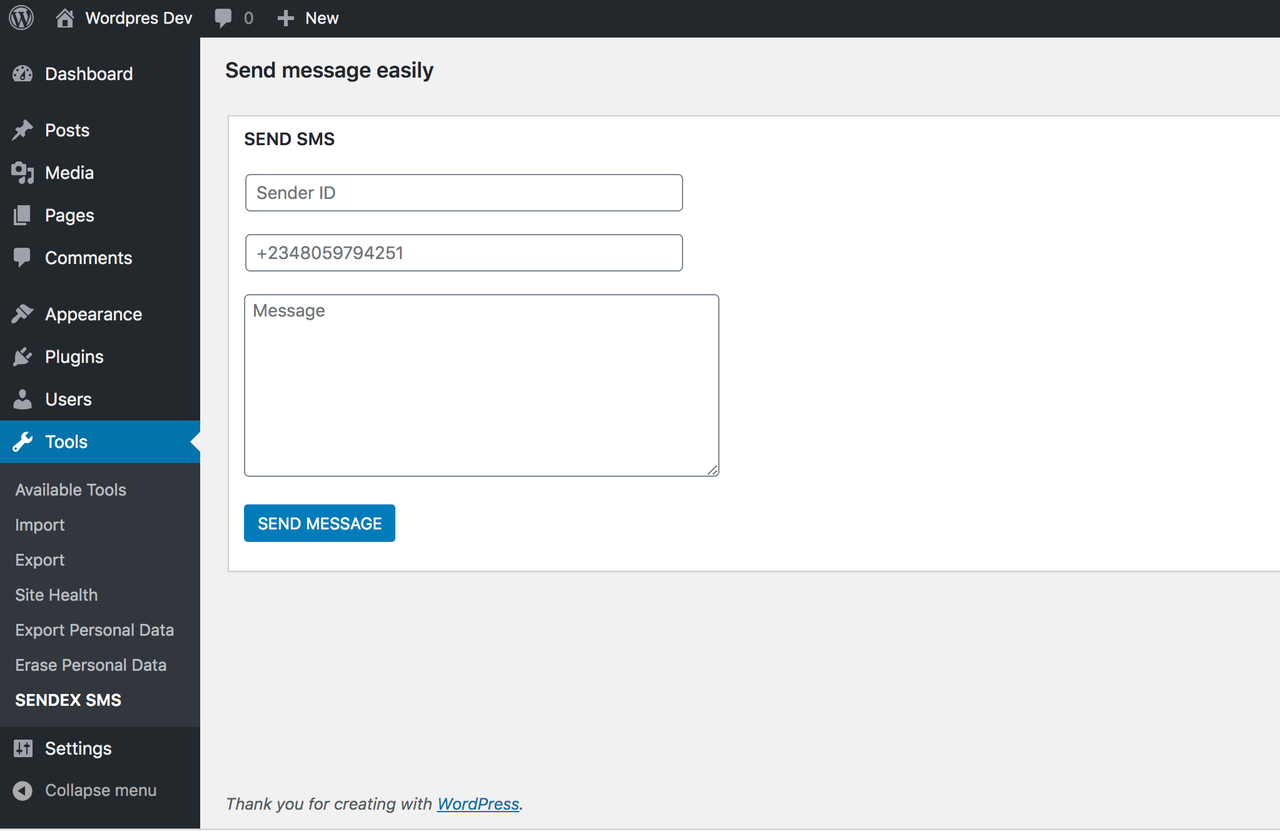
Refresh the admin page. You should now see our new submenu, SENDEX SMS, under the tools tab.
Clicking it should lead you to an empty form, ready to send a new SMS.
If you try sending SMS now, you will notice that nothing happens. We’ll be making the SMS magic happen next!
Let’s add the logic that will send our SMS. You might have noticed that our form action attribute is empty. This basically means that we are submitting to the same URL. We will add a function that checks whether our form is submitted when it processes the data.
Sending SMS
We are almost set. All that remains now is actually sending the messages.
Let’s create the method that will process the send SMS form. Add a new method named send_message to the Sendex class:
This function checks whether a REQUEST has a $_POST["send_sms_message"] and then tries to send the SMS.
The try block is for exception handling. It tries to send messages. If there’s no error, it displays a success message. If there is any error, it displays a failure message.
We also called new Client(), self::DisplayError(), and self::DisplaySuccess() which we have not defined anywhere. Let’s add those functions too.
Add these methods to the class:
The admin_notice function outputs HTML which will contain our error or success messages.
The DisplayError function calls the admin_notice to display an error message. The DisplaySuccess function calls the admin_notice to display a success message.
Next, create a new directory named twilio-lib inside the sendex directory. Then download the Twilio PHP SDK and extract it into the twilio-lib folder you just created.
Open the sendex.php file. At the top of the file, right after the plugin comment, include the Twilio client by adding the following code at the top of the file:
Here is what your file header should look like now:
Finally, let’s add a hook for sending the messages. As usual, add it to the very end of the sendex.php file:
Now open the SENDEX SMS page under the Tools tab and try sending a message. Enter the Sender ID , which is a verified Twilio number you can register on your console. Then enter the number you want to send a message to followed by the message.
Hit the SEND MESSAGE button to get the job done!
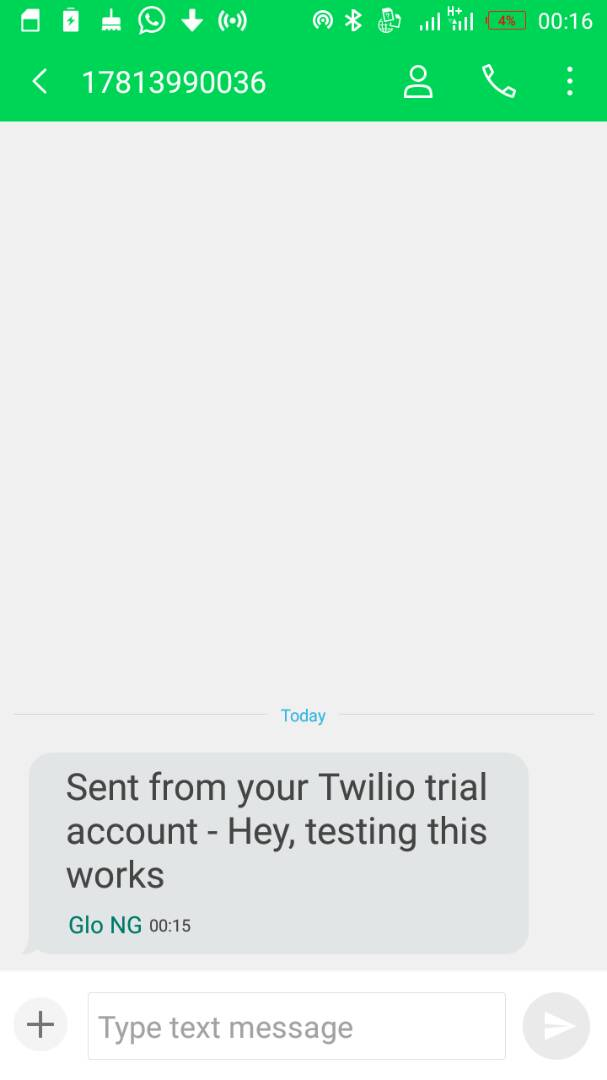
Congrats! You just sent a message from your WordPress site.
Conclusion
In this tutorial, we learned how to:
- Build WordPress plugins from a boilerplate code builder
- Create settings pages in WordPress
- Send SMS through a WordPress plugin
You can also get the complete code of this tutorial on GitHub.
I hope you enjoyed this tutorial. Thanks for reading. If you have any questions regarding this post or on WordPress, feel free to reach out on Twitter, cheers!
Gideon Onwuka is a budding Software Developer who likes writing technical articles to share his knowledge with the community. He is skilled in PHP and JavaScript. He can be reached via: dongidomed@gmail.com

Related Resources
Twilio Docs
From APIs to SDKs to sample apps
API reference documentation, SDKs, helper libraries, quickstarts, and tutorials for your language and platform.
Resource Center
The latest ebooks, industry reports, and webinars
Learn from customer engagement experts to improve your own communication.
Ahoy
Twilio's developer community hub
Best practices, code samples, and inspiration to build communications and digital engagement experiences.