Build A Group Chat With Admin Moderation In Laravel Using Twilio Programmable Chat
Time to read:
May 26, 2020
Written by
Reviewed by

In this tutorial, I’ll be showing you how to build a Laravel group chat application with admin moderation using Twilio Programmable Chat.
Prerequisites
In order to follow this tutorial, you will need the following:
- Composer and Laravel Installer (v2.3.0 and above) installed on your local machine
- Basic knowledge of the Laravel Framework
- Basic knowledge of Vue.js
- A Twilio account
What We’ll Be Building
For the purpose of this tutorial, we’ll be building a group chat, where an admin will be able to perform the following tasks:
- Ban members in a group
- Unban members in a group
- Remove members from a group
Getting Twilio Credentials
Login to your Twilio dashboard and copy both your Account SID and Auth Token.

Before you can start using the Twilio Chat API, you need to first create a chat service:
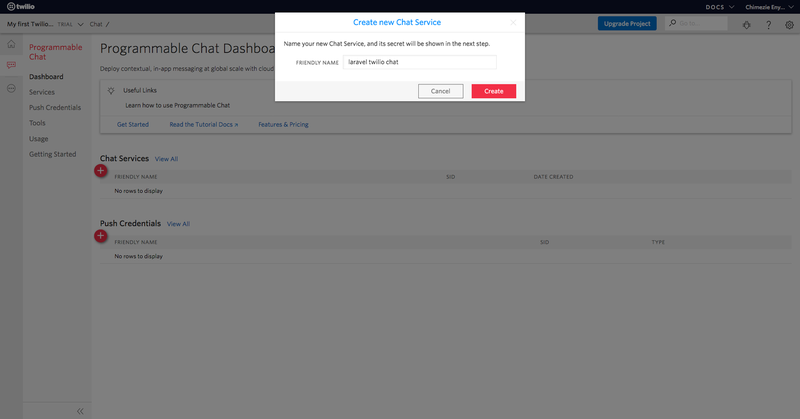
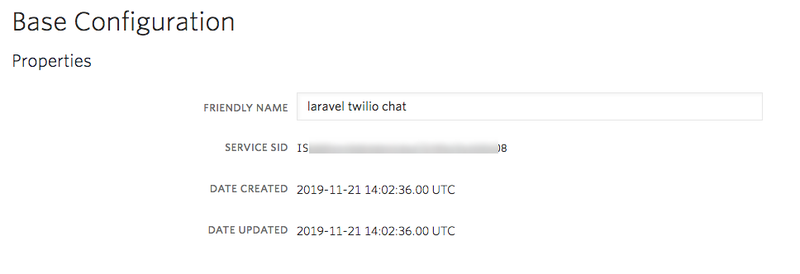
After you name and create your chat service, take note of your Service SID.
Lastly, you need to create an API key:
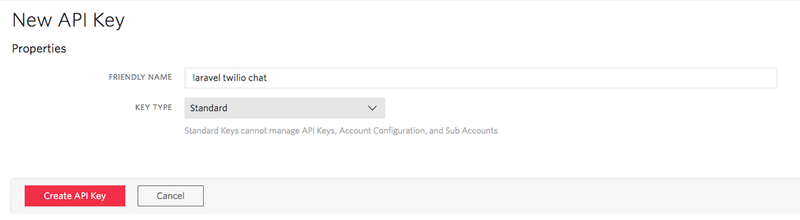
Also, take note of both your API Secret and API SID.
Getting started
To keep this tutorial concise, let’s clone a starter repo to your local machine, which you’ll build upon:
Next, generate an APP_KEY:
Create a database.sqlite file:
Then update the .env file as below:
Finally, run the migration:
With all the dependencies installed, let’s quickly review the cloned repo.
Your newly cloned repo has authentication set up by default and the User model has been updated to include a username field instead of the default name field. It also contains a ChatRoom Vue component with basic functionality of sending and displaying chat messages, as well as functionality for generating access tokens. You might want to check out my previous tutorial, which covers those in detail.
Finally, the Twilio PHP SDK and Programmable Chat JavaScript SDK have been installed as well.
Creating The Roles
Twilio Programmable Chat has an extensive and flexible roles and permission system. A chat service comes with four default roles and their respective permissions. A role can either be for a service or channel. Of these roles, two are for services while the remaining two are for channels.
For the purpose of this tutorial, we’ll be making use of only channel roles. The two default channel roles are Channel Admin and Channel Member. New channel members are assigned the Channel Member role by default.
In addition to the two channel roles, we’ll be creating a new channel role, which we’ll use to indicate banned channel members.
Navigate back to the recently created chat service , and select Roles and Permissions. Then click on the New Channel Role button to create a new channel role. Fill in the form as below with a new role, “channel banned user”:
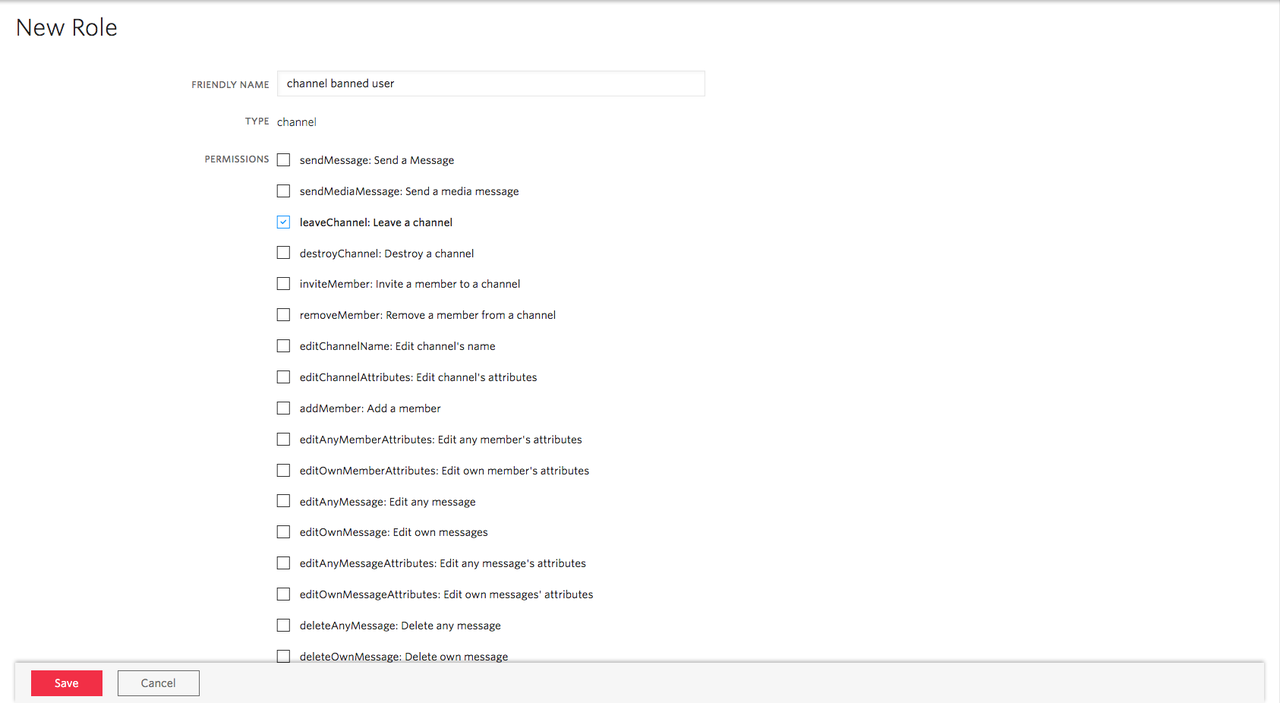
Take note of the SIDs of the three roles.
Next, add your keys/SIDs inside the project .env file:
We are prefixing some of the environment variables with MIX_ because that’s the only way Laravel Mix will make the environment variables available to be used in your Vue.js code.
Creating Channel And Admin User
With the initial set up out of the way, let’s start working on the actual group chat functionality. We’ll start by creating a new channel, which we’ll call chatroom and an admin user to administer the group. Instead of creating UIs for these tasks, we’ll wrap them inside of a console command. Run the command below to create a new console command:
This will create a new InitChannel.php file inside of app/Console/Commands. Open it up and replace its content with the following:
The code above imports the Twilio PHP SDK and the User model. Then it defines the signature of the command and gives it a description. The actual command’s implementation is inside the handle method.
First, a new user is created. Then the channel is created and the newly created user is assigned as the creator of the channel. Next, the user is added as a member of the channel and their role is changed to the channel admin by setting the user’s roleSid to that of the admin role. Lastly, the appropriate success message is returned.
Now, you can run the channel:init command to initialize your channel:
Displaying The Chatroom
Now, let’s add a way to access the chatroom. Add the code below inside web.php:
Because of the middleware, this route will only be accessible to logged in users.
Let’s create the ChannelController:
Then add the following code inside of the newly created controller at app/Http/Controllers/ChannelController.php:
Create a chatroom.blade.php file directly inside of the views directory and paste the code below into it:
We are rendering the ChatRoom component and passing the currently authenticated user as a prop.
Lastly, add a link to navigate to the chatroom page by adding a new link inside app.blade.php immediately after @else:
Joining The Chatroom
on-admin user need to be added to the channel automatically after registering. To accomplish this, we’ll make use of the registered() method, which is called once a user successfully registers. Add the following code inside of RegisterController.php:
Using the $twilio client instance, an attempt is made to fetch a channel member with the newly registered username. If the member exists, they are fetched, otherwise, the code adds the user to the channel using the user's username. Finally, the user is redirected to the chatroom page.
Displaying Group MembersNow update the ChatRoom component to display a list of members of the chatroom:
Two new data properties were added to the data object. Then inside the initializeClient() method, the members of the channel were fetched along with the currently authenticated member. Lastly, a listener was added for the memberJoined event to keep the members list updated in real-time when a new member joins the chatroom on the channel, and add them to the list.
Now, let’s update the template. Replace <!-- Members list goes here --> with the following:
If the channel has members, their identity is displayed, otherwise, the code displays an appropriate message.
Banning Members
Let’s add our first admin-only functionality, which is banning a member. Start by creating the endpoint using the snippet below inside roues/api.php:
The username/identity of the member to ban is passed to the path of the endpoint, which will be passed to the ban() method inside the MemberController.
Next, create the MemberController in your terminal using the following command:
Replace its content with the following:
The $twilio instance is defined as a class property, since we’ll be using it in multiple methods in the MemberController class. To ban a member, we will simply update the member role SID to that of the banned role SID.
Now, let’s head over to the ChatRoom component and add a button to ban a member. We’ll display the button next to a member’s identity. Add the following code just before </li>:
Once this button is clicked, a banMember() method will be called and pass the member’s identity to the method to ban. To make sure only an admin can perform this task, we verify that the currently authenticated member’s role SID equals that of the admin role SID. Also, we check that the member has not been banned already. Since we don’t want members to ban themselves, we check against that as well.
Next, let’s create the banMember method:
A new data property called isBanned is created to indicate if a member has been banned or not, which defaults to false. Also, data properties are created for your respective roles with their values fetched from environment variables. Using axios, we make a POST request to the ban member endpoint. To update the UI in real-time, we listen for the memberUpdated event being fired. Inside the event handler, instead of just setting isBanned to true (which will apply to all users), we set isBanned to true only if the member is the currently authenticated user and the member role SID is indeed same as the banned role SID.
Lastly, let’s update the .card-footer as below:
We only show the input field to send a message if the member has not been banned. Otherwise, we display an appropriate message.
Unbanning Members
We have seen how to ban a member. Let’s add a way to unban a member. As you might have guessed, this will be the complete opposite of what we have above. Again, let’s start by defining the endpoint:
Next, create the unban() method inside the MemberController:
Here, we simply updated the member’s role SID back to that of the member role SID.
Heading over to the ChatRoom component, let’s add the button to unban a member. We’ll add it immediately after the ban button:
Once clicked, the unbanMember() method will be called.
Next, let’s create the unbanMember method in ChatRoom.vue:
A POST request is made to the /unban member endpoint. Just as we did with banning a member, inside the event handler of the memberUpdated event, we set isBanned to false only if the member is the currently authenticated user and the member role SID is indeed the same as the member role SID.
Removing Members From Group
The last admin functionality our chatroom will have is the ability to remove members from the group. For this, we’ll be making use of the Twilio Programmable Chat JavaScript SDK. Let’s start by adding the button to remove a member from the group. We’ll add it below the previous buttons:
Once the button is clicked, a removeMember() method will be called. This method accepts the identity of the member to be removed.
Let’s create the method:
We call the removeMember method on the channel passing to it the identity of the member to be removed. To update the UI in real-time, we listen for the memberLeft event. Inside the event handler, we filter out the member that was removed from the members list. Lastly, if the removed member is the currently authenticated user, we simply redirect the user to the home route.
Before we wrap up this tutorial, let’s make sure only members can access the chatroom. We can achieve that using a middleware:
Then open up the newly created file at app/Http/Middleware/MemberOnly.php and replace its content with the following:
If the user is a member of the channel, we allow the user to access the chatroom, otherwise, we redirect the user to the /home route.
Next, we need to register the middleware as a route middleware in app/Http/Kernel:
Let’s put the middleware to use. Update the /chatroom route inside web.php as shown below:
Now, not only is a user required to be authenticated to access the chatroom but also must be a member of the chatroom.
Testing Our Application
Let’s test what we’ve been building so far. First, let’s make sure our app is running:
Then compile the JavaScript:
Now, open two browser windows. In the first, register and then login as the admin user and in the second, login as a normal user and try performing each of the tasks.
Conclusion
In this tutorial, we learned how to build a group chat room with admin moderation in Laravel using Twilio Programmable Chat. With the flexibility of Twilio Programmable Chat roles and permissions, we can build more advanced admin moderation functionality. To learn more about roles and permissions in Twilio Programmable Chat, check out the docs.
You can find the complete source for this tutorial on GitHub.
Chimezie Enyinnaya is a software developer and instructor. You can learn more about him here:
- Website: https://adonismastery.com
- Twitter: https://twitter.com/ammezie
- Email: meziemichael@gmail.com
- GitHub: https://github.com/ammezie

Related Resources
Twilio Docs
From APIs to SDKs to sample apps
API reference documentation, SDKs, helper libraries, quickstarts, and tutorials for your language and platform.
Resource Center
The latest ebooks, industry reports, and webinars
Learn from customer engagement experts to improve your own communication.
Ahoy
Twilio's developer community hub
Best practices, code samples, and inspiration to build communications and digital engagement experiences.