How to Build an SMS Receipt Scanner with Twilio Functions
Time to read: 7 minutes
December 12, 2022
Written by
Reviewed by

With the holiday season quickly approaching, the hunt for gift shopping begins! For the December theme of Gift of Code, what better way to stay on budget when out buying gifts for your friends and family than utilizing a receipt scanner to parse spending data? This can be implemented with Optical character recognition (OCR); it’s one of the earliest adopted and widely used computer vision/machine learning model that allows for the conversion of image text into machine-readable text. OCR functionality is commonly used in banking, and you may have used it yourself by depositing a check by taking photos of it in your bank app.
With the power of Twilio Functions, we can extend this functionality to MMS messaging and be able to scan a receipt and extract information from it simply by sending a photo of it to your Twilio phone number. To find out how to do this, read on!
Prerequisites
In order for a successful scanning of your receipts, here is what you’ll need:
- A Twilio account which will be used to create a Twilio Function
- A Twilio phone number to send photos of receipts
- A free OCR.space account to acquire a key to use their API
Setup
In this section you’ll set up the Twilio Function Service that’ll scan incoming receipts to your Twilio number.
Creating a Twilio Service
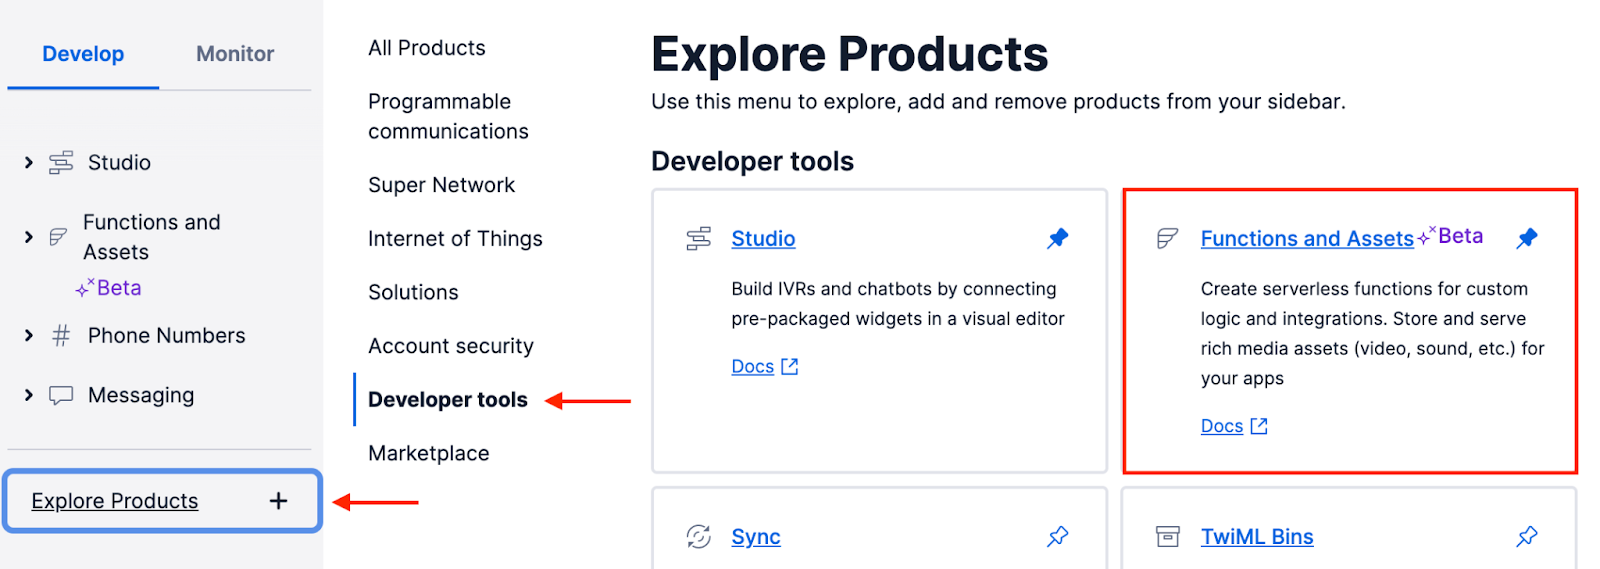
If you have never used the Twilio Console before, then you may have to search for Twilio Functions in order to create a Service. When on the dashboard of your Twilio Console, in the left sidebar click the text that says Explore Products +. Scroll down until you reach a section labeled Developer tools, or click Developer tools text in the secondary sidebar that shows up to the right of the far-left one.
Here, you will see a variety of products that are useful for developers working with Twilio, but the one used in this tutorial is the one labeled Functions and Assets. To pin this product to your far-left sidebar, click the small pin icon in the top right corner of the tile. Once it is pinned, click the Functions and Assets link in the tile itself.
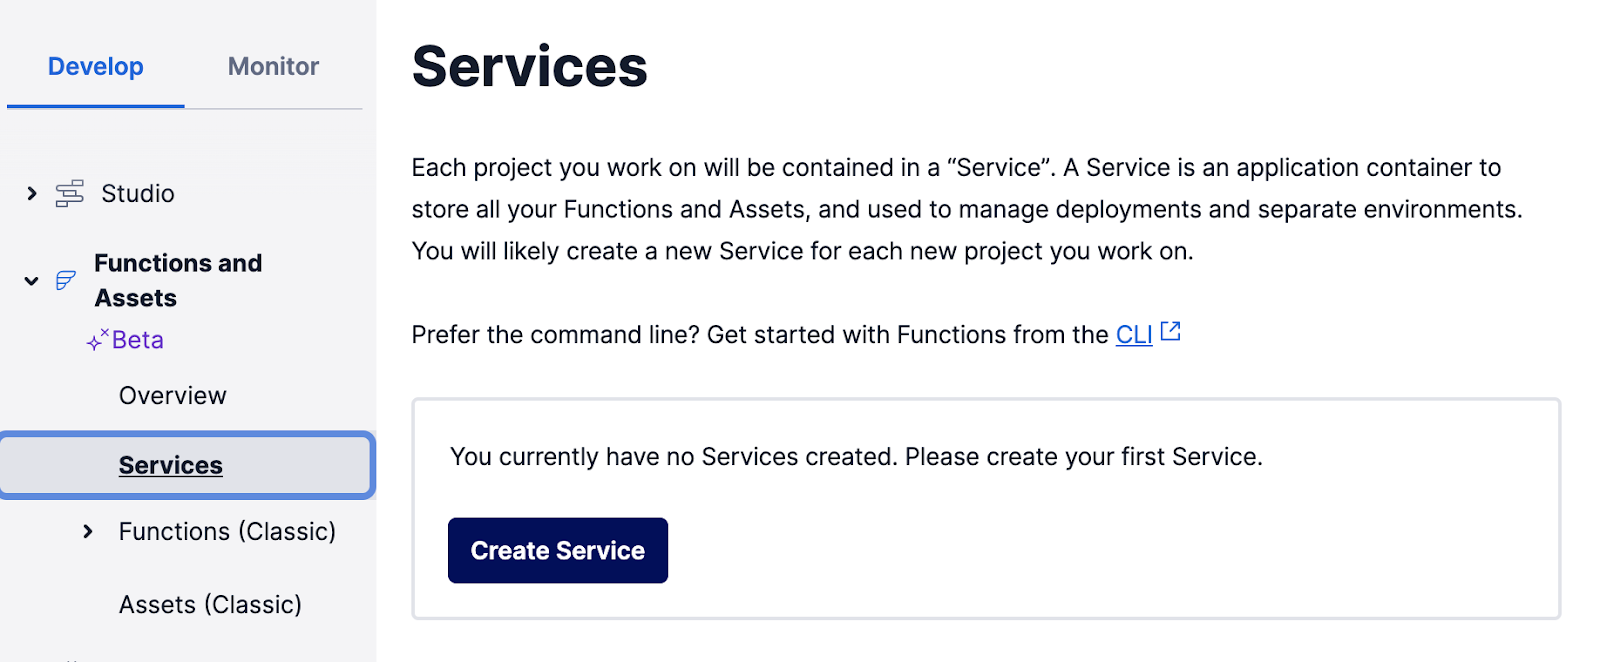
Clicking this link will take you to the Functions Overview page. Again in the far-left sidebar, click the text that says Services and then click the blue button that says Create Service.
A popup will appear asking to name your service. Enter “receipt-scanner” into the textbox and click the blue Next button. After the button is clicked, Twilio will redirect you to a Twilio Functions environment, and this is where you’ll be working for the rest of the tutorial.
Configure environment variables and dependencies
In your Twilio Functions environment, on the left of the editor you will see three labeled sections: Functions, Assets, and Settings. Under Settings, there are two options: Environment Variables and Dependencies. Click on Environment Variables first, and a new page will open in the main editor of the Function environment.
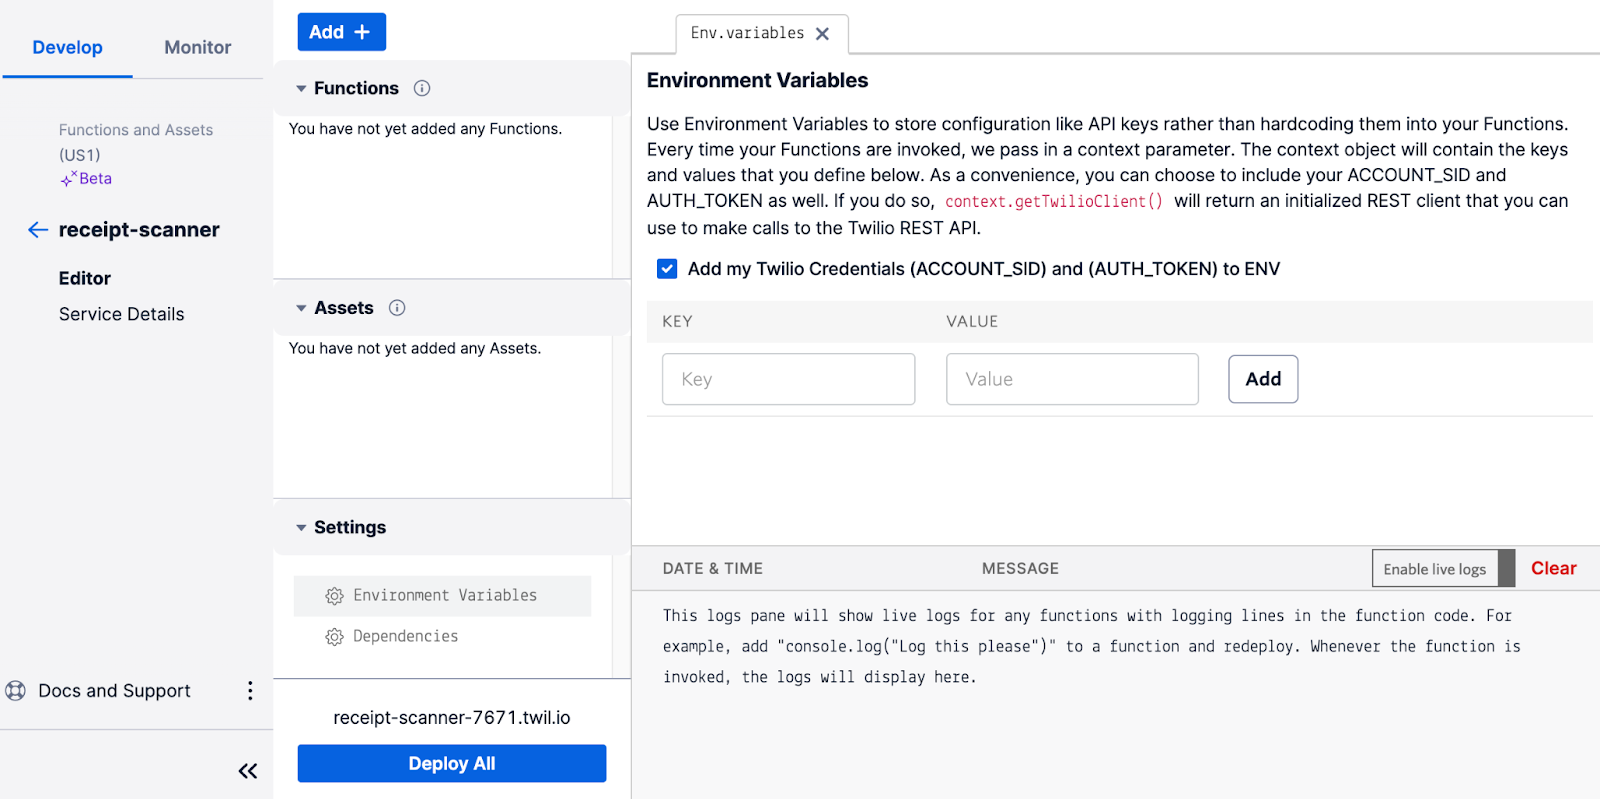
Under the KEY label, enter OCR_KEY into the textbox and paste the API key you acquired from setting up your OCRSpace account earlier into the textbox under the VALUE label. Click the white Add button and it will show up underneath the boxes. Your OCR API key can now be used in your Function.
Next, click on Dependencies, and a new tab will open in the editor that looks similar to last. Here is where you install dependencies you intend to use in your function, and for this project the OCRSpace Node.js API wrapper which will make the usage of the API much more streamlined.
Under the MODULE label, paste ocr-space-api-wrapper into the textbox. Then, under VERSION, simply enter an asterisk * to indicate that you would like to install the latest version.
Create the scanner Function and import dependencies
The final setup step will be to create the /scanner function which will be used to scan an incoming receipt and parse any important data.
Beneath the Functions label, click on the three dots next to the default /welcome function, then click Rename and rename it to /scanner.
Change the function’s default Protected status to Public by clicking the lock icon next to the path name and selecting Public in the dropdown menu. This is so we can test the function in the browser.
In the editor area that appears when the function path is clicked on, replace all boilerplate code with the following:
Click the Save button underneath the editor to save this function.
Now the setup is complete, and you’ll proceed to start coding your receipt scanner!
Scan an incoming receipt with OCR
Before getting into parsing the receipt, the first step will be to scan one and see what comes back. You can either use your own receipt image link or use this link of a receipt that I uploaded to Imgur, which was part of a free pack of receipt images intended for use in training machine learning models.
Between the ocrKey variable definition and the return callback(null); statement in your /scanner function, paste the following code.
Save the function by clicking the blue Save button and then click the blue Deploy All button underneath the Settings area. It takes a few moments to build.
Before testing this function, make sure that you enable live logs by clicking on the Live logs off toggle to switch it to the “on” position.
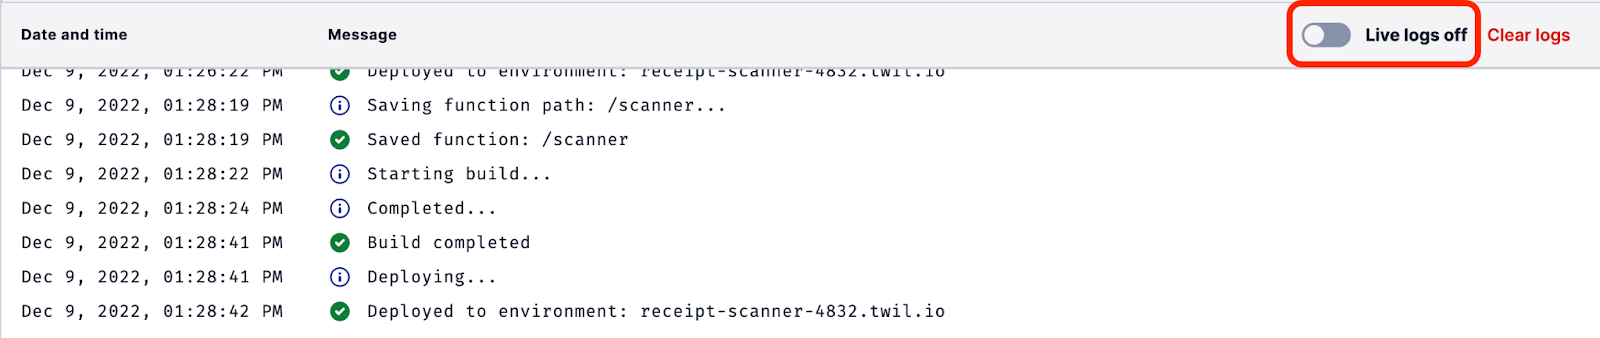
Once live logs are enabled, click the blue Copy URL text above the live logs button and paste it into a new tab of your browser. Since the function is public, this will call the function directly and use the OCRSpace API to scan the receipt.
If successful, the console.log statements used in the code will print the result of the API call first and then print the parsed results, all the image text converted to one big string, in the logs area below the editor.
Parse the results of the receipt scan
Parsing data from a receipt is completely dependent on your use case. For this tutorial, the only piece of data that we’re interested in is the total amount paid. However, this method can be used to parse for anything including dates, tax, individual items, location, and anything else you can think of extracting from a receipt.
Here is the parsing function that will be used to parse the total amount paid from a receipt. Paste it right above the exports.handler function but below the ocrSpace import statement.
This function can be edited to encompass many different ways of parsing the same information. It accepts an array in which each element represents a new line in the receipt, and it will look only at lines where the words “total”, “balance”, or “due” are detected. If detected, the string element will replace all non-numeric characters (except decimal points/periods) with an empty string before adding it to a results array that was declared at the start of the function.
This results array is then fed into a Math.max() function which will only return the largest element in the array. This is to ensure that values like “subtotal” are discarded and only the largest value is returned.
Test the parsing function
Now that the parsing function is in place, go back into the exports.handler function and replace the console.log(parsedContents); statement below the parsedContents variable definition with the following code.
Save your function and deploy it. Once it is deployed, copy the URL once again and paste it in the browser to test it. Ensure that live logs are still toggled on so you can see the results.
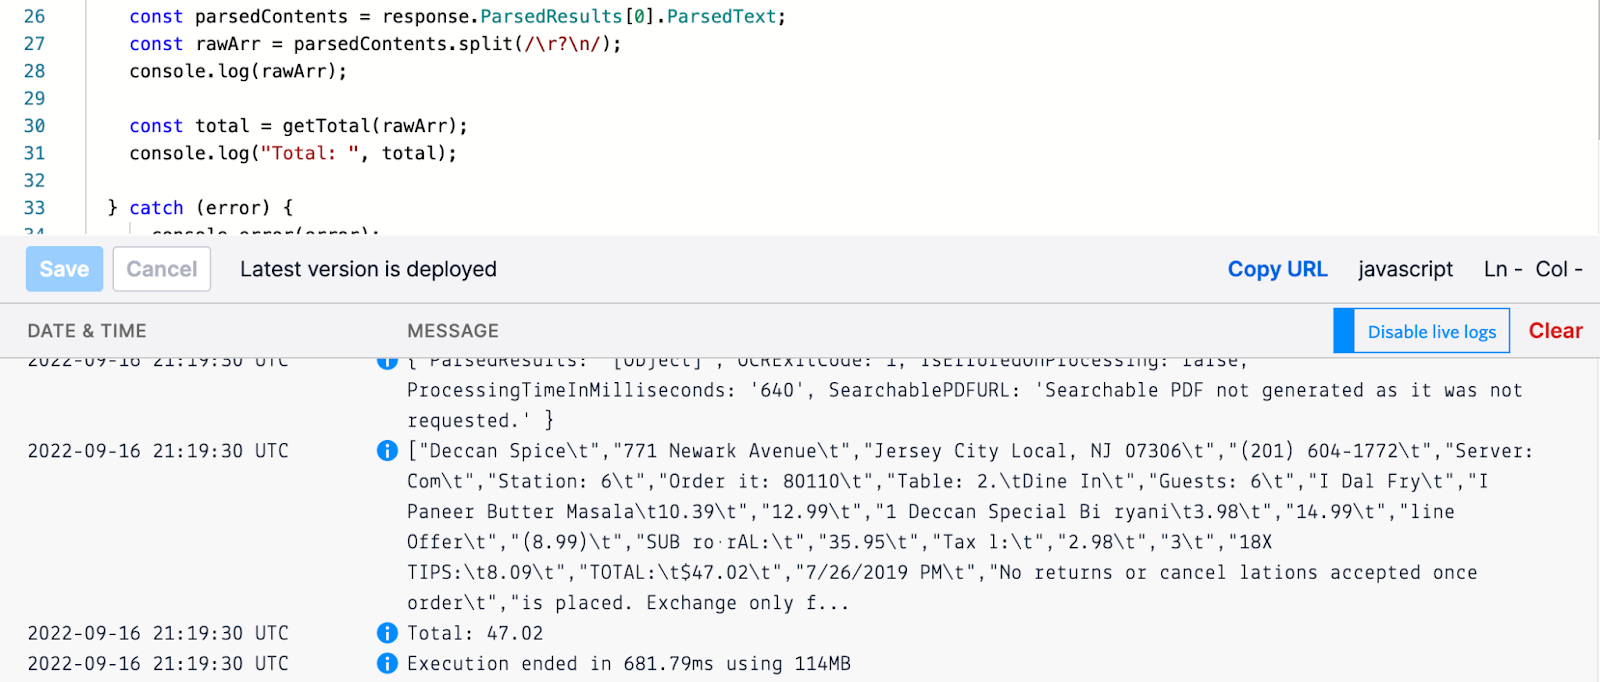
As you can see in the above screenshot, it looks like the parser function has successfully extracted the total amount in the receipt image!
Handle an OCR scan failure
Although OCRSpace has a powerful OCR API, it is still only a free and open source option. As such, even with the clearest receipt images, it may still fail to read certain text properly and the response will indicate the failure. You can catch this with the following code snippet pasted directly below the console.log(response); statement in the exports.handler function.
This if-statement will catch any OCRExitCode that is not successful, and print the error message to the screen.
Edit your scanner function to accept an MMS message
Now that all the base functionality is complete, it is time to get your function ready for parsing incoming MMS messages! In exports.handler, between the first ocrKey variable definition and the try statement, replace the current const imgUrl variable definition with the following two lines.
Then, right below where the total is printed just before the catch statement, paste the following.
As the last step, go to the very last callback function in exports.handler after the try/catch block and replace it with the following.
Save and deploy this function, and proceed to the final step!
Connect your Twilio phone number to parse MMS messages
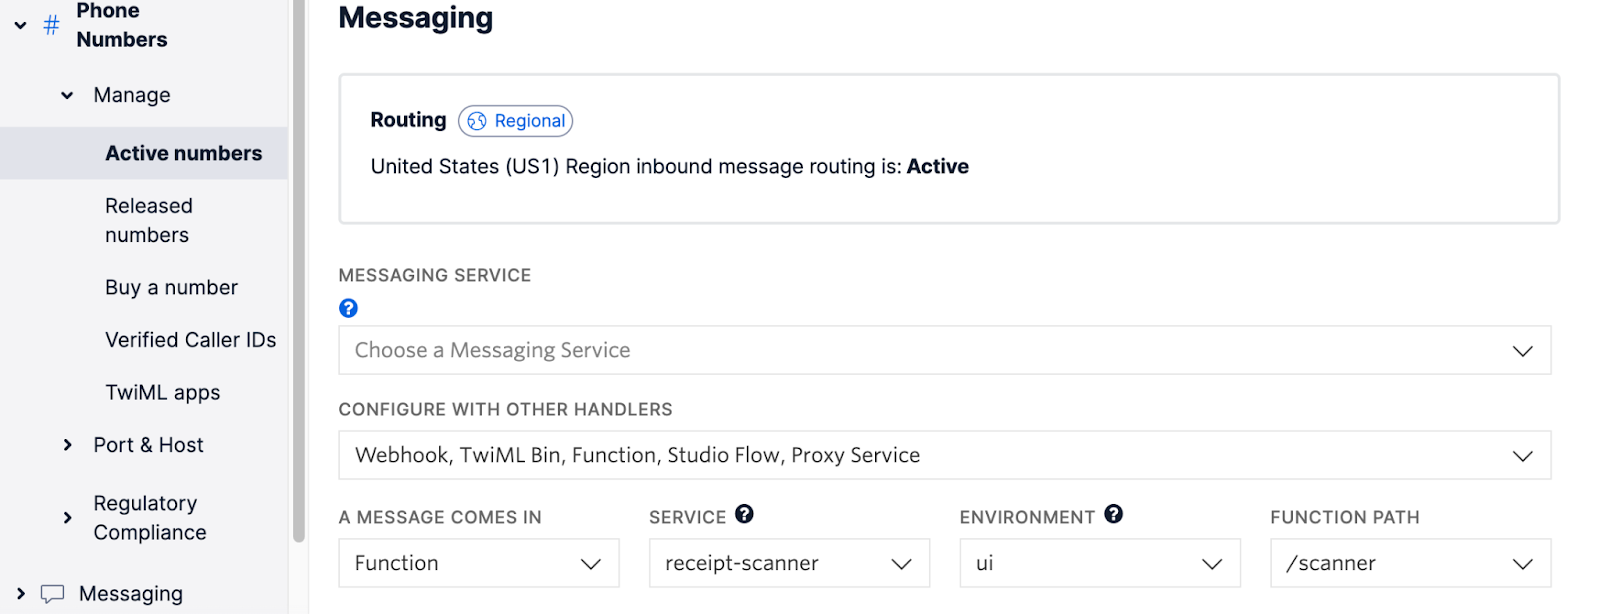
Go back to your Twilio Console dashboard and navigate to your active phone numbers. Select the number you would like to use for this project and scroll down to Messaging. Configure the following settings.
- Under A MESSAGE COMES IN, select “Function”
- Under SERVICE, select “receipt-scanner”
- Under ENVIRONMENT, select “ui”
- Lastly, under FUNCTION PATH, select “/scanner”
Here is a preview of how your settings should look.
Once these settings are in place, click the blue Save button below.
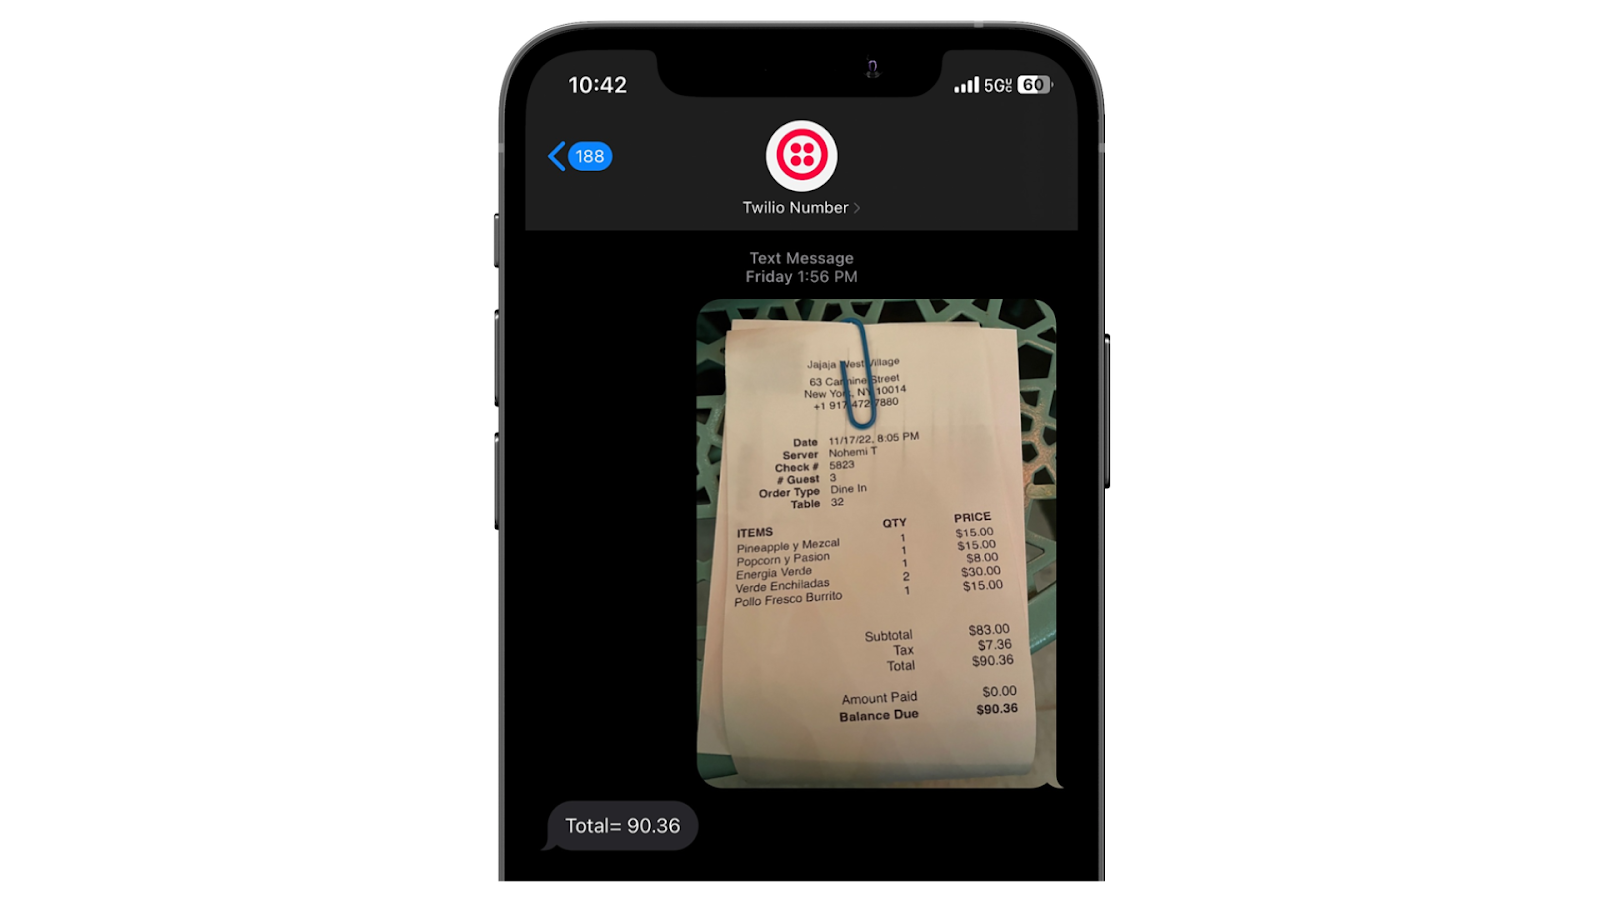
Send a receipt to your Twilio number
Now is the moment of truth, let’s find out if the receipt scanner works! If you do not have a receipt handy on you to take a picture of, either downloading or screenshotting one found online should work just fine.

As you can see from the screenshot above, the parsing was successful and I received back the correct total amount for this receipt!
Debugging
If your function fails to return the proper total, or does not send anything back at all, it may mean that the receipt was not clear enough for the OCR API to parse. Try with a few different images and remember to check the live logs in the function for clues. Checking Error Logs in your Twilio Console will also provide helpful information when nothing else seems to be working. Also, be sure to compare your code to the companion repo that contains working code for this project.
Now you can scan receipts sent to your Twilio number!
You have all the tools needed to parse receipts or any image with text sent via MMS to your Twilio phone number. What will you do with this extracted information? You could build an expense tool or budget app, or something else entirely with a completely different machine learning API like image recognition or object identification! The possibilities are endless, and with how flexible Twilio Functions are, you could integrate with many other services to make something truly robust.
Hopefully you enjoyed this tutorial and if you did, be sure to check out other tutorials on the Twilio blog where you can find inspiration for your next project. Happy coding!
Hayden Powers is a web developer and computer science student at the University of California, Irvine. She enjoys enthusing over creative ideas and endeavors, and hopes you will connect with her on LinkedIn to talk about yours.

Related Resources
Twilio Docs
From APIs to SDKs to sample apps
API reference documentation, SDKs, helper libraries, quickstarts, and tutorials for your language and platform.
Resource Center
The latest ebooks, industry reports, and webinars
Learn from customer engagement experts to improve your own communication.
Ahoy
Twilio's developer community hub
Best practices, code samples, and inspiration to build communications and digital engagement experiences.