How to Create a Laravel Notification Channel for WhatsApp with Twilio
Time to read:
November 22, 2019
Written by
Laravel makes it easy to send notifications in your PHP application. Out of the box it supports various channels such as mail, SMS, Slack, and database. What if we want to send notifications to a different channel aside these ones, say WhatsApp? In this tutorial, I’ll be showing you how to implement WhatsApp notifications in your Laravel app using the Twilio API for WhatsApp.
Tools Needed to Complete This Tutorial
In order to follow this tutorial, you will need the following:
- Composer and Laravel Installer installed on your local machine
- Basic knowledge of the Laravel Framework
- A Twilio account
What We’ll Be Building
For the purpose of this tutorial, we’ll be using the concept of an ordering system. For the sake of brevity, we won’t build a fully-featured ordering system, just the part where the system sends out notifications.
Creating a New Laravel Application
Let’s get started by creating a new Laravel application. We’ll be using the Laravel installer mentioned in the prerequisites. Run the following command in your console:
Once the application is created, we need to install the NPM dependencies (because Bootstrap comes pre-packed as an NPM dependency):
Once the dependencies are installed, run:
Adding Authentication
Next, let’s add authentication. Starting from Laravel 6, the authentication scaffolding has been extracted into a separate package, so we need to install it with Composer:
Then we can run to get the authentication scaffolding:
Since WhatsApp makes use of phone numbers, we need a way to collect users phone numbers in our application. One way to achieve this, is to collect users phone numbers at the point of registration. Let’s update the registration form to include the phone number field. Add the following code inside register.blade.php immediately after the email address field:
Note: User’s phone numbers must be in E.164 format.

Next, let’s update both the validator() and create() method of the RegisterController as shown below:
We added some validation rules for the phone number field and persist the phone number to the database along with the other data that’s being collected.
Lastly, we need to add the phone number field to the list of fields that can be mass assigned inside the User model:
Creating the Models and Migrations
We need to also update the users' table migration file that comes with the default Laravel application by adding a new field for the phone number:
Next, let’s create an Order model and its corresponding migration file:
Then, let’s update the migration file as below:
To keep things simple, the orders table will just contain the fields: id, name, amount, and the timestamps.
Before we run the migration let’s make sure we have our database set up. To keep things simple and straightforward, we’ll be making use of SQLite for our database. Update the .env file as below:
By default, Laravel will look for a database.sqlite file inside the database directory. To create it:
Now, we can run the migration:
Implementing Order Placement
Like I said earlier, we won’t be building a fully-featured ordering system. We’ll only be implementing a mock order. For that, we need to create a factory class for randomly generating fake data. Run the command below:
This will create a new OrderFactory.php file inside the database/factories directory. Replace the content of the file with the following code:
Next, let’s create the UI for our order placement. We’ll add it inside home.blade.php immediately below the “You're logged in!” text:
Nothing fancy. Just a simple form with a button, which will submit to a named route called order.

Next, we need to create the route:
Lastly, let’s create the OrderController the route points to:
Then we’ll add the following code in it:
Here we are using the factory we created earlier to create a new order upon submission. Then we redirect back to the page with a success status message.
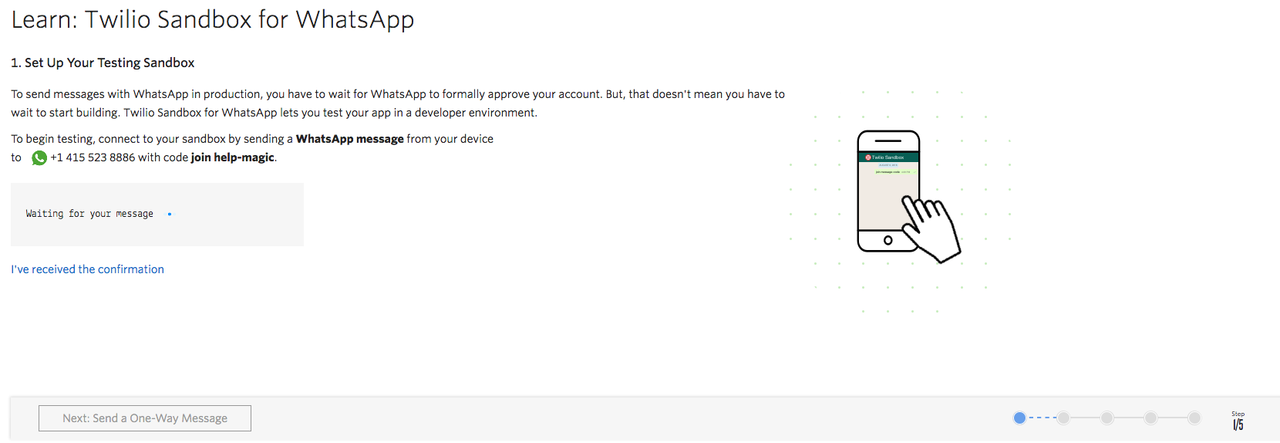
Setting Up Twilio Sandbox for WhatsApp
To send messages with WhatsApp in production, we have to wait for WhatsApp to formally approve our account. But, that doesn't mean we have to wait to start building. With Twilio Sandbox for WhatsApp, we can test our app in a developer environment. To make use of the Sandbox we need to first connect to it by sending a WhatsApp message from our device to a number that will be made available to us. To get started, follow the instructions on the Learn tab. You’ll be able to send any message after your account is connected.
Once the sandbox is set up grab your Twilio credentials. We will use these for setting up access to the Twilio PHP SDK. Head over to your Twilio dashboard and copy both your ACCOUNT SID and AUTH TOKEN. Take note of the phone number that is assigned to your sandbox as that’s the number you’ll be sending your notifications from.
Next, let’s create environment variables to hold these details inside .env:
Create a dedicated service configuration for Twilio. Add the code below inside config/services.php:
Overview of Sending Notifications with Twilio API for WhatsApp
Before we dive into sending notifications with the Twilio API for WhatsApp, let’s take a moment to understand how it works. There are two types of messages that can be sent using the Twilio API for WhatsApp: one-way messaging and two-way messaging. Sending notifications falls under one-way messaging and sending conversational messages falls under two-way messaging. To be able to send notification messages, we need to make use of what is called the WhatsApp message template.
A WhatsApp message template is a message format that can be reused to message users once they have opted-in and given your app permission to send them messages. Template messages are used to help maintain high-quality content and avoid spam in the ecosystem.
Template messages use placeholder values that can be replaced with dynamic content when the message is sent. Out of the box, the Twilio WhatsApp sandbox comes with three pre-provisioned templates:
- Your {{1}} code is {{2}}
- Your {{1}} appointment is coming up on {{2}}
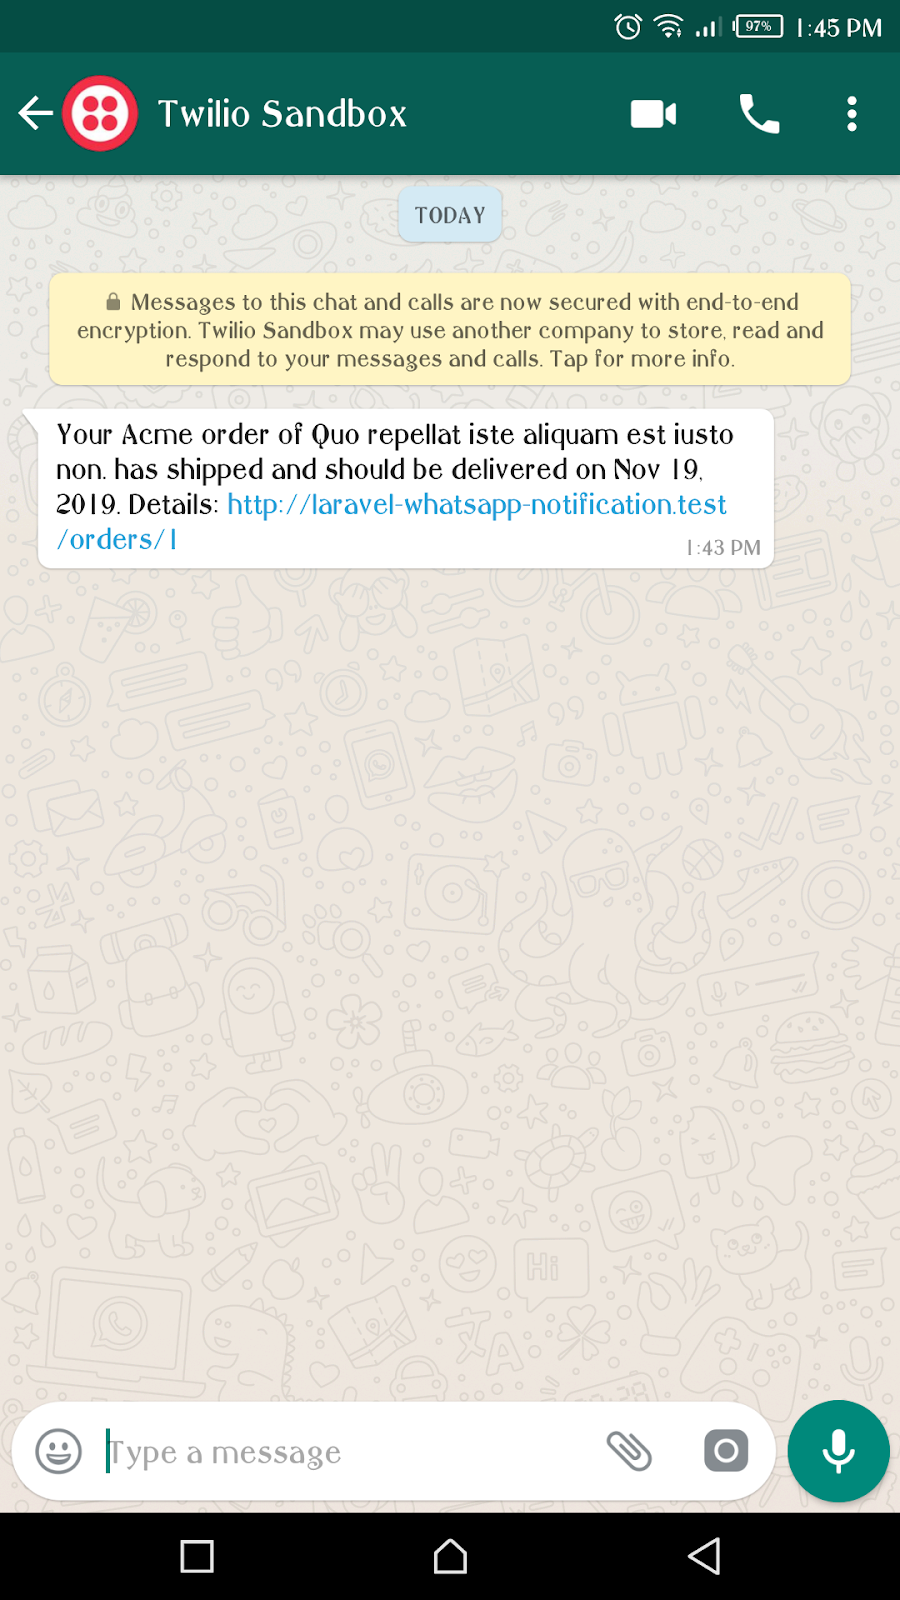
- Your {{1}} order of {{2}} has shipped and should be delivered on {{3}}. Details : {{4}}
For the purpose of this tutorial, we’ll be making use of the third template. To learn more and templates and how you can create your own, check out the docs.
Creating a Custom Notification Channel
As it stands, our users can place an order. Now, we need to send them a notification to let them know that their order has been processed. Since we want to send this notification through WhatsApp, we need to create a custom notification channel in Laravel. For this, we’ll be needing two files: WhatsAppChannel.php and WhatsAppMessage.php. The former will contain the implementation for sending a message (notification), while the latter will contain the API for composing a message.
Let’s start by creating a new directory called Channels in our app folder. Inside it, we’ll create another directory called Messages. Inside Messages we’ll create WhatsAppMessage.php and paste the following code in it:
This is a simple class that contains a $content property and setter (content method) for setting the value of the content property. Whatever data is passed to the method will be the content of the notification we’ll be sending.
Next, let’s create the WhatsAppChannel.php file directly inside the Channels directory and paste the following code in it:
Every notification channel class must have a send() method, which will contain the actual implementation for sending the notification. It must accept two arguments: a $notifiable and a $notification. The former is a trait that any model sending notifications needs to use, while the latter is an instance of the actual notification (which we’ll create shortly).
Using the notification instance, we call the toWhatsApp() method (which we’ll create later on) and pass it to $notifiable. Here $message will be an instance of WhatsAppMessage and will contain the notification we want to send.
To get the user’s phone number we want to send the notification to, we call a routeNotificationFor() method on the $notification trait. Under the hood, Laravel will look for a routeNotificationForWhatsApp() method on the model using the trait.
Lastly, we create a new instance of the Twilio PHP SDK which we use to send the notification. Notice we have to prefix both the phone numbers (to and from) with WhatsApp.
Since we are making use of the Twilio PHP SDK, we need to make sure we have it installed:
Remember I said we need to have a routeNotificationForWhatsApp() method on the model using the Notifiable trait? In our case, that is the User model:
We are simply returning the phone number field, since that is the field holding our users’ phone numbers.
Now, we can create a notification that will make use of our custom notification channel:
This will create a new OrderProcessed.php file inside app/Notifications. Open it up and replace it content with:
Inside the via() method, we are telling Laravel that we want to make use of our custom channel. Inside the toWhatsApp() method is where we will compose the message to send. We create and return a new instance of WhatsAppMessage while setting the content of the notification by calling the content() method. Notice we are making use of the WhatsApp message template we talked about earlier.
Finally, let’s update the store method of the OrderController.php to include the code that will fire the notification:
Testing Our Application
Now, let’s test what we’ve been building so far. First, let’s make sure our app is running:
Create an account with the same phone number you added to your Sandbox. You should get a message similar to the one below once you click the “Place Order” button.
Conclusion
In this tutorial, we have learned how to send notifications in a Laravel application through WhatsApp. You are not limited to sending just notifications, as you can send conversational messages to WhatsApp using the Twilio API for WhatsApp.
You can find the complete source for this tutorial on GitHub.
Chimezie Enyinnaya is a Software Developer and Instructor
Website: https://tutstack.io
Twitter: https://twitter.com/ammezie
Email: meziemichael@gmail.com
GitHub: https://github.com/ammezie

Related Resources
Twilio Docs
From APIs to SDKs to sample apps
API reference documentation, SDKs, helper libraries, quickstarts, and tutorials for your language and platform.
Resource Center
The latest ebooks, industry reports, and webinars
Learn from customer engagement experts to improve your own communication.
Ahoy
Twilio's developer community hub
Best practices, code samples, and inspiration to build communications and digital engagement experiences.