Create Transactional Emails you can Reply to in PHP with Twilio SendGrid Inbound Parse
Time to read:
November 13, 2019
Written by
This post is part of Twilio’s archive and may contain outdated information. We’re always building something new, so be sure to check out our latest posts for the most up-to-date insights.

You’ve probably received many emails sent in the format noreply@somedomain.com. The irony of no-reply emails are that they often contain information that we would like to respond to. It would be great for businesses sending transactional emails to empower customers to respond to these emails.
Allowing replies to transactional emails is now possible with Twilio SendGrid. This tutorial will teach you how to use Twilio SendGrid Inbound Parse to place a second order to a mock e-commerce store, by replying to a transactional email.
Tutorial Requirements
This tutorial will require the following dependencies:
- Global installation of Composer
- Global installation of ngrok
- Twilio Account
- SendGrid Account
- A domain name
Create a Development Environment
From your console window, create a new project directory. Add three files to the newly created directory:
- Webhook.php
- Email.php
- .env
Install Dependencies
This project will require two dependencies:
- PHP Dotenv, which makes it possible for us to load environment variables from the env file.
- SendGrid PHP SDK, which enables us to work with the SendGrid API.
Add them to your project by running the following command:
Create a Twilio SendGrid API Key
Navigate to your SendGrid dashboard and create a new API key with full access. Copy the API Key and save it in the .env file we created earlier.
Set Up the Code for Sending an Email
This project will need to send out an email so that you can test inbound responses. In Email.php copy the following code:
Note: The setFrom field contains a subdomain that I set up for the inbound parse. Instructions to set up your domain are in the next step.. Make sure you update it with your domain or subdomain.
Set Up the Inbound Parse Webhook
The inbound parse webhook processes emails from a domain or subdomain. The content of the email is parsed and posted to a URL of your choice. You will create a URL for your email content to be sent to. Using ngrok, make Webhook.php accessible through a public URL.
From the console window run the command:
In a new console run the command:
You should see a URL similar to this:
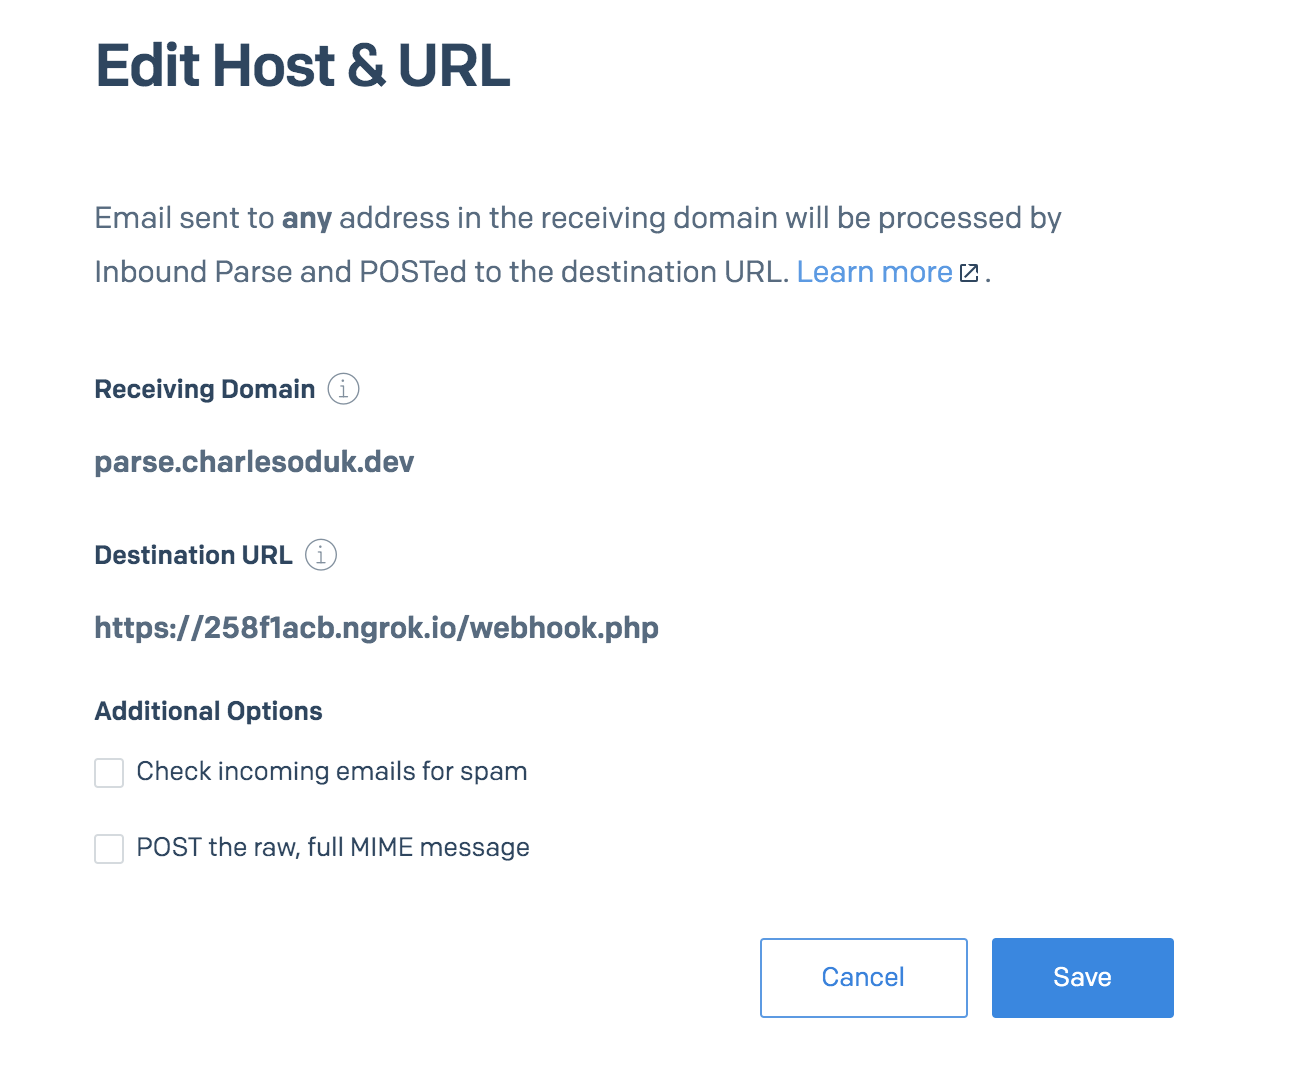
To set up your domain follow the instructions in this article. The destination URL will use the ngrok URL you just created, followed by /webhook.php. This is what mine looks like:
Here’s a screenshot of my inbound parse webhook:
Add Inbound Parse Logic to Webhook.php
Now that the inbound parse webhook set up, add the code that handles the content that will be sent to it in the Webhook.php.
Testing
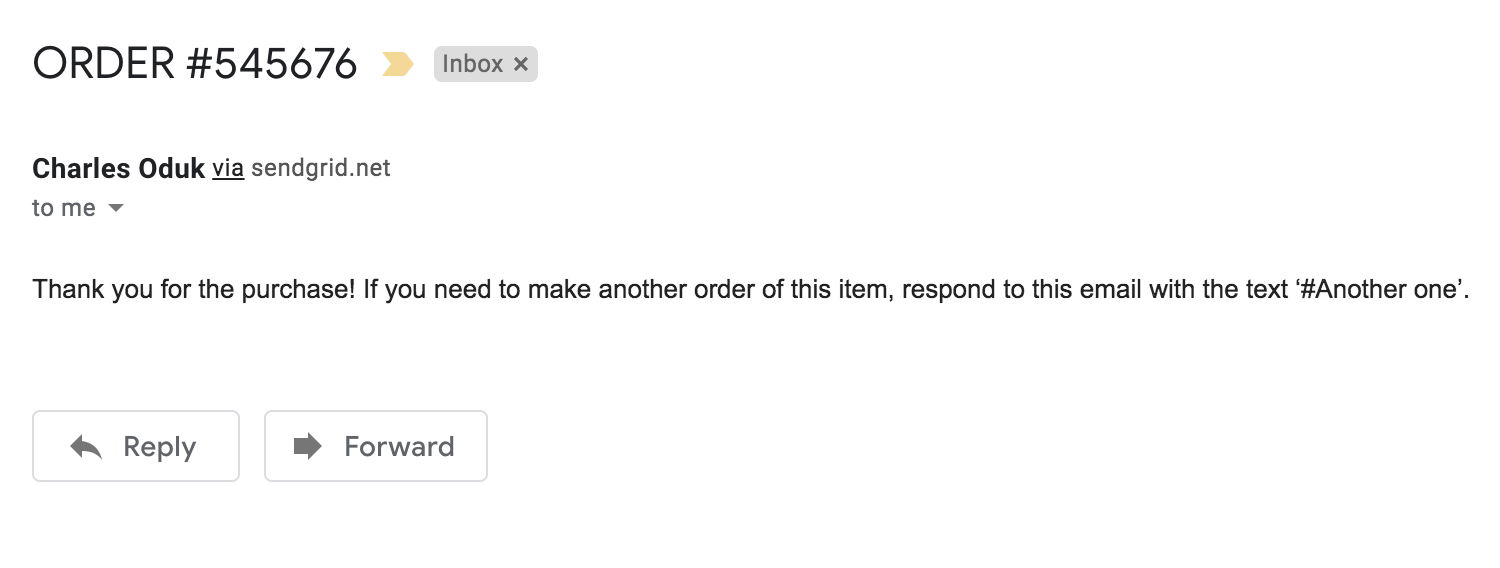
From a new console window send the first email. Run the command:
You should get an email like this:
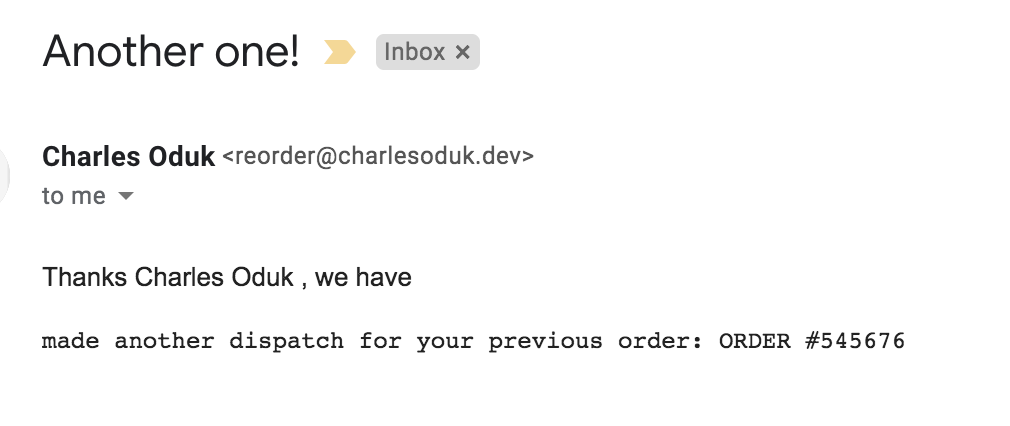
Reply to the email with the text #Another one. You should now receive another email similar to this:
Additional Resources
Checkout the Transactional Email SendGrid Documentation to learn more about what can be accomplished with transactional emails in Twilio SendGrid.
Twilio’s Marcus Battle has also written a tutorial that will teach you how to how to Send Transactional Emails in PHP with Twilio SendGrid.
Conclusion
Great work! You have just made use of the inbound parse webhook. We have just scratched the surface with a simple example. You could go ahead and implement the ordering system using Order Desk.
I look forward to seeing what you build. You can reach me on:
Email: odukjr@gmail.com
Twitter: @charlieoduk
Github: charlieoduk
Related Resources
Twilio Docs
From APIs to SDKs to sample apps
API reference documentation, SDKs, helper libraries, quickstarts, and tutorials for your language and platform.
Resource Center
The latest ebooks, industry reports, and webinars
Learn from customer engagement experts to improve your own communication.
Ahoy
Twilio's developer community hub
Best practices, code samples, and inspiration to build communications and digital engagement experiences.