Creating a Jenkins Server for GitHub Projects
Time to read:
May 08, 2018
Written by
This post is part of Twilio’s archive and may contain outdated information. We’re always building something new, so be sure to check out our latest posts for the most up-to-date insights.

A deploy process should provide consistency, incorporate tests, and utilize a multi stage deploy process to protect your production server, provide useful logging, catch breaking changes quickly, and integrate smoothly with your version control software.
There are a few options available for managing a deploy process like this. Many of these are managed services which means much of it is opaque and outside your control. If you’re like me, you’d rather have total access to and control of your deploy chain. The best option for control freaks like us, is Jenkins.
This post will walk through creating a dedicated Jenkins server and setting it up with an SSH key on your GitHub account.
Tools
Moving forward this post will assume a few things about you and your project:
- Your projects host their repositories on GitHub.
- You have a DigitalOcean account. You can create one here.
- You have some familiarity with command line linux.
Creating the Server
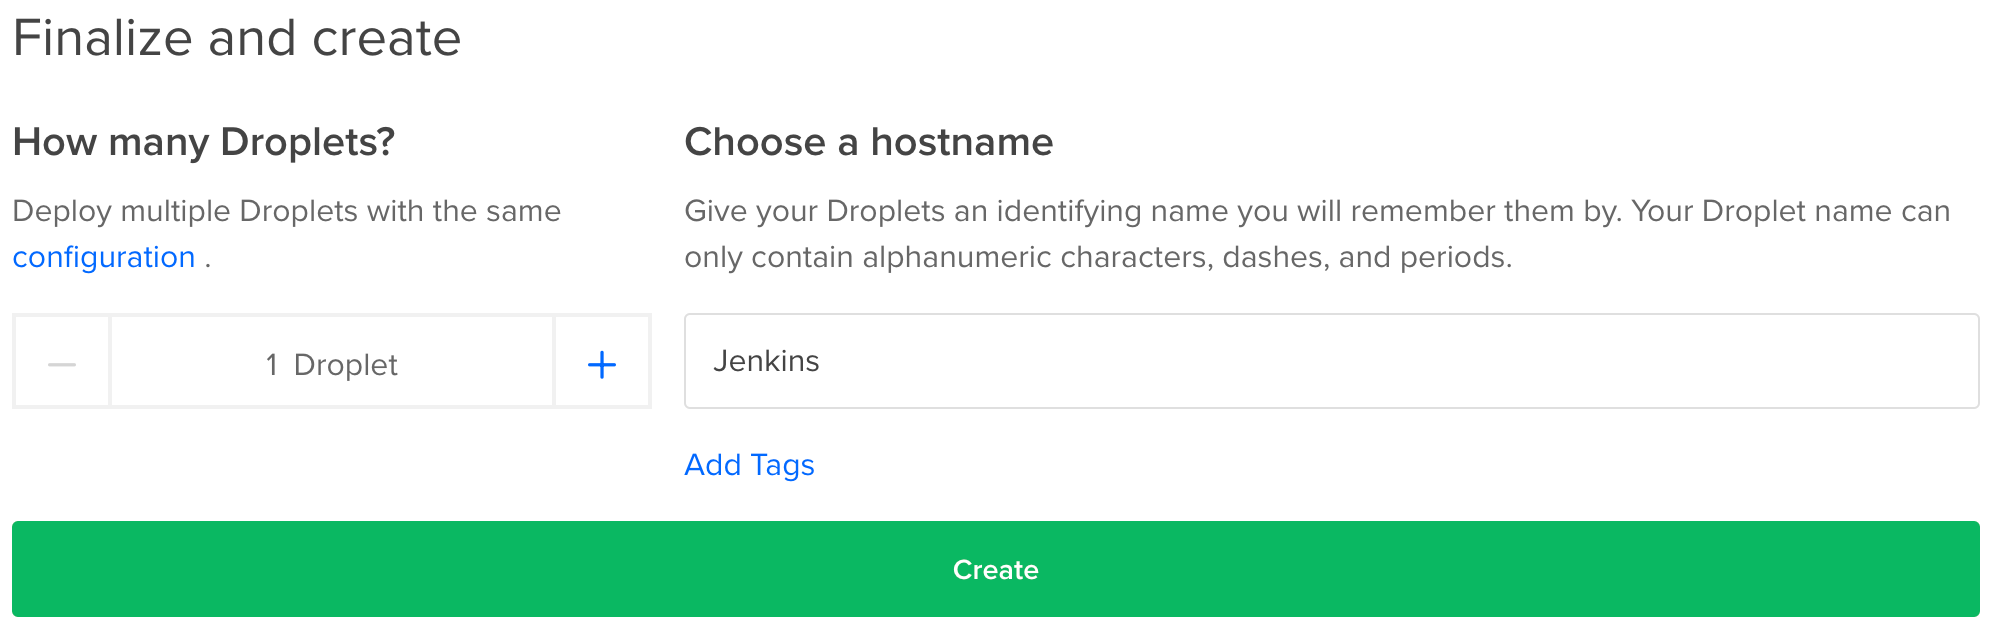
Login to your DigitalOcean account and select Create->Droplets. Select Ubuntu, the $5 server option, select the checkbox to add a saved SSH key to the new server, give it a descriptive name (I’ve used “Jenkins”), and click “Create”.
Wait a couple of minutes for your new droplet to boot up.
Next open a terminal window and login to your new server where you’ll set up a new sudo user and start using that account:
If you don’t already have an SSH key saved in your digitalocean account, or if you need help with any of the above steps, check out this handy tutorial.
Let’s setup a firewall to only allow SSH connections (port 22) and access to the Jenkins web admin (port 8080) with the following commands:
We can confirm our changes with the command:
If you have any trouble, or want additional information on setting up ufw, take a look here.
Installing Jenkins
Step by step instructions for the initial installation and admin creation can be found here.
You will not need to worry about the ufw portions as you already set that up.
GitHub Setup
Once you’ve installed Jenkins and created your admin user using the steps from the above link, we’ll want to create an SSH key for our new jenkins user so the installation can interact with your GitHub projects.
From the command line run the following, replacing the placeholder email address with the email address associated with your GitHub account:
Accept the defaults offered for location and no passphrase.
Show the new public key with the command:
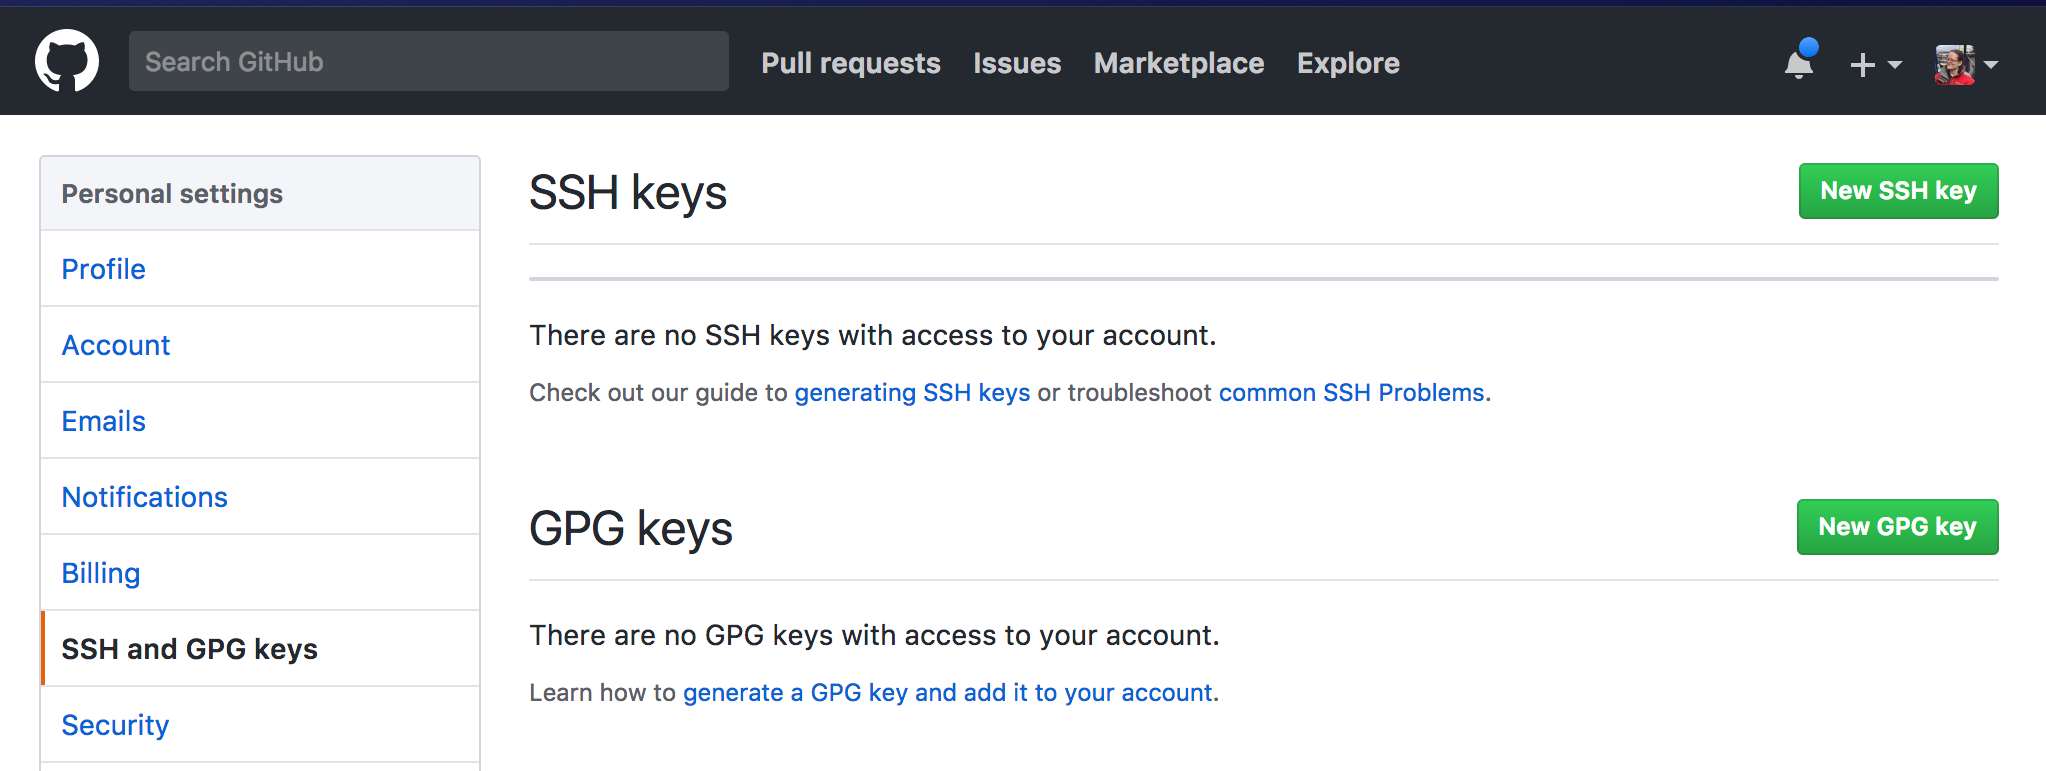
Login to your GitHub account. Click the account image, then “Settings”, then “SSH and GPG keys”, then “New SSH key”.
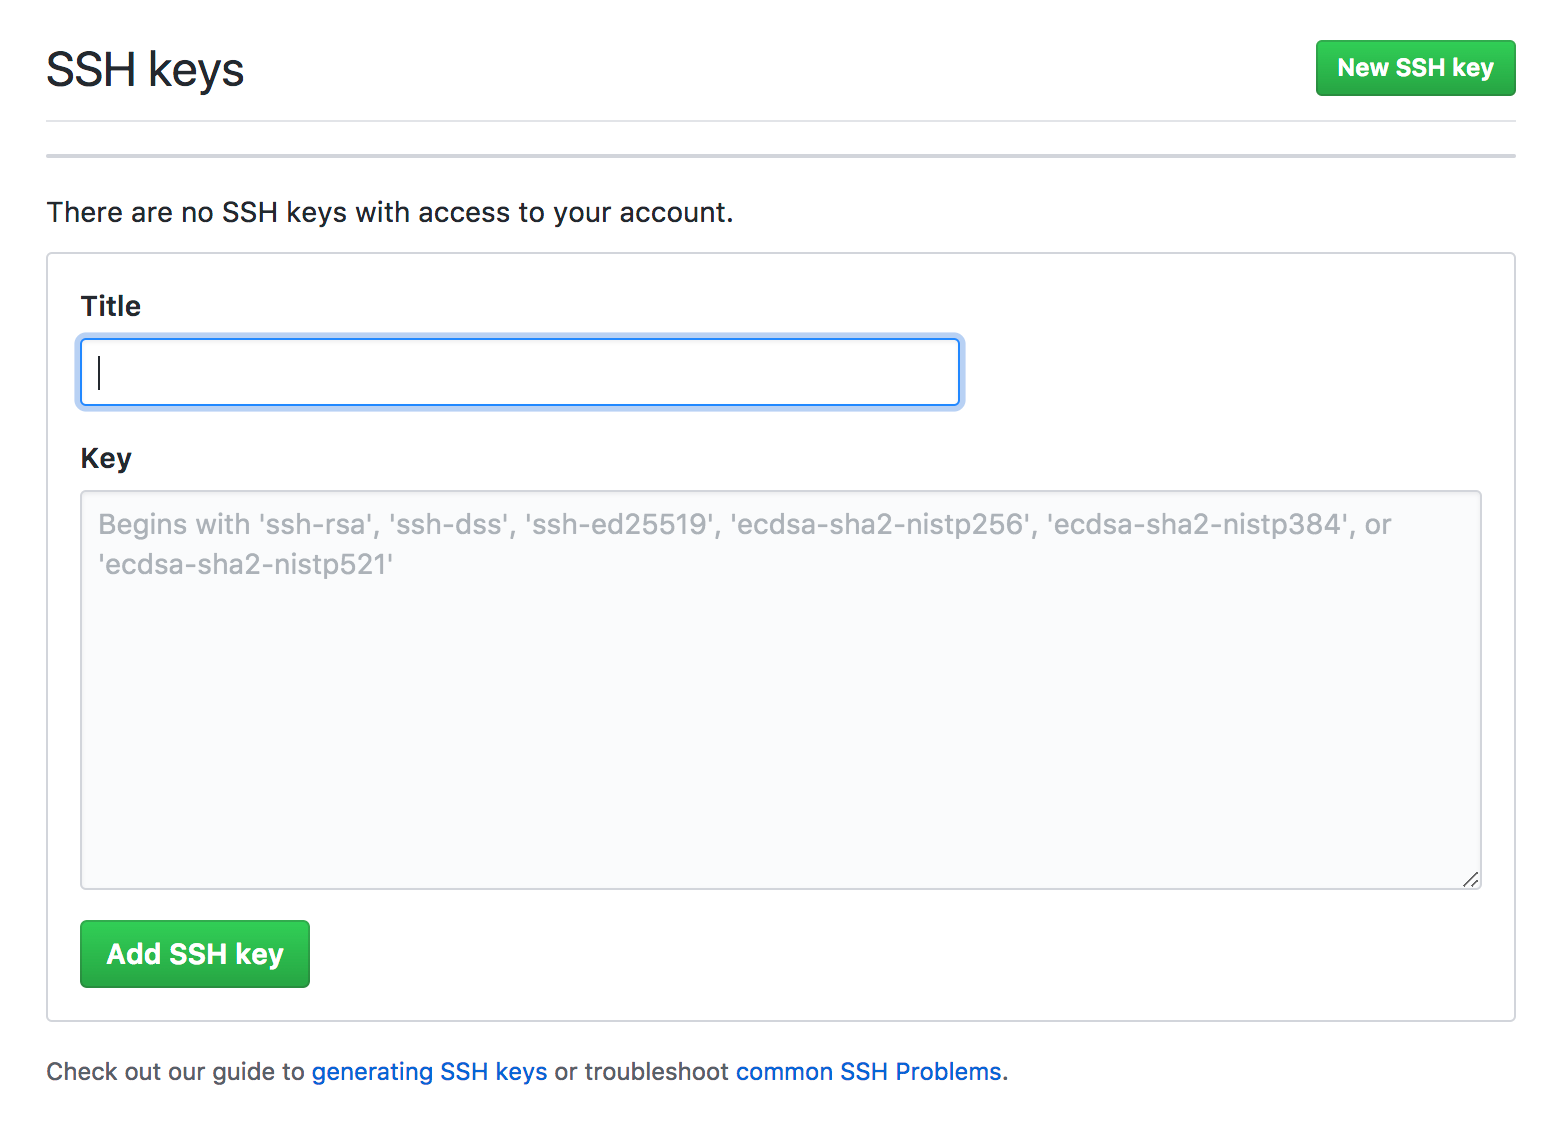
Name the new key. I used the name “Jenkins”. Copy and Paste the key you just made on your Jenkins server into the “Key” form field and click “Add SSH key”. You may need to confirm your password.
Success!
You now have a dedicated Jenkins server with SSH access to your projects’ GitHub account!
Now you can create jobs to handle deploy processes for projects and have those jobs be triggered by commits to the repositories managed by your GitHub account.
Once those jobs have incorporated all your best practices steps and tests you can develop with confidence that those important integration checks will happen every time.


Related Resources
Twilio Docs
From APIs to SDKs to sample apps
API reference documentation, SDKs, helper libraries, quickstarts, and tutorials for your language and platform.
Resource Center
The latest ebooks, industry reports, and webinars
Learn from customer engagement experts to improve your own communication.
Ahoy
Twilio's developer community hub
Best practices, code samples, and inspiration to build communications and digital engagement experiences.