Build Your Own Daily Fantasy Football Salary Tracker with Ruby and Twilio MMS
Time to read:
September 15, 2017
Written by
This post is part of Twilio’s archive and may contain outdated information. We’re always building something new, so be sure to check out our latest posts for the most up-to-date insights.

September is here, the NFL has kicked off and the fantasy season is in full swing. Kareem Hunt is a beast, Zeke is gonna serve a 6 week suspension, there’s so much going on! In this post we’ll show you how to build a price tracker for your favorite daily fantasy sports website with Ruby. It will help you stay on top of the competition and receive price alerts as soon as they happen.
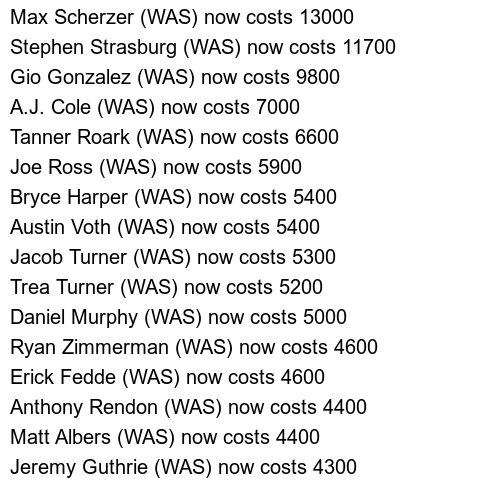
Tech-wise, we will use SQLite, an embedded database, and Sequel, a lightweight database toolkit for Ruby, to store all the data downloaded for easy accessing and querying. We will then setup a recurring task that downloads the CSV every “x” amount of time, like, say, two hours, and compares the entries with the ones received in the previous update. You will then receive a recap of all changes via MMS on your phone which could look like this:
All the code is in this GitHub repo for you to follow along.
Development Environment Setup
Start by getting your machine ready to run Ruby code. You will need Bundler to manage the dependencies for this code; if you have used Ruby before you probably installed it already, but if you haven’t just type gem install bundler on the command line (doesn’t matter in what directory since it installs it globally on your machine).
You will now need to install SQLite and ImageMagick. How you do this depends a lot on what OS and package manager you’re running; on Mac brew you can use brew install sqlite and brew install imagemagick. If you’re running a Ubuntu, you can run sudo apt-get install sqlite and sudo apt-get install imagemagick libmagickwand-dev or the equivalent for your distro.
Create a project folder wherever you prefer on your computer and navigate to it. We will now refer to it as the project root folder. Now create a file called “Gemfile” in the root folder and include all these dependencies we need in it:
No need to worry about what each of them does now as we will cover them as we go. Save the file and then run bundle install on the command line in your project directory to install them.
Our developer environment is now set up so let’s move on to setting up our database. Create a new database.rb in the root folder. First we are going to require Sequel and initiate a database:
Using SQLite as a database allows us to avoid any extra configuration steps we’d need with others like PostgreSQL.
Let’s wrap the database setup in a module so we can then run everything from a main script:
This will create the Players table the first time we run our program. The table will be used to store the player’s name, salary, team, opposing team, position and average points per game. You can find the finished database.rb file here. First down, 1st & 10 at the Getting Data section. (For those who may not follow football, that means we’re close to the next part.)
Getting Data
Create a file named csv_analysis.rb where we’ll store the code which takes care of downloading, cleaning up the file and then iterating over the results:
By using the standard csv and open-uri libraries, we are able to create a new data.csv file and copy all the information provided by the URL we pass as an argument to it.
Now we can obtain the URL to the CSV. Open the contest you want to track in your DFS website and then simply do right click -> Copy Link Address on the Export To CSV button on DraftKings or FanDuel.
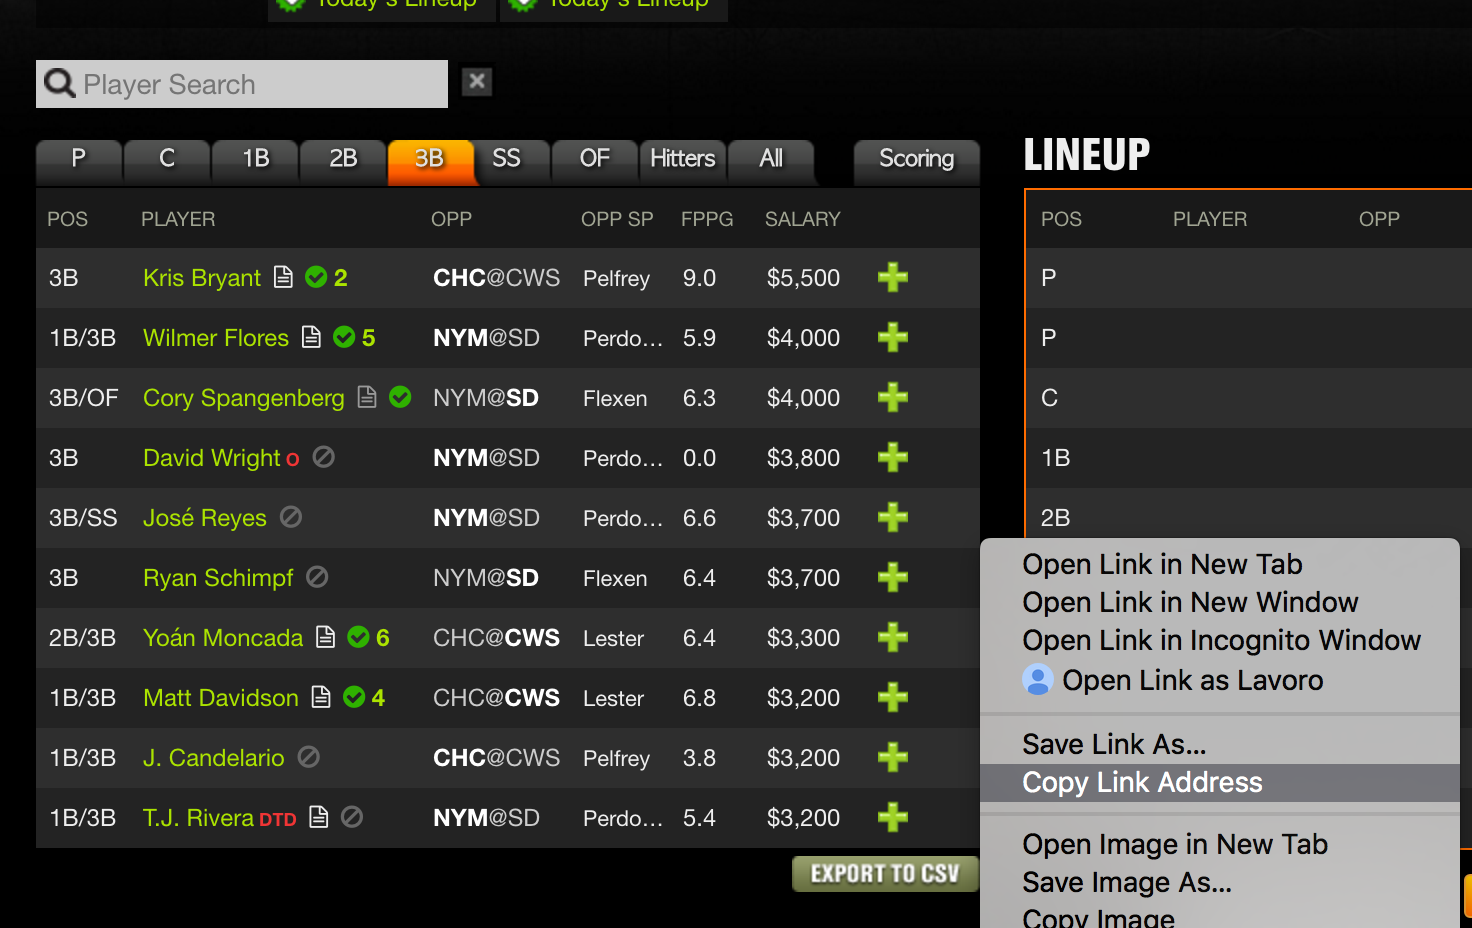
This is where it’s placed in DraftKings
We now have two different pieces of code, so it’s a good time to create a module that will bring them all together named Tracker, which will live in a tracker.rb file. It will store our URL as a constant and it will give us a simple interface to run all of our scripts at once.
Where the value of URL is the link you obtained following the steps above. Next, run ruby tracker.rb in your terminal. This will create a new data.csv file in your directory with all the information you needed! If you see some error, double-check that the URL you entered is correct and actually points to a CSV file.
Data is only as useful as the information you can extract from it, which isn’t much at the moment. To help us query it in a easier way, we are gonna store the information in our SQLite database we setup before. We are gonna add a new method to the CsvAnalysis file under the scrape method we defined earlier:
This will get all the data in the CSV and return the players as an array of Ruby hashes, with the same keys as the database table so that we can quickly insert them. To make sure everything is still working as expected, we can add this to our Tracker and print the result to screen like so:
Now you can run ruby tracker.rb again and all the player data should be printed on your terminal window.
What we need to do now is a simple if statement: if the player isn’t in the database, we add them to it. If they already exist, check their salary. If they’re different from the one we recorded before, add them to an array. If not, move to the next player by using next. This is done by lines 15 through 20 of the following code:
Let’s run ruby tracker.rb again and take a moment to check that everything was stored correctly in the database. We will also modify a player’s price to make sure that our code is working correctly. Go to the root folder of your project if you aren’t there already and run sequel sqlite://dfs.db from your terminal. This will open a IRB session with the database already loaded on DB. Now we can run DB[:players].first to find the first player in our database; cool! Let’s change their salary to 0 now with DB[:players].first.update(salary: 0). Now close the session with quit and run the Tracker again. If you repeat the steps above, you should see that the price was again updated to the one in the CSV and isn’t 0. That means everything is working fine!
Now all we need to do is put all this data on an image and send it to our phone number.
Obtaining your API keys
It’s now time to obtain a Imgur key and a Twilio credentials.
For Imgur, go to their Add Client page and fill out all the fields. Since we don’t need to provide OAuth logins, you can select “Anonymous Usage without User Authorization” and leave the callback URL field empty. Write down your client key somewhere.
To make sure everything worked properly, let’s give it a quick go! Go to your terminal and current directory and run irb; it will launch an interactive Ruby shell. Now require the imgur library with require ‘imgur’ and do:
If your client ID is working fine, this will print the URL of the image you just uploaded on Imgur. That’s pretty cool!
Let’s head to the Twilio Console now to obtain our Twilio credentials. After logging in and setting up your account you will be shown your Account SID and Auth token. Write both of those down along with the phone number Twilio provided to you, you will need all of these information later. To make sure your account is working, head to the Twilio Build dashboard and send a test SMS to your phone number. As a Giants fan, I usually send “Wide open Tyree, HE MAKES THE CATCH!” to remind me of better times, but it’s up to you.
Sending MMS
Since we will be dealing with API keys, we will now setup Dotenv: it’s always a good practice to keep secret keys out of your codebase. Create a new .env file in the root of your project and add the keys we obtained previously just like this:
We will now create a new notification.rb file which is where we will get to use most of our dependencies.
So what does all this code do? First, we will need to format the player information. We use the format “PLAYER_NAME (TEAM) now costs SALARY”, but feel free to change it as you wish. We then use those strings to generate the image with RMagick. The API isn’t really user-friendly so it can be hard to play around with; if you want to give it a shot, I suggest you read its official docs. The first two arguments of Magick::Image.new are the width and height of the file. To calculate the height we look at how many lines we have to print and multiply that by thirty pixels; the font size is twenty pixels so thirty pixels per line will give us a nice spacing. You can also pass the background color as an additional option. Next we will iterate over the player strings to add them to the image.
After the image is created, we upload it on Imgur. upload_image will return the link to it. I’ve added a puts up.link statement so that you can find the URL in your logs in case you want to share the image, post it on a forum, etc.
Now we can finally send this over to us via MMS by using the Twilio API. We just need to add it to the tracker like so:
Go long!
As the last step, we will setup crontab to run this script every x-amount of time, two hours should be frequent enough to get an edge on the rest of the players. If you use Windows, this won’t work, so you will need to find an alternative solution (Windows Task Scheduler should do the trick). Create a new folder config and then put schedule.rb inside of it. Now you just need to specify at what time interval you want to run this:
After you are done, simply save the file and run whenever —update-crontab in your terminal. This will run the tracker after every interval as long as your computer is awake. If you plan on not having your computer running most of the time, you should look into hosting this on a free Heroku Dyno and use the Heroku Scheduler to periodically run the tracker. Another option could be running the code inside a DigitalOcean droplet rather than your local machine.
Conclusion
That’s it! Whenever a salary changes you will receive that image via MMS to your phone number so you can always be up-to-the-minute on your fantasy football teams!
If you encounter any issues, feel free to leave a comment, open an issue in the GitHub repo or reach out to me directly @FanaHOVA on Twitter or via email at fana@alessiofanelli.com. Always happy to help or just talk sports!


Related Resources
Twilio Docs
From APIs to SDKs to sample apps
API reference documentation, SDKs, helper libraries, quickstarts, and tutorials for your language and platform.
Resource Center
The latest ebooks, industry reports, and webinars
Learn from customer engagement experts to improve your own communication.
Ahoy
Twilio's developer community hub
Best practices, code samples, and inspiration to build communications and digital engagement experiences.