Deploying and Running Your First C# Xamarin Mobile App
Time to read:
June 07, 2019
Written by
This post is part of Twilio’s archive and may contain outdated information. We’re always building something new, so be sure to check out our latest posts for the most up-to-date insights.

Creating mobile apps with Xamarin involves more than just coding and pressing F5. Since your apps will be running on a mobile operating system like Android or iOS, testing and debugging them requires running them on a device running one of those operating systems or a simulation of a device.
The first post in this series showed how to get set up and build your first app in Xamarin with C# .NET. This post will show you how to deploy and run your Xamarin app on an iPhone or Android device. You’ll also learn how to deploy and run on iOS and Android emulators. With these techniques you’ll be able to test and debug a single app on a variety of devices and OS versions without needing a stack of phones.
Prerequisites
Visual Studio 2017/2019 for Windows or Visual Studio for Mac
Mobile development with .NET workload for Visual Studio
If you followed along with the first post in this series you should be set up with at least one mobile device emulator, either iOS or Android, and the code for a mobile app.
If not, you can download the code from the companion repository on GitHub.
This post will introduce you to deploying and running your first app on both Windows and macOS. You can skip the sections that aren’t relevant to your environment without missing anything.
If you would like to see a full integration of Twilio APIs in a .NET Core application then checkout this free 5-part video series. It's separate from this blog post tutorial but will give you a full run down of many APIs at once.
Deploying on Visual Studio for Mac
If you are running on a Mac, you can target either iOS or Android emulators almost out of the box. Visual Studio for Mac comes with the iOS simulators built-in, so when developing on a Mac this is the easiest platform to target for quick functionality testing. However, Android doesn’t require much configuration to get you up and running.
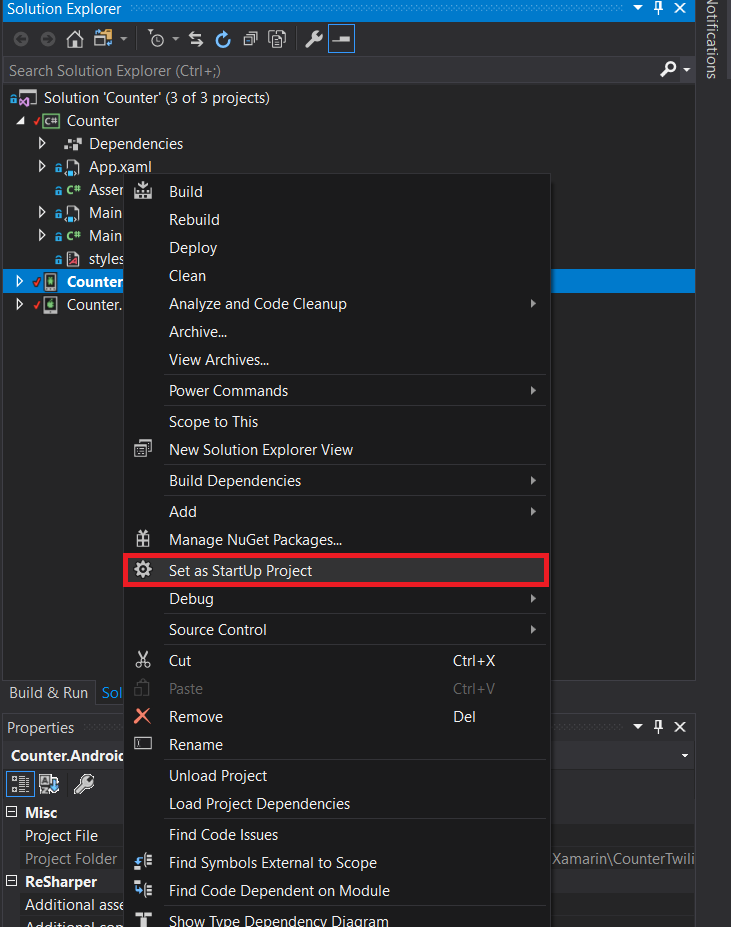
Right-click on the platform project of your choice in the Solution Explorer panel and click Set as Startup Project.

Doing so will allow you to run the app when you click the start ("play") icon in the top left, or press F5.

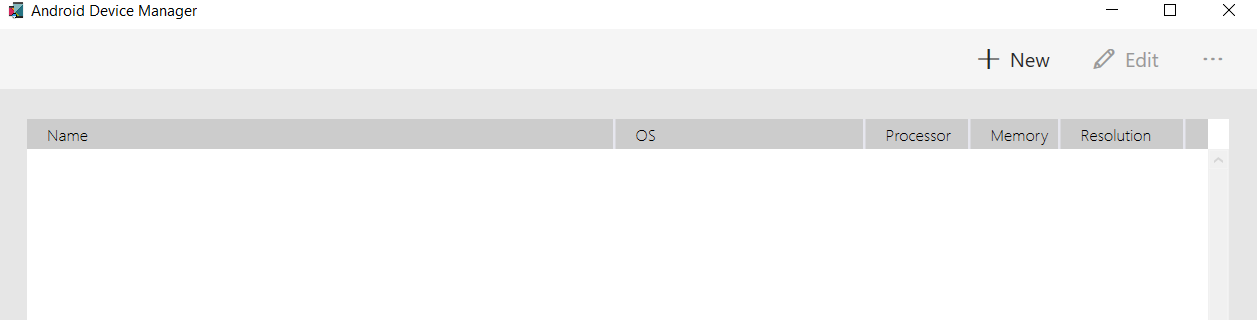
The first time you target Android with a fresh install of Visual Studio, you may find that when running initially, it loads the Android Device Manager with a blank list of devices as shown below.
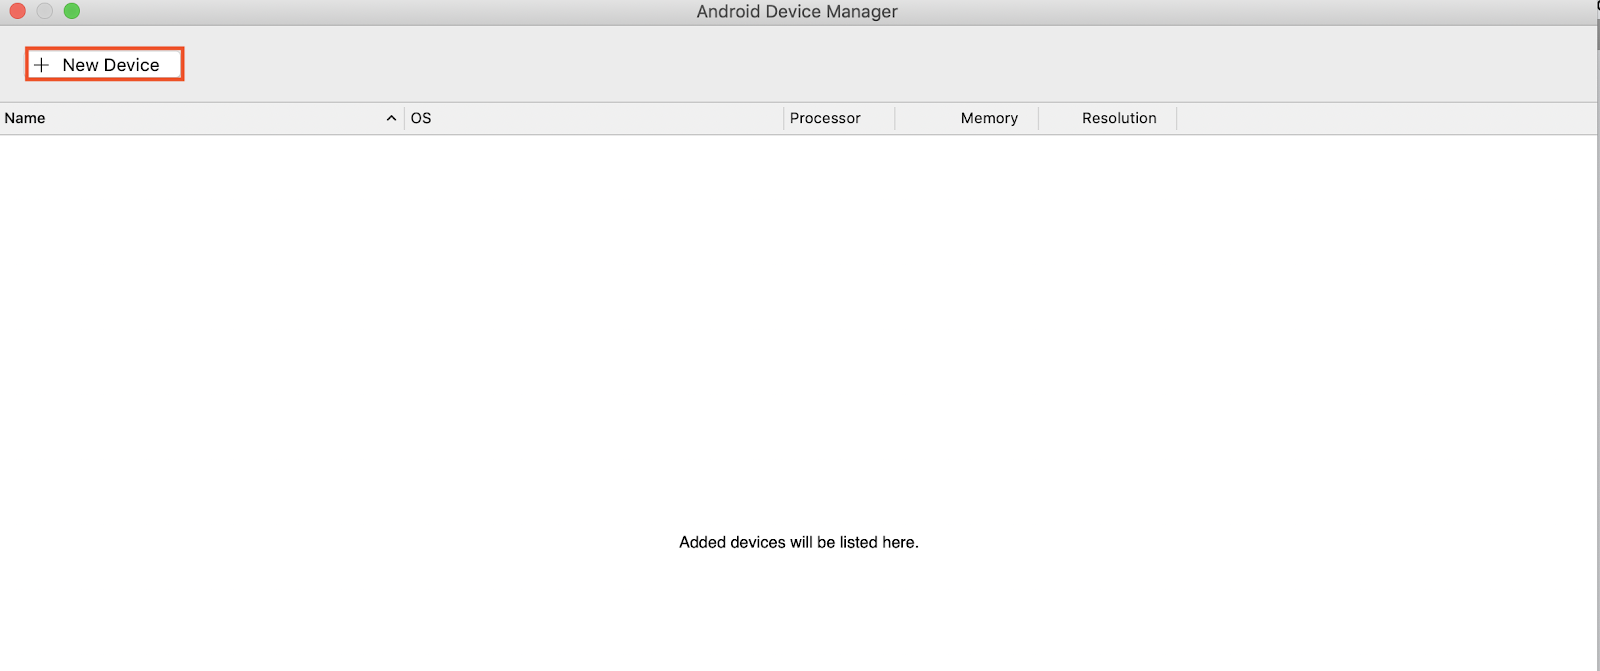
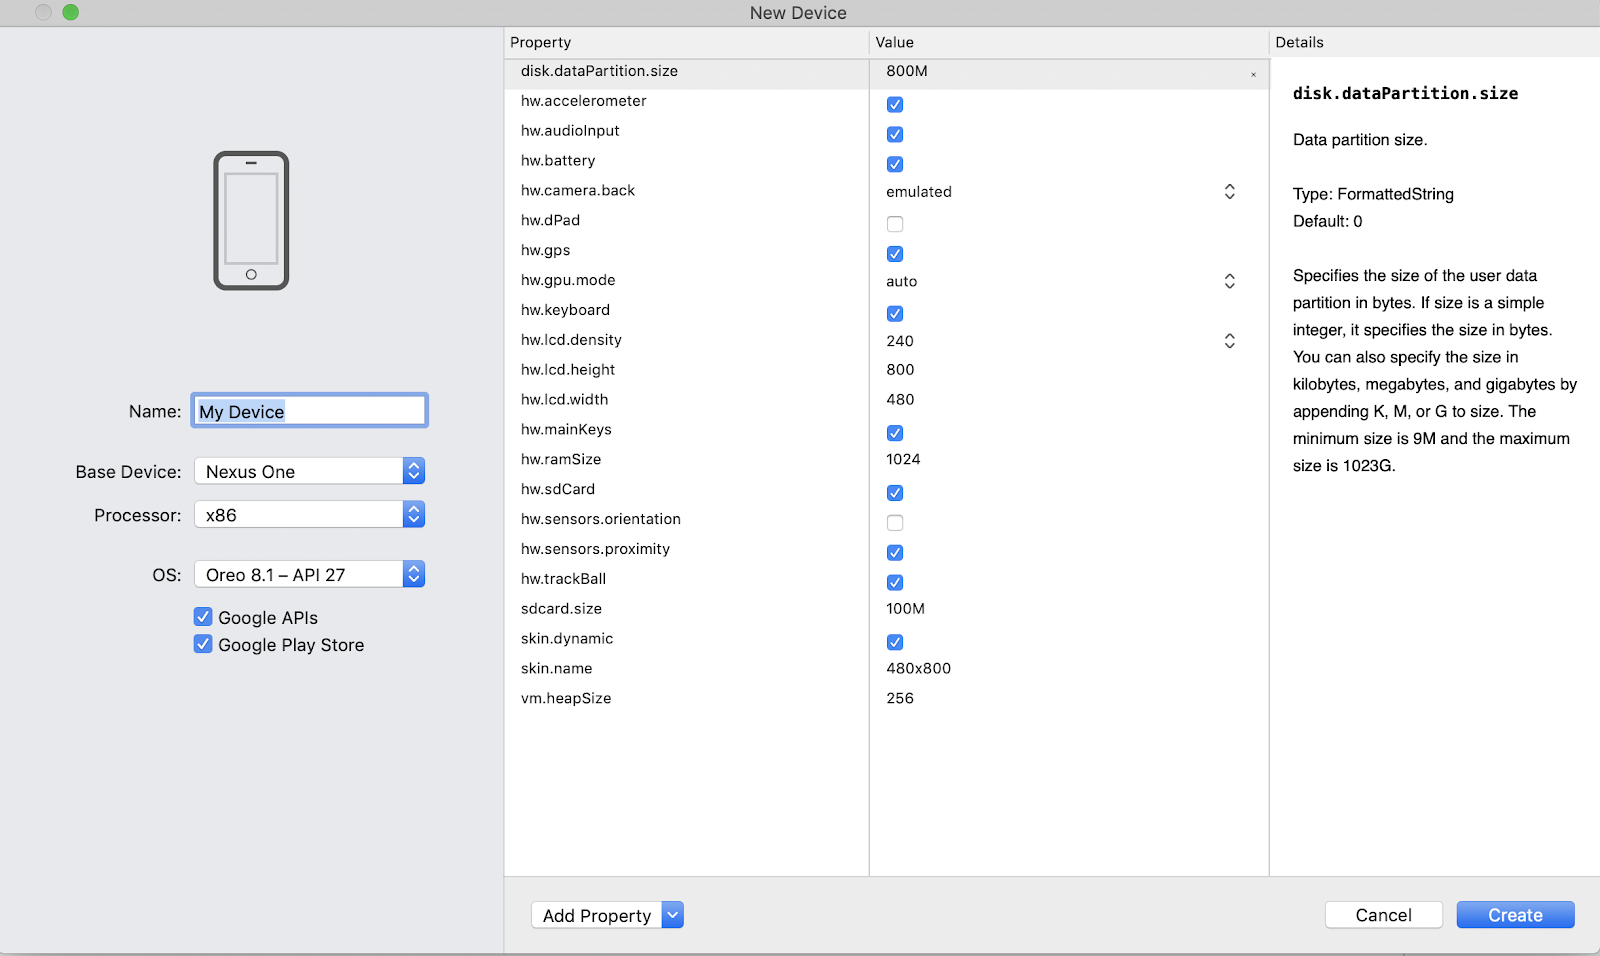
Click + New Device in the top left.
When the New Device window appears, leave all the defaults unchanged and click Create.
The first time you run against either iOS or Android emulators the app will take some time to cold start. Android is particularly slow, both booting the emulator and building and deploying the app. This is due to the work going on underneath that Android requires for an app; so if it takes some time don’t be worried that something is wrong.
If you have a physical device connected via USB cable you can chose to run the app on it, or on the simulator, from the dropdown list at the right of the three different entries you see to the right of the play icon. The first option is your chosen platform, the second is the deployment configuration, either Debug or Release, and the third is the target device.
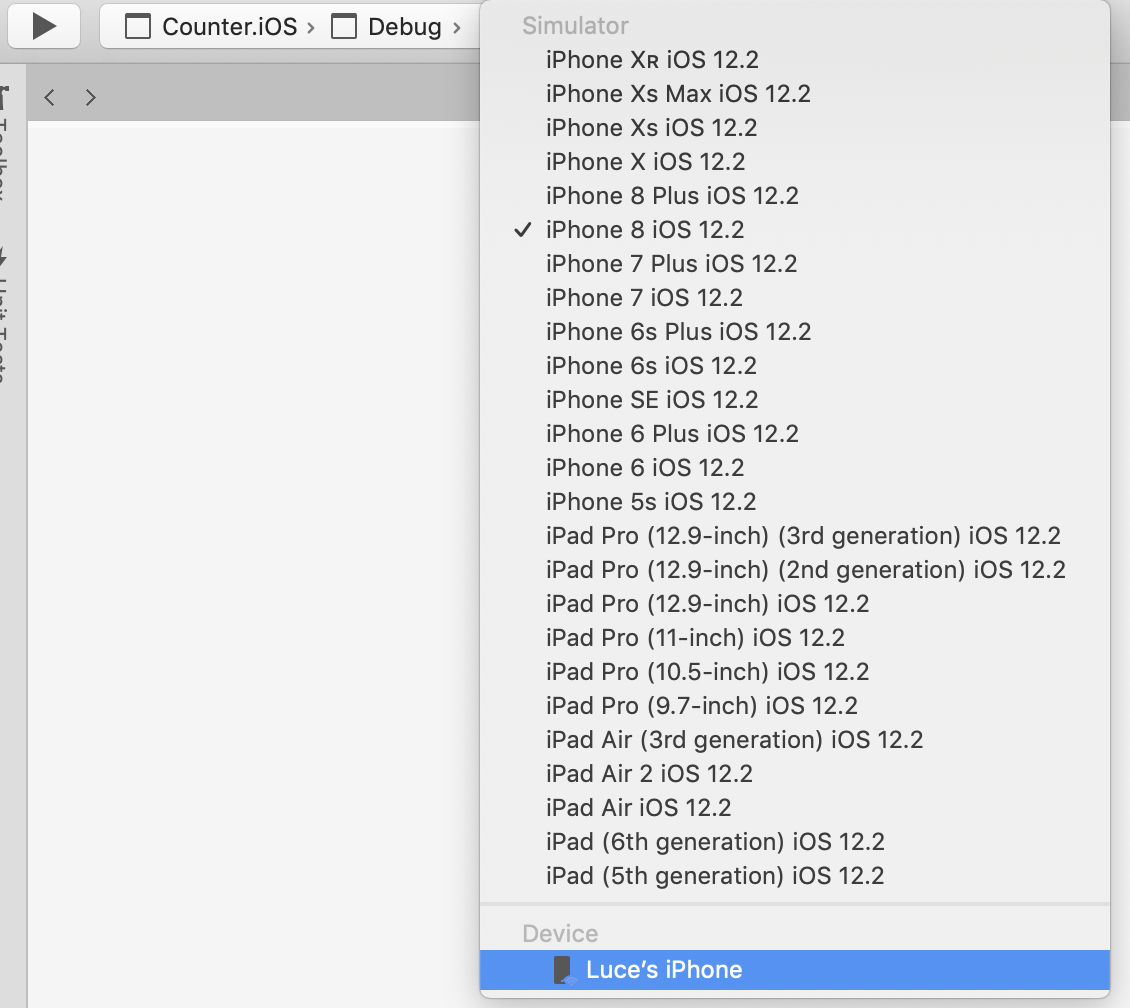
If you are targeting an iOS simulator, all the different models of iPhone are available already; just select the one you'd like to use for testing. Device Atlas provides a list of the most popular iPhone models, based on web traffic.
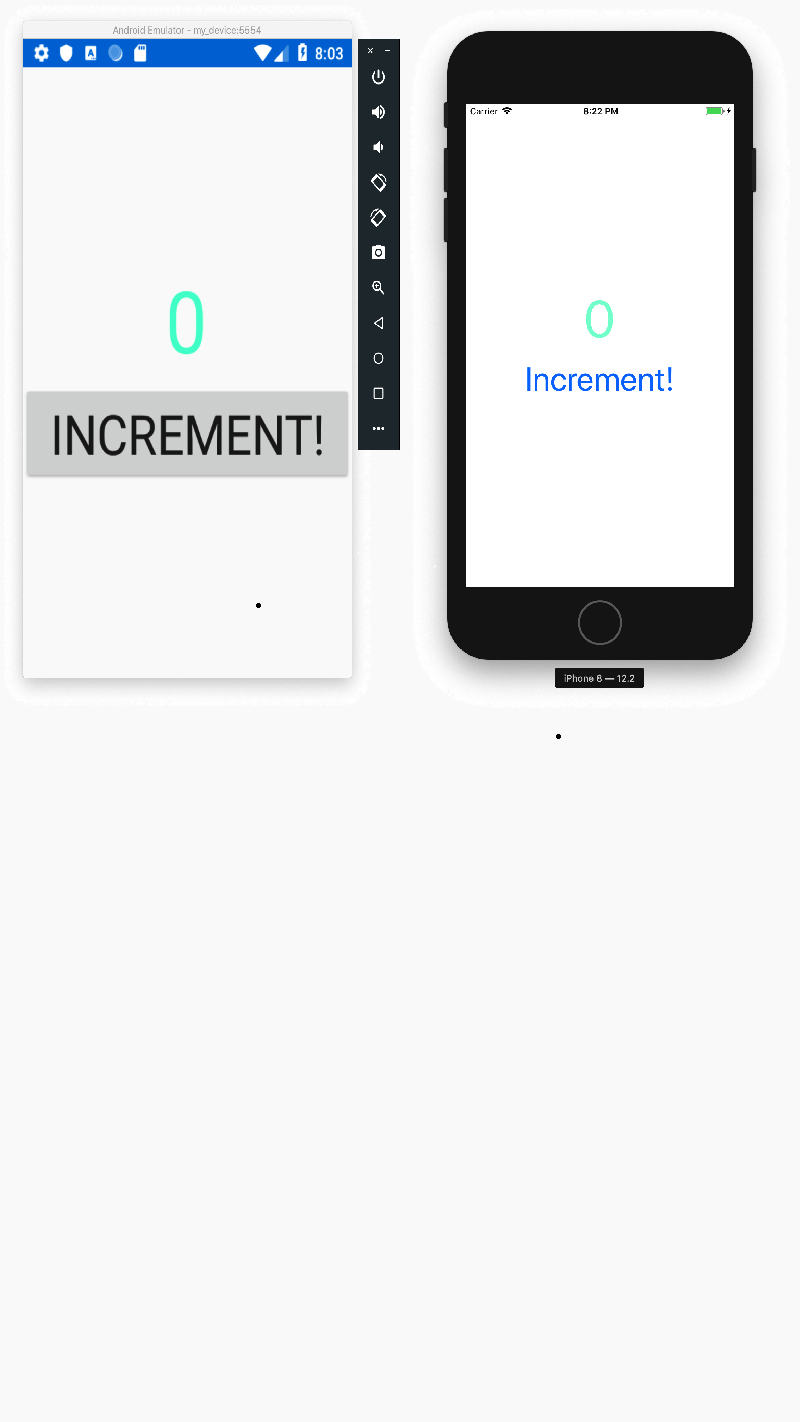
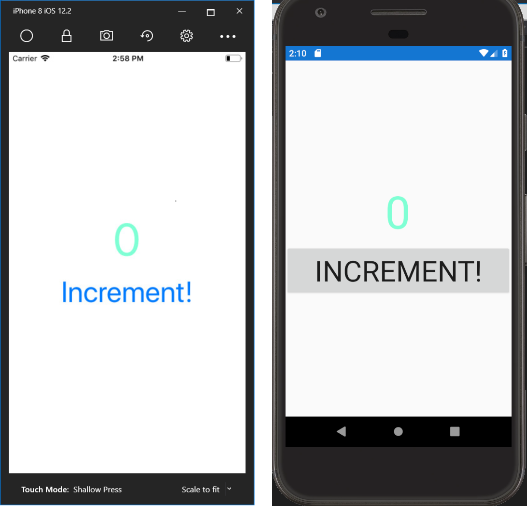
Go ahead and run the app on your platform of choice. After a short wait, you should see your first Xamarin app running!
Deploying your Xamarin app on Visual Studio for Windows
Deploying to Android on Windows is fairly straightforward but iOS requires some work. Both platforms will be covered in this section.
Running your Xamarin app on iOS
Right-click on the iOS platform project in the Solution Explorer panel and click Set as Startup Project.
First up is iOS, as this is the most complicated. You may notice that you cannot deploy your iOS project out of the box. Apple’s license agreement states that you must use “Xcode Build Tools” to compile iOS applications. However, Xcode is only available on Mac. This means you need access to a Mac to act as a “Build Agent”.
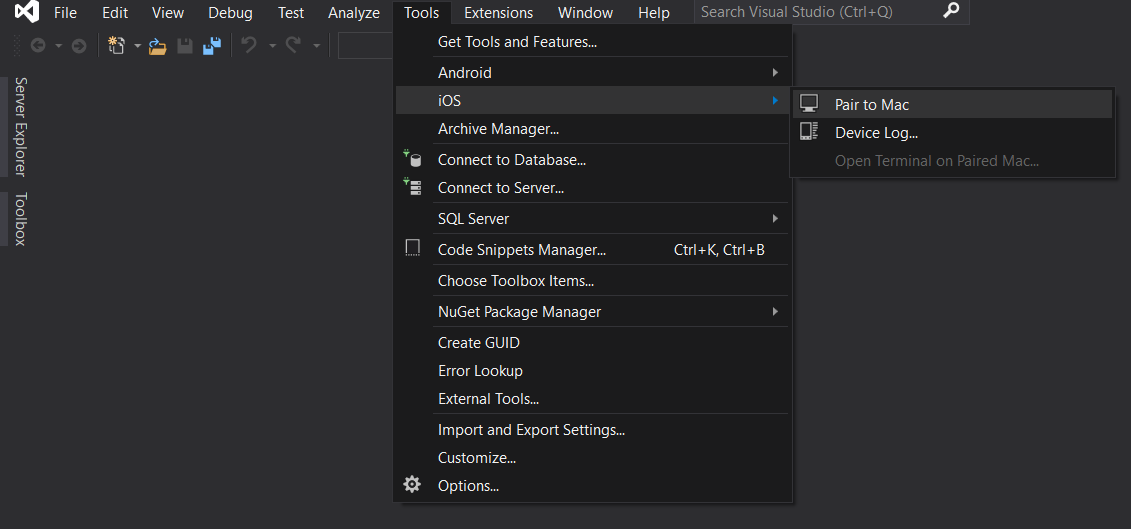
If you already have a Mac device, either a Macbook, Mac, or iMac, then as long as it is on the same network as your development machine you will be able to connect to it from Visual Studio by selecting the Tools > iOS menu and clicking Pair to Mac.
If you don’t have a Mac, then you can take advantage of cloud “rental” services such as MacInCloud, which allow you to use a cloud-based Mac for a small fee. The cloud-based Mac will provide you with a network address so you can connect to it and use it as a build agent.
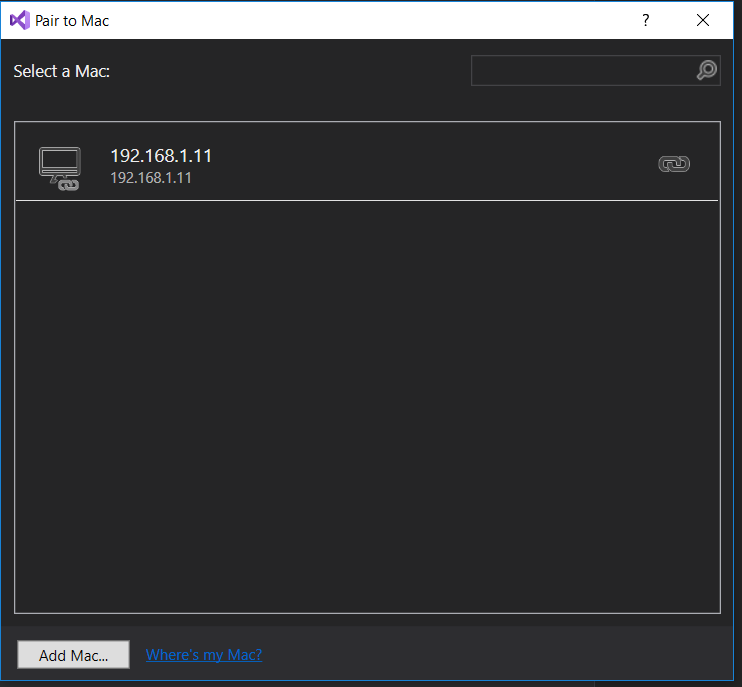
Once the connection is established to your macOS device it will be listed in the Pair to Mac window with a little chain link icon to the right, signifying your machine is successfully connected.
The amazing thing about targeting iOS simulators on Windows is that the simulators are actually being run on the Mac you are connected to, simply bringing the window over for you to view. If you own a touch screen laptop you can interact with the app like a real phone—which is one step better than simulators on the Macs themselves!
Running your Xamarin app on an Android emulator
Now for Android, which is much simpler. If you're running on an Android emulator for the first time you'll see the Android Device Manager window appear with no devices. Click New in the top-right to create a new device. Leaving all values as default is fine.
The first time you run against either iOS or Android emulators it will take some time to cold start. Android is particularly slow booting the emulator, building the app, and deploying it. This is due to the work going on underneath that Android requires for an app; so if it takes some time, don’t be worried that something is wrong.
To read more about getting started with deployment on Windows for iOS, read the Microsoft Docs page on Xamarin.iOS and Windows.
Go ahead and run the app on your platform of choice and soon you should see your first app, boom!
Deploying to a physical Android device
So you have an Android phone and you want to deploy your app to it? Look no further!
Deploying to Android is fairly straightforward, once you know how to configure your phone for development.
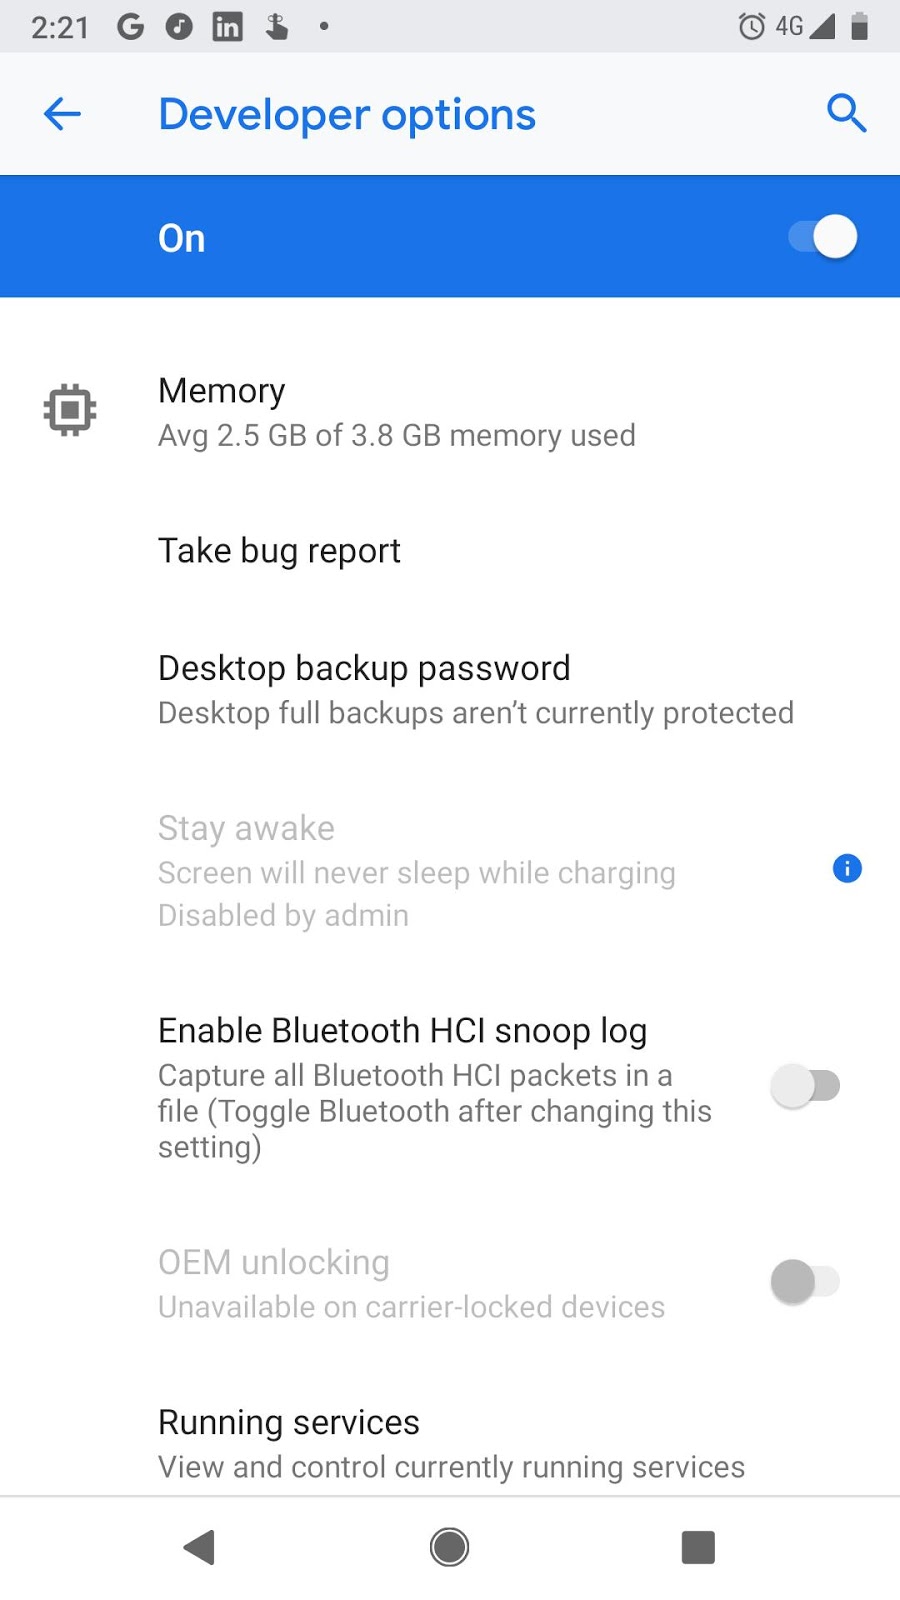
Android has a snazzy, hidden Developer Options menu which allows USB Debugging, which is the feature that allows us to install apps we have made for it, or "side load", as it is also known.
The steps for accessing USB Debugging on your device will vary slightly depending on the version of Android, but in the Settings menu on your Android device, possibly under a sub-menu such as About Device or System, there should be a Build Number entry. If you tap this a minimum of 7 times it will unlock a new entry in the settings menu called “Developer options”.
There are many options, but the essential thing is to ensure that “Allow USB Debugging” is enabled. This may be a simple “On” toggle at the top of the page, or it will be specified in the list.
When you've enabled USB debugging, connect your Android device to your computer with a USB cable. If you're connecting the phone for the first time a message box should appear on the phone asking if you want to trust the computer attached. Click Yes.
Once the phone is connected and you are targeting Android as your startup project your physical device will appear as an option in the dropdown box where you select your device of choice.
For further details on deploying to Android devices, including troubleshooting, see the Microsoft Docs Page on setting up your device for development.
Deploying to a physical iOS device
If you are running on Visual Studio for Mac, then as long as your device is connected via a cable you should be all set up. It will appear as an option in the devices list that you can select.
On Windows, the same applies if you have already followed the earlier steps and paired your remote Mac with Visual Studio.
However, if you own an iPhone or iPad, and the Mac you are using for building is accessible, it is possible to deploy over WiFi rather than using a cable. The first time you set it up you will need a cable, but once it is done you won’t have to do it again.
If you open Xcode on the Mac with your device connected, select Windows > Devices and Simulators. The window that opens will show any devices connected via a cable. Select the attached device from the Connected list on the left and ensure that the Connect via Network checkbox is selected. Once selected, Xcode will take a few seconds to process the request and then you are ready to access the device on your network.

Your device should now appear in the devices list on Visual Studio or Visual Studio for Mac.
For more information, see the Microsoft Docs page on Wireless Deployment for Xamarin.
Learning more
Future posts in this series on building your first Xamarin app will introduce the power of data binding and the Model-View-ViewModel (MVVM) architectural pattern.
Summary
In this post, you have learned:
- Deploying on Visual Studio for Mac
- Deploying on Visual Studio for Windows
- Deploying to an iOS Simulator
- Deploying to an Android emulator
- Deploying to physical devices
Luce Carter is a Software Developer at dunnhumby by day, Microsoft MVP and Twilio Champion by night. She is also the face behind the scenes, editing content for @JamesMontemagno, ensuring editorial quality in his blogs and episode descriptions on his podcast network, @soundbitefm. She can be found at @LuceCarter1 on Twitter, LuceCarter on Github and blogs on her own website. She writes C# in her dayjob, working mainly on an ASP.NET backend but Xamarin is her passion. When not writing apps for fun she can be found speaking around the UK or Europe on her two favourite Microsoft technologies, Xamarin and Cognitive Services.

Related Resources
Twilio Docs
From APIs to SDKs to sample apps
API reference documentation, SDKs, helper libraries, quickstarts, and tutorials for your language and platform.
Resource Center
The latest ebooks, industry reports, and webinars
Learn from customer engagement experts to improve your own communication.
Ahoy
Twilio's developer community hub
Best practices, code samples, and inspiration to build communications and digital engagement experiences.