How to Dial and Answer Phone Calls with Spark and Java 8 in IntelliJ
Time to read: 7 minutes
March 13, 2017
Written by

Java web applications can easily dial and receive phone calls by combining the Spark web framework with the Twilio Voice API. Our example phone calls will say a snippet of text then play an MP3 file, but they can easily be modified to provide other useful actions like gathering user input from the number pad or creating conference calls.
Our Project Tools
Our Spark web app will use the Java 8 JDK and Apache Maven so make sure you have those tools installed. If you need to get Java 8 and Apache Maven installed on your Windows machine, check out this tutorial (you can skip over the GWT bits). We will also need the following tools throughout this walkthrough:
- Spark web framework for responding to HTTP requests
- Ngrok to create a localhost tunnel to our local development environment
- A free Twilio account to use Twilio Voice
- Twilio Java helper library
You can snag all the code for this tutorial in the java-twilio-example-apps GitHub repository. Copy and modify the code as you see fit – it is all open source under the MIT license.
Starting Our Project
IntelliJ can create our project boilerplate for us as well as install Spark and the Twilio Java helper library.
Start IntelliJ and select “Create New Project”, then choose Maven.
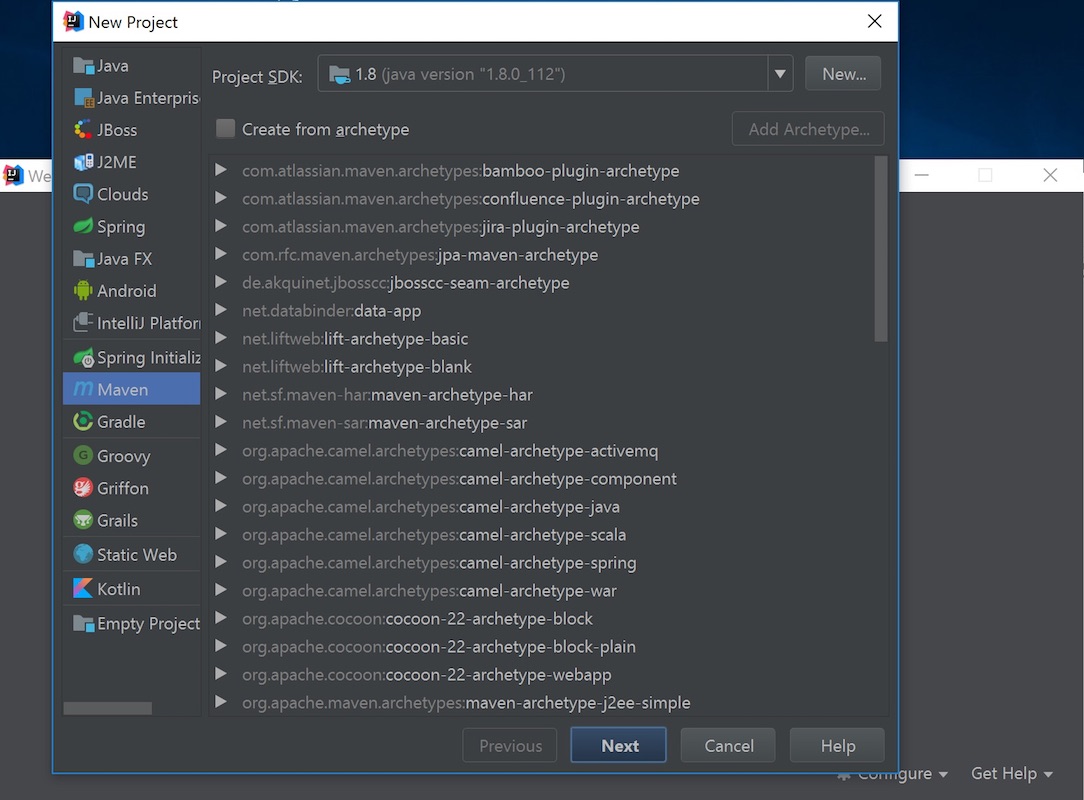
Click Next, then fill in the
GroupId, ArtifactId and Version on the New Project screen. You can keep the defaults shown in the following screenshot or use your own settings.
Click the “Next” button. On the following screen, fill in
javaCalls for the Project name and place the project in its own subdirectory under where you keep your Java projects.
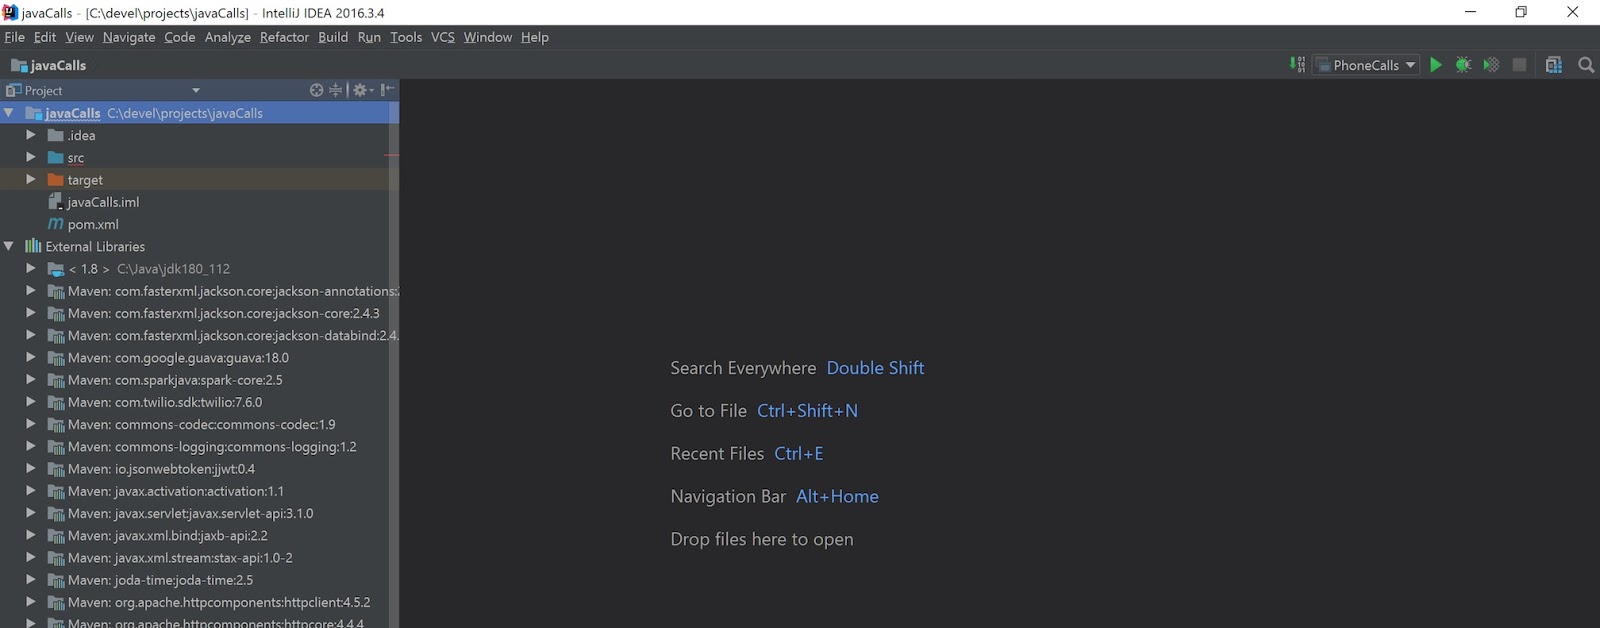
I typically store my projects under the
C:\devel\projects path, but you can put this folder wherever your projects are typically located.Click the “Finish” button and IntelliJ will open up the IDE.
Now we’re ready to install the project dependencies via Maven and finally get to coding.
Installing Our Dependencies
Open the pom.xml Maven file. Add the following two new dependencies highlighted below:
The above XML provides Maven instructions for what application dependencies to install. In our case, we only have two dependencies, one for Spark and the other for the Twilio Java helper library. Save the pom.xml file.
Maven should automatically download the dependencies. If it does not, go to “Settings” -> “Build, Execution, Deployment” -> “Build Tools” -> “Maven” -> “Importing”, then enable the checkbox to “Import Maven projects automatically”.

Our two required dependencies will be locally installed as soon as Maven finishes running.
Now that our jar dependencies are installed we can write some Java code.
Java Coding with Spark
Our Spark web application will have three endpoints:
-
/– returns a plain text message to let us know our Spark app is running -
/twiml– responds with TwiML (a set of instructions written in XML) that instructs Twilio what to do with phone calls -
/dial-phone/, where “outbound_phone_number” is a phone number in the format “+12025551234”
Create a new file named PhoneCalls.java to the src/main/java folder inside your project. Write the following lines of code in PhoneCalls.java:
Save the file. Click “Build” -> “Build Project”, or press Ctrl-F9 to compile and build via IntelliJ. Then click “Run” -> “Run PhoneCalls.java” or press Shift-F10 to run the application.
If IntelliJ gives a compilation error that says “Method references are not supported at this language level”, type Alt enter and select “Set language level to 8 – Lambdas, type annotations, etc.” from the drop-down list. Rebuild and the error should go away.
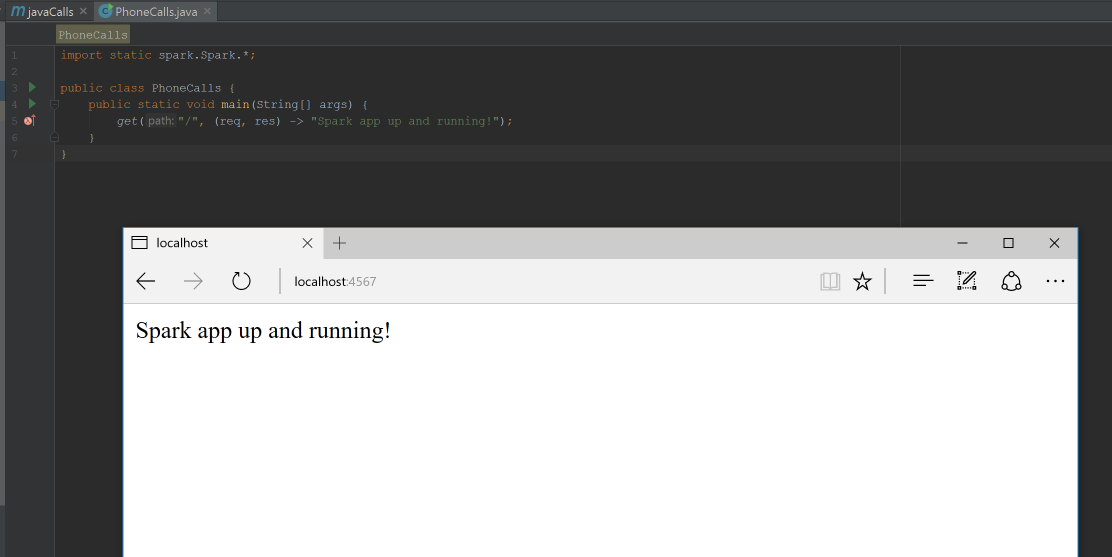
The Spark development server will start running. If you see warnings about “Failed to load class org.slf4j.impl.StaticLoggerBinder” don’t worry about that for now as we won’t need to do any logging.
Test out the app by going to http://localhost:4567/ in your web browser. We should get a success message that the app is running and responding to requests.
Next we need to buy a Twilio phone number that our Spark app can use to call other phone numbers.
Obtaining Our Twilio Number
Our Spark web app runs but what we really want to do is make some phone calls.
In your web browser go to the Twilio website and sign up for a free account. You can also sign into your existing Twilio account if you already have one.
The Twilio trial account allows you to dial and receive phone calls to your own validated phone number. To dial and receive calls from any phone number you need to upgrade your account. Trial accounts are great for initial development before your application goes live but upgraded accounts are where the real power of Twilio is revealed.
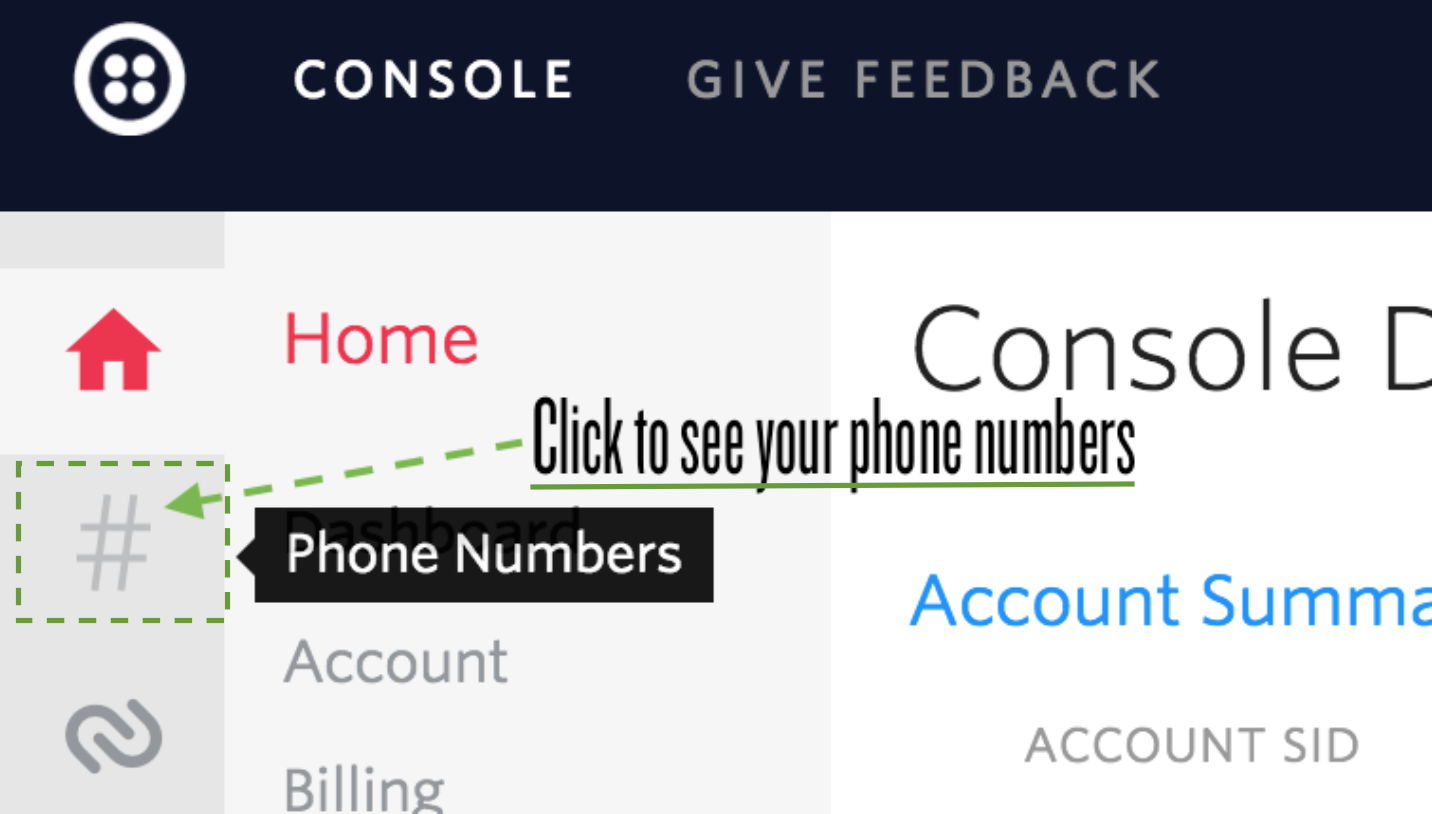
Once you are signed into your Twilio account, go to the manage phone numbers screen. On this screen you can buy one or more phone numbers or click on an existing phone number in your account to configure it.
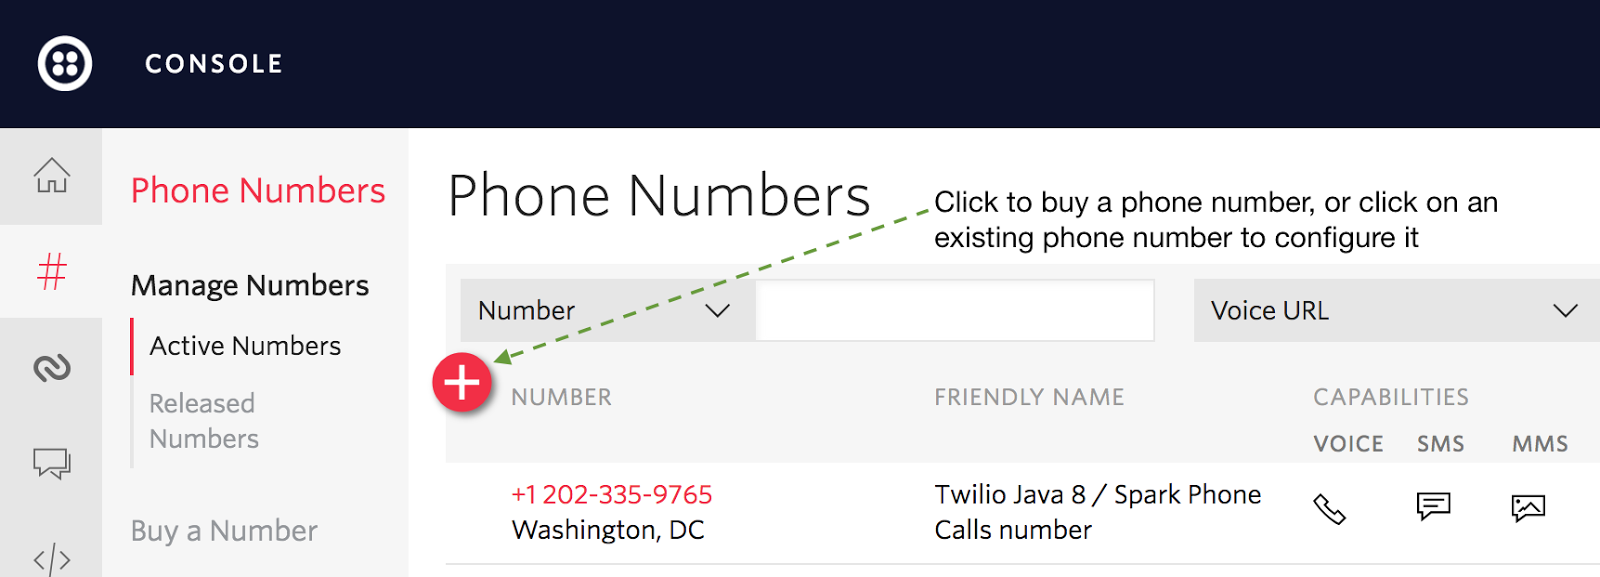
There is nothing for us to configure right now on the phone number configuration page but we will come back to it shortly so keep it open in your browser. Now that we have a phone number in hand, let’s add the final bit of code to our Spark app to get this app fully functional.
Finishing Our Spark App
There is one issue with our local development environment configuration: Twilio won’t be able to reach that /twiml route. We need to deploy our app to a reachable server or use a localhost tunneling tool like Ngrok. Ngrok provides an external URL that connects to a port running on your machine. Download and install the Ngrok application for your operating system.
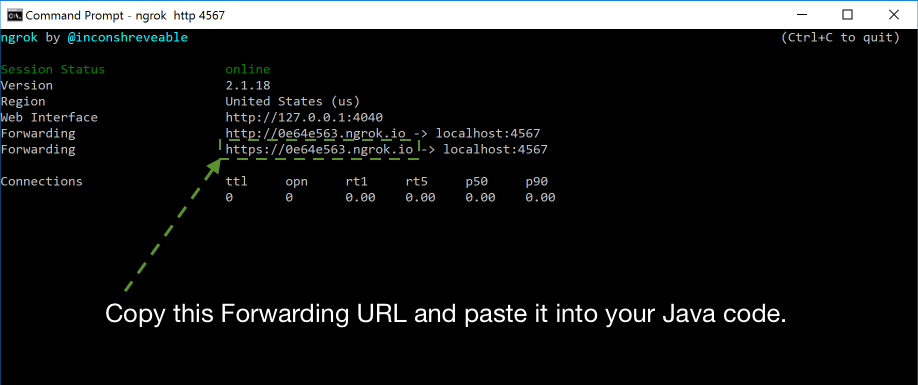
Run the following command to make our Spark app on port 4567 available publicly on the Internet via Ngrok. You either need to be in the same directory as ngrok.exe:
Ngrok will start up and provide us with a Forwarding URL, with both HTTP and HTTPS versions. Keep the HTTPS version of the Forwarding URL handy as we’ll use it in our Java code in just a moment.
We need to add two new routes to our Spark app so it can dial outbound phone calls. Modify your existing PhoneCalls.java file with the two new lambda functions below to handle the twiml_response and outbound_call endpoints:
The Forwarding URL plus the route will instruct Twilio to handle the phone call when someone answers. Insert the Ngrok forwarding URL into the PhoneCalls.java file where NGROK_BASE_URL is specified:
One bit to be aware of when using Ngrok is that your Forwarding URL will change whenever you restart Ngrok, so you’ll need to update your code with the latest Forwarding URL.
Ensure that you have replaced the phone number listed above with your Twilio phone number. Also modify the placeholders within
ACCOUNT_SID and AUTH_TOKEN constants so your application can properly instantiate the TwilioRestClient.
Making Calls
Stop your Spark application. Rebuild the project then start the Spark application so it loads up the new code you just wrote.
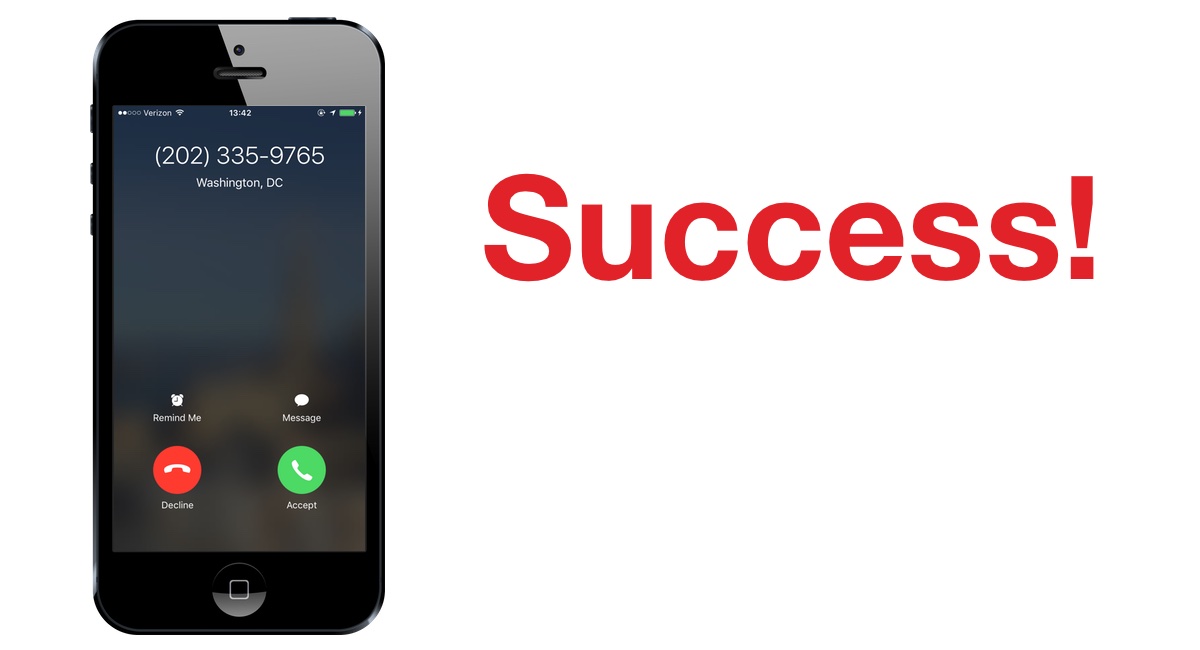
Bring up your application in the web browser. Go to “localhost:4567/dial-phone/my-phone-number”, where “my-phone-number” is a number in the “+12023350173” E.164 format. For example, here is what happens when I get the call on my phone:
When we pick up the phone call we also see the
/twiml route get called via Ngrok.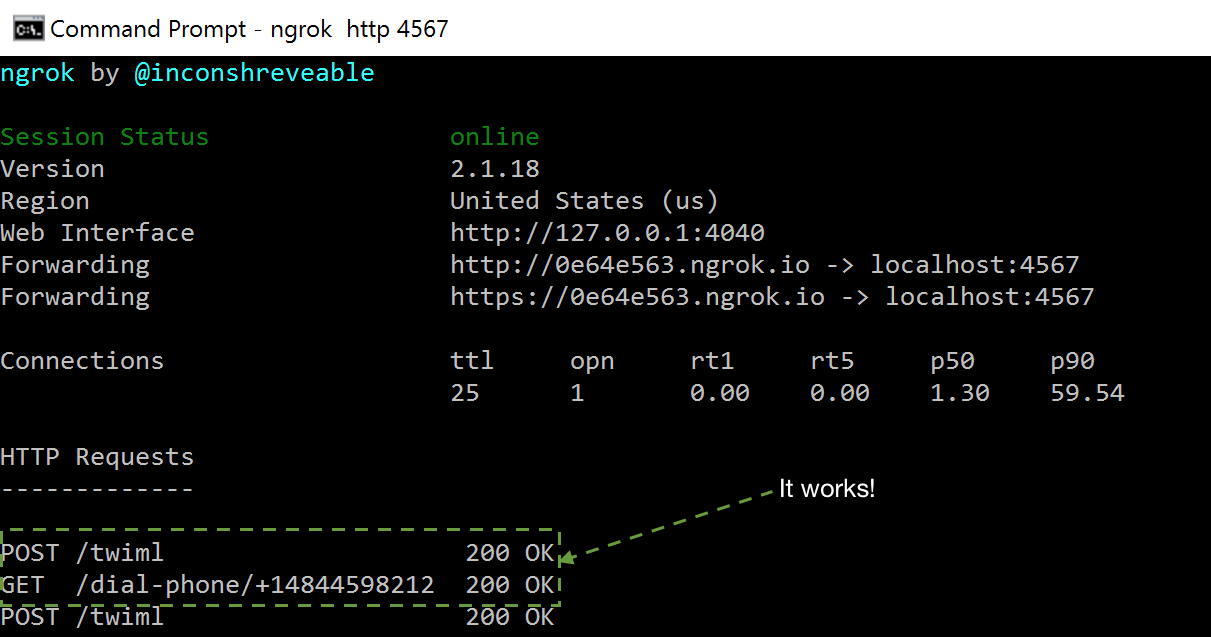
With only a couple of Spark routes plus Twilio’s Voice API and we were able to make phones ring!
Dialing Our Application
Outbound calls are handy, but what if someone misses our call and dials the phone number back? Luckily, we’ve already done all the hard work to make inbound calls possible. We just need to copy our Ngrok forwarding URL plus TwiML endpoint into the phone number configuration screen.
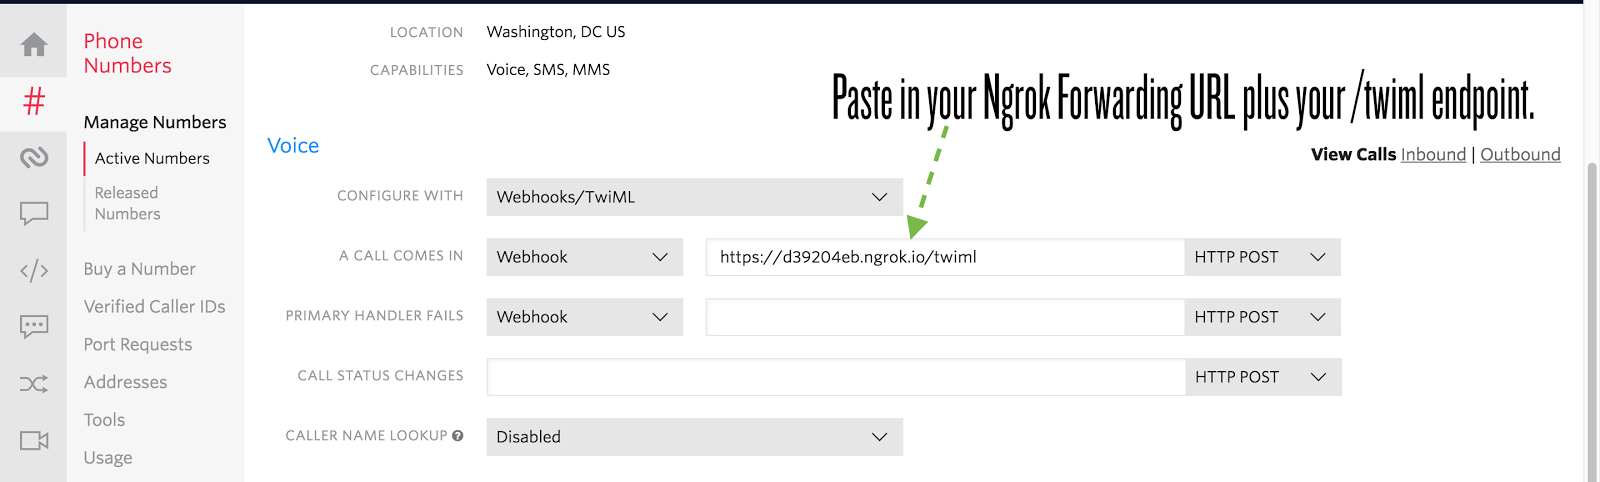
Click “Save” and dial your application’s number with your cell phone. You should get the same message and MP3 played as when you dialed the outbound phone call.
What’s Next?
We can now dial and answer phone calls from our Spark web application using our Twilio phone number. Next you could try to add even more features to your application by learning from one of the following tutorials:
- Upgrade your Spark app so it can also send and receive text messages
- Create an automated phone call survey feature
- Configure server notifications by SMS or phone calls
Questions? Contact me via
- Twitter: @mattmakai
- GitHub: mattmakai
- Email: makai@twilio.com


Related Resources
Twilio Docs
From APIs to SDKs to sample apps
API reference documentation, SDKs, helper libraries, quickstarts, and tutorials for your language and platform.
Resource Center
The latest ebooks, industry reports, and webinars
Learn from customer engagement experts to improve your own communication.
Ahoy
Twilio's developer community hub
Best practices, code samples, and inspiration to build communications and digital engagement experiences.