How to Install Java 8, Apache Maven and Google Web Toolkit on Windows 10
Time to read:
January 13, 2017
Written by
This post is part of Twilio’s archive and may contain outdated information. We’re always building something new, so be sure to check out our latest posts for the most up-to-date insights.

Do you want to get started developing Java web applications that use Google Web Toolkit (GWT)? This guide walks through how to install a Windows 10 development environment so you can start building your projects.
Tools We’ll Need
We’ll need to install and configure several tools for our development environment:
- Java 8 Java Development Kit (JDK)
- Apache Maven build and configuration tool
- Google Web Toolkit (GWT) web framework
Let’s get started by downloading and installing version 8 of the Java JDK.
Java 8 JDK
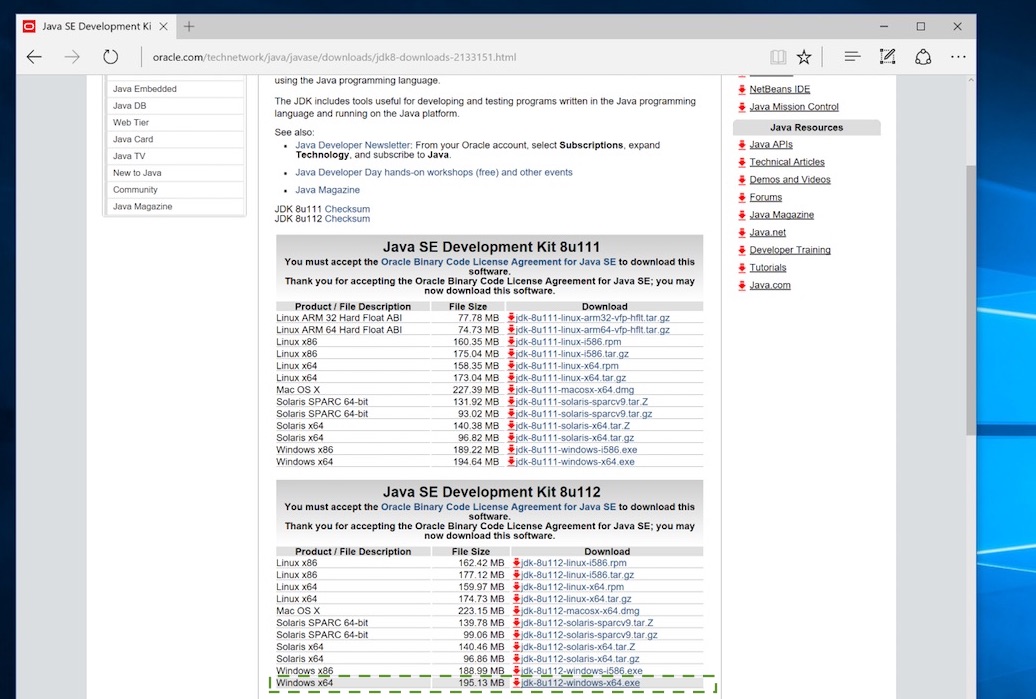
Head over to the Java 8 JDK downloads page in your web browser. Read and accept the licensing agreement then proceed with the download for the latest release of the Windows x64 Java SE Development Kit.
When the download completes, run the executable. Allow the installer to make changes to your system.
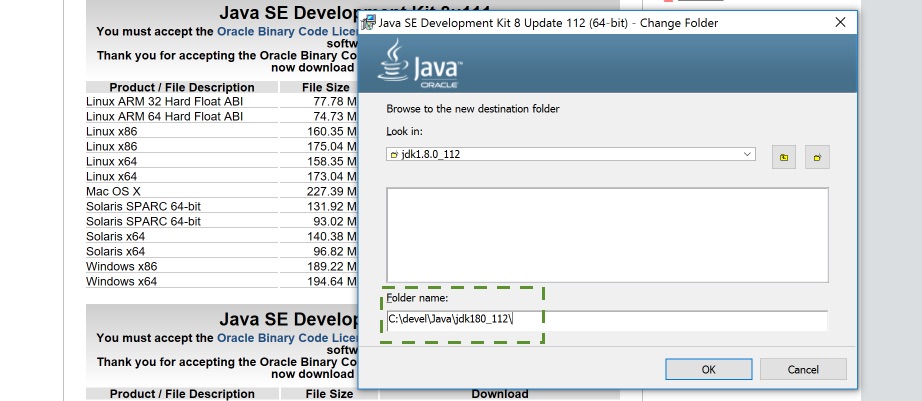
Move through the installer and when you reach the following screen press the “Change…” button.

Modify the installation directory to C:\devel\Java\jdk180_112 (or modify the numbers based on the security release version you downloaded). Generally, it is easier to work with Java on the command line if there are no spaces in the directory names.
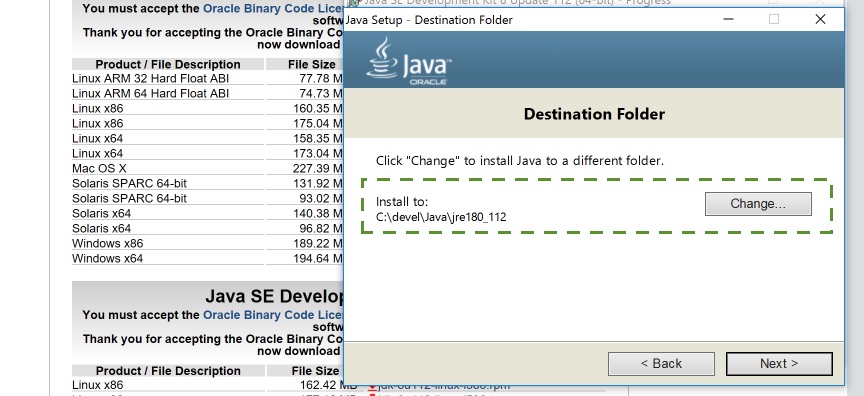
Remember to change the JRE installation directory to somewhere without spaces.
Finish the installation process. Java will be added to your PATH environment variable but we also need to set JAVA_HOME. Within the search box in the Windows Start menu, search for the term “environment variables” and click on the System Properties result to open the System Properties panel. Click the “Environment Variables…” button to open the Environment Variables settings panel. Add a new System environment variable named JAVA_HOME with the value of the base directory to your Java 8 JDK installation (not the bin subdirectory).
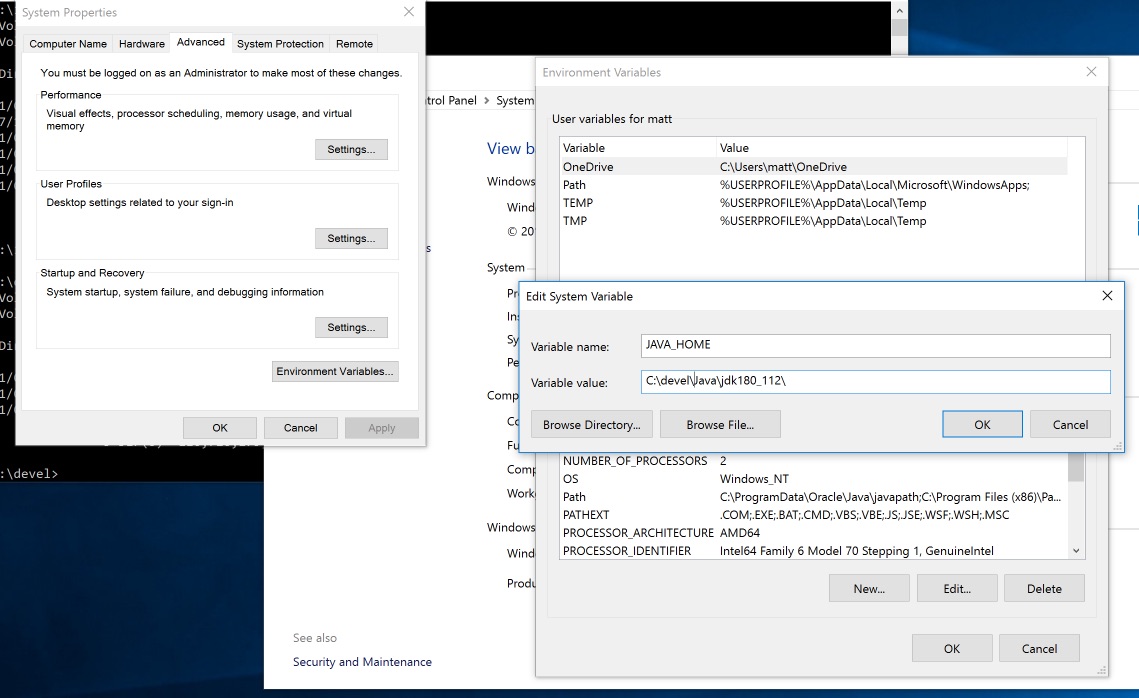
In this case, I installed the JDK to C:\devel\Java\jdk180_112. I set that as the value of JAVA_HOME. Keep the System Environment Variables panel open because we will need it soon when we install Maven and GWT.
Test that our installation proceeded correctly by opening up the command prompt. Search for “cmd” in the taskbar search menu.
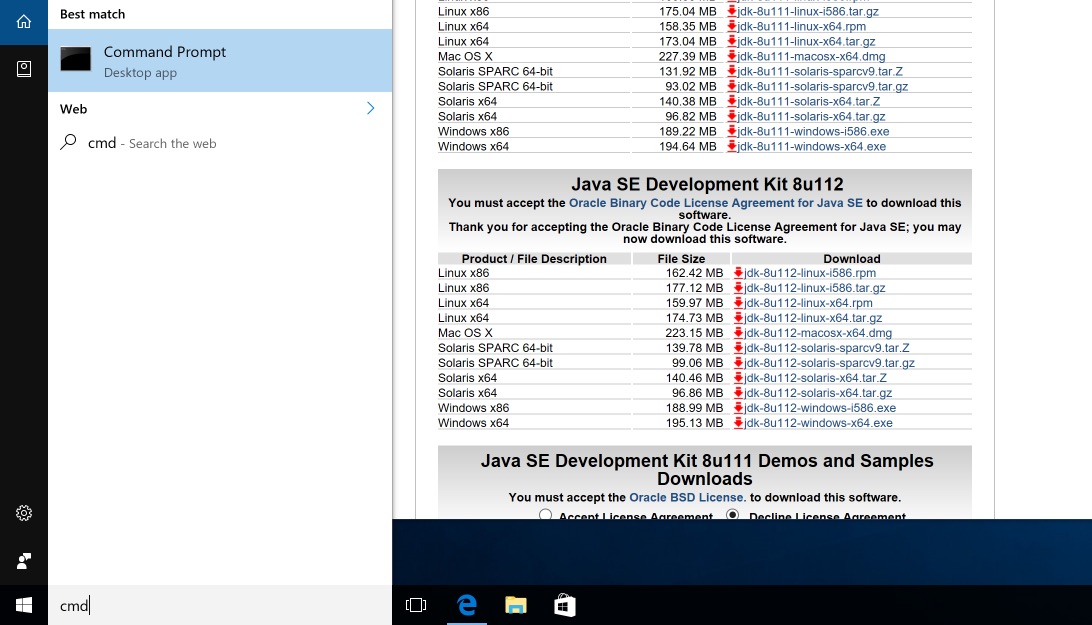
Type java -version and press enter.
You should see the exact Java version you just installed. That means you are good to go with the JDK.
Now that we have the Java JDK properly installed we move on to setting up Maven for our project builds and dependency management.
Apache Maven
Open up the Apache Maven download page and grab the “binary zip archive”.
After the file finishes downloading, open it using File Explorer. Copy the directory within the zip file into your
C:\devel folder.
Add
C:\devel\apache-maven-3.3.9\bin (or the directory of the specific version you downloaded) as a value in your
PATH system environment variable.
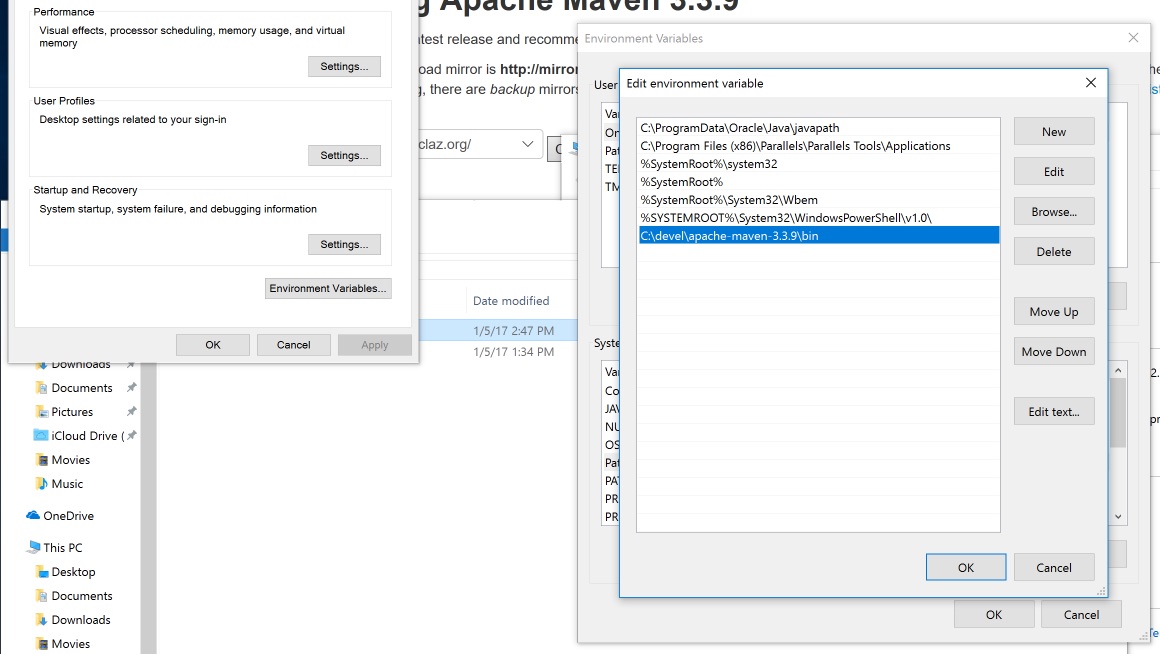
Environment variable changes, such as this one to the PATH variable, only take effect within new command prompt windows so re-open the command prompt.
Run mvn -version while not currently in the Maven installation directory. You should see output similar to the following text.
If you instead receive an error stating that the
mvn command cannot be found, double check that Maven’s
bin directory was correctly set in the PATH variable.
Now that the Java JDK and Maven are configured we can move on to installing GWT.
Google Web Toolkit (GWT)
Download GWT and extract the folder into
C:\devel, just as we did with Java and Maven.
All we have to do with GWT is add the base GWT directory to our PATH environment variable. Open the System Properties and Environment Variables panel back up and add the GWT installation directory, such as
C:\devel\gwt-2.8.0, as a value.
Test out the configuration by closing all of your command prompt windows and opening a new one. Make sure your current directory is outside the GWT directory and type
webAppCreator, one of GWT’s important commands that creates new projects. If GWT was added to the
PATH correctly then the output should look like the following text.
We can now create our first GWT web application project. Create a new directory for our project named firstProject (or the name you want for your own project) with the mkdir command, then move into that directory with cd:
Type the following command within the C:\devel\firstProject directory to create the boilerplate code for the GWT project.
GWT’s
webAppCreator command just built a new project with the necessary project structure to use Maven as our build tool.
Test that Maven works with the GWT project. Enter the following command from within the
firstProject base directory where the
pom.xml file was generated:
There will be a slew of output while Maven downloads the appropriate project build dependencies. Maven should conclude with a BUILD SUCCESS message like this one:
Now the project is ready for developing GWT applications.
Ready for Java Development!
You’re all set to get cranking building your GWT app now that your local development environment is configured. Next you will want to take a look at the Twilio Voice, Twilio SMS and TaskRouter Java quickstarts to add communications into your new application.
Questions or comments? Contact me via
- Twitter: @mattmakai
- GitHub: mattmakai
- Email: makai@twilio.com


Related Resources
Twilio Docs
From APIs to SDKs to sample apps
API reference documentation, SDKs, helper libraries, quickstarts, and tutorials for your language and platform.
Resource Center
The latest ebooks, industry reports, and webinars
Learn from customer engagement experts to improve your own communication.
Ahoy
Twilio's developer community hub
Best practices, code samples, and inspiration to build communications and digital engagement experiences.