Building Hierarchical Dropdown Lists in ASP.NET Core 3.1 Razor Pages with View Models and Ajax
Time to read:
April 25, 2020
Written by

Dropdown lists are one of the most widely used user interface controls. It’s also common for the options presented in a dropdown to depend on the value of another control. Finding a good way to build this functionality is a challenge developers often face when beginning to build websites with ASP.NET Core.
You can build hierarchical dropdown lists using ASP.NET Core Razor Pages using an Ajax call on the page view and an action method on the page model. It doesn’t require writing a lot of code, and the technique can be applied in numerous situations where user interface data needs to be set dynamically. No JavaScript frameworks required!
Using Razor Pages with the Model-View-ViewModel (MVVM) design pattern provides a way of separating the presentation of data in the Razor Page, the view, from the structure of the data that is presented and manipulated by business logic, the view model. Model classes provide an object-oriented conceptual model of the application’s data domain. A data repository layer takes care of interacting with the persistence layer, a database, and translates relational data to objects.
What you’ll learn in this post
By building the case study project you’ll learn how to create a web application that populates a user interface dropdown list based on the value selected in another dropdown list. Option values for the dropdown lists will come from a database at runtime.
The case study project uses the ASP.NET Core web application default template. Starting from that foundation, you’ll add an Entity Framework Core (EF Core) code-first data model and create a relational database from the model using EF Core migrations. You’ll create view models that combine data from multiple entities/tables and bind the view models to a Razor Page. You’ll see how to use the repository pattern to provide an interface between the data persistence layer, the database, and the view model objects used to exchange information with users. You’ll learn how to perform an Ajax query to get the values for a dependent dropdown list based on the value selected in the parent dropdown.
You’ll gain experience with these technologies:
- ASP.NET Core 3.1 Razor Pages
- Entity Framework Core 3.1
- jQuery Ajax
- SQL Server (SQL Server 2016 Express LocalDB installed with Visual Studio 2019)
Prerequisites
You’ll need the following tools to build and run the case study project:
- .NET Core SDK (includes the APIs, runtime, and CLI)
- Visual Studio 2019 (the Community edition is free)
Visual Studio should be configured with:
- C#
- ASP.NET and web development workload
- .NET Core cross-platform development workload
- GitHub Extension
Although not required, you might find it helpful to have one of the following:
- LINQPad 6 – An excellent tool for writing and debugging LINQ and SQL
- SQL Server Management Studio
In addition to these tools, you should have a working knowledge of C#, including classes, and some experience with HTML, CSS, and JavaScript. You should be familiar with the Visual Studio user interface.
This is an introductory level post. The code is written to highlight the topics of the post: don’t expect production-ready code that implements all the SOLID principles.
A separate version of this post will be published for Visual Studio Code and the .NET CLI.
The complete source code for the case study project is available in a companion repository on GitHub.
Understanding the case study project
The case study project for this post provides a simple system for creating customer records and storing them in a database. It also provides a list of the customers stored in the database. Customers have four attributes: customer ID, name, country, and region.
When a user creates a new customer an ID is generated automatically. The user enters a customer name and selects the country and region (state, province, etc.) associated with the customer from dropdown lists. The values for the region list are populated based on the value selected for the country so the user is only presented with valid choices.
While this is a simple example using static data, the techniques used in this case study can be readily applied to more complex selection criteria and dynamic data.
Initializing the Visual Studio solution
Create a new ASP.NET Core Web Application project called RazorDrop in the directory where you’d like to place the solution folder.
In the Create a new ASP.NET Core web application dialog box, be sure .NET Core and ASP.NET Core 3.1 are selected in the framework and framework version dropdown lists, and that Web Application is selected as the project type.
No Authentication is required. To facilitate testing in Chrome and other browsers, check Configure for HTTPS in the Advanced section. Docker support and Razor runtime compilation aren’t required.
The Visual Studio scaffolding will create a RazorDrop solution containing a RazorDrop web application project.
Open the Package Manager Console window and set Package Source to All and Default Project to RazorDrop. Execute the following command-line instructions to install the necessary NuGet packages:
The version numbers shown for each package should be 3.1.2 or higher. A number of package dependencies will be installed along with the requested packages.
This is a good time to add the solution to source code control.
You might also want to install Mads Kristensen’s excellent Add New File extension for Visual Studio. It enables you to create folders and files just by pressing Shift + F2 and typing a filename. The extension uses the appropriate template for the file type based on the filename extension you enter.
Verify that the solution has been initialized successfully and that your development environment is working properly by running the RazorDrop project. You should see the default ASP.NET Core web application home page in your browser.
Creating data models
Data models are POCOs, plain ol’ class objects, used in the application to represent data entities and the relationships between them. They’re also used by Entity Framework to create and modify database tables, including their keys, indexes, and relationships.
Good model design enables you to successfully map relational database data to classes while maintaining consistency with business rules and ensuring referential integrity. A simple example of this is ensuring that your application doesn’t develop any “orphaned” customers that aren’t associated with a geography your business uses to conduct operations.
Create a new folder named Models under the RazorDrop project root.
Add a new C# class file named Country.cs to Models folder and replace the contents with the following C# code:
The Region class name will lint because you haven’t created it yet.
The Country class uses .NET Data Annotations to create constraints for valid objects, including the size of string properties and required properties. These data annotations are also used by Entity Framework (EF) migrations to create constraints in the database.
By convention, a class property named ClassNameId will be used by EF to create the primary key for the database entity. If the convention isn’t being followed for unique identifier properties, or if there are multiple “Id” properties, the [Key] data annotation can be used to identify the primary key / unique identifier.
The Country class contains a List of Region objects. Including this relationship in the class will enable EF to create a corresponding relationship between the associated database tables. Since this isn’t a required property, it’s possible to have a Country object that doesn’t have any regions associated with it. (Even countries that are comparatively small geographically, like Monaco and Andorra, have administrative regions, but your business rules may not require identifying a region for all countries.)
Create a new C# class file named Region.cs in the Models folder and replace the contents with the following C# code:
This class follows the same convention as the Country class for identifying the primary key / unique identifier. It also defines its side of the one-to-many relationship with the Country class by using the CountryId property to identify the specific parent object in the relationship and a Country property to define the child side of the parent-child class relationship. EF uses this property in creating the relationship between the two database tables. Since the CountryId property is required, every region has to belong to one, and only one, Country.
Create a new C# class file named Customer.cs in the Models folder and replace the contents with the following C# code:
Customers are uniquely identified by a GUID, which is part of the System namespace. They’re required to be associated with a Country, but not necessarily with a Region. The business rule requiring the Region to be valid for the Country will be enforced on client side by the user interface, and by the customer repository, and by the referential integrity rules for the database.
This is a good point to check your code into source code control, as it will be at the end of each section of this tutorial.
Creating a connection string
Entity Framework needs to know which database server is going to host the application’s database, the name of the database, and other configuration information. One of the most common ways of providing this information is with connection strings. While there are a number of options for storing connection strings that address safeguarding user secrets and production environment configuration, this project takes the simplest approach for your convenience.
Open the appsettings.json file in the project root and replace the entire contents with the following:
Connection strings are semi-magical and may contain user secrets, so follow the link to the reference documentation if you’ve deviated from the default Visual Studio installation in any way. You may need a different incantation to connect to your database.
By default, the SQL Server 2016 Express LocalDB edition of SQL Server that’s included with Visual Studio 2019 puts the .mdf and .ldf files database files in your user root folder, which is typically called something like C:\Users\ericc if your username is Eric Cartman.
Creating a data context and seeding the database
A session with the database is represented in the application by an instance of the Entity Framework Core DbContext class. While there are many options available for configuring DbContext, and thereby the application’s connection to the database, you can create an effective implementation with the default initialization.
The DbContext is where you map your data model classes, like Country, Region, and Customer, to their corresponding database tables. The EF Core DbSet<TEntity> class that you use to define this relationship enables you to make LINQ queries against the database and save changes to the database.
You can also specify what happens when the data model is created or changed using the EF Core OnModelCreating class and the fluent API. When you use the fluent API it acts in addition to the data annotations you use in your model classes and takes precedence over any competing annotations, so it’s a good idea to establish standard practices for how you’ll use data annotations and fluent API instructions. (For some reason, “fluent” isn’t capitalized when referring to the “fluent API”.)
Another thing you can do in the EF Core OnModelCreating class is to add seed data to the database. This is helpful when you have reference (or “lookup”) data that’s required for the application to work properly when it’s first run; you can ensure it’s part of the application because the database can be created with the required data using EF Core migrations during the application installation process. In the case study project, seed data is added for the Country and Region objects.
Create a new folder named Data in the project root and add a new C# class file named DbContext.cs to the Data folder. Replace the contents of DbContext.cs with the following C# code:
The RazorDropContext class has to have access to the model classes, so DataContext.cs has to include a using directive to include the RazorDrop.Models namespace.
The DbSet declarations for the Country, Region, and Customer objects refer to the pluralized names of the respective tables in the database, as defined in the OnModelCreating method. In this way your database table names can properly reflect a collection of entities while your model classes reflect the name of a single entity.
The OnModelCreating method also uses the HasData() method of the Country and Region entities to add data to the database when it’s built. In the interest of brevity, only the states comprising New England are included for the US.
Adding the data context to the dependency injection services collection
The recommended, and convenient, method of making your data context available to modules in your application is through the DependencyInjection middleware you added to the project as a NuGet package.
Open the Startup.cs file in the project root and add the following directives to the existing list of using` directives:
Replace the existing ConfigureServices method with the following:
When the application starts the RazorDropContext data context will be added to the services available for dependency injection using the connection string provided in appsettings.json as a configuration option.
Important: If you’re familiar with the Entity Framework 6 approach to dependency injection configuration for DbContext, be sure to note that the EF Core approach is different. Using the following construction in defining your data context won’t work:
You’ll see an effect of that difference between EF Core and EF6 when you create the repositories and page models.
Adding an Entity Framework Core migration
Now for some excitement. With your data model complete, a data context created, seed data defined, and a (hopefully) correct connection string, you can create an initial Entity Framework migration and generate the database.
Open the Package Manager Console window and execute the following command-line instruction:
This command will build your project first, so if you have any typos or missing using directives it will stop right there. If the project builds, EF Core will attempt to generate a migration based on the data model you’ve defined. If that works, and it should for this project, you’ll see a new folder, Migrations, created under the project root and three new files looking something like:
Migrations
20200420153809_Initial.cs
20200420153809_Initial.Designer.cs
RazorDropContextModelSnapshot.cs
The long string of numbers in the first two files is a datetime stamp. The Designer file is auto-generated and it’s a good idea not to mess with it.
Open the _Initial.cs file. The Initial class is a migration, inheriting the Migrations class, and contains the fluent API code that’s going to be used by EF Core to create, or modify, the database. Take a look at the code and see how the fluent API builds the database, including referential integrity actions, and adds data.
In particular, look at the onDelete arguments to the .ForeignKey method for the Regions and Customers tables. In the case of Regions, if the parent Country entity is deleted the delete cascades to the associated Region entities. That’s probably what you want if you remove a country from your application’s data domain.
But look at the foreign keys for the Customers table: for those foreign keys the ReferentialAction enum value is Restrict. This prevents the deletion of a Country or a Region from leaving a Customer with invalid data: a CountryId or RegionId value that doesn’t correspond to an entry in one of those tables. Customers can’t be deleted by a cascading delete from Countries or Regions because the Customers table doesn’t have a direct parent-child relationship with either of those tables.
The net effect is that only Countries table records and their associated Regions table records can be deleted if the specific CountryId or one of its RegionId values isn’t used in a Customer table record. This is good: it prevents inconsistency. But your application will have to handle the SQL errors from the database.
If you discover an error in your migration: Don’t despair, and don’t delete the migration file directly. Instead, use the following Package Manager Console command-line instruction:
You don’t provide a migration name as an argument because this command only works on the most recent migration. For more complex reversions, see Migrations.
Creating the SQL Server database
Once you’ve verified the latest migration, in this case the initial migration, is going to do what you intend to the database, you can apply it.
Execute the following command-line instruction in the Package Manager Console window:
This command will build your project first. If it succeeds, you can expect to see a number of lines of output as EF Core converts the fluent API code to SQL. At the end of all that it will tell you if the process succeeded or provide you with an error message. If you get an error, it’s likely fixing it will affect the model, so you should remove the initial migration and regenerate it.
To confirm everything is in place, connect to your database with the Visual Studio SQL Server Object Explorer, LINQPad, or SQL Server Management Studio and execute the following SQL query:
The results should be the names of the six New England states.
Creating view models
While the entities you defined in the Models folder represent your data domain’s perspective on data, view models arrange data in structures that correspond to ways your application’s users will interact with data. This often involves combining data from multiple entities/tables.
This design paradigm is known as “Model-View-ViewModel” or “MVVM”. In this Razor Pages (RP) project, the models are the data models in the /Models folder, the views are the Razor Pages, and the view models provide structures for data that reflect business logic: how the application’s users will interact with data.
This application will have two view models, one for displaying a list of customers and another for creating new customers. Each will combine data from the three model entities.
Create a new folder named ViewModels under the project root and create a new C# class file named CustomerDisplayViewModel.cs in the new folder. Replace the existing contents with the following C# code;
This class uses data annotations to provide the labels that should go with the input fields for each property. One of the advantages of using this approach is that you can use variables in place of the hardcoded labels shown here to provide internationalization in your application.
Create another C# class field named CustomerEditViewModel.cs in the ViewModels folder and replace the contents with the following C# code:
In addition to field labels, data annotations are used in this class to set a constraint on the length of the CustomerName property.
The SelectedCountryId and SelectedRegionId properties will hold the values selected by the user on the input form. The Countries and Regions properties are collections that will provide the values and text for the elements of their respective dropdown lists. Their type is SelectListItem, which Razor can use to populate the HTML <options> elements for the dropdowns. (It is not possible to use a SelectList entity for this purpose.)
Creating repositories
The data models in the Models folder represent the source of the application’s data and the view models represent the target for that data. The repositories are classes to get data back and forth between the two, translating views of the data into models of the data.
Create a new C# class file named CountriesRepository.cs in the Data directory and replace the contents with the following C# code:
In the CountriesRepository class you can see a number of foundational techniques at work:
- The
RazorDropContextdata context is provided to the class through the dependency injection middleware. - The
GetCountriesmethod returns a collection of SelectListItem entities. The collection can be used directly by the Razor Page code to generate the associated dropdown list. - Test for a user prompt is inserted into the collection. Doing this here provides another convenient point for internationalization.
- The
.AsNoTracking()method is used to get the data from the database because the data won’t be updated in the current context instance and therefore no state needs to be maintained by the data access layer. This improves performance and is generally the right way to go for stateless applications like web apps.
A complete application would have methods for creating, updating, and deleting data. It’s also likely to retrieve data in different formats and to have an additional signature for the GetCountries retrieve method that accepts parameters.
Create a C# class file called RegionsRepository.cs in the Data directory and replace the contents with the following C# code:
The RegionsRepository class will either return a collection of regions associated with a countryId parameter or a single blank SelectListItem if no argument is passed.
Create a new C# class file called CustomersRepository.cs in the Data folder and replace the contents with the following C# code:
The repo for managing customer data has methods for creating and saving customers as well as retrieving a list of existing customers. There are a few points of particular interest:
The return type for GetCustomers is a collection of CustomerDisplayViewModel entities. This collection can be consumed directly by the Razor page that displays the list of customers.
The CreateCustomer method returns a CustomerEditViewModel object that is populated with a GUID, a list of countries, and a list of regions that has one blank entry. The returned object is provided so the Razor page for creating a customer has an object in which to store the values provided through data entry.
The SaveCustomer method accepts the associated view model as an argument. It parses the text version of the CustomerId GUID back into a GUID type, then creates a new Customer object with the parsed GUID and the other data from the view model. To complete the referential link from the Customers table to the Countries and Regions tables it finds corresponding entities and sets the values of these object properties with the associated Country and Region objects.
Creating Razor Pages using MVM and a repository
Using view models and repositories with Razor Pages doesn’t need to involve a lot of code. In some cases there will actually be less code in .cshtml and .cshtml.cs files than would be needed to implement the page’s functionality without these design patterns.
Create a new subfolder named Customers under the Pages folder.
Using the VS 2019 user interface, add a new Razor Page named Index in the Customers folder with the following characteristics:
- This should be a plain Razor Page, not one using one of the Entity Framework templates. Although this seems counterintuitive, it’s because the templates aren’t set up to use repositories: the tooling is set up to use the data context directly.
- Check the option for Generate PageModel class
- Check the option for Use a layout page and leave the box for the layout page name empty. The default _Layout.cshtml will be used automatically.
When you click Add the tooling will create the Index.cshtml and Index.cshtml.cs files.
Replace the contents of the Index.cshtml file with the following HTML and Razor markup:
The CustomerDisplayList class name will lint because it hasn’t been connected to the page model yet.
On this simple page a @foreach loop will create a table row for each item object in the backing model’s CustomerDisplayList property. Note that the model for this page is the IndexModel PageModel, so the CustomerDisplayList collection is a property of the model.
Open the Index.cshtml.cs PageModel file and replace the contents with the following C# code:
Short, isn’t it?
The data context, RazorDropContext is injected into the class through dependency injection. If you’re used to Entity Framework 6, this is going to be a change to your style. You need to inject the RazorDropContext data context into the PageModel to be able to pass it as an argument when creating a new instance of CustomersRepository.
To use a view model, or any other kind of external class, with a PageModel you need to decorate the variable declaration with the BindProperty data annotation. You also need to use the SupportsGet argument to enable the PageModel’s Get methods to use data in a bound property when they’re called. In this case, CustomerDisplayList will contain entities for all the existing customer records.
The CustomersRepository.GetCustomers() method returns a list of CustomerDisplayViewModel objects, so all that has to be done is to assign the return value to the CustomerDisplayList bound object and return the page. This makes for a concise method.
Creating a Razor Page using MVM, repositories, and Ajax
The Create page for customers is more interactive; it demonstrates how you can use Ajax calls to update the user interface based on information the user provides as they are entering data on the page. Hierarchical dropdown lists are one of the most common ways this kind of interactivity is used, and this page demonstrates how to code them.
In the Customers folder, add a new Razor Page named Create with the following characteristics:
- Use the plain Razor Page template.
- Check the option for Generate PageModel class.
- Check the option for Use a layout page and leave the layout page name blank.
Open the Create.cshtml.cs page model file and replace the contents with the following C# code:
Like the Index.cshtml.cs, this page model binds a view model and makes it available to HTTP GET requests. In this case, CustomerEditViewModel is populated with a value for CustomerId before the page is rendered for the user so that the value will be visible to the user.
The OnPost method passes the populated CustomerEditViewModel to the CustomerRepository.SaveCustomer method and uses the return value from the repository to determine the course of action.
There is also an OnPostRegions method. This is the method that will return a collection of SelectListItems to the front end when supplied with a value for CountryId.
Razor Pages imposes some constraints on the naming conventions for IActionResult methods. Using “OnPost” in the method name indicates that the method should respond to HTTP POST requests and accept query strings as part of the HTTP request.
Because this method handles POST requests directly, the Razor Pages middleware can’t use the underlying page model to access the query parameters. It uses the MemoryStream and StreamReader classes from the System.IO namespace to acquire the request body, which will contain a 2-character CountryId code, and retrieve the list of Region entities associated with the CountryId code.
Since RegionsRepository returns an IEnumerable of SelectListItem items, the JsonResult class constructor can convert the regions object directly to JSON and send it back to the requestor.
Open the Create.cshtml file and replace the contents with the following code:
This Razor view makes use of HTML Helpers to construct the HTML rendered in the browser, including the HTML Helper equivalents to a number of Tag Helpers. The Html.BeginForm creates the HTML form. The LabelFor, EditorFor, DropDownListFor, and ValidationMessageFor helpers are used in conjunction with the page model to create controls on the form.
These HTML helpers also set important attributes of the form field, including:
- Marking the CustomerId field as readonly
- Setting an
idattribute for the SelectedCountryId and SelectedRegionId controls - Setting the focus to the CustomerName field when the page opens
- Requiring a value for the CustomerName and SelectedCountryId fields
- Applying Bootstrap CSS formatting to fields and their labels and validation messages
Note the use of the HTML helper to create an antiforgery token cookie. Handling this token properly is essential to the success of the Ajax call to the page model’s OnPostRegions method.
The view also includes a <script> section. Because the page is rendered using the default Shared/_Layout.cshtml template, jQuery and the Bootstrap JavaScript are automatically included in the rendered page.
The script watches for the value of the Country element to change. When it does, it executes an Ajax call. The arguments to the Ajax call have a number of notable features:
type: It’s an HTTP POST request, so it’s sending a query string and expecting a return payload.
url: The URL for the request is the route to the Create page from the application root plus the query string handler=Regions. The naming convention for handlers in Razor Pages is that the HTTP verb portion of the name, the “OnPost” portion of OnPostRegions is dropped from the handler name.
beforeSend: The antiforgery token created with the @Html.AntiforgeryToken() HTML Helper, which is created in the rendered HTML as a hidden field named __RequestVerificationToken is sent as part of the request header.
data: The value of SelectedCountryId field, which has been given the HTML id attribute Country, is the body of the request.
contentType: The request body is a JSON object.
success: If the HTML POST request is successful, the returned list of regions is added to the options for the Region element, beginning with a blank entry so a value isn’t preselected for the user.
failure: If the POST request fails the browser displays an alert box with the response. This is helpful for debugging purposes, but you’ll want to replace it with something more user friendly that isn’t susceptible to popup suppression.
Even though antiforgery tokens are used by default in Razor Pages to prevent cross-site scripting (XSS) attacks, the application isn’t set up to handle the __RequestVerificationToken that’s part of the Ajax call. For that, there is one more C# file to change.
Open the Startup.cs file in the RazorDrop project root and modify the ConfigureServices method so it looks like the following:
The AddAntiforgery call modifies the apps Antiforgery options to use tokens included in the header as well as form data. By default, Razor Pages use the __RequestVerificationToken hidden field that’s part of the form for XFRF/CSRF protection. Since the Ajax request isn’t sending a form, the token needs to go in the HTTP POST request header.
Build the app, resolve any errors, and check in your code. It’s time to test.
Testing the application
Run the application. You should see the default homepage for ASP.NET Core web applications in your browser, since you haven’t modified Pages/Index.cshtml.
Go to https://localhost:44381/Customers in your browser. (Your port number may be different.)
By default, any Index.cshtml page is the default landing page for a route, so you should see an empty list of customers.
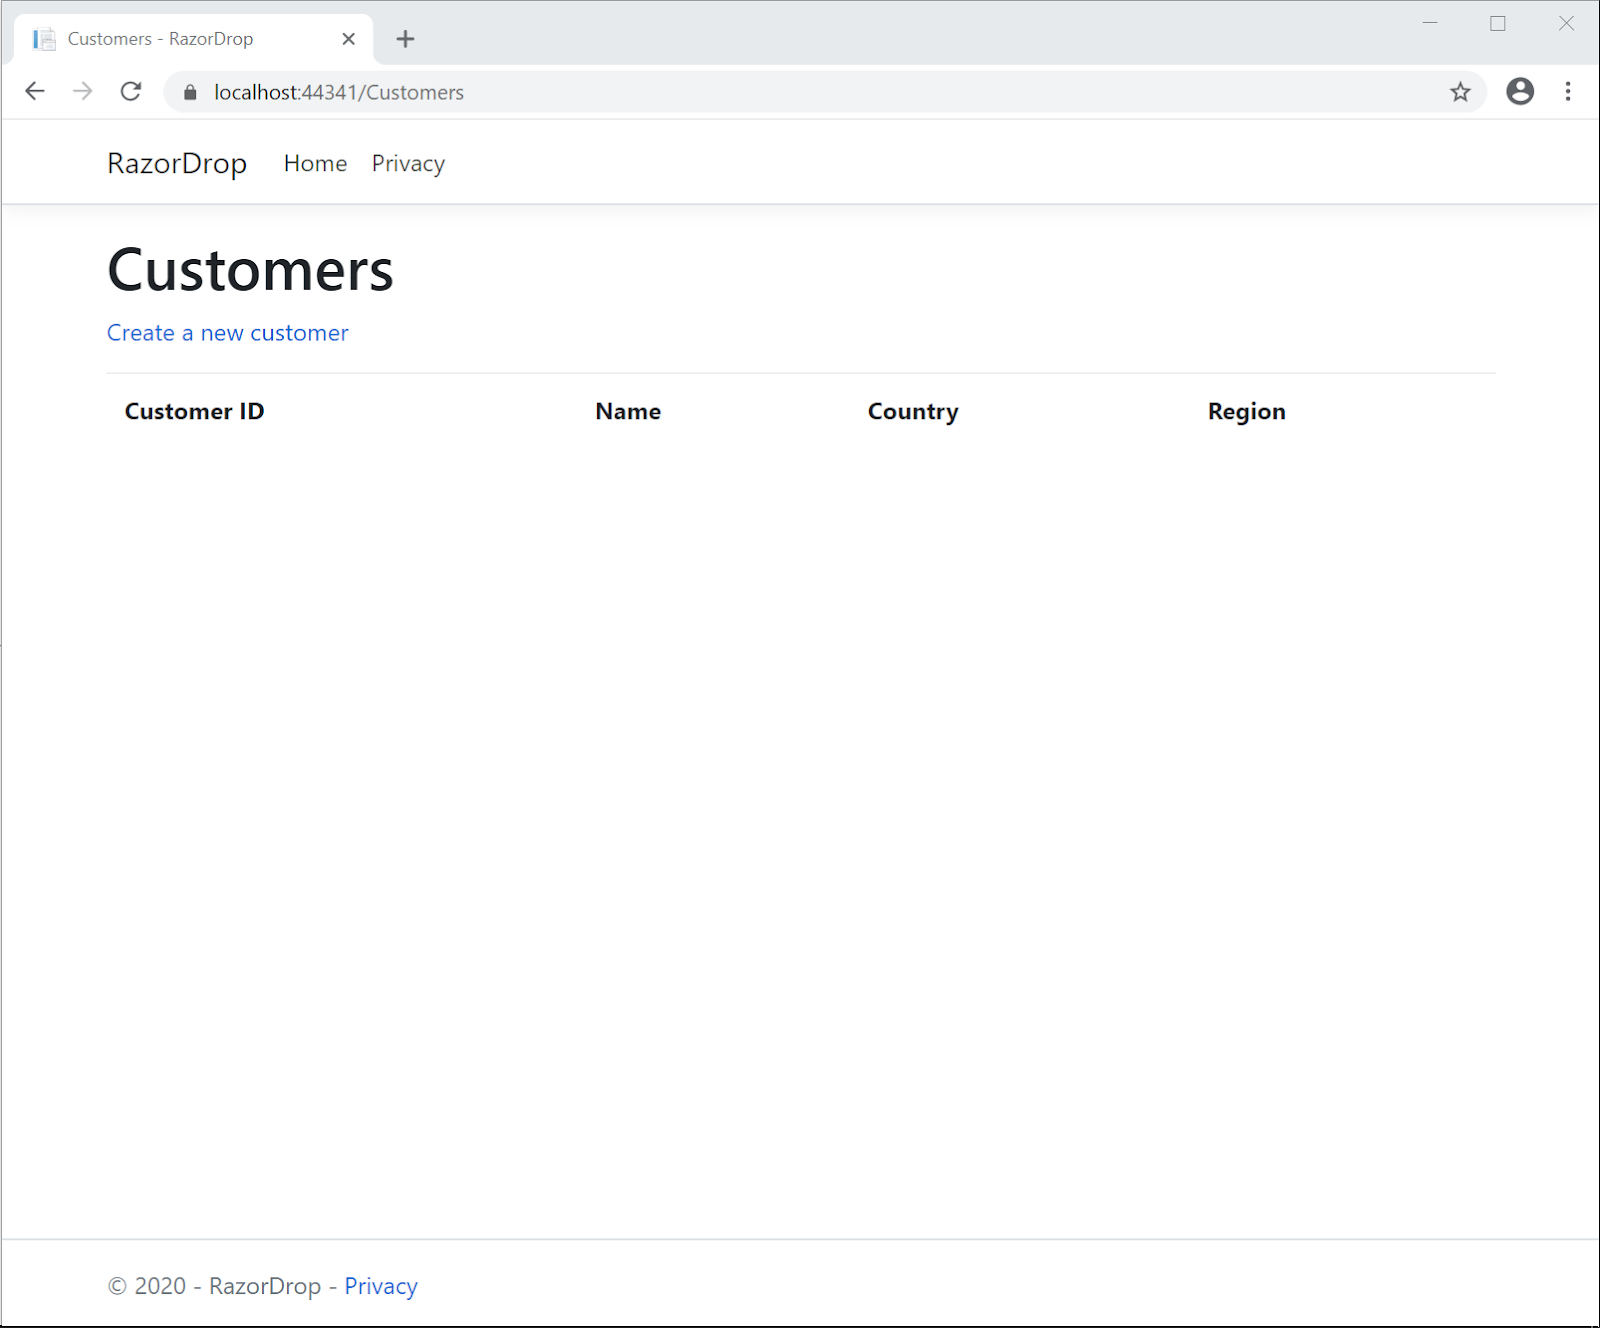
Click the Create a new customer link. You should see the /Customers/Create page.
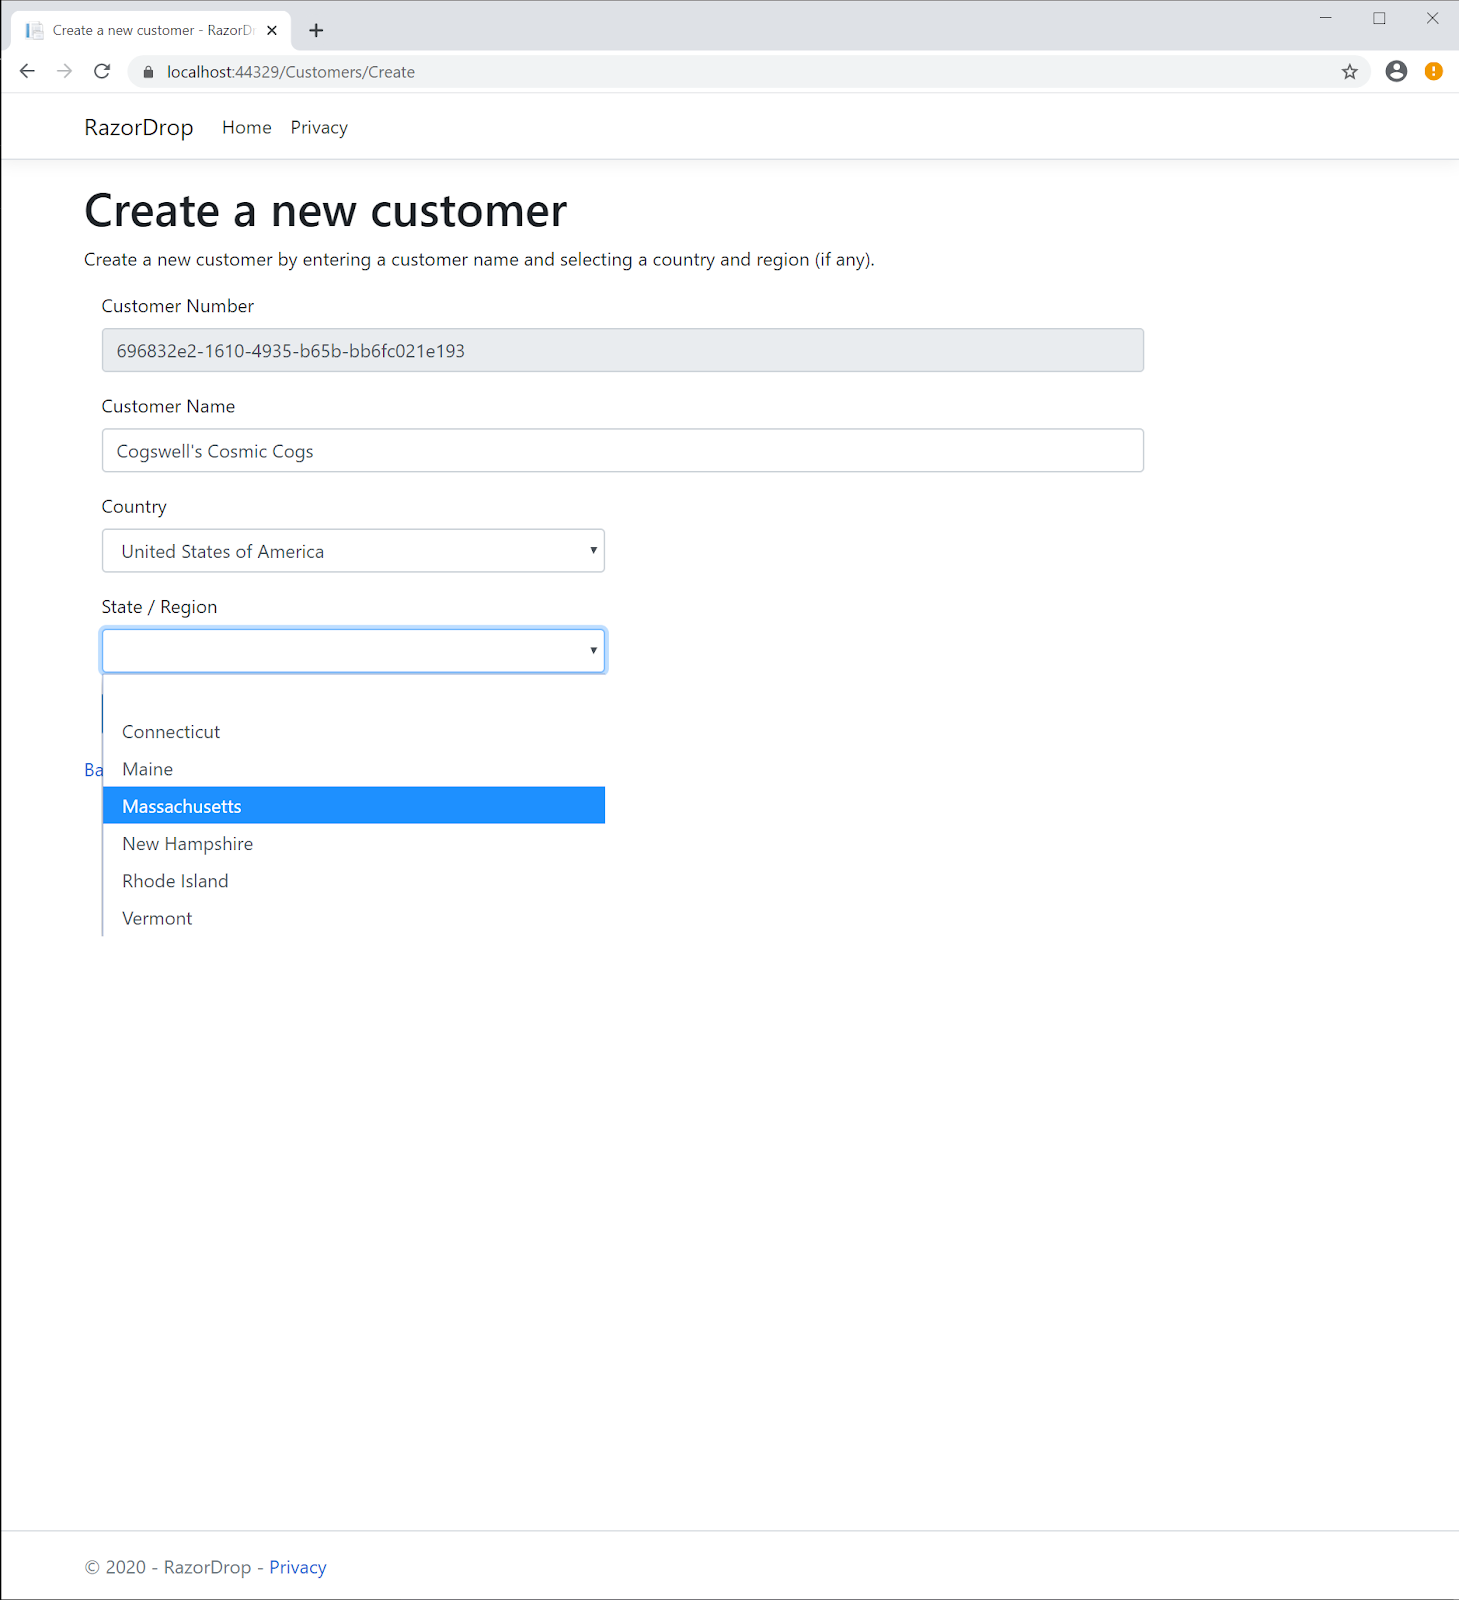
Enter a stimulating customer name, such as “Cogswell’s Cosmic Cogs”, and select a Country and Region for the customer’s secret volcano base. It will look something like the following screenshot:
Take a look at the HTML page source to understand how the page view is converted by the Razor Pages middleware to the HTML rendered in the browser. If you use your browser’s F12 developer tools you can interact with the UI and set a breakpoint in the JavaScript.
If you compare the page source before and after selecting a Country you can see the <option> elements for the State / Region dropdown that were added by the JavaScript.
Click the Create button. If the record was saved to the database you should be able to find it there using a SQL query like select * from customers.
If you stop debugging and restart the application, you should see the entry for Cogswell’s Cosmic Cogs when you go to the customer list at /Customers. You can also see it if you click Back to List to return to the Index page.
That’s it! You now have a complete end-to-end solution for adding data to your webpage user input controls without needing to refresh the page.
Potential enhancements
There are a number of ways you can take this case study project and make it more suitable for a production environment. There are some additional parts of the application that should be completed to make it fully functional, and the existing parts can be extended to make them more complete.
Complete the CRUD (create, retrieve, update, delete) functionality for Countries, Regions, and Customers. This is a good way to become more familiar with the Razor Pages tooling in Visual Studio. Because you’d be manipulating single tables you could use the model for each entity from the Models folder and supply the RazorDropContext data context to the tooling, then let it create the page views and page models for you. This relieves you of the quotidien task of writing repository methods for all those actions, but it also relieves you of the data security and architectural benefits of isolating your data layer from your user interface interaction methods (controller methods in the MVC world, action methods in Razor Pages).
Add asynchronous functionality to the repositories and the page model action methods. The database may be somewhere in the cloud and retrieving data can be a comparatively time consuming and unreliable process. Likewise, the user experience can be improved by using asynchronous action methods in the page model.
Add error handling. There are known errors, like the referential integrity error that the SQL Server data provider will return when a user tries to delete a Country that has linked Customers, and there are unknown errors, like bugs in the code. The repositories should be able to handle SQL errors and the application should be able to present the user with meaningful information about those errors and offer ways to respond to them. The code should also be able to fail gracefully and report its problems. One way to stay on top of errors from running apps is to integrate elmah.io.
Use interfaces and factory classes to reduce class coupling. While using repositories and view models provides you with an expressive way of connecting the application’s user interface to its data persistence layer, creating instances directly in classes that use these structures creates dependencies between them. Using interfaces isolates the implementation of a class from the means of interacting with a class.
Use dependency injection to implement the Inversion of Control pattern. If you’re new to this topic, and it’s likely that you are if this post has taught you new things, you can read more about the .NET way of doing IoC in Inversion of Control Patterns for the Microsoft .NET Framework from Visual Studio Magazine.
Implement I18n + L10n. Internationalization (I18n) and Localization (L10n) are not just gratuitous abbreviations; they’re ways of making your application more helpful to users around the world. The Wikipedia article Internationalization and localization provides a good introduction to the topic and Globalizing and localizing .NET applications from docs.microsoft.com will point you in the direction of relevant namespaces and tools.
Summary
In this post you saw how to use ASP.NET Core Razor Pages, view models, repositories, and Ajax to implement hierarchical dropdown lists on a webpage. You also saw how to use HTML Helpers to create input form controls and set the HTML attributes of those controls. You learned how to use the Model-ViewModel (MVM) design pattern to create entity models and view models. You saw how Entity Framework Core migrations are used to create and seed a database, and you saw how to connect data repositories to the database by injecting a DbContext implementation into your Razor Pages page models. You saw how to build an Ajax query to get a JSON object from a Razor Pages action method and how to use the results of that query to update an HTML page’s domain model. You learned how to configure an ASP.NET Core application to use an antiforgery token in an HTTP POST request header.
After building the case study project you have a working application you can build on and enhance. The post provided a number of potential enhancements that can expand your knowledge of ASP.NET Core development.
Additional resources
For a deeper dive into some of the topics discussed in this post, turn to these quality sources:
Cascading Dropdowns With AJAX in Razor Pages – An alternative look at implementing Ajax with Razor Pages handler methods.
Creating and configuring a model – docs.microsoft.com information on building and using data models with Entity Framework Core.
jQuery Ajax – API documentation for the jQuery implementation of Ajax functionality.
Razor Pages - Understanding Handler Methods – A good overview of handler methods like OnGet and OnPost, including some alternative ways of referencing the handler in URIs.
Who's in Charge Now? UI Control and the Interface Segregation Principle – An introduction to ISP from Visual Studio Magazine.
AJ Saulsberry is a Technical Editor @Twilio. Get in touch with him if you’d like to contribute your own case study to help other developers build better .NET Core software.

Related Resources
Twilio Docs
From APIs to SDKs to sample apps
API reference documentation, SDKs, helper libraries, quickstarts, and tutorials for your language and platform.
Resource Center
The latest ebooks, industry reports, and webinars
Learn from customer engagement experts to improve your own communication.
Ahoy
Twilio's developer community hub
Best practices, code samples, and inspiration to build communications and digital engagement experiences.